CometChat enables you to add voice, video & text chat for your website & app. This guide demonstrates how to add chat to an Android application using CometChat.
Before you begin, ensure you have met the following requirements:
✅ You have Android Studio installed in your machine.
✅ You have a Android Device or Emulator with Android Version 6.0 or above.
✅ You have read CometChat Key Concepts.
To setup Android SDK, you need to first register on CometChat Dashboard. Click here to sign up.
Signup for CometChat and then:
- Create a new app: Click Add App option available → Enter App Name & other information → Create App
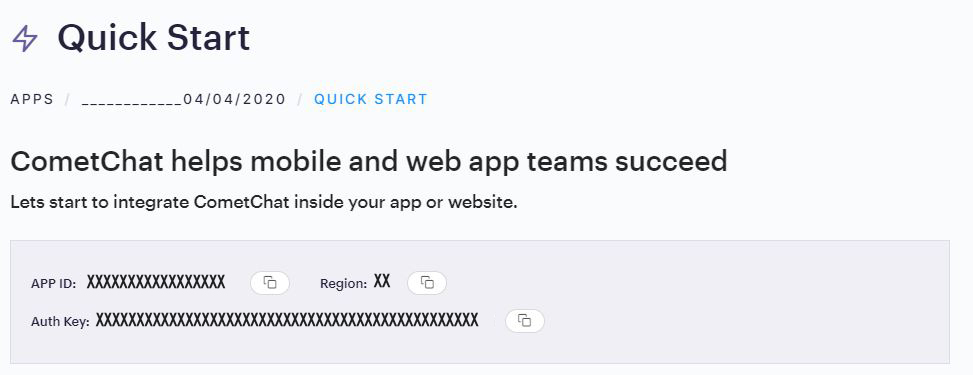
- At the Top in QuickStart section you will find Auth Key & App ID or else you can head over to the API & Auth Keys section and note the Auth Key and App ID
-
CometChat as a module
1. Download the latest aar file from .
2. Navigate to your project in Android Studio.
3. Click on **File** and select **New** -> **Module**
4. Now select Import.JAR/AAR package from the available options.
5. Specify the path to the .aar file dowloaded earlier.
6. Now open the app level build.gradle file and under the dependencies section add the below line:
implementation project(path: ':chat-sdk-android-$version')
where $version is the version of the aar downloaded.
Now that the CometChat module is successfully added to your project, you need to follow the below steps to add CometChat dependency bundle to your project.
- Open the project level build.gradle file and in the
repositoriessection underallprojectsadd the below line:
allprojects { repositories { maven { url "https://dl.cloudsmith.io/public/cometchat/cometchat/maven/" } } }- Now open the app level build.gradle file and add the below line under the
dependenciessection:
dependencies { implementation 'com.cometchat:chat-sdk-android-dependencies:4.0.6' } - Open the project level build.gradle file and in the
-
CometChat via gradle
If you do not wish to add the CometChat dependency as a module, you can directly add the CometChat SDK to your project using gradle.
Open the app level build.gradle file and
- Add the below line in the dependencies section.
dependencies { implementation 'com.cometchat:chat-sdk-android:4.0.6' }- Add the below lines android section
android { compileOptions { sourceCompatibility JavaVersion.VERSION_1_8 targetCompatibility JavaVersion.VERSION_1_8 } }v2.4+ onwards, Voice & Video Calling functionality has been moved to a separate library. Please add the following dependency to your app level
build.gradlefile in case you plan on using the Voice & Video Calling feature.dependencies { implementation 'com.cometchat:calls-sdk-android:{calling_module_latest_version}' }To know the latest version of the Calling dependency, please check the Calling documentation
You can refer to the below link for instructions on how to do so:
📝 Add CometChat Dependency
The init() method initializes the settings required for CometChat. We suggest calling the init() method on app startup, preferably in the onCreate() method of the Application class.
String appID = "APP_ID"; // Replace with your App ID
String region = "REGION"; // Replace with your App Region ("eu" or "us")

AppSettings appSettings=new AppSettings.AppSettingsBuilder().subscribePresenceForAllUsers().setRegion(region).build();

CometChat.init(this, appID,appSettings, new CometChat.CallbackListener<String>() {
  @Override
  public void onSuccess(String successMessage) {
    Log.d(TAG, "Initialization completed successfully");
  }
  @Override
  public void onError(CometChatException e) {
    Log.d(TAG, "Initialization failed with exception: " + e.getMessage());
  }
});
ℹ️ Note - Make sure to replace region and appID with your credentials. |
|---|
Once initialisation is successful, you will need to create a user. You need to user createUser() method to create user on the fly.
String authKey = "AUTH_KEY"; // Replace with your App Auth Key
User user = new User();
user.setUid("user1"); // Replace with the UID for the user to be created
user.setName("Kevin"); // Replace with the name of the user

CometChat.createUser(user, authKey, new CometChat.CallbackListener<User>() {
  @Override
    public void onSuccess(User user) {
    Log.d("createUser", user.toString());
  }

  @Override
    public void onError(CometChatException e) {
    Log.e("createUser", e.getMessage());
  }
});| ℹ️ Note - Make sure that UID and name are specified as these are mandatory fields to create a user. |
|---|
Once you have created the user successfully, you will need to log the user into CometChat using the login() method.
String UID = "user1"; // Replace with the UID of the user to login
String authKey = "AUTH_KEY"; // Replace with your App Auth Key

 if (CometChat.getLoggedInUser() == null) {
     CometChat.login(UID, authKey, new CometChat.CallbackListener<User>() {

      @Override
      public void onSuccess(User user) {
        Log.d(TAG, "Login Successful : " + user.toString());
  }

   @Override
    public void onError(CometChatException e) {
        Log.d(TAG, "Login failed with exception: " + e.getMessage());
   }
 });
 } else {
   // User already logged in
}| ℹ️ Note - The login() method needs to be called only once. Also replace AUTH_KEY with your App Auth Key. |
|---|
📝 Please refer to our Developer Documentation for more information on how to configure the CometChat SDK and implement various features using the same.
Contact us via real time support present in CometChat Dashboard.


