
- Overview
- steps of project
- steps detail
- pipeline
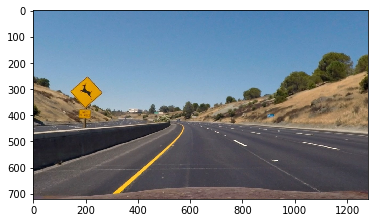
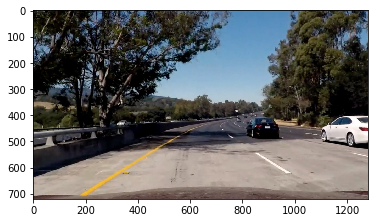
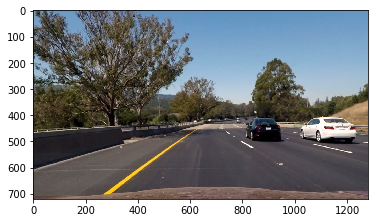
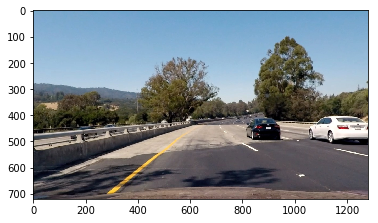
- Test on videos
- concolusion
- end
Advanced Lane Detection Project which includes advanced image processing to detect lanes irrespective of the road texture, brightness, contrast, curves etc. Used Image warping and sliding window approach to find and plot the lane lines. Also determined the real curvature of the lane and vehicle position with respect to center.

Apply a distortion correction to raw images. Use color transforms, gradients, etc., to create a thresholded binary image
1. Briefly state how you computed the camera matrix and distortion coefficients. Provide an example of a distortion corrected calibration image.
The first step in the pipeline is to undistort the camera. Some images of a 9x6 chessboard are given and are distorted. Our task is to find the Chessboard corners an plot them. For this, after loading the images we calibrate the camera. Open CV functions like findChessboardCorners(), drawChessboardCorners() and calibrateCamera() help us do this.
- code
objp = np.zeros((6*9,3), np.float32)
objp[:,:2] = np.mgrid[0:9,0:6].T.reshape(-1,2)
ret, corners = cv2.findChessboardCorners(gray, (9,6),None)
def cal_undistort(img, objpoints, imgpoints):
    # Use cv2.calibrateCamera() and cv2.undistort()
    ret, mtx, dist, rvecs, tvecs = cv2.calibrateCamera(objpoints, imgpoints, img.shape[1::-1], None, None)
    undist = cv2.undistort(img, mtx, dist, None, mtx)
    print( dist)
    return undist


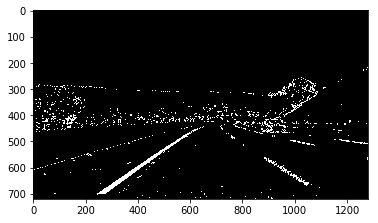
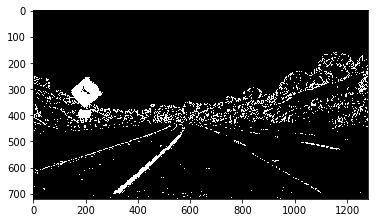
2. Describe how (and identify where in your code) you used color transforms, gradients or other methods to create a thresholded binary image. Provide an example of a binary image result.
Detecting edges around trees or cars is okay because these lines can be mostly filtered out by applying a mask to the image and essentially cropping out the area outside of the lane lines. It's most important that we reliably detect different colors of lane lines under varying degrees of daylight and shadow. So, that our self driving car does not become blind in extreme daylight hours or under the shadow of a tree.
I performed gradient threshold and color threshold individually and then created a binary combination of these two images to map out where either the color or gradient thresholds were met called the combined_binary in the code.


thresh_min = 20
thresh_max = 100
s_thresh_min = 170
s_thresh_max = 255
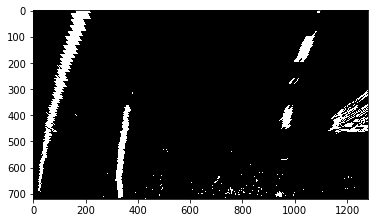
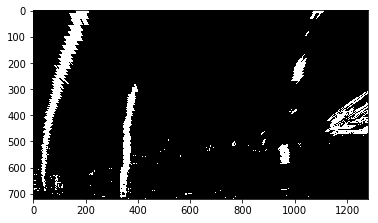
3. Describe how (and identify where in your code) you performed a perspective transform and provide an example of a transformed image.
Perspective Transform is the Bird's eye view for Lane images. We want to look at the lanes from the top and have a clear picture about their curves. Implementing Perspective Transform was the most interesting one for me. I used values of src and dst as shown below:
src = np.float32([[585, 460],[203, 720],[1127, 720],[695, 460]])
dst = np.float32([[320,0],[320,720],[960, 720],[960, 0]])
Also, made a function warper(img, src, dst) which takes in the BInary Warped Image and return the perspective transform using cv2.getPerspectiveTransform(src, dst) and cv2.warpPerspective(img, M, img_size, flags=cv2.INTER_NEAREST). The results are shown below:


def warper(img, src, dst):

    # Compute and apply perpective transform
    img_size = (img.shape[1], img.shape[0])
    M = cv2.getPerspectiveTransform(src, dst)
    warped = cv2.warpPerspective(img, M, img_size, flags=cv2.INTER_NEAREST)  # keep same size as input image

    return warped


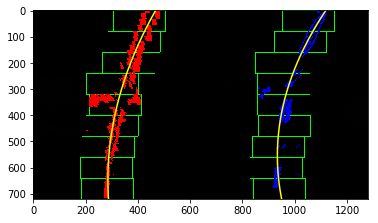
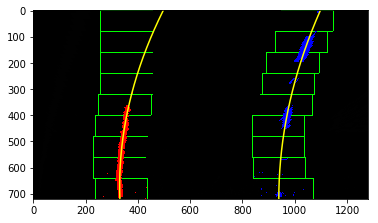


4. Provide an example image of your result plotted back down onto the road such that the lane area is identified clearly.
After implementing all the steps, it's time to create the pipeline for one image. Created a function process_image() as the main pipeline function. Also, I put the Radius of Curvature and Center Offset on the final image using cv2.putText() function. The result is shown below:


white_output = 'test_videos_output/project_video_output.mp4'
clip1 = VideoFileClip("project_video.mp4")
white_clip = clip1.fl_image(process_image) #NOTE: this function expects color images!!
%time white_clip.write_videofile(white_output, audio=False)
1. Briefly discuss any problems / issues you faced in your implementation of this project. Where will your pipeline likely fail? What could you do to make it more robust?
i face problem when i try to upload folder on colab but stack over flow help me in this i applay alot of technique which i have learned from this nanodegree like how to make calibration to my camera and how to undistortion images which come from camera using math equation which i have learned in lesson and applay prespective transform to image to correct it using src and dest array and applay how to cover line and calculate curvature of road by calculate width of road 3.7 meter and length camera 30 meter and finally applay pipeline on the video stream
def process_image(image):
    # TODO: put your pipeline here
    initial_image = np.copy(image)

    undistorted = cal_undistort(initial_image, objpoints, imgpoints)

    #gray = cv2.cvtColor(undistorted, cv2.COLOR_RGB2GRAY)
    hls = cv2.cvtColor(undistorted, cv2.COLOR_RGB2HLS)

    s_channel = hls[:,:,2]

    gray = cv2.cvtColor(undistorted, cv2.COLOR_RGB2GRAY)

    sobelx = cv2.Sobel(gray, cv2.CV_64F, 1, 0) # Take the derivative in x

    abs_sobelx = np.absolute(sobelx) # Absolute x derivative to accentuate lines away from horizontal

    scaled_sobel = np.uint8(255*abs_sobelx/np.max(abs_sobelx))

    sxbinary = np.zeros_like(scaled_sobel)

    sxbinary[(scaled_sobel >= thresh_min) & (scaled_sobel <= thresh_max)] = 1

    s_binary = np.zeros_like(s_channel)

    s_binary[(s_channel >= s_thresh_min) & (s_channel <= s_thresh_max)] = 1

    color_binary = np.dstack(( np.zeros_like(sxbinary), sxbinary, s_binary)) * 255

    combined_binary = np.zeros_like(sxbinary)

    combined_binary[(s_binary == 1) | (sxbinary == 1)] = 1

    warped_image = warper(combined_binary, src, dst)

    #result = fit_polynomial(warped_image)
    #result = search_around_poly(warped_image)

    curvature_string, offset = radius_and_offset(warped_image)

    margin = 100

    nonzero = warped_image.nonzero()

    nonzeroy = np.array(nonzero[0])

    nonzerox = np.array(nonzero[1])

    left_lane_inds = ((nonzerox > (left_fit[0]*(nonzeroy**2) + left_fit[1]*nonzeroy +

                    left_fit[2] - margin)) & (nonzerox < (left_fit[0]*(nonzeroy**2) +

                    left_fit[1]*nonzeroy + left_fit[2] + margin)))

    right_lane_inds = ((nonzerox > (right_fit[0]*(nonzeroy**2) + right_fit[1]*nonzeroy +

                    right_fit[2] - margin)) & (nonzerox < (right_fit[0]*(nonzeroy**2) +

                    right_fit[1]*nonzeroy + right_fit[2] + margin)))

    leftx = nonzerox[left_lane_inds]

    lefty = nonzeroy[left_lane_inds]

    rightx = nonzerox[right_lane_inds]

    righty = nonzeroy[right_lane_inds]

    left_fitx, right_fitx, ploty = fit_poly(warped_image.shape, leftx, lefty, rightx, righty)

    warp_zero = np.zeros_like(warped_image).astype(np.uint8)

    color_warp = np.dstack((warp_zero, warp_zero, warp_zero))

    pts_left = np.array([np.transpose(np.vstack([left_fitx, ploty]))])

    pts_right = np.array([np.flipud(np.transpose(np.vstack([right_fitx, ploty])))])

    pts = np.hstack((pts_left, pts_right))

    cv2.fillPoly(color_warp, np.int_([pts]), (0,255, 0))

    newwarp = cv2.warpPerspective(color_warp, M_inverse, img_size)

    result_final = cv2.addWeighted(undistorted, 1, newwarp, 0.3, 0)

    cv2.putText(result_final,curvature_string , (125, 90), cv2.FONT_HERSHEY_SIMPLEX, 1.7, (255,255,255), thickness=4)

    cv2.putText(result_final, offset, (125, 150), cv2.FONT_HERSHEY_SIMPLEX, 1.7, (255,255,255), thickness=4)

    return result_final

result_image = process_image(image123)

plt.imshow(result_image, cmap='gray')
End 🙋

