Now that you have learned how to build a basic web application using Flask, you'll learn about a web framework called Dash! Dash is built on top of Flask and allows you to build interactive web applications with minimal HTML and no JavaScript.
In this lesson you will:
- Define the difference between a static and a dynamic web page
- Run a Dash app directly within Jupyter Notebook
- Iteratively build a Dash app that contains a layout made of components as well as a callback
Recall the simple Flask app home page (from the / route):
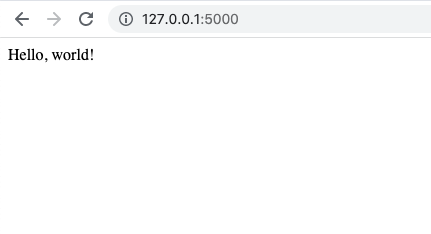
That home page is able to display information, but the interface is fundamentally static. In other words, the content served by the backend server is always the same. It also doesn't matter whether the user clicks anywhere on the page; the page will always just say "Hello, world!". Static web pages are built using HTML and CSS.
When you developed your /predict route, you made an API interface that could dynamically generate results, but that interface was only accessible through code. What if you want an interface where a user can specify the values being used for prediction?
To do that, you'll make a dynamic web page. The user can change values using familiar web form inputs (text boxes, drop-downs, checkboxes, sliders, etc.) and the model's predictions will automatically appear on the page. This kind of interface is much easier and more intuitive than using the requests library, and looks great in a data science portfolio!
Dynamic web pages are built using JavaScript in addition to HTML and CSS. JavaScript is able to attach callbacks to the HTML elements (e.g. triggered by clicking on a button), which can optionally interact with the backend server before ultimately making some change to the page's HTML and/or CSS.
Learning JavaScript can be complicated. Some of the constructs are similar to Python (e.g. first-class functions) but the syntax and error behavior are fairly different. Luckily with Dash you can create components and callbacks just using Python, and they will be translated into the appropriate HTML, CSS, and JavaScript code by Dash!
Dash is built on top of Flask, and therefore has a similar setup. Once you have the appropriate libraries installed and imported, you instantiate an app, then you can specify properties of that app before running the web server.
Clone this repository locally so you can work through these examples
Make a new conda environment for developing your Dash app.
Run this code in the terminal:
conda create --name dash-env python=3.9 pip -y
conda activate dash-env
conda install -c conda-forge notebook -y
conda install -c conda-forge  Werkzeug -y
conda install -c conda-forge  jupyter-dash -y
conda install -c conda-forge  pandas -y
conda install -c conda-forge  joblib -y
conda install -c conda-forge scikit-learn -y
conda install -c conda-forge dash-bootstrap-components -y
Now, launch this notebook using jupyter notebook
Unlike with Flask alone, there is functionality to run a Dash app directly within a Jupyter Notebook!
You'll run a basic Dash app below, and when you run the cell containing app.run_server, the dynamic web page should appear directly below the cell:
# import jupyter notebook version of dash framework
from jupyter_dash import JupyterDash as Dash
# import html elements for dash
from dash import html

# create new dash app here
app = Dash(__name__)

# set the layout to include a single <p> tag containing "Hello, World!"
app.layout = html.P("Hello, World!")
import warnings
warnings.filterwarnings('ignore')
app.run_server(mode="inline", height=150, host="localhost", port=5000)If this works, you have now run a Dash app! That was easier than running a Flask app!
If the above code didn't work, make sure you read the error message.
- If you get a
ModuleNotFoundErrorthat means that something went wrong with either installing the dependencies or pointing Jupyter Notebook to the right environment- Troubleshooting dependency installation:
- Go to the terminal and make sure you have
dash-envactivated - Run
which pythonand make sure that it prints out a path that includesdash-env. If it doesn't, runconda deactivatethenconda remove --name dash-env --alland start over with the instructions to createdash-env. - Launch a Python shell by running
pythonin the terminal. Then test out the import statements there, and see if you get aModuleNotFoundError. If you get the error, that means you should try again withpip installing the required packages. If you don't get the error, it means that your problem is probably with pointing Jupyter Notebook to the right environment
- Go to the terminal and make sure you have
- Troubleshooting Jupyter Notebook environment:
- Go to the terminal and make sure you have
dash-envactivated - Run
python -m ipykernel install --user --name dash-env --display-name "Python (dash-env)"to install this conda environment as an IPython kernel - Run
jupyter notebook, then select the Kernel --> Change kernel menu option.Python (dash-env)should be one of the options. Select it. Now you should be able to run the above cells successfully.
- Go to the terminal and make sure you have
- Troubleshooting dependency installation:
- If you get an
OSErrorsuch asAddress already in useorAn attempt was made to access a socket in a way forbidden by its access permissions, that's the same issue as with Flask, where something else is running on port 5000 on your computer- In
app.run_server, change the value of theportargument to something other than 5000 (e.g. 5001). This should resolve theOSError.
- In
Right now the only thing in your app is the text "Hello, World!". Now make it a bit more interesting.
Previously you used an HTML <p> tag to display the "Hello, World!" text. In Dash, this is instantiated using html.P. You can find documentation for this component and all other Dash HTML components here.
However as a data scientist who has typically been working in a Jupyter Notebook, you are probably more familiar with Markdown than HTML. Luckily there is a Markdown component you can use that will translate Markdown into HTML for us. This is the dcc.Markdown component (documentation here). Usage is fairly straightforward; you just specify the Markdown as a string argument (typically a triple-quoted multi-line string):
# import dash core components
from dash import dcc
# create new dash app here
app = Dash(__name__)
# set the layout to an extended markdown example
app.layout = dcc.Markdown("""
# Welcome to the Home Page
## Introduction
Hello, World! Here is some **bold** and *italic* text, a `code snippet`,
and a [hyperlink](https://www.google.com/).
## Some Lists
* Unordered list item 1
* Unordered list item 2
1. Ordered list item 1
2. Ordered list item 2
## This Is Much Better than the Old Home Page
Below is an image embedded using Markdown, showing the old home page.

""")app.run_server(mode="inline", host="localhost", port=5000)For a data science app, it is often useful to be able to display tabular data. Go ahead and load in the Iris Dataset from scikit-learn:
import pandas as pd
from sklearn.datasets import load_iris

data = load_iris()
X = pd.DataFrame(data.data, columns=data.feature_names)
y = pd.Series(data.target, name="class")
full_dataset = pd.concat([X, y], axis=1)
full_dataset
What if you wanted to display this data in your web page? Enter the DataTable component (documentation here). This is a Dash component designed for just this purpose!
Go ahead and display a random sample of 10 records from the dataset:
from dash import dash_table

# create new dash app here
app = Dash(__name__)

# set the layout to a data table
app.layout = dash_table.DataTable(
    data=full_dataset.sample(10, random_state=1).to_dict(orient="records")
)app.run_server(mode="inline", height=350, host="localhost", port=5000)Great!
So far, you have reassigned the layout attribute of your app each time, so that it originally was a <p> tag containing "Hello, World!", then it was a Markdown component with various headings and other content, then it was a DataTable with data from the Iris Dataset.
What if you want to use more than one component in the same web page?
The most straightforward way is to use multiple nested Div components (documentation here). Div components for Dash are represented as HTML <div> tags, which are generic HTML container elements.
The example below combines some Markdown text with the DataTable with data from the Iris Dataset.
# create new dash app here
app = Dash(__name__)

# declaring your individual components

markdown = dcc.Markdown("""
# Iris Dataset

Below is a DataTable showing a sample of 20 records from the
 [Iris Dataset](https://en.wikipedia.org/wiki/Iris_flower_data_set).
""")

table = dash_table.DataTable(
    data=full_dataset.sample(10, random_state=1).to_dict(orient="records")
)

# creating an app layout with these components as children

app.layout = html.Div(children=[
    html.Div(markdown),
    html.Div(table)
])app.run_server(mode="inline", height="450", host="localhost", port=5000)Now you have both Markdown and DataTable components in the same web page!
This is an optional step, but it makes the components look a bit better together. If you know how to work with CSS, you can define your own custom styles and follow these instructions, but for now you'll just use the recommended style sheet from Dash.
Style sheets are added when the app is instantiated. Then you can add your Markdown and DataTable elements and see them with their new styles:
# create a list of external stylesheets, with just one CSS file (for now)
external_stylesheets = ['https://codepen.io/chriddyp/pen/bWLwgP.css']

# create new dash app that uses the stylesheet list
app = Dash(__name__, external_stylesheets=external_stylesheets)

# set the layout
app.layout = html.Div(children=[
    html.Div(markdown),
    html.Div(table)
])app.run_server(mode="inline", height=450, host="localhost", port=5000)Not a huge change, but the look and feel is more polished with the stylesheet than without it.
So far, you have used Dash components to avoid writing HTML and CSS directly, but you still fundamentally have a static page. Add a callback to create some dynamic, interactive functionality!
One of the strategies for connecting HTML and JavaScript logic uses the id attribute of the HTML elements. In properly-formatted HTML, the id attribute is a unique identifier that only applies to a single element on the page. When the id has been declared, then JavaScript can locate the element using that id in order to specify callback behavior.
Start with a simple HTML page, consisting of a <div> containing a <button> tag and a <p> tag:
<div>
  <button id="btn">Click here</button>
  <p id="p">The button has not been clicked</p>
</div>
And say that when you click on that <button> tag, you want the text of the <p> tag to change to say "The button was clicked!" instead of saying "The button has not been clicked".
To do that in JavaScript, the code would look something like this:
const button = document.getElementById("btn");
const p = document.getElementById("p");
button.addEventListener("click", e => {
  p.innerText = "The button was clicked!";
});
Don't worry too much about the specific syntax here. The main takeaway is that:
- JavaScript code is able to locate HTML elements by their
idproperty - Once JavaScript has located the HTML element, it can add "event listeners" that define what should happen when an event (e.g. clicking) happens
- Once JavaScript has located the HTML element, it can modify the attributes of the element (e.g. setting the inner text)
- Steps 2 and 3 are often combined together, so that an event can trigger the modification of the attributes of one or more HTML element
Implement the HTML and JavaScript code above using Dash instead. You'll need a layout consisting of a Div component for the <div> tag, a Button component (documentation here) for the <button> tag, a P component for the <p> tag, a function that modifies the component's text, and a decorator that connects the click event to the text modification.
from dash import Input, Output

# create new dash app that uses the stylesheet list
app = Dash(__name__, external_stylesheets=external_stylesheets)

# set the layout to your simple html page with id attributes
app.layout = html.Div(children=[
    html.Button("Click here", id="btn"),
    html.P(id="p")
])

# attach a callback so that when n_clicks of the Button changes,
# the children text of the P changes
@app.callback(Output("p", "children"), Input("btn", "n_clicks"))
def set_text(n_clicks):
    if n_clicks is None:
        return "The button has not been clicked"
    else:
return "The button was clicked!"app.run_server(mode="inline", height=100, host="localhost", port=5000)If you have worked with JavaScript callbacks before, note that the setup with Dash is different from a typical JavaScript control flow. Instead of being event-driven, where clicking the Button triggers the change to the P text, the callback function in Dash essentially means that the Button and P components are synchronized.
This synchronization means that properties of the P component (in this case, the children attribute, which specifies the inner contents) can be automatically connected to properties of the Button component (in this case, the n_clicks attribute, which counts how many times the button has been clicked).
This is more like a spreadsheet cell that calculates a value based on the value of another cell; the calculation occurs as soon as the page loads, rather than waiting for a particular user interaction. This also works similarly to socket programming.
Take your Markdown + DataTable example from earlier and make it interactive!
Specifically you'll add a Modal component (essentially like a pop-up, although it is part of the same HTML page) that displays additional information about a record in your DataTable when the user clicks on the table.
Inside that Modal component, you'll display a photo of the iris type as well as a list of all attributes of the selected record.
There are a lot of nested components in use here; feel free to look up more information in the Dash HTML Components documentation and the Dash Bootstrap Components documentation but don't worry too much about the details. The main goal is to showcase the complex layout functionality you can achieve with only about 70 lines of Python code (not counting comments)!
If you have some background in front-end web development and are already familiar with Bootstrap CSS styling, you can apply that knowledge here! The same CSS styles should work here, and if you want to specify a CSS class, you can use the component attribute called
className.
########## IMPORTS ##########
import dash_bootstrap_components as dbc

########## SETTING UP THE APP ##########

# this time use bootstrap styles instead of Dash recommended styles
external_stylesheets = [dbc.themes.BOOTSTRAP]

# create new dash app that uses the stylesheet list
app = Dash(__name__, external_stylesheets=external_stylesheets)

########## DECLARING LAYOUT COMPONENTS ##########

# markdown component is almost identical to before, you just added a line
# telling the user to select a record
markdown = dcc.Markdown("""
# Iris Dataset

Below is a DataTable showing a sample of 20 records from the
 [Iris Dataset](https://en.wikipedia.org/wiki/Iris_flower_data_set).

Select any record to view more information!
""")

table = dash_table.DataTable(
    data=full_dataset.sample(10, random_state=1).to_dict(orient="records"),
    # you want the user to be able to select a row
    row_selectable="single",
    # suppress default cell selection styling (you are selecting by row, not cell)
    cell_selectable=False,
    # set an id so you can make attributes of this table into callback inputs
    id="tbl"
)

# create a modal (has built-in functionality for user to close it)
modal = dbc.Modal(children=[
    # modal header will always be the same
    dbc.ModalHeader(dbc.ModalTitle("Iris Information")),
    # modal body will depend on what was clicked
    # set and id so you can make this component's children a callback output
    dbc.ModalBody(id="modal-body")
],
                  # set an id so you can make the modal's open/closed status
                  # a callback output
                  id="modal",
                  # by default, the modal is not open; it opens when a row
                  # in the data table is selected
                  is_open=False
                 )

# similar layout to before, just adding the modal to the end
app.layout = html.Div(children=[
    html.Div(markdown),
    html.Div(table),
    modal
])

########## HELPER FUNCTIONS ##########

def create_list_group(selected_row_data):
    """
    Helper function that takes in a dictionary of data
    and returns a formatted list component
    """
    return dbc.ListGroup([
        dbc.ListGroupItem(f"{k}: {v}") for k, v in selected_row_data.items()
    ])

def create_image_card(selected_row_data):
    """
    Helper function that takes in a dictionary of data
    and returns a card with the relevant iris image and name
    """
    iris_class = selected_row_data["class"]
    if iris_class == 0:
        name = "Iris setosa "
        img_url = "https://upload.wikimedia.org/wikipedia/commons/thumb/5/56/Kosaciec_szczecinkowaty_Iris_setosa.jpg/180px-Kosaciec_szczecinkowaty_Iris_setosa.jpg"
        img_source = "https://commons.wikimedia.org/wiki/File:Kosaciec_szczecinkowaty_Iris_setosa.jpg"
    elif iris_class == 1:
        name = "Iris versicolor "
        img_url = "https://upload.wikimedia.org/wikipedia/commons/thumb/4/41/Iris_versicolor_3.jpg/320px-Iris_versicolor_3.jpg"
        img_source = "https://commons.wikimedia.org/wiki/File:Iris_versicolor_3.jpg"
    else:
        name = "Iris virginica "
        img_url = "https://upload.wikimedia.org/wikipedia/commons/thumb/9/9f/Iris_virginica.jpg/295px-Iris_virginica.jpg"
        img_source = "https://commons.wikimedia.org/wiki/File:Iris_virginica.jpg"

    return dbc.Card(children=[
        dbc.CardImg(src=img_url),
        dbc.CardBody(children=[
            html.Em(name),
            html.Small(html.A("(image source)", href=img_source, target="blank_"))
        ])
    ])

########## CALLBACKS ##########

@app.callback(Output("modal", "is_open"), Input("tbl", "selected_rows"))
def toggle_modal(selected_rows):
    """
    When the `selected_rows` attribute of the data table (id="tbl") changes,
    set the `is_open` attribute of the modal (id="modal") to True

    `selected_rows` is None when the page first loads, then is a list of
    row indices that have been selected by the user
    """
    if selected_rows:
        return True
    else:
        return False

@app.callback(
    Output("modal-body", "children"),
    [Input("tbl", "derived_virtual_data"), Input("tbl", "selected_rows")])
def render_information(rows, selected_rows):
    """
    When the `selected_rows` attribute of the data table (id="tbl") changes,
    set the `children` attribute of the modal body (id="modal-body") to display
    data about the selected info

    You have a list of two inputs rather than just one this time, because you
    need to know the actual contents of the row's data, not just the selected
    index:
      1) The `derived_virtual_data` attribute of the data table is a list of
         dictionaries that represent the data currently being shown in the
         table. The reason you don't just use the original dataframe that you
         passed in to create the table is that Dash data tables can allow the
         user to filter, edit, and delete data. You don't have these settings
         turned on right now, but feel free to explore them!
         For the sake of simplicity, you map the `derived_virtual_data`
         attribute onto a parameter called `rows`.
      2) The `selected_rows` attribute of the data table is a list of index
         values (i.e. integers). The values in this list correspond to the
         indices of `derived_virtual_data`.
    """
    if selected_rows:
        # selection is set to "single" so there will be exactly 1 selected row
        selected_row_data = rows[selected_rows[0]]

        # set up a layout with one row and two columns
        return html.Div(dbc.Row(children=[
            # left column is a picture + name of the iris class
            dbc.Col(create_image_card(selected_row_data)),
            # right column is a list of all the attributes and their values
            dbc.Col(create_list_group(selected_row_data))
        ]))
app.run_server(mode="inline", height=500, host="localhost", port=5000)In this lesson, you were introduced the Dash library, which is built on top of Flask. Unlike Flask, Dash has functionality to render web pages directly within a Jupyter Notebook! Dash also lets you create HTML and JavaScript functionality, just by writing Python code. HTML and CSS functionality is generally created using Dash components, whereas JavaScript functionality is generally created using Dash callbacks. Particularly with the Dash Bootstrap Components, it is possible to create sophisticated, dynamic web pages with relatively few lines of Python code.

