CodeNote is an onboarding project that helps codelink new member to get familiar with frontend tech stack at our company such as:
We have 4 main tasks in order to complete this project. Each task includes 2 parts: basic and optional requirement.
You have to complete the basic requirement first, after that you can move to optional requirement that requests more time and challenge to finish.
First, clone project to your local
$ git clone [email protected]:leo-le-07/onboarding-codenote-client.git /your_folder
$ cd your_folder
Check out and create a new branch
$ git fetch
$ git checkout task-1/add-basic-features
$ git checkout -b task-1/add-basic-features-basic-implement
Install packages and start project
$ yarn install
$ yarn start
Now you can access application at http://localhost:3000
We already have Signup feature as example.
Now we want to help a user to log in with email ([email protected]) and password (123456) at path /login.
The UI should be like this

Hints:
- Currently we're using aws-amplify library to support us to interact with AWS services. In case of login, you can use method
Auth.signInfrom that library. - After logging in successfully, you need to call
userHasAuthenticatedmethod. It passes fromAppcomponent in order to notify other components in our application that we've already logged in.
A user can create a note at path /notes/new.
The UI should be like this
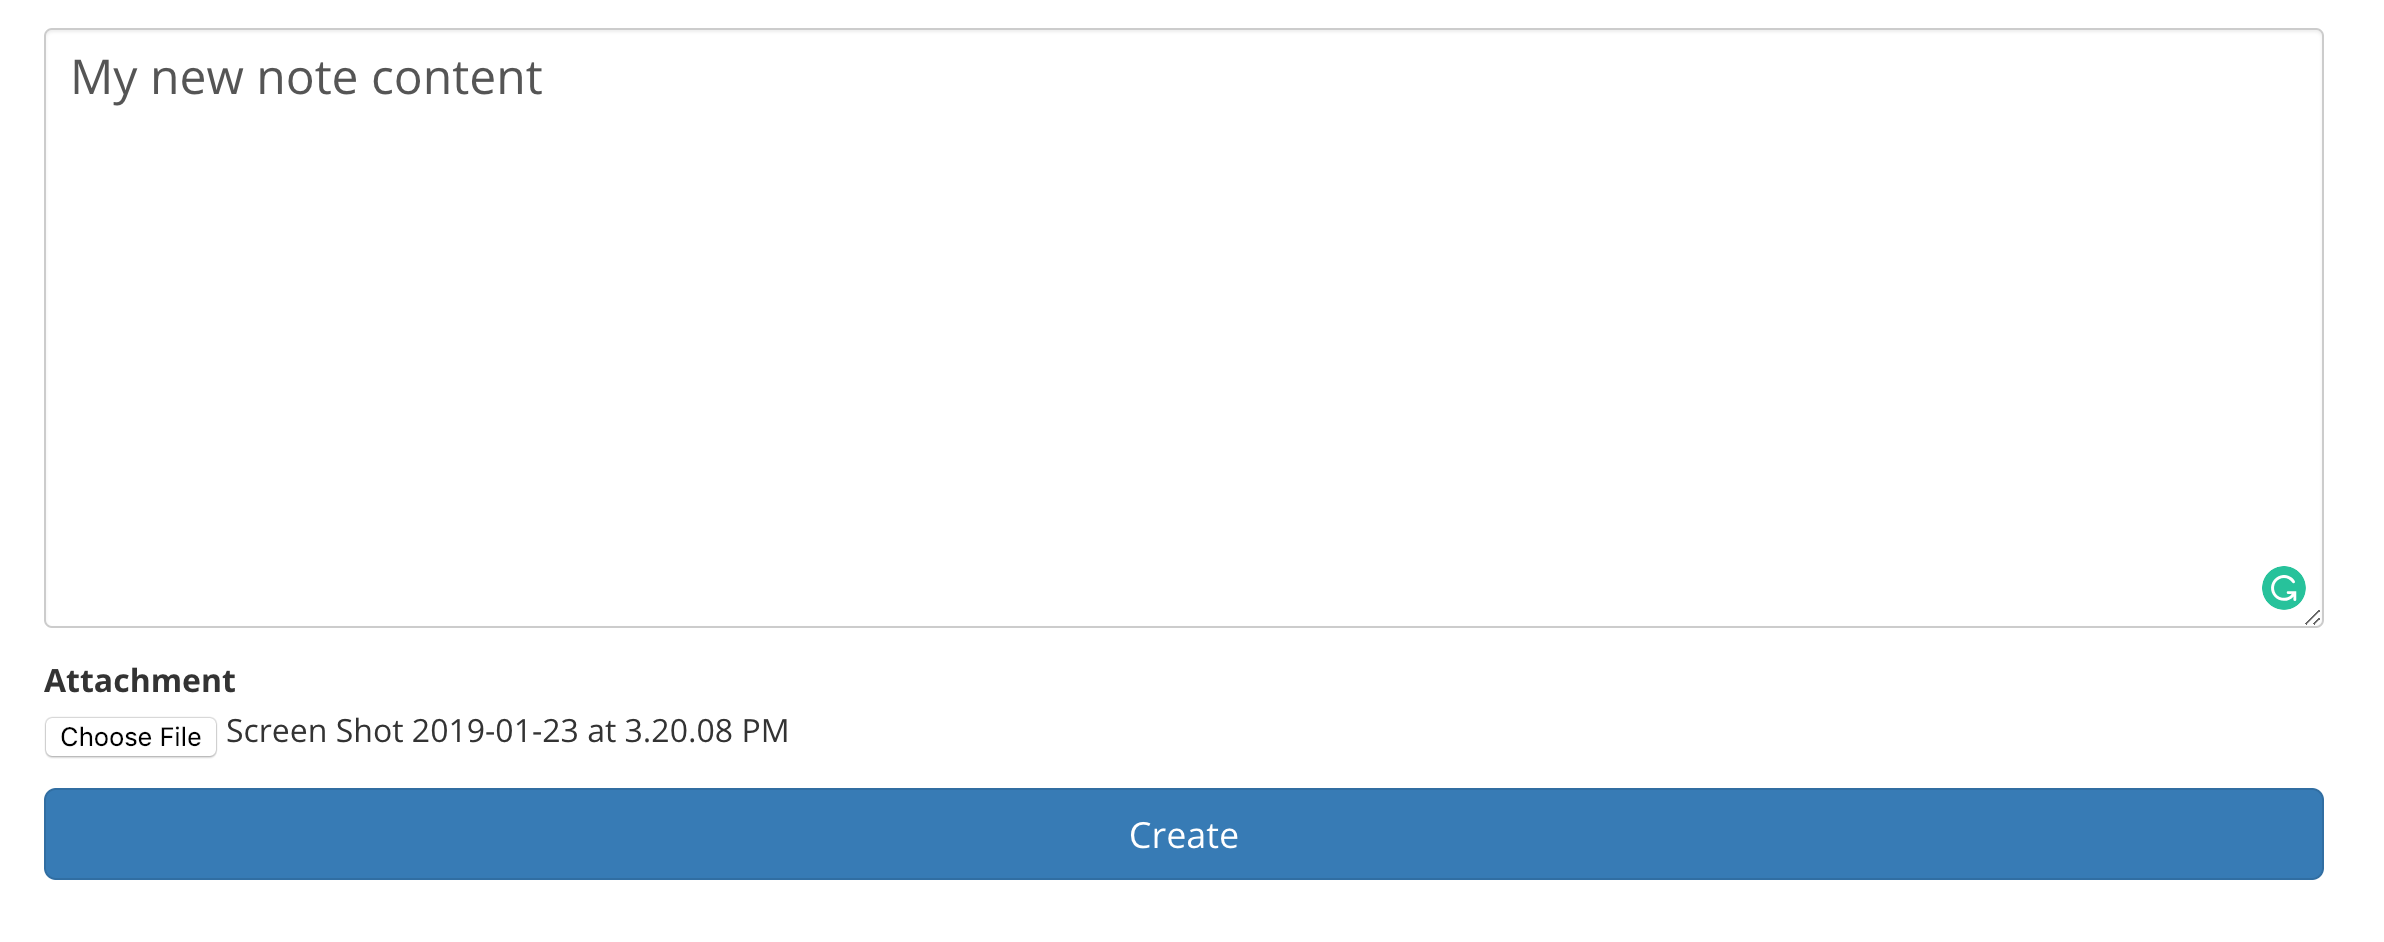
Hints:
- In order to upload file attachment to S3, please use method
s3Uploadfrom/libs/awsLiblibrary. - For creating new note, we can use
APImethod fromaws-amplifyto make a new note request. For example:
API.post("notes", "/notes", { body: { attachment: 's3-url', content: 'our note content' }});When finishing, please create a pull request to branch task-1/add-basic-features
In part I, we manage a user logged in state in App component as isAuthenticated internal state. Then we pass that state as childProps to all nested children. It still works in the beginning, however, it hards to manage in real projects.
Redux comes up with a convenient way to share state within our application.
Check out and create a new branch
$ git fetch
$ git checkout task-2/working-with-redux
$ git checkout -b task-2/working-with-redux-basic-implement
Install packages and start project
$ yarn install
$ yarn start
You'll see the website broken when trying to use some features because we've already removed isAuthenticated internal state from App component as well as childProps from ScreensRoot component.
Manage state by redux and make our website works normally again.
When finishing, please create a pull request to branch task-2/working-with-redux
From ReactJS official page
Static type checkers like Flow and TypeScript identify certain types of problems before you even run your code. They can also improve developer workflow by adding features like auto-completion. For this reason, we recommend using Flow or TypeScript instead of
PropTypesfor larger code bases.
In this project, we prefer TypeScript to Flow type.
Check out and create a new branch
$ git fetch
$ git checkout task-3/typescript-type-checking
$ git checkout -b task-3/typescript-type-checking-basic-implement
Install packages and start project
$ yarn install
$ yarn start
If you run type checker command
$ npm run checktype
You'll see some errors related to 2 components that we created in Part I: Login and NewNote.
You need to add TypeScript to those components and make sure type checker passes with no error.
Take a look at file tsconfig.json in our project, you will see that we only cover type checkers for 2 components above. Try adding type checker for all files inside src folder by replacing
  "include": [
    "src/screens/Login",
    "src/screens/NewNote",
  ]
with
"include": ["src"]This time, we'll add TypeScript to cover for all files in our project.
When finishing, please create a pull request to branch task-3/typescript-type-checking
In this part, we'll add unit tests for our components with Jest and Enzyme support.
Check out and create a new branch
$ git fetch
$ git checkout task-4/writing-tests
$ git checkout -b task-4/writing-tests-basic-implement
Install packages and start project
$ yarn install
$ yarn start
If you run test by this command
$ npm run test
You'll see an error related to empty test for Home component.
We'll fix that error by adding unit tests for that component.
Running this command to generate Jest coverage report
$ npm run test --coverage
Open coverage report file at coverage/lcov-report/index.html from root folder. You'll see that most of components in our project are not covered.
You could add more unit tests to the rest components optionally in order to increase test coverage points.
When finishing, please create a pull request to branch task-4/writing-tests
This one is optional part. We'll use Netlify service to deploy our website. You can create a new Netlify account here in case you don't have it yet.
Install Netlify client on your local
$ npm install -g netlify-cli
Build your reactjs app
$ npm run build
Deploy to production
$ netlify deploy
Netlify will ask you some simple questions before deploying. When Netify asks you about deploy path, please enter ./build. It means that Netify only deploys your build folder.
Wait for a few seconds, you will see Live Draft URL link after Netlify deployment finished.
Feel free to submit issues and enhancement requests.
Please refer to each project's style guidelines and guidelines for submitting patches and additions. In general, we follow the "fork-and-pull" Git workflow.
- Fork the repo on GitHub
- Clone the project to your own machine
- Commit changes to your own branch
- Push your work back up to your fork
- Submit a Pull request so that we can review your changes
