Apito is a powerful Headless CMS on Cloud which helps you build API easily. You can think of it as a wordpress alternative. This guide will show you how you can use Apito to build API for your next project or application.
Once you logged in to Apito Console you will a Project Space like below. You can use this space to switch between your projects or create a new one.

Now, for this quick started guide I will be creating an API for an ecommerce project, so lets gets started.
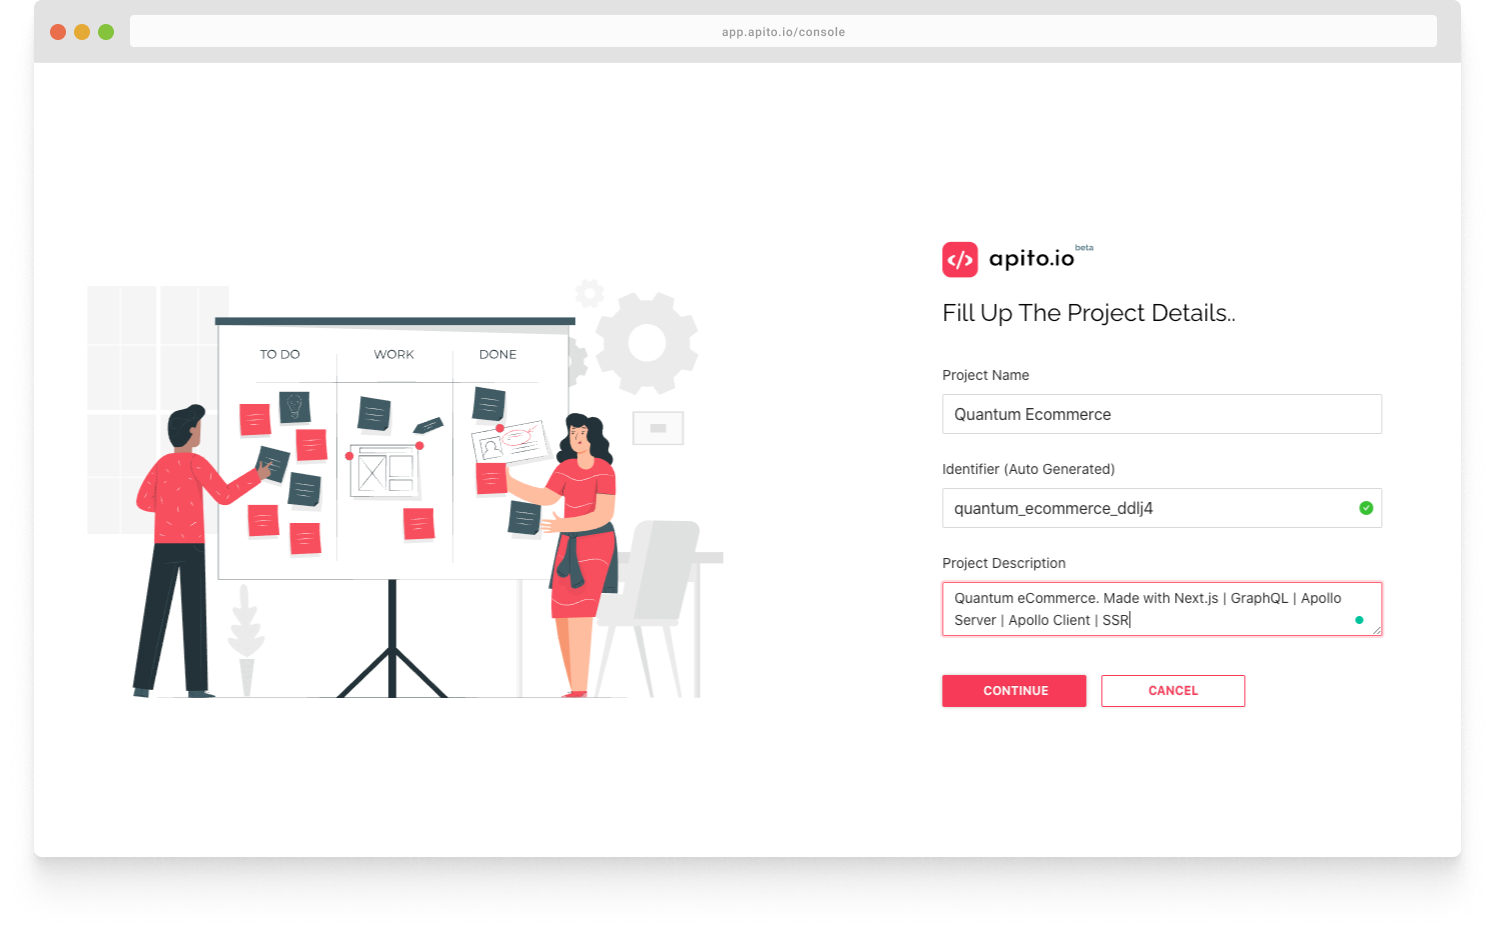
Click on the Start a new Project button to initialize your project creation. Enter your project name and description and click Continue. On the next page select
Apito Cloud option to create your project faster. Other Database options will soon be available. Congratulation! you project is being build. Once it’s done you can click
Explore new project to switch to your newly created project and start building your API instantly.
The first step after creating your project is to define your project models. The most important part of designing an API is Database Modeling. Let’s start by creating our first model. We all know Products and categories are a crucial part of an ecommerce API.
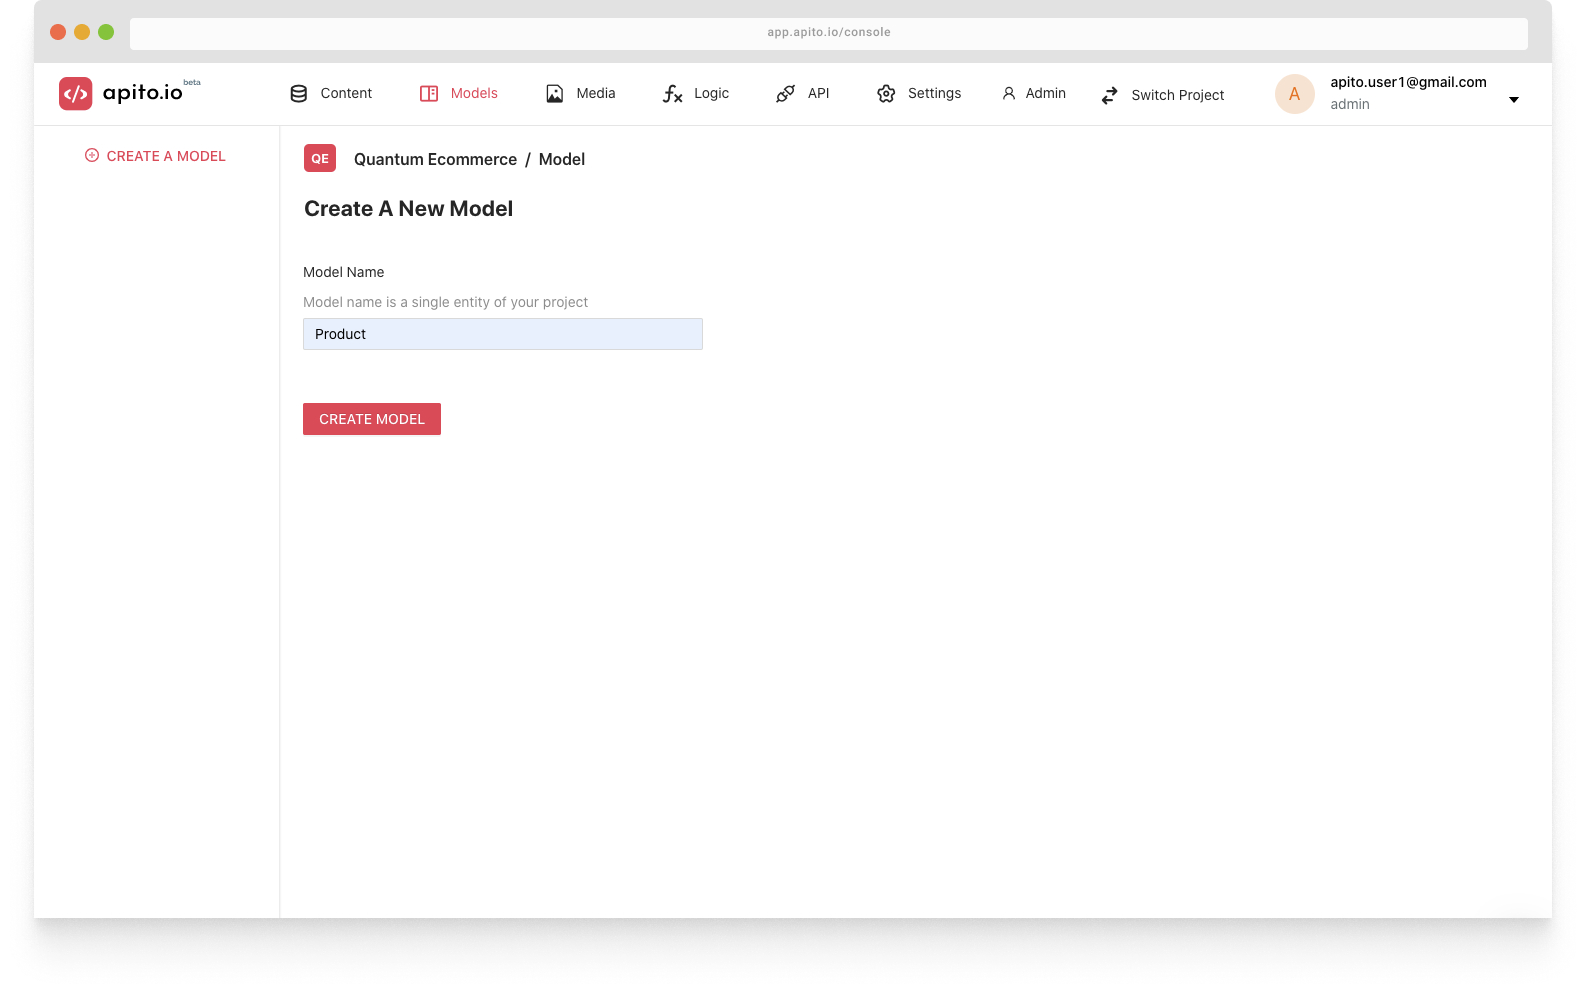
Click on the Models Tab in the top navigation menu. Then from the left side bar, click on Add a model button. Now, write down the name of the model, in our case it will be product. Now click on the create button.
Next, we will add few fields to our newly created product model.
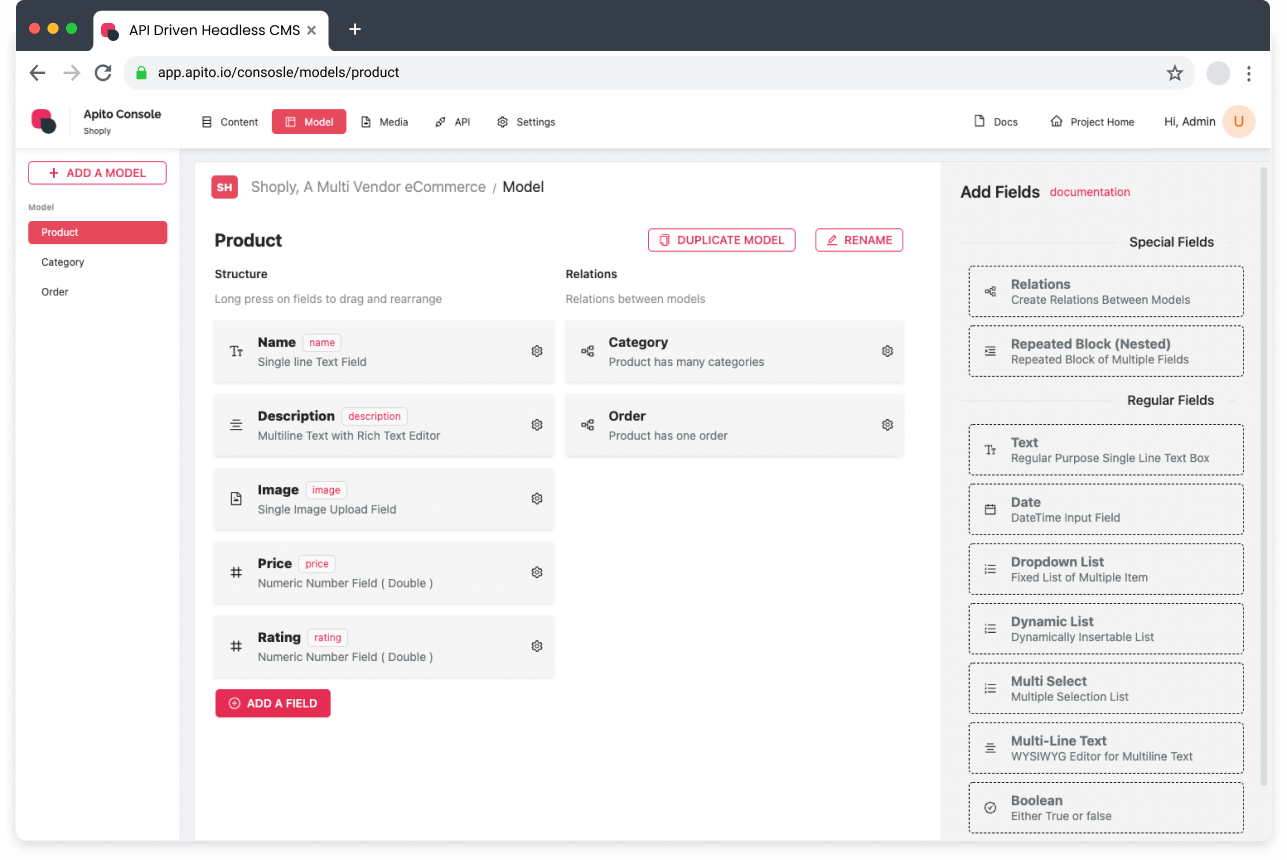
To add fields to a model click on the Add a Field button. First, we will add a title field of type text and we will set the attribute of the title to required. Then, a description field of type, Rich Text. An Image field of type, Media. A Price field of type, Number. And last but not least a Rating field of type, Number. Now let’s create another model named Category and add few fields in it. Those fields will be name, label and icons. Apito model & field builder is very versatile you can use it to design complex and nested model structure.
Next, we will create relations between them. For that you need to click on the Add Field Button and then select Relations. Your relation creation between models depends on your project requirements.
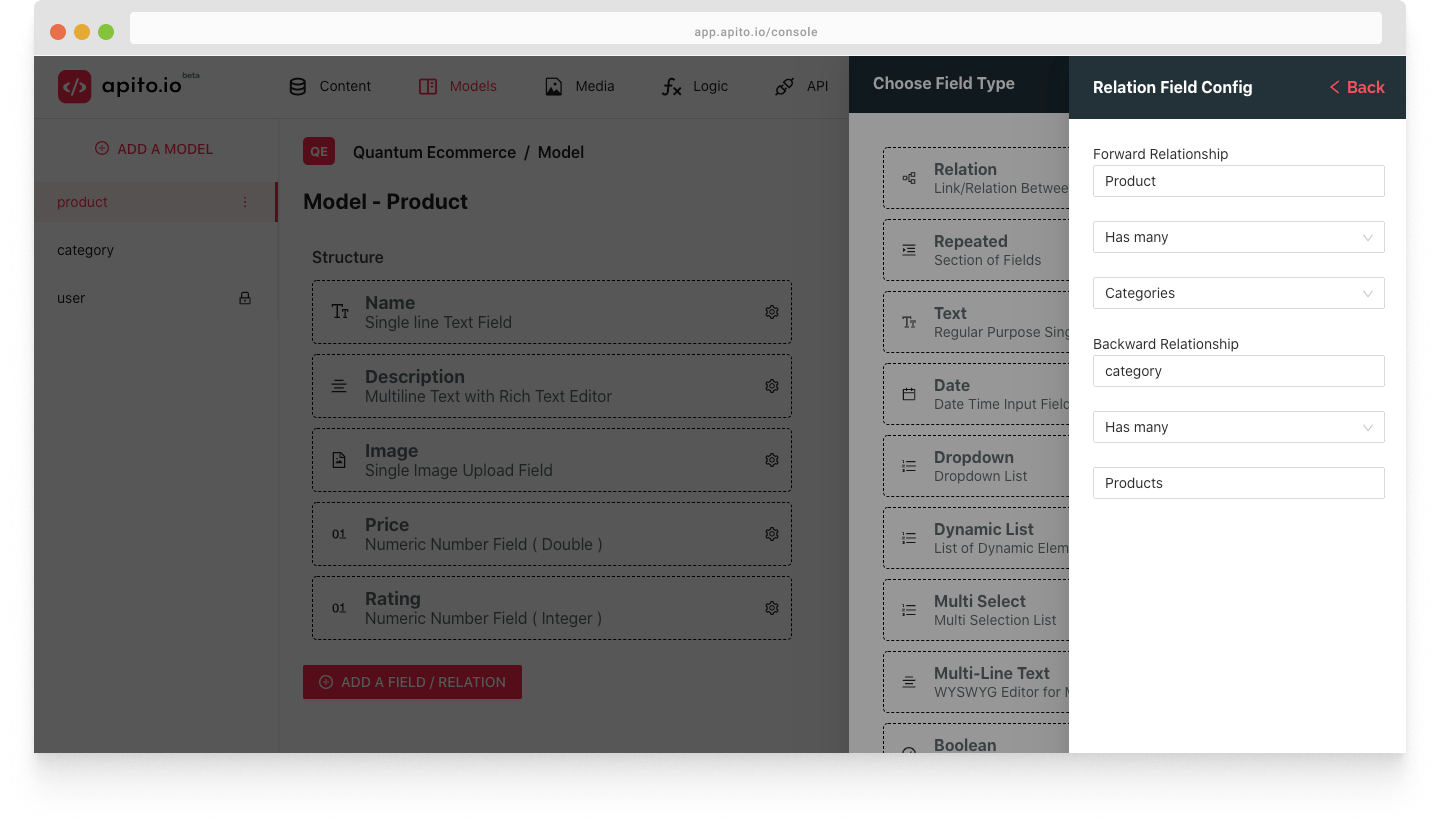
For now, let’s say, Product has many categories and categories has many products. Wow, as you can see, how easy it is to create entity relations between models in Apito . Also, you can rename, delete and create fields & relations anytime you want. Now, that our database design of product and category model with relation is created, we are ready to insert some contents.
Click on the Contents tab and select your model. As you can see, Table and forms are auto generated based on your database model design. Let me insert few products and categories into our database. To add a new product, click on the Add a new product button, which is on the right side of the product content table. You will be able to see a drawer pops up from the right side of our table, which contains an auto generated specialized input form based on your model design.
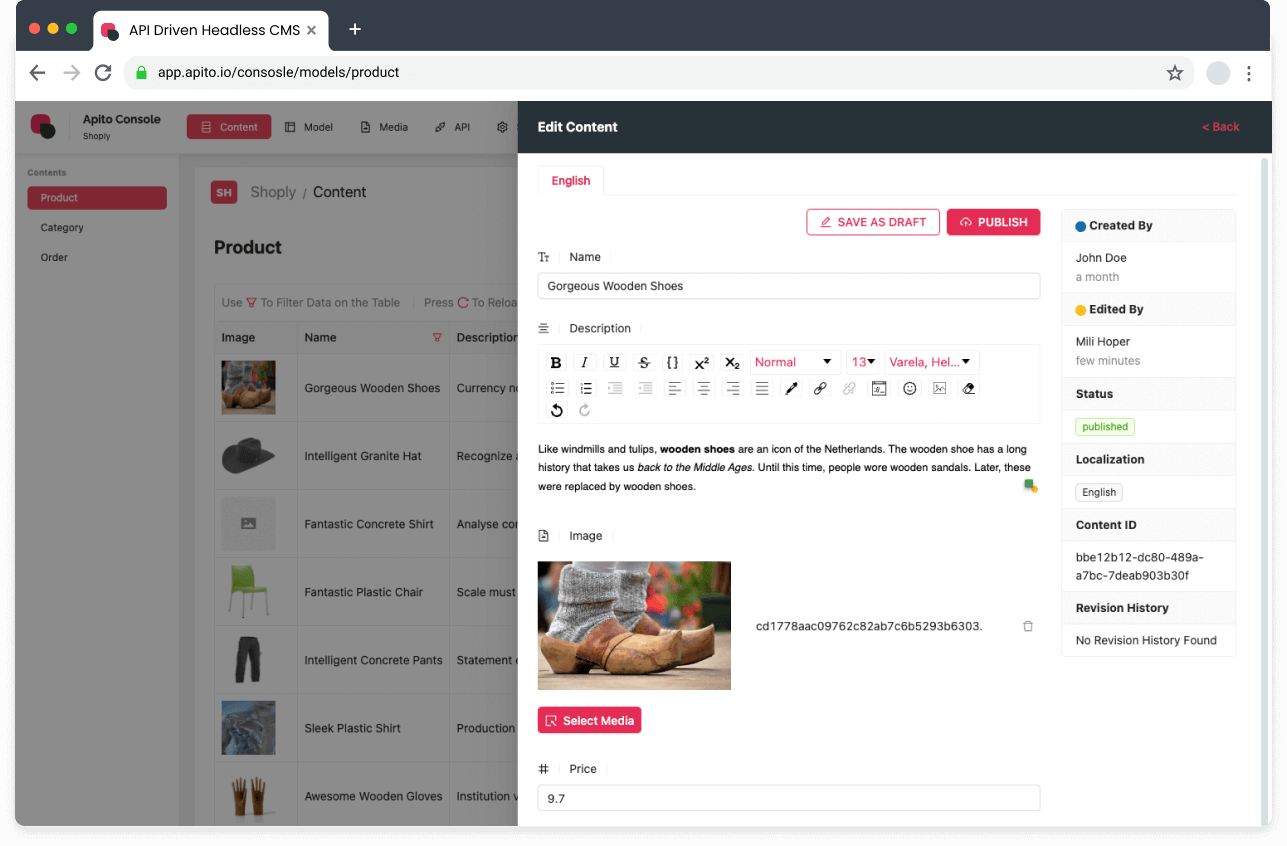
Let’s add our first product using this form into our database. Let’s add our first category into our database. As you can see while creating a category you can directly tag products with it. As you can see that product and category are now linked with each other.
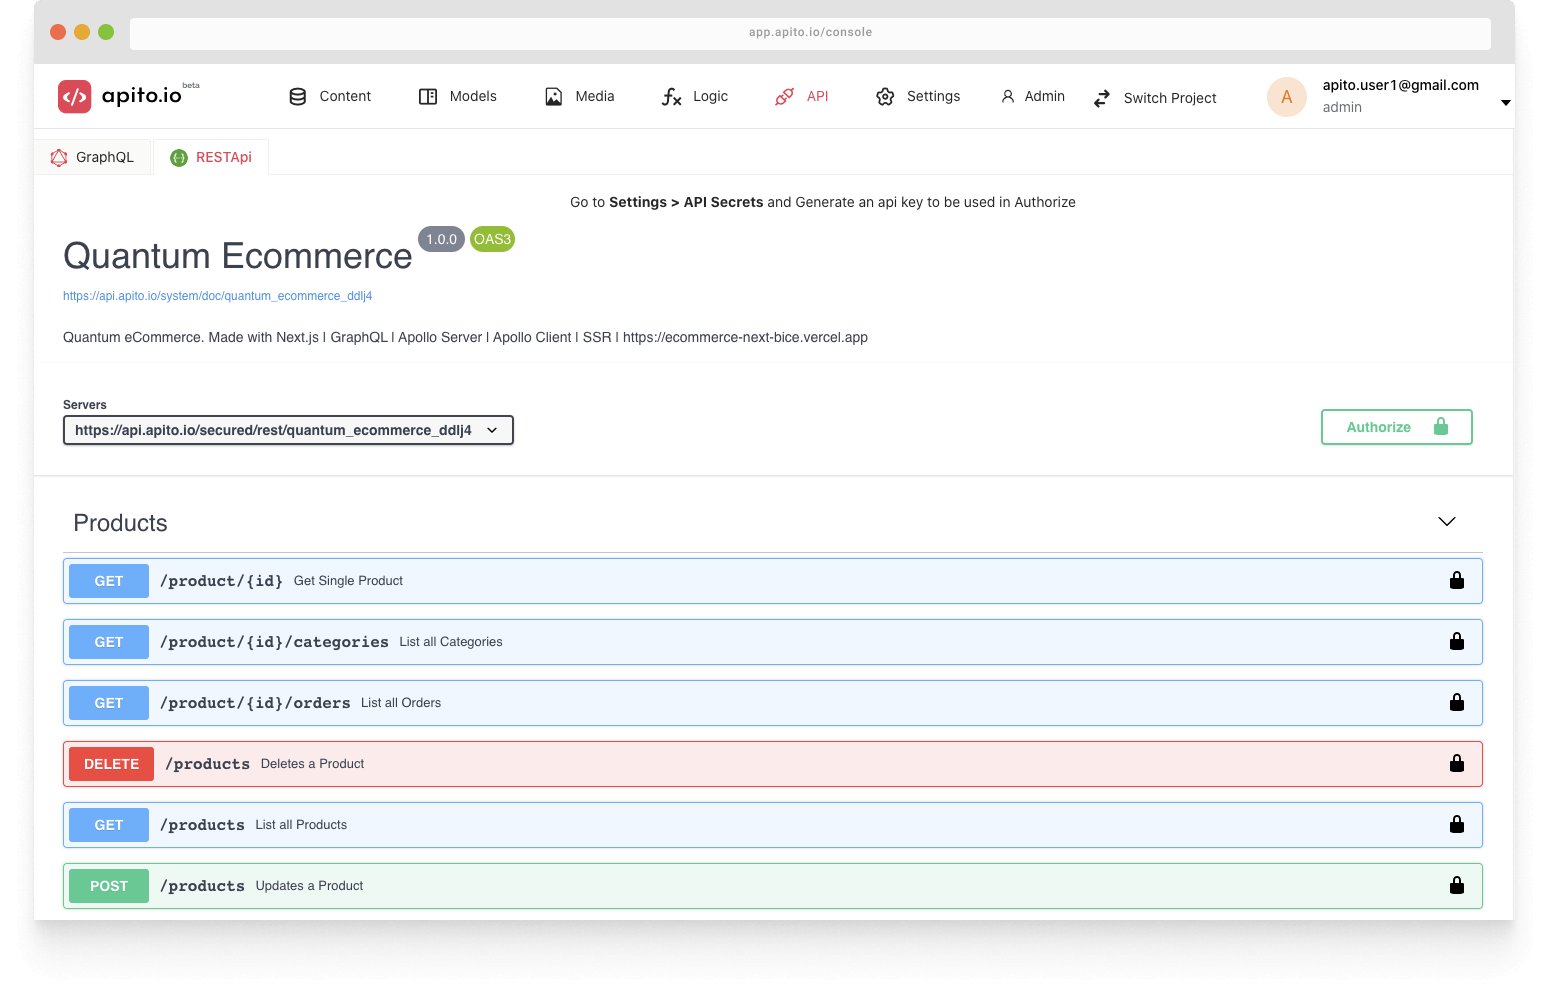
Our Ecommerce API is ready. To explore our API lets goto the API Explorer from the top of the navigation menu. As you can see, our GraphQL & REST API is ready for use.
Let’s run our first query. We will now Search a product that contains blue in its name. Now click Run and as you can see its working! our ecommerce API is ready for integration.
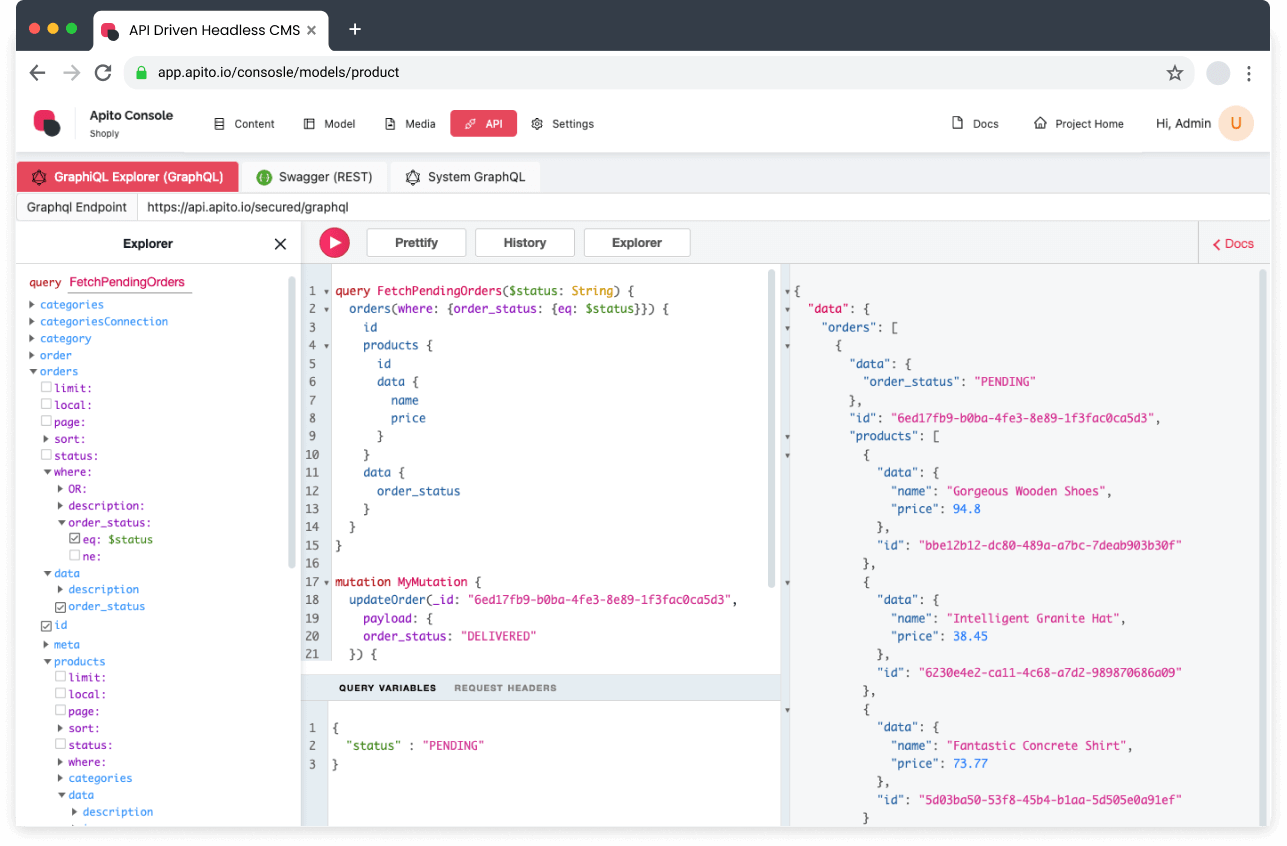
You can also use REST API if you project requires it. Apito Generates a Swagger Documentation which is compatible with OpenAPI.