基于clash 核心运作的、进行全量订阅测试的telegram机器人
- 配置文件优化,代理相关配置统一为proxy键值对,旧版代理配置proxyport仍旧可用,但已废弃。推荐使用proxy配置,proxyport配置在启动时会发出警告。
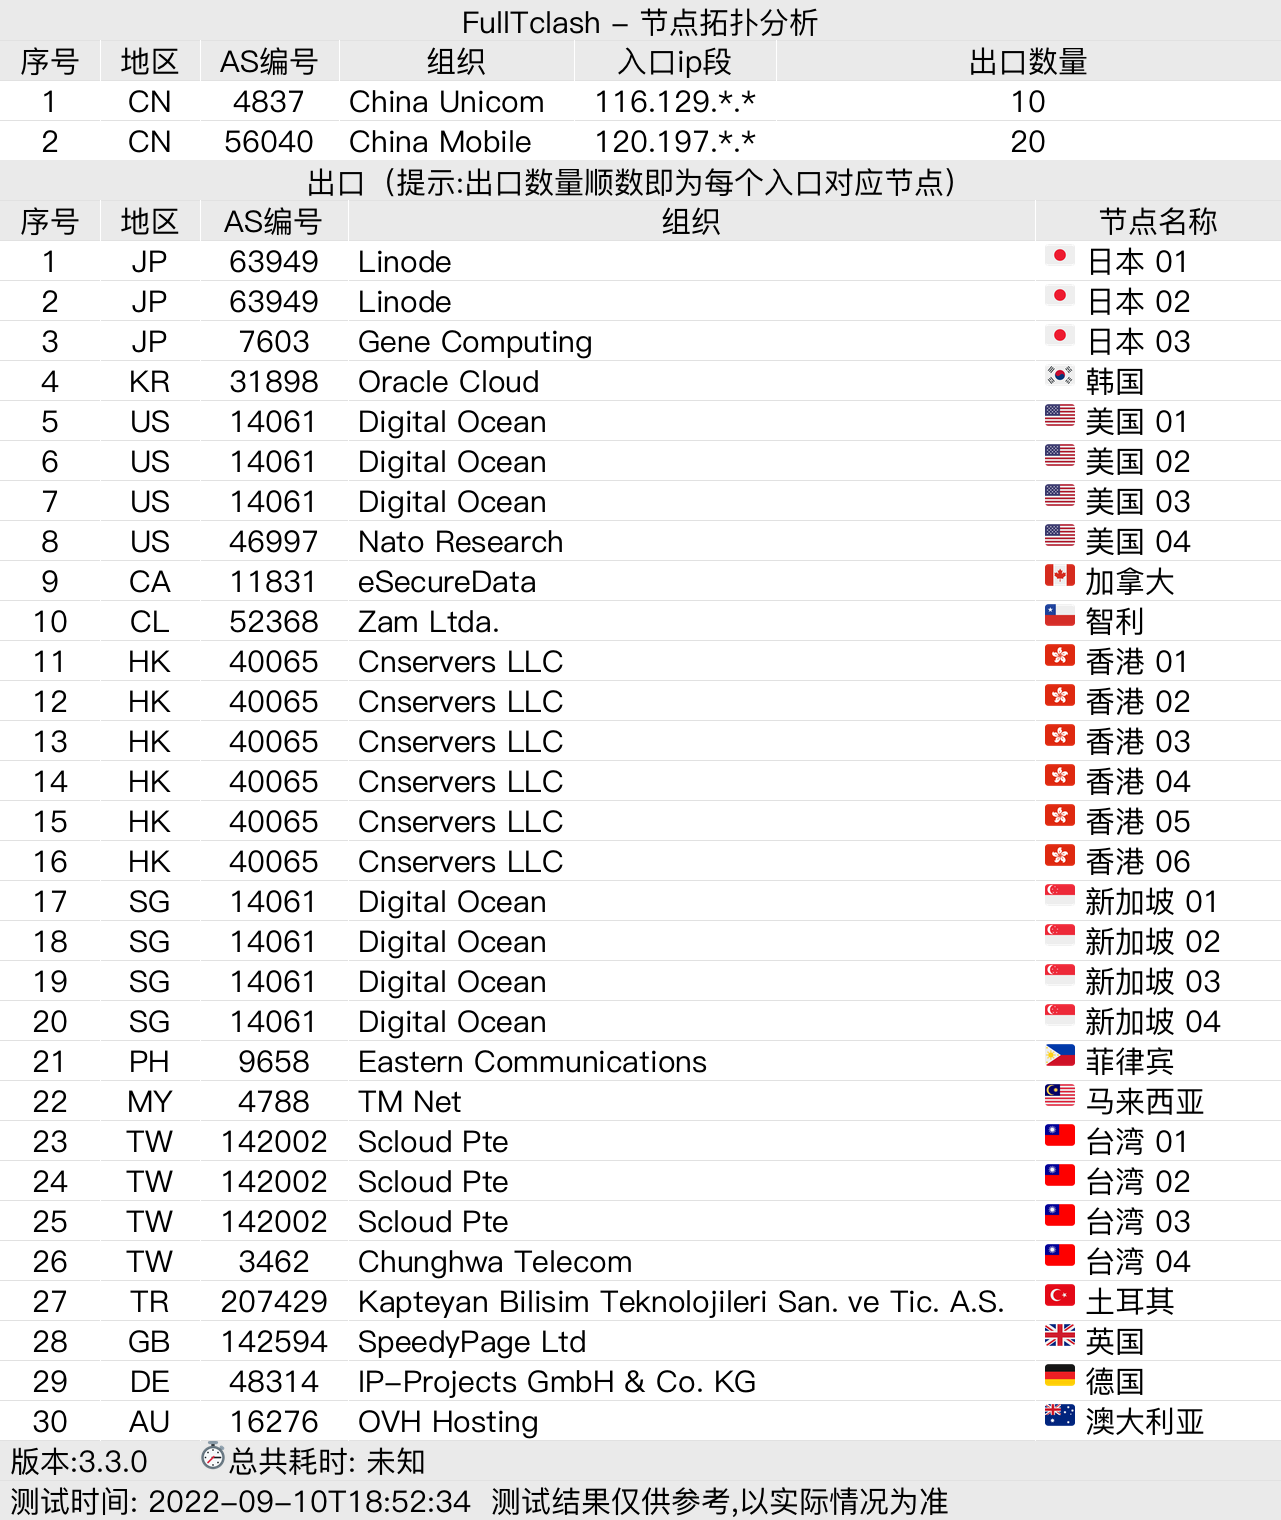
- 节点分析新增出口ip显示,用于判断复用节点,ip仅显示最后一位。
- 优化help指令,不同权限组看到的内容不同。
- 新增 /version 指令用于查询当前版本信息
- 自定义字体。可通过在配置文件添加 font键值对自定义你喜欢的字体,具体案例查看配置模板。
- 新增延迟配色。可通过配置文件修改想要的配色。具体使用方法查看config.yaml.example
- 修复部分不合法的输入,会导致任务无限阻塞的bug。
历史更新请到TG频道查看:
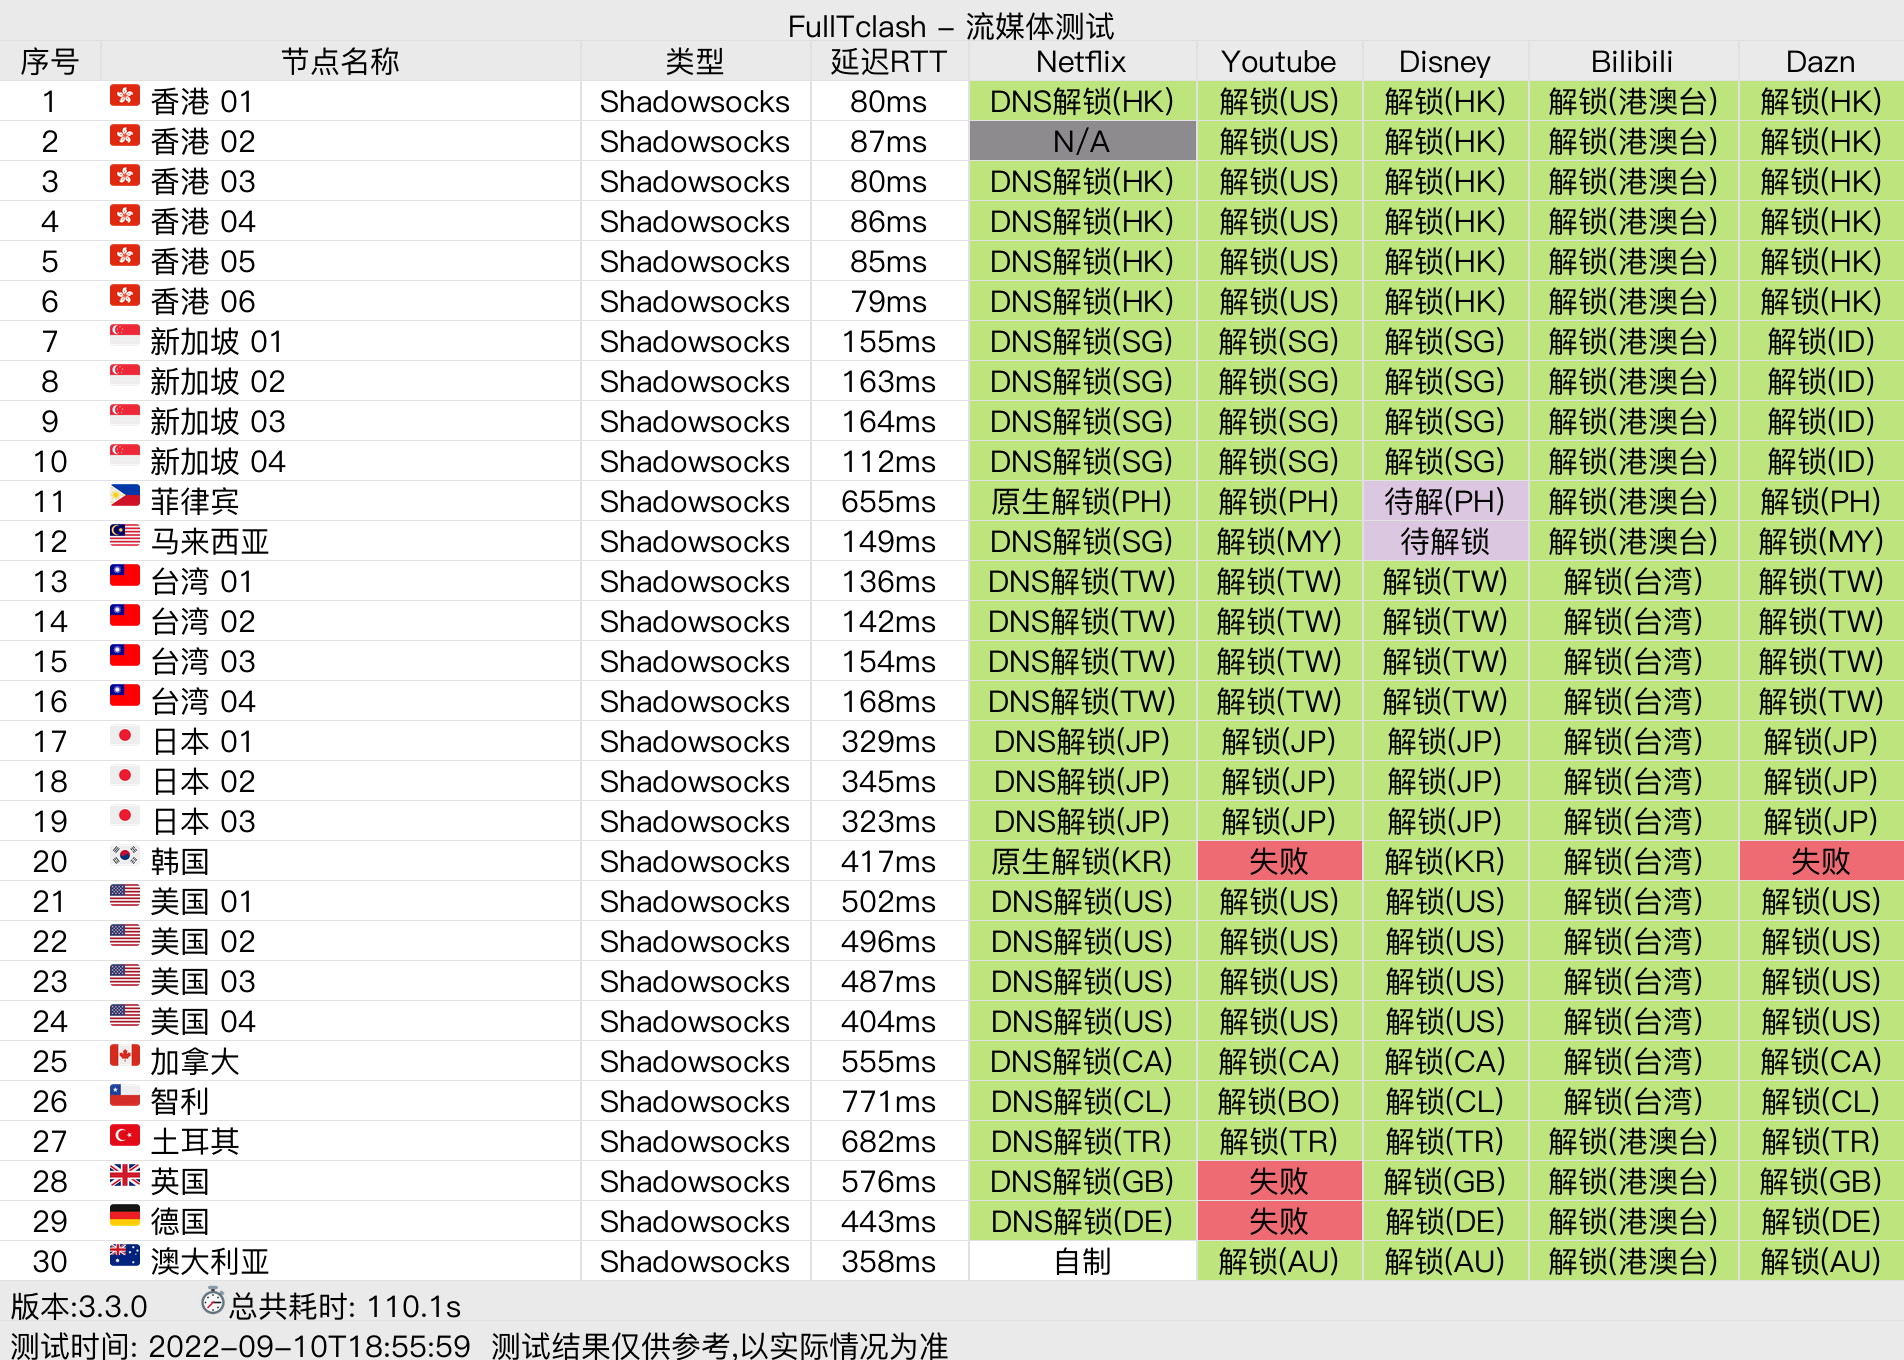
FullTclash bot 是承载其测试任务的Telegram 机器人(以下简称bot),目前支持以clash配置文件为载体的批量流媒体测试,支持以下流媒体测试条目:
-
Netflix
-
Youtube
-
Disney Plus
-
Bilibili
-
Dazn
-
Hbomax
-
Bahamut
以及clash 延迟测试和链路拓扑测试(节点出入口分析)。
流媒体测试:
要成功运行该项目代码,首先需要准备以下信息:
-
Telegram 的api_id 、api_hash 获取地址 不会请Google。
-
去 @BotFather 那里创建一个机器人,获得该机器人的bot_token,应形如:
bot_token = "123456:ABC-DEF1234ghIkl-zyx57W2v1u123ew11"
这步不会请Google。
-
一个clash 核心, 下载地址。(可选,可以用/resources里默认的)
-
字体文件。(可选,可以用默认的)
-
Python 3.5 以上
-
aiohttp>=3.8.1
-
aiohttp_socks>=0.7.1
-
async_timeout>=4.0.2
-
beautifulsoup4>=4.11.1
-
Pillow>=9.2.0
-
pilmoji>=2.0.1
-
Pyrogram>=2.0.26
-
PyYAML>=6.0
-
requests>=2.26.0
您可以用以下命令,在当前项目目录下运行以快速安装环境(Windows):
pip install -r requirements.txt
您需要在项目文件目录下,放置一个已经登陆好的.session后缀文件,这个文件是程序生成的,形如: my_bot.session
方法1: 您可以参阅这篇文档,以快速获得后缀为 .session 的文件
方法2: 项目根目录下有一个文件名为 login.py ,可以通过指令运行它:
python .\login.py
当程序退出后即可自动生成一个名为 my_bot.session 的文件
运行后它会尝试给你输入的用户名的目标发送消息,当接收到:嗨, 我在正常工作哦!
这句话时,即可说明该session文件有效,否则无效。
Windows系统无需此操作
chmod +x ./resources/clash-linux-amd64
-
管理员配置
新建一个名为config.yaml的文件,项目有模板例子名为config.yaml.example,在config.yaml中写入如下信息:
  admin:
  - 12345678 # 改成自己的telegram uid
-
代理配置
如果是在**大陆地区使用,则程序需要代理才能连接上Telegram服务器。在config.yaml中写入如下信息:
proxy: 127.0.0.1:7890 #替换成自己的代理地址和端口
在项目目录下运行以下指令
python main.py
等待初始化操作,出现“程序已启动!”字样就说明在运行了. 运行之后和bot私聊命令:
/testurl 订阅地址(clash配置格式) 即可开始测试
/help 可查看所有命令说明
由于Linux系统特性,关闭ssh连接后,前台程序会被关闭。您需要设置进程守护,才能在后台不间断地运行程序。具体方法Google搜索即可。
我们欢迎各方朋友提出针对性的反馈:
在项目页面提出issue
