ROS tele-operated robot with joystick. Tracked robot with camera, telemetry data connected to 2nd computer with joystick and HUD.
The purpose of this project was to continue my learning of ROS by creating something more sophisticated and “robot-esque” than my previous project. Also, I wanted to create a project distributed over more than one computer.
I've always thought that robots with tank tracks look cool so, naturally, I wanted to use them for this project. The robot will also feature a mounted camera that can pan, tilt and scan around. The robot will be controlled by a joystick connected to my laptop where I will also be able to view the camera feed.
The robot’s main computer will be a Raspberry Pi 2, model B. This computer is MUCH faster than the original RPi and I installed Ubuntu Trusty Tehr along with ROS.
For tank tracks I used the track and wheel set from [Tamiya] (http://www.robotshop.com/ca/en/tamiya-track-and-wheel-set.html). The tracks are controlled with a DC motor and [gear box] (http://www.robotshop.com/ca/en/tamiya-double-gearbox-70168.html) that allow for controlling each track independently.
To control the tracks, I chose a motor hat from [Adafruit] (https://www.adafruit.com/products/2348) that allows me to connect up to 4 DC motors and control everything through I2C. I experimented with an L293D H-Bridge chip but this is a much cleaner and easier-to-use option. Adafruit supplied a python script but I prefer to work in C++ so I created a C++ class that gives a cleaner interface. It also allows for motors that don't match perfectly with the power source. In this case, max 1.5V DC motors and 5V power.
To control the pan/tilt servos, I used the [Adafruit PWM servo driver] (https://www.adafruit.com/products/815). This also comes in hat form but I just choose the breakout version. This also uses I2C. I had an Arduino sketch to work off of, but opted to create a C++ class as I will likely be using both this and the motor hat often in the future.
For the camera pan/tilt I went with the RPi camera and a servo [pan/tilt kit] (http://www.robotshop.com/ca/en/lynxmotion-pan-and-tilt-kit-aluminium2.html).
I needed to power the wifi dongle separately from the RPi USB connector as the connector doesn’t provide enough amps to keep the dongle powered - it loses too many packets. I modified a powered-USB hub by lengthening the USB cord, blocking out the power line (i.e. forcing it to use the hub’s power) and adding wire leads to connect to my batteries.
For a power source, I used a 5V 4400mAh power bank to power the RPi, motor hat and servo driver logic. I wanted to use this for the motors but it has a shutoff function that stops power when too few amps are being drawn. To power the DC motors, servos, and wifi dongle I used a 3.7V 2000mAh LiPo battery connected to a LiPo charger and a power booster that gives 5V and 1 amp.
The pictures below show the assembled robot:

-
- Tank Track kit
-
- 5V 4400mAh battery
-
- 3.7V 2000mAh battery (under the white battery)
-
- Powered USB hub and wifi dongle
-
- 2 servos with pan/tilt kit
-
- RPi camera

-
- Raspberry Pi 2, model B
-
- Motor hat
-
- Servo driver

-
- Gearbox with 1.5V max DC Motors
-
- Powerboost for providing 5V
-
- LiPo charger
One of the great things about ROS is that there are many useful nodes already built-in. With this in mind, I wanted to develop a quick project leveraging as many existing technologies as possible rather than re-invent the wheel. So, instead of writing code to capture and send the camera feed, display the received images, and joystick control, I used existing code.
The Robot
-
I wrote a node for controlling the tank tracks. This node subscribes to the joystick messages and controls the DC motors accordingly. I translated the x-y axis information from the joystick into left/right track speed and direction. I created a C++ class for interfacing the Adafruit motor hat which allowed me to easily control 4 DC motors by giving a direction and speed. I also allowed for a scaling factor in case the power input doesn't match perfectly with the max voltage for the DC motors. In this case, I set the scaling to 0.3 since I have 5V power and the motors use 1.5V max.
-
I wrote another node for controlling the pan/tilt of the servos. This node subscribes to the joystick messages and listens for button presses, then sets the pan and tilt servo positions. Once again I wrote a C++ class to interface with the Adafruit servo driver allowing me to easily set the servo position.
-
For capturing the RPi camera images, I found a node [online] (https://github.com/fpasteau/raspicam_node) that works great.
Laptop
-
I am using my Macbook Pro but I installed Virtual Box and The Ubuntu Trusty Tehr and then installed ROS. I found an already-written package for ROS (joy/joy_node) that reads the values from the joystick, and publishes messages when the values change, so this saved me writing one myself.
-
I also found a great package for displaying images (image_view/image_view) which subscribes to the image messages from the raspicam_node on the robot.
Setup
Once again this is very easy with ROS, I just modified the /etc/hosts file on both the robot and my laptop so each knows the hostname of the RPi which will be the master. In the past, I’ve written my own networking code, which was fun but ROS makes this so much easier. I created launch files on both the RPi and my laptop and it was a pleasant surprise how well everything came together. In total, it only took a week to complete this project, including the robot construction, which I thoroughly enjoyed.
/etc/hosts on RPi
192.168.0.20    localhost
192.168.0.20    pibot
192.168.0.21    Mac-Ubuntu-ROS
/etc/hosts on laptop
192.168.0.21    localhost
192.168.0.21    Mac-Ubuntu-ROS
192.168.0.20    pibot
On laptop: ROS_MASTER_URI=http://pibot:11311 ROS_IP=192.168.0.21
The launch file on my laptop
<launch>
	<node name="joy_node" pkg="joy" type="joy_node">
		<param name="dev" value="/dev/input/js2" />
	</node>
	<node name="image_view" pkg="image_view" type="image_view" respawn="false" output="screen">
		<remap from="image" to="/camera/image" />
		<param name="image_transport" value="compressed" />
		<param name="autosize" value="false" />
	</node>
</launch>
And the startup script on my laptop
#! /bin/bash

cd /home/phil/catkin_ws
source devel/setup.bash
sudo chmod a+rw /dev/input/js2
rosservice call /camera/start_capture
roslaunch src/project2_teleop_tank/teleOpControl.launch
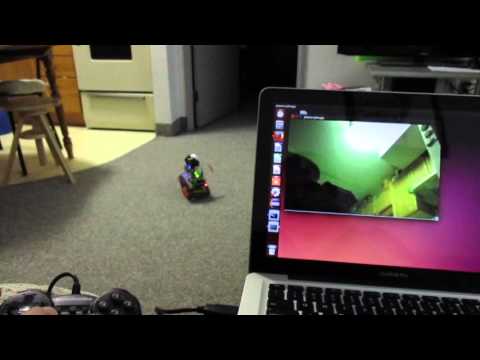
Here is a video of the robot in action:
-
The antennae on the wifi dongle is a bit weak so it would help the range to upgrade this.
-
Tank tracks look cool but their functionality is lacking - they slip off too often. It might be because I used a cheap $10 track kit but for the next project, I think I’ll spring for wheels.
-
I’d like to topics priority so that the joystick control of the tracks and camera pan/tilt have a higher priority than the camera feed. Again, the wifi dongle was a bit weak so every once in a while the camera feed got backed up or slowed down the networking which rendered the joystick control unresponsive. When I created my own networking library in the past (before ROS) I added communication priority for just this situation – something to consider for the future.

