Minstance is a Godot plugin that enables running and debugging multiple instances. That makes it greate for developing multiplayer games.
After enabling plugin there should be minstance run icon near play icon.
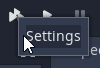
Press right click on icon and then settings. In settings window, click on Add New Instance.

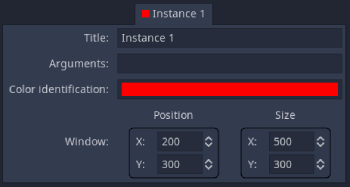
Title of instance. For example you could name it with name of player.
Arguments can be retrieved by using get_minstance_value_from_args in MinstanceAutoload node. See example.
Color that will represent everything that is related to instance. Inspected object in inspector will have title in that color, output in Minstance Outputs and window of instance.
You can manually add values for position or you could drag window in monitor widget.
Every new instance will have that number plus sequence number of the instance for debugging.
If it's set on, instance will save position and size of window on exit.
Breakpoints will be preserved for scripts that are opened in editor.
When minstance is about to run it enables minstance autoload and on exit disables. That enabling and disabling triggers save project window on exiting editor. Sometimes it can be annoying.
In scenario where you need to have two instances with different accounts to login. For first instance add "--test-player Andrej" in arguments on settings window and for second "--test-player John"
if has_node("/root/MinstanceAutoload"): # check if Minstance autoload is present
  var minstance = get_node("/root/MinstanceAutoload") # get Minstance autoload node
  var test_player = minstance.get_minstance_value_from_args("--test-player") # retrieve value from instance arguments

  match test_player:
    "Andrej":
      email = "[email protected]"
      password = "reallybigpassword123"

      print("Using test player account Andrej")

    "John":
      email = "[email protected]"
      password = "reallybigpassword123"

      print("Using test player account John")
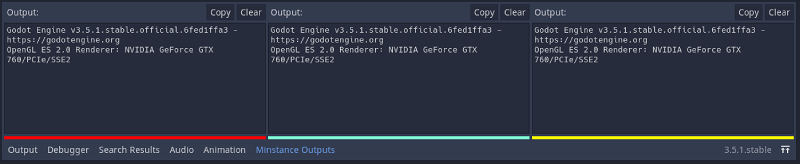
For every instance there is a output in Minstance Outputs that is located in bottom panel.
Debug panel is slightly modified. From left, there is a list of instances and their statuses. Clicking on instance sets the active instance for the debug panel. Next is live scene tree view for active instance and rest is similar like in normal debug panel except two added buttons in upper right corner. "Bring to front instances" button brings instances to front and the lock icon next to him locks instances so that they stay in front, handy when changing values in the inspector. If a break occurs, the lock will be unlocked.

In the code editor in the upper right corner there is an option button (list) of instances to choose which the breakpoints refer to. If you place in default, that breakpoint will be for normal run.

