Quick Mongodb wrapper for beginners that provides key-value based interface.
Added Redis Cache, for fast, scaleable performance caching !
- OR IN MEMORY CACHE by using
this.cache = new Map();
The File handles all of the caching by itsself! Fastens it up by ~90-125% (if you do many .set() requests == POST) Fastens it up by over 300% (if you do many .get() requests == GET)
Why is this good?
You do not spam mongodb, and it's userfriendly, you don't need something like
redisbut you CAN! It is a very Advanced way of Caching. Why?
- When you set / get fresh data, it's stored in the cache, from then it will always use the cached values.
- When you CHANGE something, it also changes it in the cache, which will be later used again
- When you add / change something, it will also be changed in the whole cache too, so you can do db.all() and receive a fast response from the cache
- It can be used with a redis-server -- RECOMMENDED AND FULLY TESTED
- Which is good, because even if you restart your process, the cached data will stay until you restart the redis server,
- If you are sharding, the redis-server will work too, since you can access the cache from multiple Servers!
to install it: npm install https://github.com/Tomato6966/quickmongo
You can use it with
redisor if you want to keep the SPEED of a MAP Based Cache, you can usenpm i remote-map-cacheas a CUSTOMCACHE by doing: db.loadCustomCache(customCache)
const { remoteCacheClient } = require("remote-map-cache");
const { Database } = require("quickmongo");

const customCache = new remoteCacheClient({
  username: "cacheUsername", password: "password",
  port: 4040, host: "hostname|ipaddress|localhost", tls: true
}); // more infos at: https://npmjs.org/remote-map-cache

const db = new Database(mongoUri, options)
db.loadCustomCache(customCache);-
Mongodb:
mongodb://<username>:<password>@<hostname/Ip>:<Port>/<DatabaseName>mongodb://tomato:[email protected]:27017/admin- Defaults:
- IP:
127.0.0.1| aka:localhost - Port:
27017
- IP:
-
Redis:
redis://<hostname/Ip>:<port>redis://127.0.0.1:6379- Defaults:
- IP:
127.0.0.1| aka:localhost - Port:
6379
- IP:
If you want to connect to a redis Server remotly, change the following in the
/etc/redis/redis.conf(Redis configuration File):
bind 127.0.0.1-->bind 127.0.0.1 <your_public_ipv4>// Make sure there is no#infront of it
#requirepass ...-->requirepass <yourConnectionPassword>// Make sure there is no#infront of it
To self host a redis Server do this: official Docs
curl -fsSL https://packages.redis.io/gpg | sudo gpg --dearmor -o /usr/share/keyrings/redis-archive-keyring.gpg

echo "deb [signed-by=/usr/share/keyrings/redis-archive-keyring.gpg] https://packages.redis.io/deb $(lsb_release -cs) main" | sudo tee /etc/apt/sources.list.d/redis.list

sudo apt-get update
sudo apt-get install redis
Then Start it with cli
redis-server
# OR:
systemctl start redis

# Status:
systemctl status redis
To go in the redis-Command-Line-Interface type: redis-cli
Default Caching - Duration == When to fetch the DB Again
Not using a Timeout, just using stored Timestamps - MEMORY FRIENDLY & FASTER & MORE RELYABLE
Able to use node-redis-connection-pool for pooling settings Example:
// Just provide those redis settings to use redis-connection-pool
const RedisSettings = {
    redis: { //standard "node-redis" aka "redis" settings
        password: redis.password,
        url: redis.url,
        retry_strategy: () => 1000
    },
    max_clients: 50,
}
// How to change them
// change the max. cache duration for db.ping()
process.env.DB_cache_ping = 10_000; // Delete the cache after X ms | < 0 === never delete [DEFAULT: 60_000], -1 (or less) == disabled cache
// change the max. cache duration for db.get("key", [optional: ForceFetch <true/false>])
process.env.DB_cache_get = 0; // Delete the cache after X ms | 0 === never delete [DEFAULT: 300_000], -1 (or less) == disabled cache
// change the max. cache duration for db.all([optional: ForceFetch <true/false>])
process.env.DB_cache_all = 0; // Delete the cache after X ms | 0 === never delete [DEFAULT: 600_000], -1 (or less) == disabled cacheconst { Database } = require("quickmongo"); // npm i https://github.com/Tomato6966/quickmongo
const mongoUri = process.env.mongoUri; // EXAMPLE: "mongodb://<username>:<password>@<hostname/Ip>:<Port>/<DatabaseName>"
const db = new Database(mongoUri);
// use a redis cache, INSTEAD of a MAP(inmemory) Cache:
await db.connectToRedis({ // If no options added, it uses the DEFAULT REDIS SETTINGS
  password: process.env.redisPassword || `yourstrongpassword`,
  url: process.env.redisUrl || `redis://127.0.0.1:6379`,
  retry_strategy: () => 1000
});
// CHANGES FOR THE .get() method
db.get("key"); // 1. Time getting --> Fetch from db
db.get("key"); // 2. Time getting --> Get from cache (instant)
db.get("key", true) // 3. Time getting --> Force-fetch from db (you can add ,true for fetching)
// CHANGES FOR THE .ping() METHOD
db.ping(); // 1. Time getting --> PING THE db
db.ping(); // 2. Time getting --> Get the last ping, which u got before (instant) ( will work until the max. cache duration is reached )
db.ping(true) // 3. Time getting --> Force-fetch from db (you can add ,true for fetching)
// CHANGES FOR THE .all() METHOD
db.all(); // 1. Time getting --> Fetch from the db
db.all(); // 2. Time getting --> Get it from the cache (intsant)
db.all(true) // 3. Time getting --> Force-fetch from db (you can add , true for fetching)- Create a Database
const db = new Database(mongoUri);
- Execute the
db.connectToRedis()Function (if no options added, it uses the DEFAULT REDIS SETTINGS)
await db.connectToRedis({ // If no options added, it uses the DEFAULT REDIS SETTINGS
password: process.env.redisPassword || `yourstrongpassword`,
url: process.env.redisUrl || `redis://127.0.0.1:6379`,
retry_strategy: () => 1000
});
See: https://github.com/redis/node-redis/blob/master/docs/clustering.md To connect to a redis cluster, instead of adding a PLAIN OBJECT, add a OBJECT with they key "cluster"
- Create a Database
const db = new Database(mongoUri);
- Execute the
db.connectToRedis()Function (if no options added, it uses the DEFAULT REDIS SETTINGS)
await db.connectToRedis({
  cluster: {
   defaults: {
      password: process.env.redisPassword || `yourstrongpassword`,
      retry_strategy: () => 1000
   },
   rootNodes: [
     {
       url: process.env.redisUrl || `redis://127.0.0.1:7000`
     },
     {
       url: process.env.redisUrl || `redis://127.0.0.1:7001`
     },
     {
       url: process.env.redisUrl || `redis://127.0.0.1:7002`
     }
   ]
  }
});
- When creating the Database, add mongoose options, to spread the load on your db!
const { Database } = require("quickmongo"); // npm i https://github.com/Tomato6966/quickmongo
const mongoUri = process.env.mongoUri;
const db = new Database(mongoUri, {
    useUnifiedTopology: true, // allow pools
    maxPoolSize: 100, // maximum spreader
    minPoolSize: 50, // minimum spreader
    writeConcern: "majority", // writer before get
});- Always create a TABLE and use the TABLES instead of the DB (it's easier, but has the same methods as the db, and are subinstances of the db)
db.on("ready", async () => {
  // Creating the Tables
  global.settings = new db.table("settings");
  global.economy = new db.table("economy");
  console.log(`DB connected with a ${await client.database.ping()}ms Ping`);
})- Always use a CACHED METHOD, and prefer REDIS
If you're interested to see it changes test this:
const { Database } = require("quickmongo"); // npm i https://github.com/Tomato6966/quickmongo
const mongoUri = process.env.mongoUri;

process.env.DB_cache_ping = 10_000; // allow the cache to be just 10 sec in there...

const db = new Database(mongoUri, {
    useUnifiedTopology: true, // allow pools
    maxPoolSize: 100, // maximum spreader
    minPoolSize: 50, // minimum spreader
    writeConcern: "majority", // writer before get
});
// first time
setTimeout(async() => console.log(`Ping: ${await db.ping()}`), 1_000) // fetch from the db (DIRECT VALUE FROM MONGODB)
// 2 times from cache (will be instant when the timeout executes)
setTimeout(async() => console.log(`Ping: ${await db.ping()}`), 5_000) // cache
setTimeout(async() => console.log(`Ping: ${await db.ping()}`), 8_000) // cache
// cache ranned out, after first fetch, so fetch it again ( you cahgned process.env.DB_cache_ping to 10secs)
setTimeout(async() =>console.log(`Ping: ${await db.ping()}`), 11_000) // fetch (DIRECT VALUE FROM MONGODB)
// get it from the cache again as it's already in there
setTimeout(async() => console.log(`Ping: ${await db.ping()}`), 12_000) // get from cache
// force-fetch from the DB (DIRECT VALUE FROM MONGODB)
setTimeout(async() => console.log(`Ping: ${await db.ping(true)}`), 12_000) npm install --save https://github.com/Tomato6966/quickmongo # for the adjusted one with cache
npm install --save quickmongo # for the original without cacheDocumentation - Official from the https://quickmongo.js.org Page!
- Beginner friendly
- Asynchronous
- Dot notation support
- Key-Value like interface
- Easy to use
- TTL (temporary storage) supported
import { Database } from "quickmongo";

const db = new Database("mongodb://localhost:27017/quickmongo");

db.on("ready", () => {
    console.log("Connected to the database");
    doStuff();
});

// top-level awaits
await db.connect();

async function doStuff() {
    // Setting an object in the database:
    await db.set("userInfo", { difficulty: "Easy" });
    // -> { difficulty: 'Easy' }

    // Pushing an element to an array (that doesn't exist yet) in an object:
    await db.push("userInfo.items", "Sword");
    // -> { difficulty: 'Easy', items: ['Sword'] }

    // Adding to a number (that doesn't exist yet) in an object:
    await db.add("userInfo.balance", 500);
    // -> { difficulty: 'Easy', items: ['Sword'], balance: 500 }

    // Repeating previous examples:
    await db.push("userInfo.items", "Watch");
    // -> { difficulty: 'Easy', items: ['Sword', 'Watch'], balance: 500 }
    await db.add("userInfo.balance", 500);
    // -> { difficulty: 'Easy', items: ['Sword', 'Watch'], balance: 1000 }

    // Fetching individual properties
    await db.get("userInfo.balance"); // -> 1000
    await db.get("userInfo.items"); // -> ['Sword', 'Watch']

    // remove item
    await db.pull("userInfo.items", "Sword");
    // -> { difficulty: 'Easy', items: ['Watch'], balance: 1000 }

    // set the data and automatically delete it after 1 minute
    await db.set("foo", "bar", 60); // 60 seconds = 1 minute

    // fetch the temporary data after a minute
    setTimeout(async () => {
        await db.get("foo"); // null
    }, 60_000);
}
Created and maintained by CesiumLabs - Cache Added and improved by Tomato6966
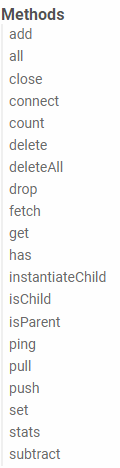
List of All Methods
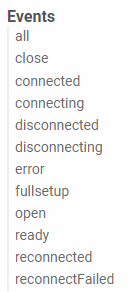
List of All Events