AppTestStudio (ATS) is a automated development environment, you can builder, tester, and can automate windows applications and android emmulators.
Youtube tutorials cover how to go from a beginner to an expert.
Always launch the Emmulator from AppTestStudio AppTestStudio launches the emmulator with a specific WindowName, and resolution for consistency and automation.
1.) The Package Name is used to launch the application when the emmulator starts. If the Package Name is configured, pressing the "Start Emmulator + Launch App" button will launch the instance of nox player specified in the instance to launch (in 2. below). Package Name is recommended but not required, if you don't want or have the Package Name, Press the "Start Emmulator"( in 4. below) button instead. Then run the application from the emmulator manually. When scheduling a script to run at a later time, the application the Package name is required so that the script can be run, and the applicaion can be loaded.
2.) Instance to launch is the instance number you want to target during testing, launching and running scripts. This is required, users with a single instance will always choose instance 0. Multiple apps/accounts can be configured on different instances. For example, you could run 5 instances with the same account, and automate 5 different apps/games on each instance. Or you could run a different account on each instance, and run 5 separate instances of the same app/game.
3.) The Start Emmulator + Launch App button will run the Android Emmulator and launch the application on the emmulator.
4.) Start Emmulator button will launch the instance to launch(2) of the android emmulator with a set window name,and initial resolution for consistency.
Initial Resolution: is passed from the Start Emmulator buttons to set emmulator to a specific size so that the screenshots will always contain the same resolution. This helps with sharing the script. Be sure to have the "Fixed Window Size" checkbox checked, this will make it less likely to resize the window. Sometimes the emmulator window get's resized, it's best to restart the emmulator.
Video: A video can be saved that takes a screenshot of the screen at each activity/checkpoint. Video can be helpful to troubleshoot issues with the script.
Frame Limit: A basic limit to prevent running out of disk space, the script can take 100's to 1000's of screenshots when running.

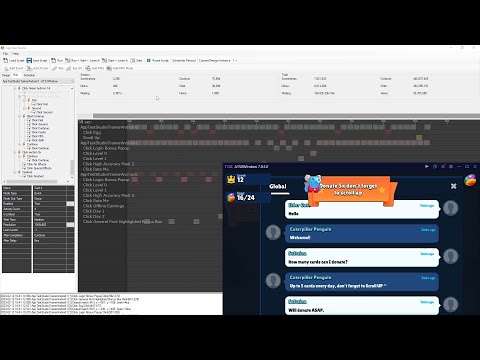
4.1 On the Events Node in AppTestStudio Tree, right Click and Choose "Add Event", this will take a screenshot.

1-Give the Event a name
2-Left click on a few unique colors on the screenshot, in this example, I chose a white color inside the 'u' in Zeus, a black color in the 'e' in Zeus, and a Blue color near the word Zeus, and a blue color inside the blue label after the name Zeus.
3-A grid view shows the color, and X,Y coordinates of the color. Since the logic is AND, when the script is run when all 4 colors at the 4 locations are true, then child events and actions will be run.
(opinion) There are other pixel,coordinate locations that may be better, for example: selecting pixels on the skip text may be ideal so that anytime skip is presented it would be clicked.

Right click on the 'Zeus' Event, then left click 'Add Action'.
The name will automatically have 'Click ' prepended to the parent name.

Incidate where to click, click and drag a blue box around the area that needs to be clicked. AppTestStudio will randomly click at a single location inside the box when the application is run or when the application is tested.

App Test Studio will click inside the box inside the emmulator, which will advance app to the next screen.

Object search enables you to quickly define regions on the screen to search, and quickly define images to locate.
To define an object click the 'Create Object' button from an Event Node or Right click on the Objects Tree Node under the application.

Add New Object will take a screenshot of the current window and allow you to select the object to look for.
1.) Take a screenshot: Sometimes a fresh screenshot is needed to get the right image, pressing 'Take a Screenshot' will load a fresh screenshot.
2.) Name: This is the unique name that will be attached to an Object Search Node, Use good naming patterns so it can be easily identfiable.
3.) Draw a box, it will highlight in Blue.
3.1) To improve accuracy look for sections that are unique and distinguishable, sometimes avoiding using the background can improve accuracy. It is not necessary to search for entire images, just something unique.
4.) Make Object (SAVE): Make object will save your selection and add it to the list of objects that can be searched for in the Object Search Event.

Events default to Color/Point change the event mode to 'Object Search'
On the Object Search a screenshot will be displayed, draw a mask around the area to be searched. Image recognition can significantly slower than the Color/Point implementation, so define a mask to reduce the area that is needed to be searched. To draw a mask click on the area and draw a box. If the box is unsuitable, redraw a box.

After the Object Search Event mode is set to 'Object Search' object properties appears.
Search Object: Select the object to search.
Color Channel: You can choose to search of Red, Green, or the Blue Channel. It will compare the object to the search area based on the Red, Green, or Blue colors to determine the location of the object. This if for fine tuning and in most cases I use Red, but sometimes the other colors provide better results.
Threshold: Object search will ALWAYS find something, it will ALWAYS locate the closest match and provide a Threshold value. Adjust the acceptance threshold value so that it performs as expected. The default threshold is set to 70, a threshold match of 100 would be that the image matches identically.
Mask Size: Shows the size of the mask range, it is recommended to limit the area to search for performance reasons.
Set Mask to Max: Is it time to search the entire area, press the Max button and it's done.
Object: This shows the object to search for giving you a visual representation.

So you have build the event, but events don't do anything. Now an action is needed, place an action under the Object Search.
Object Search has a hourglass icon when the mode of an evetn is set to 'Object Search'. When a Click or Drag event is a child of a Object Search, the click or drag event will be positioned at the location of the found object that was found in the object search mask.
On the click event draw a box the size of the range you would like searched, when the object is found the box will be centered on the location, then the click or drag will be performed.

Continue building more actions and events until the build is complete.
Use an Event inside another Event.
1.) Organize events inside other events for clarity.
2.) Organize events inside other events for logic/priority.

What needs to occur after a Event Node is true or after an Action node is completed.
By default Event nodes are set to After Completion: Continue
By default Action nodes are set to After Completion: Back to Home
Continue - Chosing continue will continue execution of any child nodes (nodes lower in the tree) followed by any sibling nodes (nodes on the same level). This is used when chains of need to be run in a specific order, especially useful when unique events cannot be identified.
Back to Home - Goes back to the Beginning (Home Events) and starts over from the top.
Back to Parent - Goes back to the Parent Level. Back to parent is used when you don't want any sibling nodes(Nodes on the same level) to be run. This can be useful as a break condition such as the app not being ready for the sibling processes.
Stop Thread - Stop will stop the thread when running the script, and App Test Studio will attempt to close the emmulator. This is useful when you run out of turns for a given application, run out of life, money, or reach an point where large amounts of waiting are necessary.
Recycle - Recycle will restart the emmulator, and restart the application, leaving the thread running. This useful when there is a detectable an error condition, such as when Ads and the application don't play nice, and cause the app to move or switch resolutions. Recycling the emmulator and rerunning the app can sometimes fix the issue.
Delay - How long to wait after the Event is true or Action is complete before moving to the next child or sibiling. The script can run 20-40 times per second, often times the app needs to redraw the screen or move to the next activity. Waiting ensures that the script will not need to have any false positives. For example: Setting the Click wait to 0 sec could cause AppTestStudio to click on a button 20 times before the appliation can move to the next activity, because AppTestStudio can be configured to run with limited waiting.
By default Event nodes are set to Delay: 0
By default Action nodes are set to Delay: 1s
Delay for example can be useful to wait for an activity to complete, or wait for 30 seconds after clicking a 'watch ads' button.
Limit - Limit is used to add superior control over how many times a process can be run.
Wait type: Iteration and Iterations #. Iterations # is how many times the Action or Event needs to be capable of completing before it is actually done. If you want AppTestStudio to click the button every 10th time it's able. Set Limit (checked), Wait Type(Iteration), Iterations(10), Repeats(checked).
Wait type: Time. How long to wait between activities. For example you only want an event to be tested every 120 seconds: Set Limit(checked), Wait Type(Time), Time(2 minutes) and Repeats(checked). Another example you want an event to be tested only once after 45 seconds into execution: Set Limit(Checked),Wait Type(Time), Time(45 seconds) and Repeats(unchecked).
Wait type: once per session: You want this activity to run only one time.
Repeats will reset the iteration count if limit has already compelted, so it will occur again.

Enabled: Enable or disable parts of the script from running. This is useful when you don't want full functionality, or something is not working as desired.
Repeats Until False (with Iteration Limit): This will repeat until the designated iteration limit is hit OR if the event value is false. This is usefull when you want to repeat a section of code without going back through the entire loop from the start.

Logic is how the color points are treated options are: AND: ALL colors and points must match before the event is considered true. OR: Only a single color and point must match before the event is considered true.
POINTS: Points are added and subtracted on the range of the RGB.
In this example below with the first line R=36, B=30, G=35, X=951, Y=673, and POINTS = 5. Acceptable range for R would be any color between 36-5 to 36+5, Acceptable range for B would be any color from 30-5 to 30+5, and the acceptable range for G would be an color between 35-5 to 35 + 5. If the R and G and B are in that range the line would be considered true, this is applied to each line in the calculation.

CUSTOM: You can mix and match AND/OR/NOT/(). Acceptable (AND, &, &&) - All are considered logical AND. Acceptable (OR, |, || ) - all are considered logical OR. Acceptable (NOT, !) - Are considered logical NOT.

Validate button, pressing the validate button can verify the logic is valid ( This isn't perfect but it's very good at checking).
Scan will take a new screenshot and sample the X/Y position if the R,G,B color is not in the list it will be added. This is useful when used with OR logic on animated points where the colors where there is a limited number of choices that are cycled through in a pattern.
Remove: Removes the color point.
Points increase the ranges of the RGB color point.
POINTS: Points are added and subtracted on the range of the RGB.
In this example below with the first line R=36, B=30, G=35, X=951, Y=673, and POINTS = 5. Acceptable range for R would be any color between 36-5 to 36+5, Acceptable range for B would be any color from 30-5 to 30+5, and the acceptable range for G would be an color between 35-5 to 35 + 5. If the R and G and B are in that range the line would be considered true, this is applied to each line in the calculation.
Every app is different, some apps I have found need at least 5 points on every event, while most others the colors remain the same over time. I would caution using very large numbers, I have not found a use case to go over 15.
Enabled: Enable or disable parts of the script from running. This is useful when you don't want full functionality, or something is not working as desired.
Repeats Until False (with Iteration Limit): This will repeat until the designated iteration limit is hit OR if the event value is false. This is usefull when you want to repeat a section of code without going back through the entire loop from the start.
Anchor is used to adjust the size of button regions, and mask regions.
Top+Left is the default the regions will stay the same size and not be moved.
None is the same as Top+Left.
Right: will keep the button or mask region sticky to the right side. Very usedful when handling ADS where the resolution changes but the close is found in the top Right corner.
Left+Right the button and mask region will scale up or down to the percentage between the orginal image and the current image on the X axis.
Top+Bottom the button and mask region will scale up or down to the percentage between the orginal image and the current image on the Y axis.

Pressing the Test button on an object search event will:
01.) Take a screenshot and show the screenshot
02.) Show Red Channel
03.) Show Green Channel
04.) Show Blue Channel
05.) Determine if the detected threshold matched the acceptance threshold, With a Green Pass or Red Fail.
06.) Display the Mask in blue to indicate the searchable area.
07.) Display a Yellow box on the closest match, this will always find something which is what is closest to the search object.
08.) Shows the image that was seached for.
09.) Re-Test Current Window - takes a screenshot and re-tests from the current window.
10.) Re-Test From Reference - re-tests from the reference window.
11.) Adjusts the acceptance criteria, often adjusted to meet the particular object and screen that's needed. It's very dependent on the media and application being used. Pressing Use this Threshold will save the threshold to the project.
12.) Channel: Which channel to use, experiment with the different channels can improve accuracy. Just because an object is RED doesn't mean that red will perform better. It depends on the colors in the mask and the object being searched. Sometimes green or blue is a better indicator even though the object is red. Press the Retest-Current window to rapidly retest the changes to help you find the best match.
13.) Detected Threshold: A mathmatical indication of how close the object matches. A 100.0 threshold indicates a exact pixel perfect match, what works depends on the object being searched and the colors in the mask. I have used 65 threshold on some searches while others have been cranked up to 80. Using minimum necessary masks helps imporve speed and accuracy. 14.) Point: The center point detected.
15.) Hide and Seek Time: How long it takes to find the object in ms. Keep in mind that 1000ms = 1 second, use masks and whenever possible use color points to improve performance.

When a color point event is tested the Single Test Dialog is displayed.
1.) Failed/Passed indicator that will indicate if the test was successful.
2.) Resolution information is displayed.
3.) Reference Window is displayed with the colors indicated on the screen with #'s.
4.) Test Window is displayed with the same colors indicated with #'s.
5.) Reference the list of Colors and Points necessary for a true result. Pressing the Rem button will remove the point from the project, this is useful when colors work the first time, but subsequent tests find that the color/point is unstable.
6.) Test Window Colors - the colors that were found and how many points would be needed to enable a true result.
7.) Re-Test - often the screen changes and the test is retested from a screenshot from a current window.
8.) Points - the number of configued points.

Testing Click and Scroll Events will perform the action on the currently indicated design instance. This is commonly used not need to leave the designer increasing build speed.
Same as Object Search Event, with the execption that the action is performed on the current instance. So it will click the button on the indicated location ( If the parent object search is true ).
The scheduler can be used to run a script a a designated time such as every 4.1 hours. In conjunction with scripting exit events via (After Completion - Stop Thread) can provide high levels of flexibility.

AppTestStudio will NOT function if the system goes to sleep, Screen Savers are OK, and Lock Screens are OK.
If running overnight makes sure the SCREEN and PC do not go to sleep by modifying the windows settings. If the Screen goes the sleep the GDI function return black screens. If the PC is sleeping well then nothing is running.

File-> Import/Export -> Export -> Minimal Export
AppTestStudio doesn't actually use the reference images to run the scripts, the click locations and points are stored in the project.xml file.
When run, AppTestStudio will rebuild the reference images whenever an image is true. Be sure to save your work so that the modifications will be saved.

AppTestStudio can manage on multiple instances and run them in the background so there's no need to any fancy window management, however there are a few gotchas that are easily manageable.
1.) AppTestStudio can see what windows paints, Windows DOES NOT PAINT area's that are off the monitors view, Dragging the emmulators so that they are below the monitor's view will result in black areas where the emmulator is not shown. This also includes moving it partially on the Left, Bottom, or Right side. Running in the background (or forground is fine).
2.) Windows does not paint minimized applications so AppTestStudio can't see the windown. This makes windows efficent, but makes it invisible to AppTestStudio.
3.) Dual monitors is fine, however running them at different resolutions and moving the windows back and forth can cause instability when the DPI settings are different between monitors.
4.) Minimizing AppTestStudio is fine, AppTestStudio does not need to paint on the screen to function.
5.) Each thread runs independently on it's own, the events in the log show the exact time a event or action was completed. The logging system is setup to Queue so the log is a reflection of the past, but should not be used as an indication of timing. In most cases it won't be noticiable.
6.) Many apps paint a black or white or another color screen between activities. Be careful keying off those colors alone as they could produce false positives that are very difficult to track down. For example using color points of all black to trigger an event.
7.) AppTestStudio does not limit you from bombarding an application with events, keep in mind most applications cannot process 100's of click events per second. Depending on how the developers (or summer interns :) ) coded the application it may induce strange or corrupted behaviour.
8.) You can run muliple different or the same scripts simulateously in the background, just send them to a different instance.
9.) Avoid dragging a emmulator window at the same time clicks and drags are being sent, it won't hurt anything but it's annoying.
10.) Turn on: Require password for every purchase.
11.) Don't use with personal accounts.
12.) Sometimes its easier to edit the project file manually, often it's not.

13.) You can manually code in AppTestStudio XML and run them in AppTestStudio, See #12.
13.) Every time you save a backup project file is made, look in the backup folder.
14.) Try to build each action so that the script can be restarted in any spot in the process. (Avoid large chains of actions such as using continue after every action - sometimes it's necessary.
15.) Sometimes you need to sleep on it, getting stuck is no fun. Try and solve the problem from another angle.
16.) Some apps need button presses to be longer than instant. Change the default click speed from 0ms to 25ms or more.
Coming soon, needs an update. AppTestStudio Projects
