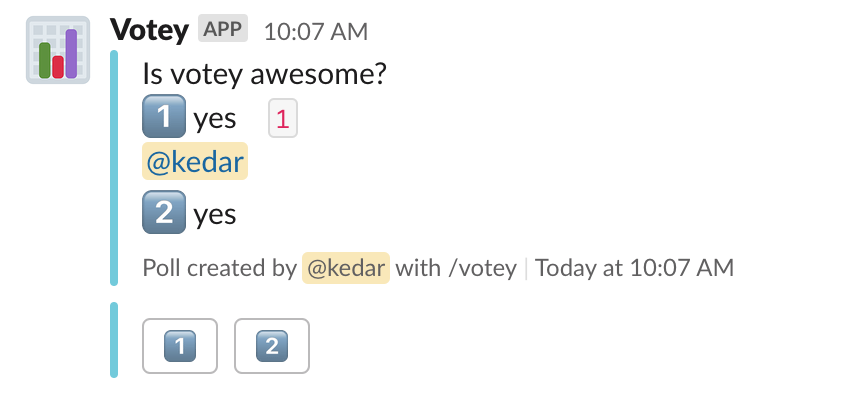
a simple slack polling slash command - because paying for polls is kind of stupid

- Click the Deploy button above, and then create a new Slack app and scroll down to the App Credentials Panel.
- Once the application has deployed on Heroku, head to the Settings tab, and scroll down to the
Config Varssection. We'll need to fill out some variables that are generated upon creating a Slack App:CLIENT_ID- Client ID of your Slack AppCLIENT_SECRET- Client Secret of your Slack AppSIGNING_SECRET- Signing Secret of your Slack AppFLASK_ENV- should be set toproductionDATABASE_URL- this should automatically be set to your postgres database uri
- Click into the Interactive Components panel (
Interactivity and Shortcutson the sidebar)- Toggle this feature on in the upper right hand corner
- Fill in the
Request URLtohttps://your-app.herokuapp.com/slack(the/slackpart is what's important).
- Go back, and Click into the Slash Commands panel (also found on the sidebar)
- The command name can just be
votey, or whatever you'd like to use to trigger the bot. Again the Request URL should behttps://your-app.herokuapp.com/slack(remember, the/slackpart is what's important).
- The command name can just be
- Go back, and Click into the Permissions panel (
OAuth & Permissionson the sidebar).- Add a
Redirect URL:https://your-app.herokuapp.com/oauth. - Add Permissions under the Scopes Panel, and enter:
chat:writecommands
- Add a
- Finally, we're ready to connect Slack with our bot. Navigate to
Manage Distributionon the sidebar, and clickAdd to Slack. This should navigate to the OAuth URL we provided above, and store the workspace specific token in our database.
Once OAuth has successfully completed, you're ready to start using Votey!
Votey runs on Python 3.8, so you'll need to make sure your environment has Python 3.8 and Pipenv installed.
Run the following in the source directory:
pipenv install -d
pipenv run install-hooks
cp .env.example .env
Modify your .env file to look something like this:
SQLALCHEMY_DATABASE_URI='postgres://some_postgres_connection_string'
CLIENT_ID='slack_client_id'
CLIENT_SECRET='slack_client_secret'
SIGNING_SECRET='slack_signing_secret'
FLASK_ENV='development'
Go ahead and fill the above with your actual Slack API information (refer to the Deploying for Production section above), and your postgres database URI. If you don't have a postgres database running, you can either set one up locally or use the Deploy with Heroku button above to have a database provisioned for free. To boot the app, run pipenv run start.
Connecting your app to Slack follows the same procedure as the Deploying for Production section above, but instead of using Heroku's domain, you'll need to use a tunneling forwarding program like ngrok.io.
While developing, you can use pipenv run <format|lint|pre-commit> to format code, run linters, or run the whole pre-commit suite over all files (which will both format and lint).
Before committing, don't forget to run pipenv run install-hooks.
Happy Developing!


![dependabot[bot] avatar](https://avatars.githubusercontent.com/in/29110?v=4 "dependabot[bot]")