"# ericvlog repository"
note's Introduction
note's People
Contributors

Stargazers


Watchers
Forkers
echosenonenote's Issues
Complete guide the setup linux based system as nas
Step 1: Install the ‘sudo’ command
- Switch user to root
su -
apt get install sudo
- Added user to sudo groups, use
id usernameto checks user groups.
usermod -aG sudo username
- Logout & login SSH
Install Docker & Portainer 2.0 on Debian Based Distros!
- Install and start docker by running the commands below.
sudo apt install docker.io
sudo systemctl start docker
- Download and run Portainer 2.0 by running the commands below.
sudo docker pull portainer/portainer-ce
sudo docker run --restart=always --name=portainer -d -p 9000:9000 -v /var/run/docker.sock:/var/run/docker.sock portainer/portainer-ce
- This will install Docker and it will be accessible by the workstation’s IP address and port 9000. When you get there, create a username and password.
http://[WORKSTATION_IP_ADDRESS]:9000
- Give user permission for docker.
sudo groupadd docker
sudo usermod -aG docker $USER
logout & login ssh.
Install docker-compose
sudo apt install docker-compose
Install docker-compose v2
- X86 device
mkdir -p /usr/local/lib/docker/cli-plugins
curl -SL https://github.com/docker/compose/releases/download/v2.12.2/docker-compose-linux-x86_64 -o /usr/local/lib/docker/cli-plugins/docker-compose
- Arm device
mkdir -p /usr/local/lib/docker/cli-plugins
curl -SL https://github.com/docker/compose/releases/download/v2.12.2/docker-compose-linux-aarch64 -o /usr/local/lib/docker/cli-plugins/docker-compose
chmod +x /usr/local/lib/docker/cli-plugins/docker-compose
docker compose version
Mount hardisk in armbian.
useful command
lsblk #check hardisk 'add -f' for checking file system of drive.
sudo blkid #check hardisk uuid.
mount /dev/fromlsblk /mountpoint #mount hardisk command.
Let's suppose we have a single disk drive and want it to be available at /mnt/wd, run the following commands
sudo mkdir /mnt/wd
sudo chown -hR $(whoami):$(whoami) /mnt/wd
The next thing we have to do is edit /etc/fstab file and include the new path so that our disk drive will be recognized the next time we restart.
Run the following command and take a note of the ID number of the disk drive you want to automatically mount.
sudo blkid
Having the correct disk ID, we now edit /etc/fstab
sudo nano /etc/fstab
Then we add a new line to the end of /etc/fstab so that the system knows what to mount and where.
UUID="ID From blkid" /mnt/wd ext4 rw,user,auto 0 0
Reboot for it mount automatic.
Set up Samba Shares
Samba allows you to share files via the SMB network protocol. Basically this means file and print services for various Microsoft Windows clients and integration with a Microsoft Windows Server domain.
First you need to install samba and smbfs by running.
sudo apt-get install samba smbfs
After the installation is done, edit /etc/samba/smb.conf to include settings for the share folders. In the example, we're sharing /mnt/wd with both read and write permission.
NAS share directory
Install dependencies:
sudo apt install samba samba-common-bin
Setup Network Shares
Edit the Samba config:
sudo nano /etc/samba/smb.conf
Add the following to the end of the smb.conf file:
[mynas]
	comment = Samba on My NAS
	path = /patch
	read only = no
	browsable = yes
This creates a share called “mynas” allowing access to all the drives mounted under the /mnt folder.
Read-only is set to no, which permits modifying and writing data to the share.
Browsable allows the share to be seen by a Linux file manager or Windows Explorer.
Add user account to access the Samba share
Since Samba doesn’t use the system account password, we need to set up a Samba password for our user account:
You can also specify a different username, although it must exist on the system.
sudo smbpasswd -a $(whoami)
sudo smbpasswd -a anotheruser
Restart Samba
sudo service smbd restart
Connect to the Share
You can now connect to the share using \IP address of NAS from Windows Explorer.
If unable access from windows, try reboot windows and tested.
Or smb://IP address of NAS from a Linux file manager.
How To View Linux Machines from a Windows 10 Network
Installing WSD on Ubuntu
wsdd is a service by christgau on GitHub, which implements a Web Service Discovery host daemon for Ubuntu. This enables Samba hosts to be found by Web Service Discovery Clients like Windows 10.
If you are experiencing any issues with this service, please let us know in the comments or submit an issue on GitHub.
Change to /tmp directory.
cd /tmp
Download and unzip the archive.
wget https://github.com/christgau/wsdd/archive/master.zip
unzip master.zip
Rename wsdd.py to wsdd.
sudo mv wsdd-master/src/wsdd.py wsdd-master/src/wsdd
Copy to /usr/bin.
sudo cp wsdd-master/src/wsdd /usr/bin
Copy wsdd to /etc/systemd/system.
sudo cp wsdd-master/etc/systemd/wsdd.service /etc/systemd/system
Open wsdd.service in nano and comment out User=nobody and Group=nobody with a ; semicolon.
sudo nano /etc/systemd/system/wsdd.service
If you found out below code different from yours just copy and paste it under [Service] to remove original code.
/etc/systemd/system/wsdd.service
[Unit]
Description=Web Services Dynamic Discovery host daemon
; Start after the network has been configured
After=network-online.target
Wants=network-online.target
; It makes sense to have Samba running when wsdd starts, but is not required
;Wants=smb.service

[Service]
Type=simple
ExecStart=/usr/bin/wsdd --shortlog
; Replace those with an unprivledged user/group that matches your environment,
; like nobody/nogroup or daemon:daemon or a dedicated user for wsdd
; User=nobody
; Group=nobody
; The following lines can be used for a chroot execution of wsdd.
; Also append '--chroot /run/wsdd/chroot' to ExecStart to enable chrooting
;AmbientCapabilities=CAP_SYS_CHROOT
;ExecStartPre=/usr/bin/install -d -o nobody -g nobody -m 0700 /run/wsdd/chroot
;ExecStopPost=rmdir /run/wsdd/chroot

[Install]
WantedBy=multi-user.target
Save and exit (press CTRL + X, press Y and then press ENTER)
Reload daemon.
sudo systemctl daemon-reload
Start and enable wsdd.
sudo systemctl start wsdd
sudo systemctl enable wsdd
Output:
Created symlink /etc/systemd/system/multi-user.target.wants/wsdd.service → /etc/systemd/system/wsdd.service.
Now check that the service is running.
sudo service wsdd status
Output:
● wsdd.service - Web Services Dynamic Discovery host daemon
Loaded: loaded (/etc/systemd/system/wsdd.service; enabled; vendor preset: enabled)
Active: active (running) since Wed 2020-06-10 10:51:39 CEST; 8s ago
Main PID: 40670 (python3)
Tasks: 1 (limit: 6662)
Memory: 10.8M
CGroup: /system.slice/wsdd.service
└─40670 python3 /usr/bin/wsdd --shortlog
jun 10 10:51:39 ubuntu systemd[1]: Started Web Services Dynamic Discovery host daemon.
jun 10 10:51:40 ubuntu wsdd[40670]: WARNING: no interface given, using all interfaces
You should now be able to browse your Ubuntu machines and Samba shares in the Windows 10 file explorer. You may need to restart the Windows 10 machines to force discovery.
You may also want to reboot the Ubuntu server just to make sure the wsdd service starts up automatically without issue.
Disable zram Optional
sudo vim /etc/default/armbian-zram-config
A few lines down the file, uncomment the line that says SWAP=false:
Zram swap enabled by default, unless set to disabled
SWAP=false
Reboot, and the zram swap is gone.
Credits
https://devanswers.co/discover-ubuntu-machines-samba-shares-windows-10-network/
emoji-cheat-sheet
emoji-cheat-sheet/README.md at master · ikatyang/emoji-cheat-sheet
-
In this repository All GitHub ↵
Jump to ↵
-
No suggested jump to results
-
In this repository All GitHub ↵
Jump to ↵
-
In this user All GitHub ↵
Jump to ↵
-
In this repository All GitHub ↵
Jump to ↵
Dashboard Pull requests Issues
Explore Codespaces Sponsors Settings
plsharevme

Sign out
New repository Import repository New gist New organization
Sorry, something went wrong.
/ ... /
ikatyang / emoji-cheat-sheet /
Clear Type # for issues and pull requests, > for commands, and ? for help Type # for issues, pull requests, and projects, > for commands, and ? for help Type # for issues, pull requests, and projects, / for files, and > for commands
We’ve encountered an error and some results aren't available at this time. Type a new search or try again later.
No results matched your search
Top result
Commands Type > to filter
Files
Pages
Access Policies
Organizations
Repositories
Issues, pull requests, and discussions Type # to filter
Teams
Users
Projects
Modes
Use filters in issues, pull requests, discussions, and projects
Search for issues and pull requests # Search for issues, pull requests, discussions, and projects # Search for organizations, repositories, and users @ Search for projects ! Search for files / Activate command mode > Search your issues, pull requests, and discussions # author:@me Search your issues, pull requests, and discussions # author:@me Filter to pull requests # is:pr Filter to issues # is:issue Filter to discussions # is:discussion Filter to projects # is:project Filter to open issues, pull requests, and discussions # is:open
ikatyang / emoji-cheat-sheet Public
-
Unwatch Stop ignoring Watch 96
Notifications
Participating and @mentions
Only receive notifications from this repository when participating or @mentioned.
All Activity
Notified of all notifications on this repository.
Ignore
Never be notified.
Custom
Select events you want to be notified of in addition to participating and @mentions.
Custom
Custom
Select events you want to be notified of in addition to participating and @mentions.
Issues
Pull requests
Releases
Discussions
Security alerts
Apply Cancel
-
Fork 2.7k -
    Starred  6.2k

    Star  6.2k
More
Open in github.dev Open in a new github.dev tab
master
Switch branches/tags
Branches Tags
emoji-cheat-sheet/README.md
-
Go to line L
-
Copy path
-
Copy permalink

github-actions docs(readme): update emoji-cheat-sheet (#540)
Loading status checks…
Latest commit ce523d1 on 17 Oct 2021 History
2 contributors
Users who have contributed to this file

emoji-cheat-sheet Table of Contents Smileys & Emotion Face Smiling Face Affection Face Tongue Face Hand Face Neutral Skeptical Face Sleepy Face Unwell Face Hat Face Glasses Face Concerned Face Negative Face Costume Cat Face Monkey Face Emotion People & Body Hand Fingers Open Hand Fingers Partial Hand Single Finger Hand Fingers Closed Hands Hand Prop Body Parts Person Person Gesture Person Role Person Fantasy Person Activity Person Sport Person Resting Family Person Symbol Animals & Nature Animal Mammal Animal Bird Animal Amphibian Animal Reptile Animal Marine Animal Bug Plant Flower Plant Other Food & Drink Food Fruit Food Vegetable Food Prepared Food Asian Food Marine Food Sweet Drink Dishware Travel & Places Place Map Place Geographic Place Building Place Religious Place Other Transport Ground Transport Water Transport Air Hotel Time Sky & Weather Activities Event Award Medal Sport Game Arts & Crafts Objects Clothing Sound Music Musical Instrument Phone Computer Light & Video Book Paper Money Mail Writing Office Lock Tool Science Medical Household Other Object Symbols Transport Sign Warning Arrow Religion Zodiac Av Symbol Gender Math Punctuation Currency Other Symbol Keycap Alphanum Geometric Flags Flag Country Flag Subdivision Flag GitHub Custom Emoji
1584 lines (1363 sloc) 119 KB
-
Open with Desktop
-
Copy raw contents Copy raw contents Copy raw contents Copy raw contents
emoji-cheat-sheet
![]()
This cheat sheet is automatically generated from GitHub Emoji API and Unicode Full Emoji List.
Table of Contents
- Smileys & Emotion
- People & Body
- Animals & Nature
- Food & Drink
- Travel & Places
- Activities
- Objects
- Symbols
- Flags
- GitHub Custom Emoji
Smileys & Emotion
- Face Smiling
- Face Affection
- Face Tongue
- Face Hand
- Face Neutral Skeptical
- Face Sleepy
- Face Unwell
- Face Hat
- Face Glasses
- Face Concerned
- Face Negative
- Face Costume
- Cat Face
- Monkey Face
- Emotion
Face Smiling
| ico | shortcode | ico | shortcode | ||
|---|---|---|---|---|---|
| top | 😀 | :grinning: |
😃 | :smiley: |
top |
| top | 😄 | :smile: |
😁 | :grin: |
top |
| top | 😆 | :laughing: |
|||
:satisfied: |
😅 | :sweat_smile: |
top | ||
| top | 🤣 | :rofl: |
😂 | :joy: |
top |
| top | 🙂 | :slightly_smiling_face: |
🙃 | :upside_down_face: |
top |
| top | 😉 | :wink: |
😊 | :blush: |
top |
| top | 😇 | :innocent: |
top |
Face Affection
| ico | shortcode | ico | shortcode | ||
|---|---|---|---|---|---|
| top | 🥰 | :smiling_face_with_three_hearts: |
😍 | :heart_eyes: |
top |
| top | 🤩 | :star_struck: |
😘 | :kissing_heart: |
top |
| top | 😗 | :kissing: |
:relaxed: |
top | |
| top | 😚 | :kissing_closed_eyes: |
😙 | :kissing_smiling_eyes: |
top |
| top | 🥲 | :smiling_face_with_tear: |
top |
Face Tongue
| ico | shortcode | ico | shortcode | ||
|---|---|---|---|---|---|
| top | 😋 | :yum: |
😛 | :stuck_out_tongue: |
top |
| top | 😜 | :stuck_out_tongue_winking_eye: |
🤪 | :zany_face: |
top |
| top | 😝 | :stuck_out_tongue_closed_eyes: |
🤑 | :money_mouth_face: |
top |
Face Hand
| ico | shortcode | ico | shortcode | ||
|---|---|---|---|---|---|
| top | 🤗 | :hugs: |
🤭 | :hand_over_mouth: |
top |
| top | 🤫 | :shushing_face: |
🤔 | :thinking: |
top |
Face Neutral Skeptical
| ico | shortcode | ico | shortcode | ||
|---|---|---|---|---|---|
| top | 🤐 | :zipper_mouth_face: |
🤨 | :raised_eyebrow: |
top |
| top | 😐 | :neutral_face: |
😑 | :expressionless: |
top |
| top | 😶 | :no_mouth: |
😶🌫️ | :face_in_clouds: |
top |
| top | 😏 | :smirk: |
😒 | :unamused: |
top |
| top | 🙄 | :roll_eyes: |
😬 | :grimacing: |
top |
| top | 😮💨 | :face_exhaling: |
🤥 | :lying_face: |
top |
Face Sleepy
| ico | shortcode | ico | shortcode | ||
|---|---|---|---|---|---|
| top | 😌 | :relieved: |
😔 | :pensive: |
top |
| top | 😪 | :sleepy: |
🤤 | :drooling_face: |
top |
| top | 😴 | :sleeping: |
top |
Face Unwell
| ico | shortcode | ico | shortcode | ||
|---|---|---|---|---|---|
| top | 😷 | :mask: |
🤒 | :face_with_thermometer: |
top |
| top | 🤕 | :face_with_head_bandage: |
🤢 | :nauseated_face: |
top |
| top | 🤮 | :vomiting_face: |
🤧 | :sneezing_face: |
top |
| top | 🥵 | :hot_face: |
🥶 | :cold_face: |
top |
| top | 🥴 | :woozy_face: |
😵 | :dizzy_face: |
top |
| top | 😵💫 | :face_with_spiral_eyes: |
🤯 | :exploding_head: |
top |
Face Hat
| ico | shortcode | ico | shortcode | ||
|---|---|---|---|---|---|
| top | 🤠 | :cowboy_hat_face: |
🥳 | :partying_face: |
top |
| top | 🥸 | :disguised_face: |
top |
Face Glasses
| ico | shortcode | ico | shortcode | ||
|---|---|---|---|---|---|
| top | 😎 | :sunglasses: |
🤓 | :nerd_face: |
top |
| top | 🧐 | :monocle_face: |
top |
Face Concerned
| ico | shortcode | ico | shortcode | ||
|---|---|---|---|---|---|
| top | 😕 | :confused: |
😟 | :worried: |
top |
| top | 🙁 | :slightly_frowning_face: |
:frowning_face: |
top | |
| top | 😮 | :open_mouth: |
😯 | :hushed: |
top |
| top | 😲 | :astonished: |
😳 | :flushed: |
top |
| top | 🥺 | :pleading_face: |
😦 | :frowning: |
top |
| top | 😧 | :anguished: |
😨 | :fearful: |
top |
| top | 😰 | :cold_sweat: |
😥 | :disappointed_relieved: |
top |
| top | 😢 | :cry: |
😭 | :sob: |
top |
| top | 😱 | :scream: |
😖 | :confounded: |
top |
| top | 😣 | :persevere: |
😞 | :disappointed: |
top |
| top | 😓 | :sweat: |
😩 | :weary: |
top |
| top | 😫 | :tired_face: |
🥱 | :yawning_face: |
top |
Face Negative
| ico | shortcode | ico | shortcode | ||
|---|---|---|---|---|---|
| top | 😤 | :triumph: |
😡 | :pout: |
|
:rage: |
top | ||||
| top | 😠 | :angry: |
🤬 | :cursing_face: |
top |
| top | 😈 | :smiling_imp: |
👿 | :imp: |
top |
| top | 💀 | :skull: |
☠️ | :skull_and_crossbones: |
top |
Face Costume
| ico | shortcode | ico | shortcode | ||
|---|---|---|---|---|---|
| top | 💩 | :hankey: |
:poop:
:shit: | 🤡 | :clown_face: | top |
| top | 👹 | :japanese_ogre: | 👺 | :japanese_goblin: | top |
| top | 👻 | :ghost: | 👽 | :alien: | top |
| top | 👾 | :space_invader: | 🤖 | :robot: | top |
Cat Face
| ico | shortcode | ico | shortcode | ||
|---|---|---|---|---|---|
| top | 😺 | :smiley_cat: |
😸 | :smile_cat: |
top |
| top | 😹 | :joy_cat: |
😻 | :heart_eyes_cat: |
top |
| top | 😼 | :smirk_cat: |
😽 | :kissing_cat: |
top |
| top | 🙀 | :scream_cat: |
😿 | :crying_cat_face: |
top |
| top | 😾 | :pouting_cat: |
top |
Monkey Face
| ico | shortcode | ico | shortcode | ||
|---|---|---|---|---|---|
| top | 🙈 | :see_no_evil: |
🙉 | :hear_no_evil: |
top |
| top | 🙊 | :speak_no_evil: |
top |
Emotion
| ico | shortcode | ico | shortcode | ||
|---|---|---|---|---|---|
| top | 💋 | :kiss: |
💌 | :love_letter: |
top |
| top | 💘 | :cupid: |
💝 | :gift_heart: |
top |
| top | 💖 | :sparkling_heart: |
💗 | :heartpulse: |
top |
| top | 💓 | :heartbeat: |
💞 | :revolving_hearts: |
top |
| top | 💕 | :two_hearts: |
💟 | :heart_decoration: |
top |
| top | ❣️ | :heavy_heart_exclamation: |
💔 | :broken_heart: |
top |
| top | ❤️🔥 | :heart_on_fire: |
❤️🩹 | :mending_heart: |
top |
| top | ❤️ | :heart: |
🧡 | :orange_heart: |
top |
| top | 💛 | :yellow_heart: |
💚 | :green_heart: |
top |
| top | 💙 | :blue_heart: |
💜 | :purple_heart: |
top |
| top | 🤎 | :brown_heart: |
🖤 | :black_heart: |
top |
| top | 🤍 | :white_heart: |
💯 | :100: |
top |
| top | 💢 | :anger: |
💥 | :boom: |
|
:collision: |
top | ||||
| top | 💫 | :dizzy: |
💦 | :sweat_drops: |
top |
| top | 💨 | :dash: |
🕳️ | :hole: |
top |
| top | 💣 | :bomb: |
💬 | :speech_balloon: |
top |
| top | 👁️🗨️ | :eye_speech_bubble: |
🗨️ | :left_speech_bubble: |
top |
| top | 🗯️ | :right_anger_bubble: |
💭 | :thought_balloon: |
top |
| top | 💤 | :zzz: |
top |
People & Body
- Hand Fingers Open
- Hand Fingers Partial
- Hand Single Finger
- Hand Fingers Closed
- Hands
- Hand Prop
- Body Parts
- Person
- Person Gesture
- Person Role
- Person Fantasy
- Person Activity
- Person Sport
- Person Resting
- Family
- Person Symbol
Hand Fingers Open
| ico | shortcode | ico | shortcode | ||
|---|---|---|---|---|---|
| top | 👋 | :wave: |
🤚 | :raised_back_of_hand: |
top |
| top | 🖐️ | :raised_hand_with_fingers_splayed: |
✋ | :hand: |
|
:raised_hand: |
top | ||||
| top | 🖖 | :vulcan_salute: |
top |
Hand Fingers Partial
| ico | shortcode | ico | shortcode | ||
|---|---|---|---|---|---|
| top | 👌 | :ok_hand: |
🤌 | :pinched_fingers: |
top |
| top | 🤏 | :pinching_hand: |
✌️ | :v: |
top |
| top | 🤞 | :crossed_fingers: |
🤟 | :love_you_gesture: |
top |
| top | 🤘 | :metal: |
🤙 | :call_me_hand: |
top |
Hand Single Finger
| ico | shortcode | ico | shortcode | ||
|---|---|---|---|---|---|
| top | 👈 | :point_left: |
👉 | :point_right: |
top |
| top | 👆 | :point_up_2: |
🖕 | :fu: |
|
:middle_finger: |
top | ||||
| top | 👇 | :point_down: |
☝️ | :point_up: |
top |
Hand Fingers Closed
| ico | shortcode | ico | shortcode | ||
|---|---|---|---|---|---|
| top | 👍 | :+1: |
|||
:thumbsup: |
👎 | :-1: |
|||
:thumbsdown: |
top | ||||
| top | ✊ | :fist: |
|||
:fist_raised: |
👊 | :facepunch: |
:fist_oncoming:
:punch: | top |
| top | 🤛 | :fist_left: | 🤜 | :fist_right: | top |
Hands
| ico | shortcode | ico | shortcode | ||
|---|---|---|---|---|---|
| top | 👏 | :clap: |
🙌 | :raised_hands: |
top |
| top | 👐 | :open_hands: |
🤲 | :palms_up_together: |
top |
| top | 🤝 | :handshake: |
🙏 | :pray: |
top |
Hand Prop
| ico | shortcode | ico | shortcode | ||
|---|---|---|---|---|---|
| top | ✍️ | :writing_hand: |
💅 | :nail_care: |
top |
| top | 🤳 | :selfie: |
top |
Body Parts
| ico | shortcode | ico | shortcode | ||
|---|---|---|---|---|---|
| top | 💪 | :muscle: |
🦾 | :mechanical_arm: |
top |
| top | 🦿 | :mechanical_leg: |
🦵 | :leg: |
top |
| top | 🦶 | :foot: |
👂 | :ear: |
top |
| top | 🦻 | :ear_with_hearing_aid: |
👃 | :nose: |
top |
| top | 🧠 | :brain: |
🫀 | :anatomical_heart: |
top |
| top | 🫁 | :lungs: |
🦷 | :tooth: |
top |
| top | 🦴 | :bone: |
👀 | :eyes: |
top |
| top | 👁️ | :eye: |
👅 | :tongue: |
top |
| top | 👄 | :lips: |
top |
Person
| ico | shortcode | ico | shortcode | ||
|---|---|---|---|---|---|
| top | 👶 | :baby: |
🧒 | :child: |
top |
| top | 👦 | :boy: |
👧 | :girl: |
top |
| top | 🧑 | :adult: |
👱 | :blond_haired_person: |
top |
| top | 👨 | :man: |
🧔 | :bearded_person: |
top |
| top | 🧔♂️ | :man_beard: |
🧔♀️ | :woman_beard: |
top |
| top | 👨🦰 | :red_haired_man: |
👨🦱 | :curly_haired_man: |
top |
| top | 👨🦳 | :white_haired_man: |
👨🦲 | :bald_man: |
top |
| top | 👩 | :woman: |
👩🦰 | :red_haired_woman: |
top |
| top | 🧑🦰 | :person_red_hair: |
👩🦱 | :curly_haired_woman: |
top |
| top | 🧑🦱 | :person_curly_hair: |
👩🦳 | :white_haired_woman: |
top |
| top | 🧑🦳 | :person_white_hair: |
👩🦲 | :bald_woman: |
top |
| top | 🧑🦲 | :person_bald: |
👱♀️ | :blond_haired_woman: |
|
:blonde_woman: |
top | ||||
| top | 👱♂️ | :blond_haired_man: |
🧓 | :older_adult: |
top |
| top | 👴 | :older_man: |
👵 | :older_woman: |
top |
Person Gesture
| ico | shortcode | ico | shortcode | ||
|---|---|---|---|---|---|
| top | 🙍 | :frowning_person: |
🙍♂️ | :frowning_man: |
top |
| top | 🙍♀️ | :frowning_woman: |
🙎 | :pouting_face: |
top |
| top | 🙎♂️ | :pouting_man: |
🙎♀️ | :pouting_woman: |
top |
| top | 🙅 | :no_good: |
🙅♂️ | :ng_man: |
|
:no_good_man: |
top | ||||
| top | 🙅♀️ | :ng_woman: |
|||
:no_good_woman: |
🙆 | :ok_person: |
top | ||
| top | 🙆♂️ | :ok_man: |
🙆♀️ | :ok_woman: |
top |
| top | 💁 | :information_desk_person: |
|||
:tipping_hand_person: |
💁♂️ | :sassy_man: |
|||
:tipping_hand_man: |
top | ||||
| top | 💁♀️ | :sassy_woman: |
|||
:tipping_hand_woman: |
🙋 | :raising_hand: |
top | ||
| top | 🙋♂️ | :raising_hand_man: |
🙋♀️ | :raising_hand_woman: |
top |
| top | 🧏 | :deaf_person: |
🧏♂️ | :deaf_man: |
top |
| top | 🧏♀️ | :deaf_woman: |
🙇 | :bow: |
top |
| top | 🙇♂️ | :bowing_man: |
🙇♀️ | :bowing_woman: |
top |
| top | 🤦 | :facepalm: |
🤦♂️ | :man_facepalming: |
top |
| top | 🤦♀️ | :woman_facepalming: |
🤷 | :shrug: |
top |
| top | 🤷♂️ | :man_shrugging: |
🤷♀️ | :woman_shrugging: |
top |
Person Role
| ico | shortcode | ico | shortcode | ||
|---|---|---|---|---|---|
| top | 🧑⚕️ | :health_worker: |
👨⚕️ | :man_health_worker: |
top |
| top | 👩⚕️ | :woman_health_worker: |
🧑🎓 | :student: |
top |
| top | 👨🎓 | :man_student: |
👩🎓 | :woman_student: |
top |
| top | 🧑🏫 | :teacher: |
👨🏫 | :man_teacher: |
top |
| top | 👩🏫 | :woman_teacher: |
🧑⚖️ | :judge: |
top |
| top | 👨⚖️ | :man_judge: |
👩⚖️ | :woman_judge: |
top |
| top | 🧑🌾 | :farmer: |
👨🌾 | :man_farmer: |
top |
| top | 👩🌾 | :woman_farmer: |
🧑🍳 | :cook: |
top |
| top | 👨🍳 | :man_cook: |
👩🍳 | :woman_cook: |
top |
| top | 🧑🔧 | :mechanic: |
👨🔧 | :man_mechanic: |
top |
| top | 👩🔧 | :woman_mechanic: |
🧑🏭 | :factory_worker: |
top |
| top | 👨🏭 | :man_factory_worker: |
👩🏭 | :woman_factory_worker: |
top |
| top | 🧑💼 | :office_worker: |
👨💼 | :man_office_worker: |
top |
| top | 👩💼 | :woman_office_worker: |
🧑🔬 | :scientist: |
top |
| top | 👨🔬 | :man_scientist: |
👩🔬 | :woman_scientist: |
top |
| top | 🧑💻 | :technologist: |
👨💻 | :man_technologist: |
top |
| top | 👩💻 | :woman_technologist: |
🧑🎤 | :singer: |
top |
| top | 👨🎤 | :man_singer: |
👩🎤 | :woman_singer: |
top |
| top | 🧑🎨 | :artist: |
👨🎨 | :man_artist: |
top |
| top | 👩🎨 | :woman_artist: |
🧑 |
:pilot: |
top |
| top | 👨 |
:man_pilot: |
👩 |
:woman_pilot: |
top |
| top | 🧑🚀 | :astronaut: |
👨🚀 | :man_astronaut: |
top |
| top | 👩🚀 | :woman_astronaut: |
🧑🚒 | :firefighter: |
top |
| top | 👨🚒 | :man_firefighter: |
👩🚒 | :woman_firefighter: |
top |
| top | 👮 | :cop: |
|||
:police_officer: |
👮♂️ | :policeman: |
top | ||
| top | 👮♀️ | :policewoman: |
🕵️ | :detective: |
top |
| top | 🕵️♂️ | :male_detective: |
🕵️♀️ | :female_detective: |
top |
| top | 💂 | :guard: |
💂♂️ | :guardsman: |
top |
| top | 💂♀️ | :guardswoman: |
🥷 | :ninja: |
top |
| top | 👷 | :construction_worker: |
👷♂️ | :construction_worker_man: |
top |
| top | 👷♀️ | :construction_worker_woman: |
🤴 | :prince: |
top |
| top | 👸 | :princess: |
👳 | :person_with_turban: |
top |
| top | 👳♂️ | :man_with_turban: |
👳♀️ | :woman_with_turban: |
top |
| top | 👲 | :man_with_gua_pi_mao: |
🧕 | :woman_with_headscarf: |
top |
| top | 🤵 | :person_in_tuxedo: |
🤵♂️ | :man_in_tuxedo: |
top |
| top | 🤵♀️ | :woman_in_tuxedo: |
👰 | :person_with_veil: |
top |
| top | 👰♂️ | :man_with_veil: |
👰♀️ | :bride_with_veil: |
|
:woman_with_veil: |
top | ||||
| top | 🤰 | :pregnant_woman: |
🤱 | :breast_feeding: |
top |
| top | 👩🍼 | :woman_feeding_baby: |
👨🍼 | :man_feeding_baby: |
top |
| top | 🧑🍼 | :person_feeding_baby: |
top |
Person Fantasy
| ico | shortcode | ico | shortcode | ||
|---|---|---|---|---|---|
| top | 👼 | :angel: |
🎅 | :santa: |
top |
| top | 🤶 | :mrs_claus: |
🧑🎄 | :mx_claus: |
top |
| top | 🦸 | :superhero: |
🦸♂️ | :superhero_man: |
top |
| top | 🦸♀️ | :superhero_woman: |
🦹 | :supervillain: |
top |
| top | 🦹♂️ | :supervillain_man: |
🦹♀️ | :supervillain_woman: |
top |
| top | 🧙 | :mage: |
🧙♂️ | :mage_man: |
top |
| top | 🧙♀️ | :mage_woman: |
🧚 | :fairy: |
top |
| top | 🧚♂️ | :fairy_man: |
🧚♀️ | :fairy_woman: |
top |
| top | 🧛 | :vampire: |
🧛♂️ | :vampire_man: |
top |
| top | 🧛♀️ | :vampire_woman: |
🧜 | :merperson: |
top |
| top | 🧜♂️ | :merman: |
🧜♀️ | :mermaid: |
top |
| top | 🧝 | :elf: |
🧝♂️ | :elf_man: |
top |
| top | 🧝♀️ | :elf_woman: |
🧞 | :genie: |
top |
| top | 🧞♂️ | :genie_man: |
🧞♀️ | :genie_woman: |
top |
| top | 🧟 | :zombie: |
🧟♂️ | :zombie_man: |
top |
| top | 🧟♀️ | :zombie_woman: |
top |
Person Activity
| ico | shortcode | ico | shortcode | ||
|---|---|---|---|---|---|
| top | 💆 | :massage: |
💆♂️ | :massage_man: |
top |
| top | 💆♀️ | :massage_woman: |
💇 | :haircut: |
top |
| top | 💇♂️ | :haircut_man: |
💇♀️ | :haircut_woman: |
top |
| top | 🚶 | :walking: |
🚶♂️ | :walking_man: |
top |
| top | 🚶♀️ | :walking_woman: |
🧍 | :standing_person: |
top |
| top | 🧍♂️ | :standing_man: |
🧍♀️ | :standing_woman: |
top |
| top | 🧎 | :kneeling_person: |
🧎♂️ | :kneeling_man: |
top |
| top | 🧎♀️ | :kneeling_woman: |
🧑🦯 | :person_with_probing_cane: |
top |
| top | 👨🦯 | :man_with_probing_cane: |
👩🦯 | :woman_with_probing_cane: |
top |
| top | 🧑🦼 | :person_in_motorized_wheelchair: |
👨🦼 | :man_in_motorized_wheelchair: |
top |
| top | 👩🦼 | :woman_in_motorized_wheelchair: |
🧑🦽 | :person_in_manual_wheelchair: |
top |
| top | 👨🦽 | :man_in_manual_wheelchair: |
👩🦽 | :woman_in_manual_wheelchair: |
top |
| top | 🏃 | :runner: |
|||
:running: |
🏃♂️ | :running_man: |
top | ||
| top | 🏃♀️ | :running_woman: |
💃 | :dancer: |
|
:woman_dancing: |
top | ||||
| top | 🕺 | :man_dancing: |
🕴️ | :business_suit_levitating: |
top |
| top | 👯 | :dancers: |
👯♂️ | :dancing_men: |
top |
| top | 👯♀️ | :dancing_women: |
🧖 | :sauna_person: |
top |
| top | 🧖♂️ | :sauna_man: |
🧖♀️ | :sauna_woman: |
top |
| top | 🧗 | :climbing: |
🧗♂️ | :climbing_man: |
top |
| top | 🧗♀️ | :climbing_woman: |
top |
Person Sport
| ico | shortcode | ico | shortcode | ||
|---|---|---|---|---|---|
| top | 🤺 | :person_fencing: |
🏇 | :horse_racing: |
top |
| top | ⛷️ | :skier: |
🏂 | :snowboarder: |
top |
| top | 🏌️ | :golfing: |
🏌️♂️ | :golfing_man: |
top |
| top | 🏌️♀️ | :golfing_woman: |
🏄 | :surfer: |
top |
| top | 🏄♂️ | :surfing_man: |
🏄♀️ | :surfing_woman: |
top |
| top | 🚣 | :rowboat: |
🚣♂️ | :rowing_man: |
top |
| top | 🚣♀️ | :rowing_woman: |
🏊 | :swimmer: |
top |
| top | 🏊♂️ | :swimming_man: |
🏊♀️ | :swimming_woman: |
top |
| top | ⛹️ | :bouncing_ball_person: |
⛹️♂️ | :basketball_man: |
|
:bouncing_ball_man: |
top | ||||
| top | ⛹️♀️ | :basketball_woman: |
|||
:bouncing_ball_woman: |
🏋️ | :weight_lifting: |
top | ||
| top | 🏋️♂️ | :weight_lifting_man: |
🏋️♀️ | :weight_lifting_woman: |
top |
| top | 🚴 | :bicyclist: |
🚴♂️ | :biking_man: |
top |
| top | 🚴♀️ | :biking_woman: |
🚵 | :mountain_bicyclist: |
top |
| top | 🚵♂️ | :mountain_biking_man: |
🚵♀️ | :mountain_biking_woman: |
top |
| top | 🤸 | :cartwheeling: |
🤸♂️ | :man_cartwheeling: |
top |
| top | 🤸♀️ | :woman_cartwheeling: |
🤼 | :wrestling: |
top |
| top | 🤼♂️ | :men_wrestling: |
🤼♀️ | :women_wrestling: |
top |
| top | 🤽 | :water_polo: |
🤽♂️ | :man_playing_water_polo: |
top |
| top | 🤽♀️ | :woman_playing_water_polo: |
🤾 | :handball_person: |
top |
| top | 🤾♂️ | :man_playing_handball: |
🤾♀️ | :woman_playing_handball: |
top |
| top | 🤹 | :juggling_person: |
🤹♂️ | :man_juggling: |
top |
| top | 🤹♀️ | :woman_juggling: |
top |
Person Resting
| ico | shortcode | ico | shortcode | ||
|---|---|---|---|---|---|
| top | 🧘 | :lotus_position: |
🧘♂️ | :lotus_position_man: |
top |
| top | 🧘♀️ | :lotus_position_woman: |
🛀 | :bath: |
top |
| top | 🛌 | :sleeping_bed: |
top |
Family
| ico | shortcode | ico | shortcode | ||
|---|---|---|---|---|---|
| top | 🧑🤝🧑 | :people_holding_hands: |
👭 | :two_women_holding_hands: |
top |
| top | 👫 | :couple: |
👬 | :two_men_holding_hands: |
top |
| top | 💏 | :couplekiss: |
👩❤️💋👨 | :couplekiss_man_woman: |
top |
| top | 👨❤️💋👨 | :couplekiss_man_man: |
👩❤️💋👩 | :couplekiss_woman_woman: |
top |
| top | 💑 | :couple_with_heart: |
👩❤️👨 | :couple_with_heart_woman_man: |
top |
| top | 👨❤️👨 | :couple_with_heart_man_man: |
👩❤️👩 | :couple_with_heart_woman_woman: |
top |
| top | 👪 | :family: |
👨👩👦 | :family_man_woman_boy: |
top |
| top | 👨👩👧 | :family_man_woman_girl: |
👨👩👧👦 | :family_man_woman_girl_boy: |
top |
| top | 👨👩👦👦 | :family_man_woman_boy_boy: |
👨👩👧👧 | :family_man_woman_girl_girl: |
top |
| top | 👨👨👦 | :family_man_man_boy: |
👨👨👧 | :family_man_man_girl: |
top |
| top | 👨👨👧👦 | :family_man_man_girl_boy: |
👨👨👦👦 | :family_man_man_boy_boy: |
top |
| top | 👨👨👧👧 | :family_man_man_girl_girl: |
👩👩👦 | :family_woman_woman_boy: |
top |
| top | 👩👩👧 | :family_woman_woman_girl: |
👩👩👧👦 | :family_woman_woman_girl_boy: |
top |
| top | 👩👩👦👦 | :family_woman_woman_boy_boy: |
👩👩👧👧 | :family_woman_woman_girl_girl: |
top |
| top | 👨👦 | :family_man_boy: |
👨👦👦 | :family_man_boy_boy: |
top |
| top | 👨👧 | :family_man_girl: |
👨👧👦 | :family_man_girl_boy: |
top |
| top | 👨👧👧 | :family_man_girl_girl: |
👩👦 | :family_woman_boy: |
top |
| top | 👩👦👦 | :family_woman_boy_boy: |
👩👧 | :family_woman_girl: |
top |
| top | 👩👧👦 | :family_woman_girl_boy: |
👩👧👧 | :family_woman_girl_girl: |
top |
Person Symbol
| ico | shortcode | ico | shortcode | ||
|---|---|---|---|---|---|
| top | 🗣️ | :speaking_head: |
👤 | :bust_in_silhouette: |
top |
| top | 👥 | :busts_in_silhouette: |
🫂 | :people_hugging: |
top |
| top | 👣 | :footprints: |
top |
Animals & Nature
- Animal Mammal
- Animal Bird
- Animal Amphibian
- Animal Reptile
- Animal Marine
- Animal Bug
- Plant Flower
- Plant Other
Animal Mammal
| ico | shortcode | ico | shortcode | ||
|---|---|---|---|---|---|
| top | 🐵 | :monkey_face: |
🐒 | :monkey: |
top |
| top | 🦍 | :gorilla: |
🦧 | :orangutan: |
top |
| top | 🐶 | :dog: |
🐕 | :dog2: |
top |
| top | 🦮 | :guide_dog: |
🐕🦺 | :service_dog: |
top |
| top | 🐩 | :poodle: |
🐺 | :wolf: |
top |
| top | 🦊 | :fox_face: |
🦝 | :raccoon: |
top |
| top | 🐱 | :cat: |
🐈 | :cat2: |
top |
| top | 🐈⬛ | :black_cat: |
🦁 | :lion: |
top |
| top | 🐯 | :tiger: |
🐅 | :tiger2: |
top |
| top | 🐆 | :leopard: |
🐴 | :horse: |
top |
| top | 🐎 | :racehorse: |
🦄 | :unicorn: |
top |
| top | 🦓 | :zebra: |
🦌 | :deer: |
top |
| top | 🦬 | :bison: |
🐮 | :cow: |
top |
| top | 🐂 | :ox: |
🐃 | :water_buffalo: |
top |
| top | 🐄 | :cow2: |
🐷 | :pig: |
top |
| top | 🐖 | :pig2: |
🐗 | :boar: |
top |
| top | 🐽 | :pig_nose: |
🐏 | :ram: |
top |
| top | 🐑 | :sheep: |
🐐 | :goat: |
top |
| top | 🐪 | :dromedary_camel: |
🐫 | :camel: |
top |
| top | 🦙 | :llama: |
🦒 | :giraffe: |
top |
| top | 🐘 | :elephant: |
🦣 | :mammoth: |
top |
| top | 🦏 | :rhinoceros: |
🦛 | :hippopotamus: |
top |
| top | 🐭 | :mouse: |
🐁 | :mouse2: |
top |
| top | 🐀 | :rat: |
🐹 | :hamster: |
top |
| top | 🐰 | :rabbit: |
🐇 | :rabbit2: |
top |
| top | 🐿️ | :chipmunk: |
🦫 | :beaver: |
top |
| top | 🦔 | :hedgehog: |
🦇 | :bat: |
top |
| top | 🐻 | :bear: |
🐻❄️ | :polar_bear: |
top |
| top | 🐨 | :koala: |
🐼 | :panda_face: |
top |
| top | 🦥 | :sloth: |
🦦 | :otter: |
top |
| top | 🦨 | :skunk: |
🦘 | :kangaroo: |
top |
| top | 🦡 | :badger: |
🐾 | :feet: |
|
:paw_prints: |
top |
Animal Bird
| ico | shortcode | ico | shortcode | ||
|---|---|---|---|---|---|
| top | 🦃 | :turkey: |
🐔 | :chicken: |
top |
| top | 🐓 | :rooster: |
🐣 | :hatching_chick: |
top |
| top | 🐤 | :baby_chick: |
🐥 | :hatched_chick: |
top |
| top | 🐦 | :bird: |
🐧 | :penguin: |
top |
| top | 🕊️ | :dove: |
🦅 | :eagle: |
top |
| top | 🦆 | :duck: |
🦢 | :swan: |
top |
| top | 🦉 | :owl: |
🦤 | :dodo: |
top |
| top | 🪶 | :feather: |
🦩 | :flamingo: |
top |
| top | 🦚 | :peacock: |
🦜 | :parrot: |
top |
Animal Amphibian
| ico | shortcode | ||
|---|---|---|---|
| top | 🐸 | :frog: |
top |
Animal Reptile
| ico | shortcode | ico | shortcode | ||
|---|---|---|---|---|---|
| top | 🐊 | :crocodile: |
🐢 | :turtle: |
top |
| top | 🦎 | :lizard: |
🐍 | :snake: |
top |
| top | 🐲 | :dragon_face: |
🐉 | :dragon: |
top |
| top | 🦕 | :sauropod: |
🦖 | :t-rex: |
top |
Animal Marine
| ico | shortcode | ico | shortcode | ||
|---|---|---|---|---|---|
| top | 🐳 | :whale: |
🐋 | :whale2: |
top |
| top | 🐬 | :dolphin: |
|||
:flipper: |
🦭 | :seal: |
top | ||
| top | 🐟 | :fish: |
🐠 | :tropical_fish: |
top |
| top | 🐡 | :blowfish: |
🦈 | :shark: |
top |
| top | 🐙 | :octopus: |
🐚 | :shell: |
top |
Animal Bug
| ico | shortcode | ico | shortcode | ||
|---|---|---|---|---|---|
| top | 🐌 | :snail: |
🦋 | :butterfly: |
top |
| top | 🐛 | :bug: |
🐜 | :ant: |
top |
| top | 🐝 | :bee: |
|||
:honeybee: |
🪲 | :beetle: |
top | ||
| top | 🐞 | :lady_beetle: |
🦗 | :cricket: |
top |
| top | 🪳 | :cockroach: |
🕷️ | :spider: |
top |
| top | 🕸️ | :spider_web: |
🦂 | :scorpion: |
top |
| top | 🦟 | :mosquito: |
🪰 | :fly: |
top |
| top | 🪱 | :worm: |
🦠 | :microbe: |
top |
Plant Flower
| ico | shortcode | ico | shortcode | ||
|---|---|---|---|---|---|
| top | 💐 | :bouquet: |
🌸 | :cherry_blossom: |
top |
| top | 💮 | :white_flower: |
🏵️ | :rosette: |
top |
| top | 🌹 | :rose: |
🥀 | :wilted_flower: |
top |
| top | 🌺 | :hibiscus: |
🌻 | :sunflower: |
top |
| top | 🌼 | :blossom: |
🌷 | :tulip: |
top |
Plant Other
| ico | shortcode | ico | shortcode | ||
|---|---|---|---|---|---|
| top | 🌱 | :seedling: |
🪴 | :potted_plant: |
top |
| top | 🌲 | :evergreen_tree: |
🌳 | :deciduous_tree: |
top |
| top | 🌴 | :palm_tree: |
🌵 | :cactus: |
top |
| top | 🌾 | :ear_of_rice: |
🌿 | :herb: |
top |
| top | ☘️ | :shamrock: |
🍀 | :four_leaf_clover: |
top |
| top | 🍁 | :maple_leaf: |
🍂 | :fallen_leaf: |
top |
| top | 🍃 | :leaves: |
top |
Food & Drink
Food Fruit
| ico | shortcode | ico | shortcode | ||
|---|---|---|---|---|---|
| top | 🍇 | :grapes: |
🍈 | :melon: |
top |
| top | 🍉 | :watermelon: |
🍊 | :mandarin: |
:orange:
:tangerine: | top |
| top | 🍋 | :lemon: | 🍌 | :banana: | top |
| top | 🍍 | :pineapple: | 🥭 | :mango: | top |
| top | 🍎 | :apple: | 🍏 | :green_apple: | top |
| top | 🍐 | :pear: | 🍑 | :peach: | top |
| top | 🍒 | :cherries: | 🍓 | :strawberry: | top |
| top | 🫐 | :blueberries: | 🥝 | :kiwi_fruit: | top |
| top | 🍅 | :tomato: | 🫒 | :olive: | top |
| top | 🥥 | :coconut: | | | top |
Food Vegetable
| ico | shortcode | ico | shortcode | ||
|---|---|---|---|---|---|
| top | 🥑 | :avocado: |
🍆 | :eggplant: |
top |
| top | 🥔 | :potato: |
🥕 | :carrot: |
top |
| top | 🌽 | :corn: |
🌶️ | :hot_pepper: |
top |
| top | 🫑 | :bell_pepper: |
🥒 | :cucumber: |
top |
| top | 🥬 | :leafy_green: |
🥦 | :broccoli: |
top |
| top | 🧄 | :garlic: |
🧅 | :onion: |
top |
| top | 🍄 | :mushroom: |
🥜 | :peanuts: |
top |
| top | 🌰 | :chestnut: |
top |
Food Prepared
| ico | shortcode | ico | shortcode | ||
|---|---|---|---|---|---|
| top | 🍞 | :bread: |
🥐 | :croissant: |
top |
| top | 🥖 | :baguette_bread: |
🫓 | :flatbread: |
top |
| top | 🥨 | :pretzel: |
🥯 | :bagel: |
top |
| top | 🥞 | :pancakes: |
🧇 | :waffle: |
top |
| top | 🧀 | :cheese: |
🍖 | :meat_on_bone: |
top |
| top | 🍗 | :poultry_leg: |
🥩 | :cut_of_meat: |
top |
| top | 🥓 | :bacon: |
🍔 | :hamburger: |
top |
| top | 🍟 | :fries: |
🍕 | :pizza: |
top |
| top | 🌭 | :hotdog: |
🥪 | :sandwich: |
top |
| top | 🌮 | :taco: |
🌯 | :burrito: |
top |
| top | 🫔 | :tamale: |
🥙 | :stuffed_flatbread: |
top |
| top | 🧆 | :falafel: |
🥚 | :egg: |
top |
| top | 🍳 | :fried_egg: |
🥘 | :shallow_pan_of_food: |
top |
| top | 🍲 | :stew: |
🫕 | :fondue: |
top |
| top | 🥣 | :bowl_with_spoon: |
🥗 | :green_salad: |
top |
| top | 🍿 | :popcorn: |
🧈 | :butter: |
top |
| top | 🧂 | :salt: |
🥫 | :canned_food: |
top |
Food Asian
| ico | shortcode | ico | shortcode | ||
|---|---|---|---|---|---|
| top | 🍱 | :bento: |
🍘 | :rice_cracker: |
top |
| top | 🍙 | :rice_ball: |
🍚 | :rice: |
top |
| top | 🍛 | :curry: |
🍜 | :ramen: |
top |
| top | 🍝 | :spaghetti: |
🍠 | :sweet_potato: |
top |
| top | 🍢 | :oden: |
🍣 | :sushi: |
top |
| top | 🍤 | :fried_shrimp: |
🍥 | :fish_cake: |
top |
| top | 🥮 | :moon_cake: |
🍡 | :dango: |
top |
| top | 🥟 | :dumpling: |
🥠 | :fortune_cookie: |
top |
| top | 🥡 | :takeout_box: |
top |
Food Marine
| ico | shortcode | ico | shortcode | ||
|---|---|---|---|---|---|
| top | 🦀 | :crab: |
🦞 | :lobster: |
top |
| top | 🦐 | :shrimp: |
🦑 | :squid: |
top |
| top | 🦪 | :oyster: |
top |
Food Sweet
| ico | shortcode | ico | shortcode | ||
|---|---|---|---|---|---|
| top | 🍦 | :icecream: |
🍧 | :shaved_ice: |
top |
| top | 🍨 | :ice_cream: |
🍩 | :doughnut: |
top |
| top | 🍪 | :cookie: |
🎂 | :birthday: |
top |
| top | 🍰 | :cake: |
🧁 | :cupcake: |
top |
| top | 🥧 | :pie: |
🍫 | :chocolate_bar: |
top |
| top | 🍬 | :candy: |
🍭 | :lollipop: |
top |
| top | 🍮 | :custard: |
🍯 | :honey_pot: |
top |
Drink
| ico | shortcode | ico | shortcode | ||
|---|---|---|---|---|---|
| top | 🍼 | :baby_bottle: |
🥛 | :milk_glass: |
top |
| top | ☕ | :coffee: |
🫖 | :teapot: |
top |
| top | 🍵 | :tea: |
🍶 | :sake: |
top |
| top | 🍾 | :champagne: |
🍷 | :wine_glass: |
top |
| top | 🍸 | :cocktail: |
🍹 | :tropical_drink: |
top |
| top | 🍺 | :beer: |
🍻 | :beers: |
top |
| top | 🥂 | :clinking_glasses: |
🥃 | :tumbler_glass: |
top |
| top | 🥤 | :cup_with_straw: |
🧋 | :bubble_tea: |
top |
| top | 🧃 | :beverage_box: |
🧉 | :mate: |
top |
| top | 🧊 | :ice_cube: |
top |
Dishware
| ico | shortcode | ico | shortcode | ||
|---|---|---|---|---|---|
| top | 🥢 | :chopsticks: |
🍽️ | :plate_with_cutlery: |
top |
| top | 🍴 | :fork_and_knife: |
🥄 | :spoon: |
top |
| top | 🔪 | :hocho: |
|||
:knife: |
🏺 | :amphora: |
top |
Travel & Places
- Place Map
- Place Geographic
- Place Building
- Place Religious
- Place Other
- Transport Ground
- Transport Water
- Transport Air
- Hotel
- Time
- Sky & Weather
Place Map
| ico | shortcode | ico | shortcode | ||
|---|---|---|---|---|---|
| top | 🌍 | :earth_africa: |
🌎 | :earth_americas: |
top |
| top | 🌏 | :earth_asia: |
🌐 | :globe_with_meridians: |
top |
| top | 🗺️ | :world_map: |
🗾 | :japan: |
top |
| top | 🧭 | :compass: |
top |
Place Geographic
| ico | shortcode | ico | shortcode | ||
|---|---|---|---|---|---|
| top | 🏔️ | :mountain_snow: |
⛰️ | :mountain: |
top |
| top | 🌋 | :volcano: |
🗻 | :mount_fuji: |
top |
| top | 🏕️ | :camping: |
🏖️ | :beach_umbrella: |
top |
| top | 🏜️ | :desert: |
🏝️ | :desert_island: |
top |
| top | 🏞️ | :national_park: |
top |
Place Building
| ico | shortcode | ico | shortcode | ||
|---|---|---|---|---|---|
| top | 🏟️ | :stadium: |
🏛️ | :classical_building: |
top |
| top | 🏗️ | :building_construction: |
🧱 | :bricks: |
top |
| top | 🪨 | :rock: |
🪵 | :wood: |
top |
| top | 🛖 | :hut: |
🏘️ | :houses: |
top |
| top | 🏚️ | :derelict_house: |
🏠 | :house: |
top |
| top | 🏡 | :house_with_garden: |
🏢 | :office: |
top |
| top | 🏣 | :post_office: |
🏤 | :european_post_office: |
top |
| top | 🏥 | :hospital: |
🏦 | :bank: |
top |
| top | 🏨 | :hotel: |
🏩 | :love_hotel: |
top |
| top | 🏪 | :convenience_store: |
🏫 | :school: |
top |
| top | 🏬 | :department_store: |
🏭 | :factory: |
top |
| top | 🏯 | :japanese_castle: |
🏰 | :european_castle: |
top |
| top | 💒 | :wedding: |
🗼 | :tokyo_tower: |
top |
| top | 🗽 | :statue_of_liberty: |
top |
Place Religious
| ico | shortcode | ico | shortcode | ||
|---|---|---|---|---|---|
| top | ⛪ | :church: |
🕌 | :mosque: |
top |
| top | 🛕 | :hindu_temple: |
🕍 | :synagogue: |
top |
| top | ⛩️ | :shinto_shrine: |
🕋 | :kaaba: |
top |
Place Other
| ico | shortcode | ico | shortcode | ||
|---|---|---|---|---|---|
| top | ⛲ | :fountain: |
⛺ | :tent: |
top |
| top | 🌁 | :foggy: |
🌃 | :night_with_stars: |
top |
| top | 🏙️ | :cityscape: |
🌄 | :sunrise_over_mountains: |
top |
| top | 🌅 | :sunrise: |
🌆 | :city_sunset: |
top |
| top | 🌇 | :city_sunrise: |
🌉 | :bridge_at_night: |
top |
| top | ♨️ | :hotsprings: |
🎠 | :carousel_horse: |
top |
| top | 🎡 | :ferris_wheel: |
🎢 | :roller_coaster: |
top |
| top | 💈 | :barber: |
🎪 | :circus_tent: |
top |
Transport Ground
| ico | shortcode | ico | shortcode | ||
|---|---|---|---|---|---|
| top | 🚂 | :steam_locomotive: |
🚃 | :railway_car: |
top |
| top | 🚄 | :bullettrain_side: |
🚅 | :bullettrain_front: |
top |
| top | 🚆 | :train2: |
🚇 | :metro: |
top |
| top | 🚈 | :light_rail: |
🚉 | :station: |
top |
| top | 🚊 | :tram: |
🚝 | :monorail: |
top |
| top | 🚞 | :mountain_railway: |
🚋 | :train: |
top |
| top | 🚌 | :bus: |
🚍 | :oncoming_bus: |
top |
| top | 🚎 | :trolleybus: |
🚐 | :minibus: |
top |
| top | 🚑 | :ambulance: |
🚒 | :fire_engine: |
top |
| top | 🚓 | :police_car: |
🚔 | :oncoming_police_car: |
top |
| top | 🚕 | :taxi: |
🚖 | :oncoming_taxi: |
top |
| top | 🚗 | :car: |
|||
:red_car: |
🚘 | :oncoming_automobile: |
top | ||
| top | 🚙 | :blue_car: |
🛻 | :pickup_truck: |
top |
| top | 🚚 | :truck: |
🚛 | :articulated_lorry: |
top |
| top | 🚜 | :tractor: |
🏎️ | :racing_car: |
top |
| top | 🏍️ | :motorcycle: |
🛵 | :motor_scooter: |
top |
| top | 🦽 | :manual_wheelchair: |
🦼 | :motorized_wheelchair: |
top |
| top | 🛺 | :auto_rickshaw: |
🚲 | :bike: |
top |
| top | 🛴 | :kick_scooter: |
🛹 | :skateboard: |
top |
| top | 🛼 | :roller_skate: |
🚏 | :busstop: |
top |
| top | 🛣️ | :motorway: |
🛤️ | :railway_track: |
top |
| top | 🛢️ | :oil_drum: |
⛽ | :fuelpump: |
top |
| top | 🚨 | :rotating_light: |
🚥 | :traffic_light: |
top |
| top | 🚦 | :vertical_traffic_light: |
🛑 | :stop_sign: |
top |
| top | 🚧 | :construction: |
top |
Transport Water
| ico | shortcode | ico | shortcode | ||
|---|---|---|---|---|---|
| top | ⚓ | :anchor: |
⛵ | :boat: |
|
:sailboat: |
top | ||||
| top | 🛶 | :canoe: |
🚤 | :speedboat: |
top |
| top | 🛳️ | :passenger_ship: |
⛴️ | :ferry: |
top |
| top | 🛥️ | :motor_boat: |
🚢 | :ship: |
top |
Transport Air
| ico | shortcode | ico | shortcode | ||
|---|---|---|---|---|---|
| top | :airplane: |
🛩️ | :small_airplane: |
top | |
| top | 🛫 | :flight_departure: |
🛬 | :flight_arrival: |
top |
| top | 🪂 | :parachute: |
💺 | :seat: |
top |
| top | 🚁 | :helicopter: |
🚟 | :suspension_railway: |
top |
| top | 🚠 | :mountain_cableway: |
🚡 | :aerial_tramway: |
top |
| top | 🛰️ | :artificial_satellite: |
🚀 | :rocket: |
top |
| top | 🛸 | :flying_saucer: |
top |
Hotel
| ico | shortcode | ico | shortcode | ||
|---|---|---|---|---|---|
| top | 🛎️ | :bellhop_bell: |
🧳 | :luggage: |
top |
Time
| ico | shortcode | ico | shortcode | ||
|---|---|---|---|---|---|
| top | ⌛ | :hourglass: |
⏳ | :hourglass_flowing_sand: |
top |
| top | ⌚ | :watch: |
⏰ | :alarm_clock: |
top |
| top | ⏱️ | :stopwatch: |
⏲️ | :timer_clock: |
top |
| top | 🕰️ | :mantelpiece_clock: |
🕛 | :clock12: |
top |
| top | 🕧 | :clock1230: |
🕐 | :clock1: |
top |
| top | 🕜 | :clock130: |
🕑 | :clock2: |
top |
| top | 🕝 | :clock230: |
🕒 | :clock3: |
top |
| top | 🕞 | :clock330: |
🕓 | :clock4: |
top |
| top | 🕟 | :clock430: |
🕔 | :clock5: |
top |
| top | 🕠 | :clock530: |
🕕 | :clock6: |
top |
| top | 🕡 | :clock630: |
🕖 | :clock7: |
top |
| top | 🕢 | :clock730: |
🕗 | :clock8: |
top |
| top | 🕣 | :clock830: |
🕘 | :clock9: |
top |
| top | 🕤 | :clock930: |
🕙 | :clock10: |
top |
| top | 🕥 | :clock1030: |
🕚 | :clock11: |
top |
| top | 🕦 | :clock1130: |
top |
Sky & Weather
| ico | shortcode | ico | shortcode | ||
|---|---|---|---|---|---|
| top | 🌑 | :new_moon: |
🌒 | :waxing_crescent_moon: |
top |
| top | 🌓 | :first_quarter_moon: |
🌔 | :moon: |
|
:waxing_gibbous_moon: |
top | ||||
| top | 🌕 | :full_moon: |
🌖 | :waning_gibbous_moon: |
top |
| top | 🌗 | :last_quarter_moon: |
🌘 | :waning_crescent_moon: |
top |
| top | 🌙 | :crescent_moon: |
🌚 | :new_moon_with_face: |
top |
| top | 🌛 | :first_quarter_moon_with_face: |
🌜 | :last_quarter_moon_with_face: |
top |
| top | 🌡️ | :thermometer: |
☀️ | :sunny: |
top |
| top | 🌝 | :full_moon_with_face: |
🌞 | :sun_with_face: |
top |
| top | 🪐 | :ringed_planet: |
⭐ | :star: |
top |
| top | 🌟 | :star2: |
🌠 | :stars: |
top |
| top | 🌌 | :milky_way: |
☁️ | :cloud: |
top |
| top | ⛅ | :partly_sunny: |
⛈️ | :cloud_with_lightning_and_rain: |
top |
| top | 🌤️ | :sun_behind_small_cloud: |
🌥️ | :sun_behind_large_cloud: |
top |
| top | 🌦️ | :sun_behind_rain_cloud: |
🌧️ | :cloud_with_rain: |
top |
| top | 🌨️ | :cloud_with_snow: |
🌩️ | :cloud_with_lightning: |
top |
| top | 🌪️ | :tornado: |
🌫️ | :fog: |
top |
| top | 🌬️ | :wind_face: |
🌀 | :cyclone: |
top |
| top | 🌈 | :rainbow: |
🌂 | :closed_umbrella: |
top |
| top | ☂️ | :open_umbrella: |
☔ | :umbrella: |
top |
| top | ⛱️ | :parasol_on_ground: |
⚡ | :zap: |
top |
| top | ❄️ | :snowflake: |
☃️ | :snowman_with_snow: |
top |
| top | ⛄ | :snowman: |
☄️ | :comet: |
top |
| top | 🔥 | :fire: |
💧 | :droplet: |
top |
| top | 🌊 | :ocean: |
top |
Activities
Event
| ico | shortcode | ico | shortcode | ||
|---|---|---|---|---|---|
| top | 🎃 | :jack_o_lantern: |
🎄 | :christmas_tree: |
top |
| top | 🎆 | :fireworks: |
🎇 | :sparkler: |
top |
| top | 🧨 | :firecracker: |
✨ | :sparkles: |
top |
| top | 🎈 | :balloon: |
🎉 | :tada: |
top |
| top | 🎊 | :confetti_ball: |
🎋 | :tanabata_tree: |
top |
| top | 🎍 | :bamboo: |
🎎 | :dolls: |
top |
| top | 🎏 | :flags: |
🎐 | :wind_chime: |
top |
| top | 🎑 | :rice_scene: |
🧧 | :red_envelope: |
top |
| top | 🎀 | :ribbon: |
🎁 | :gift: |
top |
| top | 🎗️ | :reminder_ribbon: |
🎟️ | :tickets: |
top |
| top | 🎫 | :ticket: |
top |
Award Medal
| ico | shortcode | ico | shortcode | ||
|---|---|---|---|---|---|
| top | 🎖️ | :medal_military: |
🏆 | :trophy: |
top |
| top | 🏅 | :medal_sports: |
🥇 | :1st_place_medal: |
top |
| top | 🥈 | :2nd_place_medal: |
🥉 | :3rd_place_medal: |
top |
Sport
| ico | shortcode | ico | shortcode | ||
|---|---|---|---|---|---|
| top | ⚽ | :soccer: |
⚾ | :baseball: |
top |
| top | 🥎 | :softball: |
🏀 | :basketball: |
top |
| top | 🏐 | :volleyball: |
🏈 | :football: |
top |
| top | 🏉 | :rugby_football: |
🎾 | :tennis: |
top |
| top | 🥏 | :flying_disc: |
🎳 | :bowling: |
top |
| top | 🏏 | :cricket_game: |
🏑 | :field_hockey: |
top |
| top | 🏒 | :ice_hockey: |
🥍 | :lacrosse: |
top |
| top | 🏓 | :ping_pong: |
🏸 | :badminton: |
top |
| top | 🥊 | :boxing_glove: |
🥋 | :martial_arts_uniform: |
top |
| top | 🥅 | :goal_net: |
⛳ | :golf: |
top |
| top | ⛸️ | :ice_skate: |
🎣 | :fishing_pole_and_fish: |
top |
| top | 🤿 | :diving_mask: |
🎽 | :running_shirt_with_sash: |
top |
| top | 🎿 | :ski: |
🛷 | :sled: |
top |
| top | 🥌 | :curling_stone: |
top |
Game
| ico | shortcode | ico | shortcode | ||
|---|---|---|---|---|---|
| top | 🎯 | :dart: |
🪀 | :yo_yo: |
top |
| top | 🪁 | :kite: |
🎱 | :8ball: |
top |
| top | 🔮 | :crystal_ball: |
🪄 | :magic_wand: |
top |
| top | 🧿 | :nazar_amulet: |
🎮 | :video_game: |
top |
| top | 🕹️ | :joystick: |
🎰 | :slot_machine: |
top |
| top | 🎲 | :game_die: |
🧩 | :jigsaw: |
top |
| top | 🧸 | :teddy_bear: |
🪅 | :pinata: |
top |
| top | 🪆 | :nesting_dolls: |
:spades: |
top | |
| top | :hearts: |
:diamonds: |
top | ||
| top | :clubs: |
♟️ | :chess_pawn: |
top | |
| top | 🃏 | :black_joker: |
🀄 | :mahjong: |
top |
| top | 🎴 | :flower_playing_cards: |
top |
Arts & Crafts
| ico | shortcode | ico | shortcode | ||
|---|---|---|---|---|---|
| top | 🎭 | :performing_arts: |
🖼️ | :framed_picture: |
top |
| top | 🎨 | :art: |
🧵 | :thread: |
top |
| top | 🪡 | :sewing_needle: |
🧶 | :yarn: |
top |
| top | 🪢 | :knot: |
top |
Objects
- Clothing
- Sound
- Music
- Musical Instrument
- Phone
- Computer
- Light & Video
- Book Paper
- Money
- Writing
- Office
- Lock
- Tool
- Science
- Medical
- Household
- Other Object
Clothing
| ico | shortcode | ico | shortcode | ||
|---|---|---|---|---|---|
| top | 👓 | :eyeglasses: |
🕶️ | :dark_sunglasses: |
top |
| top | 🥽 | :goggles: |
🥼 | :lab_coat: |
top |
| top | 🦺 | :safety_vest: |
👔 | :necktie: |
top |
| top | 👕 | :shirt: |
|||
:tshirt: |
👖 | :jeans: |
top | ||
| top | 🧣 | :scarf: |
🧤 | :gloves: |
top |
| top | 🧥 | :coat: |
🧦 | :socks: |
top |
| top | 👗 | :dress: |
👘 | :kimono: |
top |
| top | 🥻 | :sari: |
🩱 | :one_piece_swimsuit: |
top |
| top | 🩲 | :swim_brief: |
🩳 | :shorts: |
top |
| top | 👙 | :bikini: |
👚 | :womans_clothes: |
top |
| top | 👛 | :purse: |
👜 | :handbag: |
top |
| top | 👝 | :pouch: |
🛍️ | :shopping: |
top |
| top | 🎒 | :school_satchel: |
🩴 | :thong_sandal: |
top |
| top | 👞 | :mans_shoe: |
|||
:shoe: |
👟 | :athletic_shoe: |
top | ||
| top | 🥾 | :hiking_boot: |
🥿 | :flat_shoe: |
top |
| top | 👠 | :high_heel: |
👡 | :sandal: |
top |
| top | 🩰 | :ballet_shoes: |
👢 | :boot: |
top |
| top | 👑 | :crown: |
👒 | :womans_hat: |
top |
| top | 🎩 | :tophat: |
🎓 | :mortar_board: |
top |
| top | 🧢 | :billed_cap: |
🪖 | :military_helmet: |
top |
| top | ⛑️ | :rescue_worker_helmet: |
📿 | :prayer_beads: |
top |
| top | 💄 | :lipstick: |
💍 | :ring: |
top |
| top | 💎 | :gem: |
top |
Sound
| ico | shortcode | ico | shortcode | ||
|---|---|---|---|---|---|
| top | 🔇 | :mute: |
🔈 | :speaker: |
top |
| top | 🔉 | :sound: |
🔊 | :loud_sound: |
top |
| top | 📢 | :loudspeaker: |
📣 | :mega: |
top |
| top | 📯 | :postal_horn: |
🔔 | :bell: |
top |
| top | 🔕 | :no_bell: |
top |
Music
| ico | shortcode | ico | shortcode | ||
|---|---|---|---|---|---|
| top | 🎼 | :musical_score: |
🎵 | :musical_note: |
top |
| top | 🎶 | :notes: |
🎙️ | :studio_microphone: |
top |
| top | 🎚️ | :level_slider: |
🎛️ | :control_knobs: |
top |
| top | 🎤 | :microphone: |
🎧 | :headphones: |
top |
| top | 📻 | :radio: |
top |
Musical Instrument
| ico | shortcode | ico | shortcode | ||
|---|---|---|---|---|---|
| top | 🎷 | :saxophone: |
🪗 | :accordion: |
top |
| top | 🎸 | :guitar: |
🎹 | :musical_keyboard: |
top |
| top | 🎺 | :trumpet: |
🎻 | :violin: |
top |
| top | 🪕 | :banjo: |
🥁 | :drum: |
top |
| top | 🪘 | :long_drum: |
top |
Phone
| ico | shortcode | ico | shortcode | ||
|---|---|---|---|---|---|
| top | 📱 | :iphone: |
📲 | :calling: |
top |
| top | ☎️ | :phone: |
|||
:telephone: |
📞 | :telephone_receiver: |
top | ||
| top | 📟 | :pager: |
📠 | :fax: |
top |
Computer
| ico | shortcode | ico | shortcode | ||
|---|---|---|---|---|---|
| top | 🔋 | :battery: |
🔌 | :electric_plug: |
top |
| top | 💻 | :computer: |
🖥️ | :desktop_computer: |
top |
| top | 🖨️ | :printer: |
⌨️ | :keyboard: |
top |
| top | 🖱️ | :computer_mouse: |
🖲️ | :trackball: |
top |
| top | 💽 | :minidisc: |
💾 | :floppy_disk: |
top |
| top | 💿 | :cd: |
📀 | :dvd: |
top |
| top | 🧮 | :abacus: |
top |
Light & Video
| ico | shortcode | ico | shortcode | ||
|---|---|---|---|---|---|
| top | 🎥 | :movie_camera: |
🎞️ | :film_strip: |
top |
| top | 📽️ | :film_projector: |
🎬 | :clapper: |
top |
| top | 📺 | :tv: |
📷 | :camera: |
top |
| top | 📸 | :camera_flash: |
📹 | :video_camera: |
top |
| top | 📼 | :vhs: |
🔍 | :mag: |
top |
| top | 🔎 | :mag_right: |
🕯️ | :candle: |
top |
| top | 💡 | :bulb: |
🔦 | :flashlight: |
top |
| top | 🏮 | :izakaya_lantern: |
|||
:lantern: |
🪔 | :diya_lamp: |
top |
Book Paper
| ico | shortcode | ico | shortcode | ||
|---|---|---|---|---|---|
| top | 📔 | :notebook_with_decorative_cover: |
📕 | :closed_book: |
top |
| top | 📖 | :book: |
|||
:open_book: |
📗 | :green_book: |
top | ||
| top | 📘 | :blue_book: |
📙 | :orange_book: |
top |
| top | 📚 | :books: |
📓 | :notebook: |
top |
| top | 📒 | :ledger: |
📃 | :page_with_curl: |
top |
| top | 📜 | :scroll: |
📄 | :page_facing_up: |
top |
| top | 📰 | :newspaper: |
🗞️ | :newspaper_roll: |
top |
| top | 📑 | :bookmark_tabs: |
🔖 | :bookmark: |
top |
| top | 🏷️ | :label: |
top |
Money
| ico | shortcode | ico | shortcode | ||
|---|---|---|---|---|---|
| top | 💰 | :moneybag: |
🪙 | :coin: |
top |
| top | 💴 | :yen: |
💵 | :dollar: |
top |
| top | 💶 | :euro: |
💷 | :pound: |
top |
| top | 💸 | :money_with_wings: |
💳 | :credit_card: |
top |
| top | 🧾 | :receipt: |
💹 | :chart: |
top |
| ico | shortcode | ico | shortcode | ||
|---|---|---|---|---|---|
| top | ✉️ | :envelope: |
📧 | :e-mail: |
|
:email: |
top | ||||
| top | 📨 | :incoming_envelope: |
📩 | :envelope_with_arrow: |
top |
| top | 📤 | :outbox_tray: |
📥 | :inbox_tray: |
top |
| top | 📦 | :package: |
📫 | :mailbox: |
top |
| top | 📪 | :mailbox_closed: |
📬 | :mailbox_with_mail: |
top |
| top | 📭 | :mailbox_with_no_mail: |
📮 | :postbox: |
top |
| top | 🗳️ | :ballot_box: |
top |
Writing
| ico | shortcode | ico | shortcode | ||
|---|---|---|---|---|---|
| top | ✏️ | :pencil2: |
✒️ | :black_nib: |
top |
| top | 🖋️ | :fountain_pen: |
🖊️ | :pen: |
top |
| top | 🖌️ | :paintbrush: |
🖍️ | :crayon: |
top |
| top | 📝 | :memo: |
|||
:pencil: |
top |
Office
| ico | shortcode | ico | shortcode | ||
|---|---|---|---|---|---|
| top | 💼 | :briefcase: |
📁 | :file_folder: |
top |
| top | 📂 | :open_file_folder: |
🗂️ | :card_index_dividers: |
top |
| top | 📅 | :date: |
📆 | :calendar: |
top |
| top | 🗒️ | :spiral_notepad: |
🗓️ | :spiral_calendar: |
top |
| top | 📇 | :card_index: |
📈 | :chart_with_upwards_trend: |
top |
| top | 📉 | :chart_with_downwards_trend: |
📊 | :bar_chart: |
top |
| top | 📋 | :clipboard: |
📌 | :pushpin: |
top |
| top | 📍 | :round_pushpin: |
📎 | :paperclip: |
top |
| top | 🖇️ | :paperclips: |
📏 | :straight_ruler: |
top |
| top | 📐 | :triangular_ruler: |
✂️ | :scissors: |
top |
| top | 🗃️ | :card_file_box: |
🗄️ | :file_cabinet: |
top |
| top | 🗑️ | :wastebasket: |
top |
Lock
| ico | shortcode | ico | shortcode | ||
|---|---|---|---|---|---|
| top | 🔒 | :lock: |
🔓 | :unlock: |
top |
| top | 🔏 | :lock_with_ink_pen: |
🔐 | :closed_lock_with_key: |
top |
| top | 🔑 | :key: |
🗝️ | :old_key: |
top |
Tool
| ico | shortcode | ico | shortcode | ||
|---|---|---|---|---|---|
| top | 🔨 | :hammer: |
🪓 | :axe: |
top |
| top | ⛏️ | :pick: |
⚒️ | :hammer_and_pick: |
top |
| top | 🛠️ | :hammer_and_wrench: |
🗡️ | :dagger: |
top |
| top | ⚔️ | :crossed_swords: |
🔫 | :gun: |
top |
| top | 🪃 | :boomerang: |
🏹 | :bow_and_arrow: |
top |
| top | 🛡️ | :shield: |
🪚 | :carpentry_saw: |
top |
| top | 🔧 | :wrench: |
🪛 | :screwdriver: |
top |
| top | 🔩 | :nut_and_bolt: |
⚙️ | :gear: |
top |
| top | 🗜️ | :clamp: |
⚖️ | :balance_scale: |
top |
| top | 🦯 | :probing_cane: |
🔗 | :link: |
top |
| top | ⛓️ | :chains: |
🪝 | :hook: |
top |
| top | 🧰 | :toolbox: |
🧲 | :magnet: |
top |
| top | 🪜 | :ladder: |
top |
Science
| ico | shortcode | ico | shortcode | ||
|---|---|---|---|---|---|
| top | ⚗️ | :alembic: |
🧪 | :test_tube: |
top |
| top | 🧫 | :petri_dish: |
🧬 | :dna: |
top |
| top | 🔬 | :microscope: |
🔭 | :telescope: |
top |
| top | 📡 | :satellite: |
top |
Medical
| ico | shortcode | ico | shortcode | ||
|---|---|---|---|---|---|
| top | 💉 | :syringe: |
🩸 | :drop_of_blood: |
top |
| top | 💊 | :pill: |
🩹 | :adhesive_bandage: |
top |
| top | 🩺 | :stethoscope: |
top |
Household
| ico | shortcode | ico | shortcode | ||
|---|---|---|---|---|---|
| top | 🚪 | :door: |
🛗 | :elevator: |
top |
| top | 🪞 | :mirror: |
🪟 | :window: |
top |
| top | 🛏️ | :bed: |
🛋️ | :couch_and_lamp: |
top |
| top | 🪑 | :chair: |
🚽 | :toilet: |
top |
| top | 🪠 | :plunger: |
🚿 | :shower: |
top |
| top | 🛁 | :bathtub: |
🪤 | :mouse_trap: |
top |
| top | 🪒 | :razor: |
🧴 | :lotion_bottle: |
top |
| top | 🧷 | :safety_pin: |
🧹 | :broom: |
top |
| top | 🧺 | :basket: |
🧻 | :roll_of_paper: |
top |
| top | 🪣 | :bucket: |
🧼 | :soap: |
top |
| top | 🪥 | :toothbrush: |
🧽 | :sponge: |
top |
| top | 🧯 | :fire_extinguisher: |
🛒 | :shopping_cart: |
top |
Other Object
| ico | shortcode | ico | shortcode | ||
|---|---|---|---|---|---|
| top | 🚬 | :smoking: |
⚰️ | :coffin: |
top |
| top | 🪦 | :headstone: |
⚱️ | :funeral_urn: |
top |
| top | 🗿 | :moyai: |
🪧 | :placard: |
top |
Symbols
- Transport Sign
- Warning
- Arrow
- Religion
- Zodiac
- Av Symbol
- Gender
- Math
- Punctuation
- Currency
- Other Symbol
- Keycap
- Alphanum
- Geometric
Transport Sign
| ico | shortcode | ico | shortcode | ||
|---|---|---|---|---|---|
| top | 🏧 | :atm: |
🚮 | :put_litter_in_its_place: |
top |
| top | 🚰 | :potable_water: |
♿ | :wheelchair: |
top |
| top | 🚹 | :mens: |
🚺 | :womens: |
top |
| top | 🚻 | :restroom: |
🚼 | :baby_symbol: |
top |
| top | 🚾 | :wc: |
🛂 | :passport_control: |
top |
| top | 🛃 | :customs: |
🛄 | :baggage_claim: |
top |
| top | 🛅 | :left_luggage: |
top |
Warning
| ico | shortcode | ico | shortcode | ||
|---|---|---|---|---|---|
| top | :warning: |
🚸 | :children_crossing: |
top | |
| top | ⛔ | :no_entry: |
🚫 | :no_entry_sign: |
top |
| top | 🚳 | :no_bicycles: |
🚭 | :no_smoking: |
top |
| top | 🚯 | :do_not_litter: |
🚱 | :non-potable_water: |
top |
| top | 🚷 | :no_pedestrians: |
📵 | :no_mobile_phones: |
top |
| top | 🔞 | :underage: |
☢️ | :radioactive: |
top |
| top | ☣️ | :biohazard: |
top |
Arrow
| ico | shortcode | ico | shortcode | ||
|---|---|---|---|---|---|
| top | ⬆️ | :arrow_up: |
:arrow_upper_right: |
top | |
| top | ➡️ | :arrow_right: |
:arrow_lower_right: |
top | |
| top | ⬇️ | :arrow_down: |
:arrow_lower_left: |
top | |
| top | ⬅️ | :arrow_left: |
:arrow_upper_left: |
top | |
| top | :arrow_up_down: |
:left_right_arrow: |
top | ||
| top | ↩️ | :leftwards_arrow_with_hook: |
↪️ | :arrow_right_hook: |
top |
| top | :arrow_heading_up: |
:arrow_heading_down: |
top | ||
| top | 🔃 | :arrows_clockwise: |
🔄 | :arrows_counterclockwise: |
top |
| top | 🔙 | :back: |
🔚 | :end: |
top |
| top | 🔛 | :on: |
🔜 | :soon: |
top |
| top | 🔝 | :top: |
top |
Religion
| ico | shortcode | ico | shortcode | ||
|---|---|---|---|---|---|
| top | 🛐 | :place_of_worship: |
⚛️ | :atom_symbol: |
top |
| top | 🕉️ | :om: |
✡️ | :star_of_david: |
top |
| top | ☸️ | :wheel_of_dharma: |
☯️ | :yin_yang: |
top |
| top | ✝️ | :latin_cross: |
☦️ | :orthodox_cross: |
top |
| top | ☪️ | :star_and_crescent: |
☮️ | :peace_symbol: |
top |
| top | 🕎 | :menorah: |
🔯 | :six_pointed_star: |
top |
Zodiac
| ico | shortcode | ico | shortcode | ||
|---|---|---|---|---|---|
| top | ♈ | :aries: |
♉ | :taurus: |
top |
| top | ♊ | :gemini: |
♋ | :cancer: |
top |
| top | ♌ | :leo: |
♍ | :virgo: |
top |
| top | ♎ | :libra: |
♏ | :scorpius: |
top |
| top | ♐ | :sagittarius: |
♑ | :capricorn: |
top |
| top | ♒ | :aquarius: |
♓ | :pisces: |
top |
| top | ⛎ | :ophiuchus: |
top |
Av Symbol
| ico | shortcode | ico | shortcode | ||
|---|---|---|---|---|---|
| top | 🔀 | :twisted_rightwards_arrows: |
🔁 | :repeat: |
top |
| top | 🔂 | :repeat_one: |
:arrow_forward: |
top | |
| top | ⏩ | :fast_forward: |
⏭️ | :next_track_button: |
top |
| top | ⏯️ | :play_or_pause_button: |
:arrow_backward: |
top | |
| top | ⏪ | :rewind: |
⏮️ | :previous_track_button: |
top |
| top | 🔼 | :arrow_up_small: |
⏫ | :arrow_double_up: |
top |
| top | 🔽 | :arrow_down_small: |
⏬ | :arrow_double_down: |
top |
| top | ⏸️ | :pause_button: |
⏹️ | :stop_button: |
top |
| top | ⏺️ | :record_button: |
:eject_button: |
top | |
| top | 🎦 | :cinema: |
🔅 | :low_brightness: |
top |
| top | 🔆 | :high_brightness: |
📶 | :signal_strength: |
top |
| top | 📳 | :vibration_mode: |
📴 | :mobile_phone_off: |
top |
Gender
| ico | shortcode | ico | shortcode | ||
|---|---|---|---|---|---|
| top | ♀️ | :female_sign: |
♂️ | :male_sign: |
top |
| top | ⚧️ | :transgender_symbol: |
top |
Math
| ico | shortcode | ico | shortcode | ||
|---|---|---|---|---|---|
| top | ✖️ | :heavy_multiplication_x: |
➕ | :heavy_plus_sign: |
top |
| top | ➖ | :heavy_minus_sign: |
➗ | :heavy_division_sign: |
top |
| top | ♾️ | :infinity: |
top |
Punctuation
| ico | shortcode | ico | shortcode | ||
|---|---|---|---|---|---|
| top | :bangbang: |
:interrobang: |
top | ||
| top | ❓ | :question: |
❔ | :grey_question: |
top |
| top | ❕ | :grey_exclamation: |
❗ | :exclamation: |
|
:heavy_exclamation_mark: |
top | ||||
| top | 〰️ | :wavy_dash: |
top |
Currency
| ico | shortcode | ico | shortcode | ||
|---|---|---|---|---|---|
| top | 💱 | :currency_exchange: |
💲 | :heavy_dollar_sign: |
top |
Other Symbol
| ico | shortcode | ico | shortcode | ||
|---|---|---|---|---|---|
| top | ⚕️ | :medical_symbol: |
♻️ | :recycle: |
top |
| top | ⚜️ | :fleur_de_lis: |
🔱 | :trident: |
top |
| top | 📛 | :name_badge: |
🔰 | :beginner: |
top |
| top | ⭕ | :o: |
✅ | :white_check_mark: |
top |
| top | ☑️ | :ballot_box_with_check: |
✔️ | :heavy_check_mark: |
top |
| top | ❌ | :x: |
❎ | :negative_squared_cross_mark: |
top |
| top | ➰ | :curly_loop: |
➿ | :loop: |
top |
| top | 〽️ | :part_alternation_mark: |
✳️ | :eight_spoked_asterisk: |
top |
| top | ✴️ | :eight_pointed_black_star: |
❇️ | :sparkle: |
top |
| top | ©️ | :copyright: |
®️ | :registered: |
top |
| top | ™️ | :tm: |
top |
Keycap
| ico | shortcode | ico | shortcode | ||
|---|---|---|---|---|---|
| top | #️⃣ | :hash: |
*️⃣ | :asterisk: |
top |
| top | 0️⃣ | :zero: |
1️⃣ | :one: |
top |
| top | 2️⃣ | :two: |
3️⃣ | :three: |
top |
| top | 4️⃣ | :four: |
5️⃣ | :five: |
top |
| top | 6️⃣ | :six: |
7️⃣ | :seven: |
top |
| top | 8️⃣ | :eight: |
9️⃣ | :nine: |
top |
| top | 🔟 | :keycap_ten: |
top |
Alphanum
| ico | shortcode | ico | shortcode | ||
|---|---|---|---|---|---|
| top | 🔠 | :capital_abcd: |
🔡 | :abcd: |
top |
| top | 🔢 | :1234: |
🔣 | :symbols: |
top |
| top | 🔤 | :abc: |
:a: |
top | |
| top | 🆎 | :ab: |
:b: |
top | |
| top | 🆑 | :cl: |
🆒 | :cool: |
top |
| top | 🆓 | :free: |
ℹ️ | :information_source: |
top |
| top | 🆔 | :id: |
:m: |
top | |
| top | 🆕 | :new: |
🆖 | :ng: |
top |
| top | :o2: |
🆗 | :ok: |
top | |
| top | :parking: |
🆘 | :sos: |
top | |
| top | 🆙 | :up: |
🆚 | :vs: |
top |
| top | 🈁 | :koko: |
🈂️ | :sa: |
top |
| top | 🈷️ | :u6708: |
🈶 | :u6709: |
top |
| top | 🈯 | :u6307: |
🉐 | :ideograph_advantage: |
top |
| top | 🈹 | :u5272: |
🈚 | :u7121: |
top |
| top | 🈲 | :u7981: |
🉑 | :accept: |
top |
| top | 🈸 | :u7533: |
🈴 | :u5408: |
top |
| top | 🈳 | :u7a7a: |
㊗️ | :congratulations: |
top |
| top | ㊙️ | :secret: |
🈺 | :u55b6: |
top |
| top | 🈵 | :u6e80: |
top |
Geometric
| ico | shortcode | ico | shortcode | ||
|---|---|---|---|---|---|
| top | 🔴 | :red_circle: |
🟠 | :orange_circle: |
top |
| top | 🟡 | :yellow_circle: |
🟢 | :green_circle: |
top |
| top | 🔵 | :large_blue_circle: |
🟣 | :purple_circle: |
top |
| top | 🟤 | :brown_circle: |
⚫ | :black_circle: |
top |
| top | ⚪ | :white_circle: |
🟥 | :red_square: |
top |
| top | 🟧 | :orange_square: |
🟨 | :yellow_square: |
top |
| top | 🟩 | :green_square: |
🟦 | :blue_square: |
top |
| top | 🟪 | :purple_square: |
🟫 | :brown_square: |
top |
| top | ⬛ | :black_large_square: |
⬜ | :white_large_square: |
top |
| top | ◼️ | :black_medium_square: |
◻️ | :white_medium_square: |
top |
| top | ◾ | :black_medium_small_square: |
◽ | :white_medium_small_square: |
top |
| top | ▪️ | :black_small_square: |
▫️ | :white_small_square: |
top |
| top | 🔶 | :large_orange_diamond: |
🔷 | :large_blue_diamond: |
top |
| top | 🔸 | :small_orange_diamond: |
🔹 | :small_blue_diamond: |
top |
| top | 🔺 | :small_red_triangle: |
🔻 | :small_red_triangle_down: |
top |
| top | 💠 | :diamond_shape_with_a_dot_inside: |
🔘 | :radio_button: |
top |
| top | 🔳 | :white_square_button: |
🔲 | :black_square_button: |
top |
Flags
Flag
| ico | shortcode | ico | shortcode | ||
|---|---|---|---|---|---|
| top | 🏁 | :checkered_flag: |
🚩 | :triangular_flag_on_post: |
top |
| top | 🎌 | :crossed_flags: |
🏴 | :black_flag: |
top |
| top | 🏳️ | :white_flag: |
🏳️🌈 | :rainbow_flag: |
top |
| top | 🏳️⚧️ | :transgender_flag: |
🏴☠️ | :pirate_flag: |
top |
Country Flag
| ico | shortcode | ico | shortcode | ||
|---|---|---|---|---|---|
| top | 🇦🇨 | :ascension_island: |
🇦🇩 | :andorra: |
top |
| top | 🇦🇪 | :united_arab_emirates: |
🇦🇫 | :afghanistan: |
top |
| top | 🇦🇬 | :antigua_barbuda: |
🇦🇮 | :anguilla: |
top |
| top | 🇦🇱 | :albania: |
🇦🇲 | :armenia: |
top |
| top | 🇦🇴 | :angola: |
🇦🇶 | :antarctica: |
top |
| top | 🇦🇷 | :argentina: |
🇦🇸 | :american_samoa: |
top |
| top | 🇦🇹 | :austria: |
🇦🇺 | :australia: |
top |
| top | 🇦🇼 | :aruba: |
🇦🇽 | :aland_islands: |
top |
| top | 🇦🇿 | :azerbaijan: |
🇧🇦 | :bosnia_herzegovina: |
top |
| top | 🇧🇧 | :barbados: |
🇧🇩 | :bangladesh: |
top |
| top | 🇧🇪 | :belgium: |
🇧🇫 | :burkina_faso: |
top |
| top | 🇧🇬 | :bulgaria: |
🇧🇭 | :bahrain: |
top |
| top | 🇧🇮 | :burundi: |
🇧🇯 | :benin: |
top |
| top | 🇧🇱 | :st_barthelemy: |
🇧🇲 | :bermuda: |
top |
| top | 🇧🇳 | :brunei: |
🇧🇴 | :bolivia: |
top |
| top | 🇧🇶 | :caribbean_netherlands: |
🇧🇷 | :brazil: |
top |
| top | 🇧🇸 | :bahamas: |
🇧🇹 | :bhutan: |
top |
| top | 🇧🇻 | :bouvet_island: |
🇧🇼 | :botswana: |
top |
| top | 🇧🇾 | :belarus: |
🇧🇿 | :belize: |
top |
| top | 🇨🇦 | :canada: |
🇨🇨 | :cocos_islands: |
top |
| top | 🇨🇩 | :congo_kinshasa: |
🇨🇫 | :central_african_republic: |
top |
| top | 🇨🇬 | :congo_brazzaville: |
🇨🇭 | :switzerland: |
top |
| top | 🇨🇮 | :cote_divoire: |
🇨🇰 | :cook_islands: |
top |
| top | 🇨🇱 | :chile: |
🇨🇲 | :cameroon: |
top |
| top | 🇨🇳 | :cn: |
🇨🇴 | :colombia: |
top |
| top | 🇨🇵 | :clipperton_island: |
🇨🇷 | :costa_rica: |
top |
| top | 🇨🇺 | :cuba: |
🇨🇻 | :cape_verde: |
top |
| top | 🇨🇼 | :curacao: |
🇨🇽 | :christmas_island: |
top |
| top | 🇨🇾 | :cyprus: |
🇨🇿 | :czech_republic: |
top |
| top | 🇩🇪 | :de: |
🇩🇬 | :diego_garcia: |
top |
| top | 🇩🇯 | :djibouti: |
🇩🇰 | :denmark: |
top |
| top | 🇩🇲 | :dominica: |
🇩🇴 | :dominican_republic: |
top |
| top | 🇩🇿 | :algeria: |
🇪🇦 | :ceuta_melilla: |
top |
| top | 🇪🇨 | :ecuador: |
🇪🇪 | :estonia: |
top |
| top | 🇪🇬 | :egypt: |
🇪🇭 | :western_sahara: |
top |
| top | 🇪🇷 | :eritrea: |
🇪🇸 | :es: |
top |
| top | 🇪🇹 | :ethiopia: |
🇪🇺 | :eu: |
|
:european_union: |
top | ||||
| top | 🇫🇮 | :finland: |
🇫🇯 | :fiji: |
top |
| top | 🇫🇰 | :falkland_islands: |
🇫🇲 | :micronesia: |
top |
| top | 🇫🇴 | :faroe_islands: |
🇫🇷 | :fr: |
top |
| top | 🇬🇦 | :gabon: |
🇬🇧 | :gb: |
|
:uk: |
top | ||||
| top | 🇬🇩 | :grenada: |
🇬🇪 | :georgia: |
top |
| top | 🇬🇫 | :french_guiana: |
🇬🇬 | :guernsey: |
top |
| top | 🇬🇭 | :ghana: |
🇬🇮 | :gibraltar: |
top |
| top | 🇬🇱 | :greenland: |
🇬🇲 | :gambia: |
top |
| top | 🇬🇳 | :guinea: |
🇬🇵 | :guadeloupe: |
top |
| top | 🇬🇶 | :equatorial_guinea: |
🇬🇷 | :greece: |
top |
| top | 🇬🇸 | :south_georgia_south_sandwich_islands: |
🇬🇹 | :guatemala: |
top |
| top | 🇬🇺 | :guam: |
🇬🇼 | :guinea_bissau: |
top |
| top | 🇬🇾 | :guyana: |
🇭🇰 | :hong_kong: |
top |
| top | 🇭🇲 | :heard_mcdonald_islands: |
🇭🇳 | :honduras: |
top |
| top | 🇭🇷 | :croatia: |
🇭🇹 | :haiti: |
top |
| top | 🇭🇺 | :hungary: |
🇮🇨 | :canary_islands: |
top |
| top | 🇮🇩 | :indonesia: |
🇮🇪 | :ireland: |
top |
| top | 🇮🇱 | :israel: |
🇮🇲 | :isle_of_man: |
top |
| top | 🇮🇳 | :india: |
🇮🇴 | :british_indian_ocean_territory: |
top |
| top | 🇮🇶 | :iraq: |
🇮🇷 | :iran: |
top |
| top | 🇮🇸 | :iceland: |
🇮🇹 | :it: |
top |
| top | 🇯🇪 | :jersey: |
🇯🇲 | :jamaica: |
top |
| top | 🇯🇴 | :jordan: |
🇯🇵 | :jp: |
top |
| top | 🇰🇪 | :kenya: |
🇰🇬 | :kyrgyzstan: |
top |
| top | 🇰🇭 | :cambodia: |
🇰🇮 | :kiribati: |
top |
| top | 🇰🇲 | :comoros: |
🇰🇳 | :st_kitts_nevis: |
top |
| top | 🇰🇵 | :north_korea: |
🇰🇷 | :kr: |
top |
| top | 🇰🇼 | :kuwait: |
🇰🇾 | :cayman_islands: |
top |
| top | 🇰🇿 | :kazakhstan: |
🇱🇦 | :laos: |
top |
| top | 🇱🇧 | :lebanon: |
🇱🇨 | :st_lucia: |
top |
| top | 🇱🇮 | :liechtenstein: |
🇱🇰 | :sri_lanka: |
top |
| top | 🇱🇷 | :liberia: |
🇱🇸 | :lesotho: |
top |
| top | 🇱🇹 | :lithuania: |
🇱🇺 | :luxembourg: |
top |
| top | 🇱🇻 | :latvia: |
🇱🇾 | :libya: |
top |
| top | 🇲🇦 | :morocco: |
🇲🇨 | :monaco: |
top |
| top | 🇲🇩 | :moldova: |
🇲🇪 | :montenegro: |
top |
| top | 🇲🇫 | :st_martin: |
🇲🇬 | :madagascar: |
top |
| top | 🇲🇭 | :marshall_islands: |
🇲🇰 | :macedonia: |
top |
| top | 🇲🇱 | :mali: |
🇲🇲 | :myanmar: |
top |
| top | 🇲🇳 | :mongolia: |
🇲🇴 | :macau: |
top |
| top | 🇲🇵 | :northern_mariana_islands: |
🇲🇶 | :martinique: |
top |
| top | 🇲🇷 | :mauritania: |
🇲🇸 | :montserrat: |
top |
| top | 🇲🇹 | :malta: |
🇲🇺 | :mauritius: |
top |
| top | 🇲🇻 | :maldives: |
🇲🇼 | :malawi: |
top |
| top | 🇲🇽 | :mexico: |
🇲🇾 | :malaysia: |
top |
| top | 🇲🇿 | :mozambique: |
🇳🇦 | :namibia: |
top |
| top | 🇳🇨 | :new_caledonia: |
🇳🇪 | :niger: |
top |
| top | 🇳🇫 | :norfolk_island: |
🇳🇬 | :nigeria: |
top |
| top | 🇳🇮 | :nicaragua: |
🇳🇱 | :netherlands: |
top |
| top | 🇳🇴 | :norway: |
🇳🇵 | :nepal: |
top |
| top | 🇳🇷 | :nauru: |
🇳🇺 | :niue: |
top |
| top | 🇳🇿 | :new_zealand: |
🇴🇲 | :oman: |
top |
| top | 🇵🇦 | :panama: |
🇵🇪 | :peru: |
top |
| top | 🇵🇫 | :french_polynesia: |
🇵🇬 | :papua_new_guinea: |
top |
| top | 🇵🇭 | :philippines: |
🇵🇰 | :pakistan: |
top |
| top | 🇵🇱 | :poland: |
🇵🇲 | :st_pierre_miquelon: |
top |
| top | 🇵🇳 | :pitcairn_islands: |
🇵🇷 | :puerto_rico: |
top |
| top | 🇵🇸 | :palestinian_territories: |
🇵🇹 | :portugal: |
top |
| top | 🇵🇼 | :palau: |
🇵🇾 | :paraguay: |
top |
| top | 🇶🇦 | :qatar: |
🇷🇪 | :reunion: |
top |
| top | 🇷🇴 | :romania: |
🇷🇸 | :serbia: |
top |
| top | 🇷🇺 | :ru: |
🇷🇼 | :rwanda: |
top |
| top | 🇸🇦 | :saudi_arabia: |
🇸🇧 | :solomon_islands: |
top |
| top | 🇸🇨 | :seychelles: |
🇸🇩 | :sudan: |
top |
| top | 🇸🇪 | :sweden: |
🇸🇬 | :singapore: |
top |
| top | 🇸🇭 | :st_helena: |
🇸🇮 | :slovenia: |
top |
| top | 🇸🇯 | :svalbard_jan_mayen: |
🇸🇰 | :slovakia: |
top |
| top | 🇸🇱 | :sierra_leone: |
🇸🇲 | :san_marino: |
top |
| top | 🇸🇳 | :senegal: |
🇸🇴 | :somalia: |
top |
| top | 🇸🇷 | :suriname: |
🇸🇸 | :south_sudan: |
top |
| top | 🇸🇹 | :sao_tome_principe: |
🇸🇻 | :el_salvador: |
top |
| top | 🇸🇽 | :sint_maarten: |
🇸🇾 | :syria: |
top |
| top | 🇸🇿 | :swaziland: |
🇹🇦 | :tristan_da_cunha: |
top |
| top | 🇹🇨 | :turks_caicos_islands: |
🇹🇩 | :chad: |
top |
| top | 🇹🇫 | :french_southern_territories: |
🇹🇬 | :togo: |
top |
| top | 🇹🇭 | :thailand: |
🇹🇯 | :tajikistan: |
top |
| top | 🇹🇰 | :tokelau: |
🇹🇱 | :timor_leste: |
top |
| top | 🇹🇲 | :turkmenistan: |
🇹🇳 | :tunisia: |
top |
| top | 🇹🇴 | :tonga: |
🇹🇷 | :tr: |
top |
| top | 🇹🇹 | :trinidad_tobago: |
🇹🇻 | :tuvalu: |
top |
| top | 🇹🇼 | :taiwan: |
🇹🇿 | :tanzania: |
top |
| top | 🇺🇦 | :ukraine: |
🇺🇬 | :uganda: |
top |
| top | 🇺🇲 | :us_outlying_islands: |
🇺🇳 | :united_nations: |
top |
| top | 🇺🇸 | :us: |
🇺🇾 | :uruguay: |
top |
| top | 🇺🇿 | :uzbekistan: |
🇻🇦 | :vatican_city: |
top |
| top | 🇻🇨 | :st_vincent_grenadines: |
🇻🇪 | :venezuela: |
top |
| top | 🇻🇬 | :british_virgin_islands: |
🇻🇮 | :us_virgin_islands: |
top |
| top | 🇻🇳 | :vietnam: |
🇻🇺 | :vanuatu: |
top |
| top | 🇼🇫 | :wallis_futuna: |
🇼🇸 | :samoa: |
top |
| top | 🇽🇰 | :kosovo: |
🇾🇪 | :yemen: |
top |
| top | 🇾🇹 | :mayotte: |
🇿🇦 | :south_africa: |
top |
| top | 🇿🇲 | :zambia: |
🇿🇼 | :zimbabwe: |
top |
Subdivision Flag
| ico | shortcode | ico | shortcode | ||
|---|---|---|---|---|---|
| top | 🏴 | :england: |
🏴 | :scotland: |
top |
| top | 🏴 | :wales: |
top |
GitHub Custom Emoji
| ico | shortcode | ico | shortcode | ||
|---|---|---|---|---|---|
| top | |||||
:atom: |
|||||
:basecamp: |
top | ||||
| top | |||||
:basecampy: |
|||||
:bowtie: |
top | ||||
| top | |||||
:electron: |
|||||
:feelsgood: |
top | ||||
| top | |||||
:finnadie: |
|||||
:goberserk: |
top | ||||
| top | |||||
:godmode: |
|||||
:hurtrealbad: |
top | ||||
| top | |||||
:neckbeard: |
|||||
:octocat: |
top | ||||
| top | |||||
:rage1: |
|||||
:rage2: |
top | ||||
| top | |||||
:rage3: |
|||||
:rage4: |
top | ||||
| top | |||||
:shipit: |
|||||
:suspect: |
top | ||||
| top | |||||
:trollface: |
top |
Go
You can’t perform that action at this time.
You signed in with another tab or window. Reload to refresh your session. You signed out in another tab or window. Reload to refresh your session.
▲
x▼
https://github.com/ikatyang/emoji-cheat-sheet/blob/master/README.md
Svi Cloud 8P Installation Guide Yogurt TV, Yogurt Kids, Yogurt Malaysia & 合家欢
Step to install SVI official APK
After get the box " SVI 8P" just connect HDMI to TV ➡️ 📺 , Connect to WIFI or Lan cable 📶
Follow the Picture to installation SVI Live & Movies, Adult Apk
- Click Orz and typing the following url to install.
- If you cannot find Orz, just press 6868 at remote control and install it.
Yogurt TV, Yogurt Kids, Yogurt Malaysia & 合家欢
keyin 6868c.cc and install above mention apk.
Adult APK (18+) Cherry TV🧑
keyin 8989c.cc and install Cherry TV, password if need 898989.


How to Update Git Clone
In Git, developers clone the remote repository in their local system to work on the same codebase simultaneously. Every developer makes modifications to the locally cloned repository and then pushes those changes to the GitHub repository for others to see. However, it is necessary to update the Git clone regularly to ensure that everyone is working on the latest version of the project.
This blog will illustrate the method of updating the Git clone.
How to Update Git Clone?
To update the Git clone, try out the below-mentioned steps:
- Navigate to the particular local repository and list its content.
- Switch to the cloned repository and view its content and commit history.
- Update cloned repository using the “git pull” command.
- Ensure changes.
Step 1: Redirect to Local repository
First, switch to the desired local repository:
Step 2: View Repository Content
Then, enter the below-listed command and list the current repository’s content:
It can be seen that the current repository contains two files and one cloned repository:
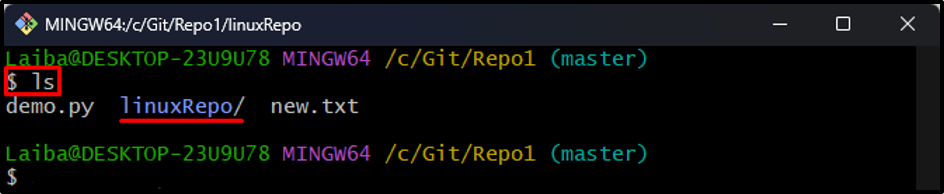
Step 3: Navigate to Cloned Repository
Switch to the cloned Git repository using the below-provided command:
Step 4: View Cloned Repository Content
Now, display the content of the cloned repository:
In the below output, the content of the cloned repository can be seen:
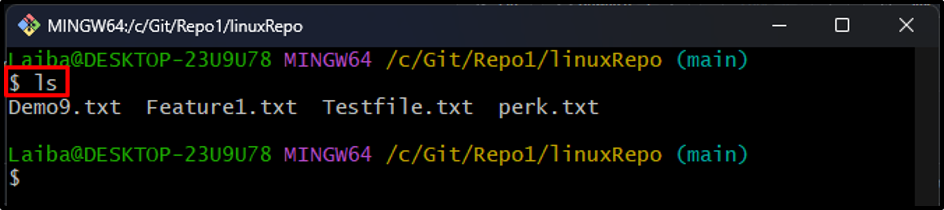
Step 5: View Commit History
Next, run the given-provided command to view cloned repository’s Git log:
It can be observed that the HEAD is pointing to the “851eee2” commit id:
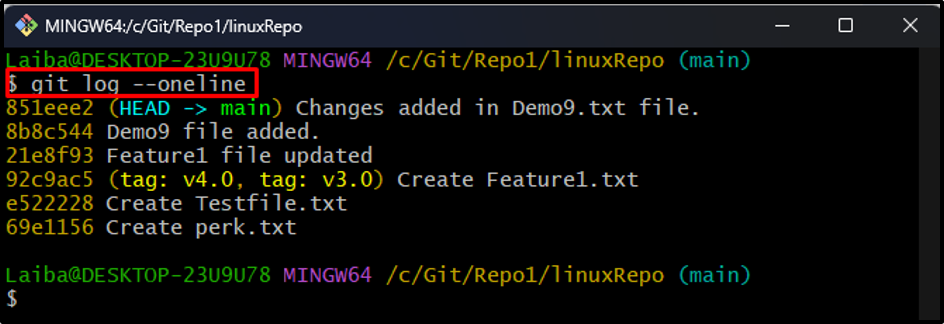
Step 6: Update Cloned Repository
To update the cloned local repository, fetch and merge the changes of the remote repository, execute the below-listed command:
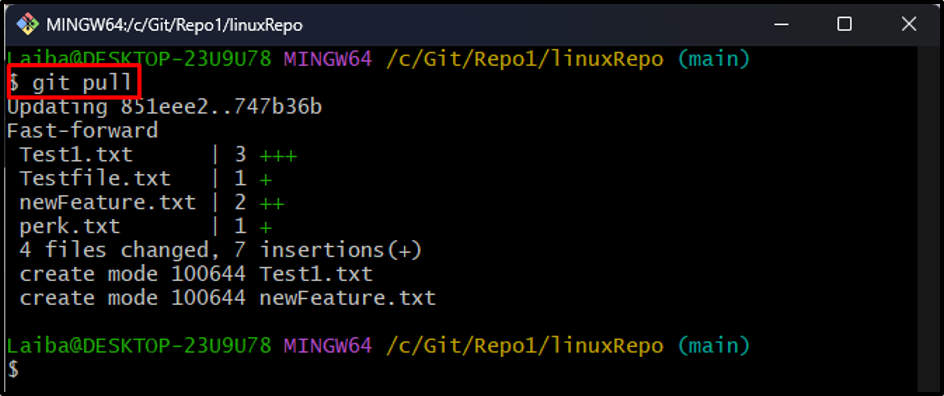
Step 7: Verify Changes
After that, view the Git log to verify whether the changes have been added to the locally cloned repository or not:
As you can see, the HEAD is now pointing to the most recent commit of the remote repository and changes have been added to the cloned repository:
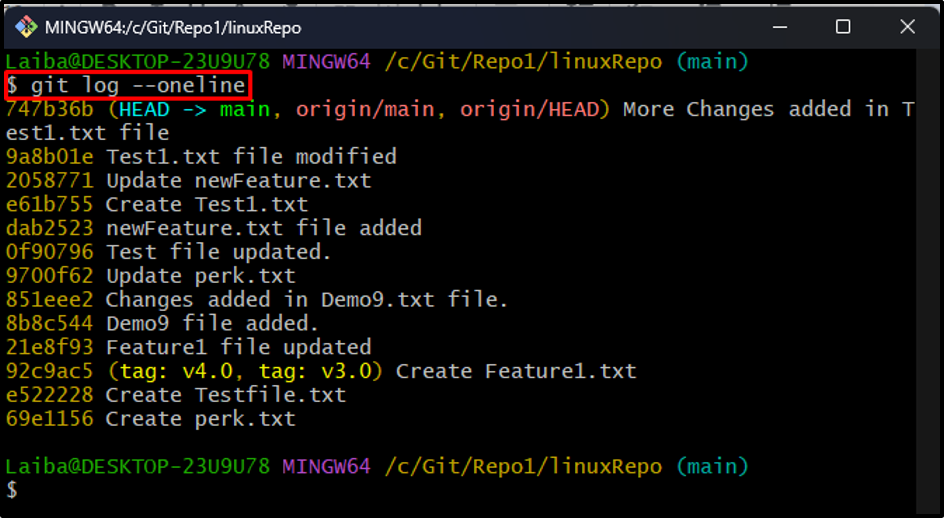
Step 8: View Updated Content
Lastly, list the content of cloned repository to view changes:
It can be observed the content of the cloned repository has been updated successfully:
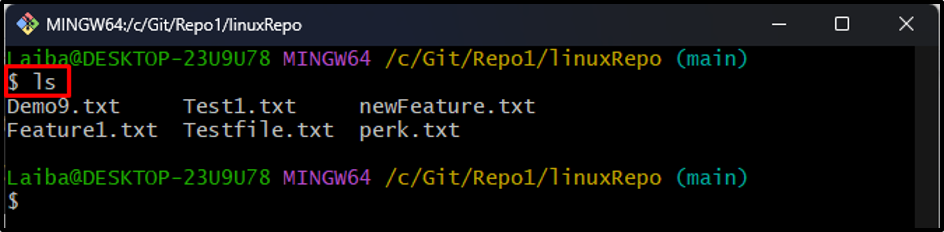
That was all about updating the Git clone.
Conclusion
To update the Git clone, first, navigate to the locally cloned repository. Then, view its content and commit history. Next, execute the “git pull” command to fetch and combine the content of the remote repository and update the cloned repository. Lastly, ensure changes by checking Git log. This blog illustrated the method of updating the Git clone.
Mount a network shared drive on Linux
Overview
In this post we will go through the process on how to mount a network shared drive on Linux.The procedure is executed on Debian and Ubuntu distros using the cifs-utils and for CentOS as well. With this method, not only you can mount a network shared drive, you can also use this method to mount other network shared locations(network shared folders or other network shares). I have a network shared storage server, the server has HDDs in RAID configuration and the storage drives are shared over the network, I am going to use this setup as an example. Also in this post, we will cover the steps how to mount the network drives permanently and to mount automatically on boot.
UPDATE: published posts that demonstrates another process – how to setup a network share using NFS for Debian and Ubuntu, Rocky Linux 8 and Alma Linux – Alma Linx Rocky Linux 8, Ubuntu 20.04, Debian 10/11
There are couple of things we need to setup in order to make this configuration. We need to install an app called cifs-utils and we need to create a mount point. Also, for this to work – your network shared drive needs to be on a server with a static IP address.
Bellow you can find a video tutorial as well:
Mount a network shared drive on Linux
Creating a mount point

First we need to create our mount point for our network share and for that we need to use the terminal. We will create the mount point in the /mnt folder. Start the terminal and use the following command:
sudo mkdir /mnt
sudo mkdir /mnt/share
Installing cifs-utils
Next what we need to do is to install the cifs-utils utility. This software will helps to mount and manage our network shares. Another reason we’re going to use this software is because this software supports other non-Linux partition extensions, such as partitions which Windows use.
To install the software, use the command:
For apt package manager(Debian and Ubuntu based distros):
sudo apt install cifs-utils
For RPM package manager(CentOS/Fedora):
yum install cifs-utils
Mounting the network share
Now we can mount the network shared drive. First, please note, the commands bellow are an example and the parameters which are used are for my network setup. They will not be same as how is your network configured. You need to apply parameters according to your network settings.
First we use the command if credentials are set to the network share(meaning, the username and password is required to access the network share):
sudo mount.cifs //10.0.1.4/share /mnt/share/nmshare/ -o user=share,pass=share
Command description:
- sudo mount.cifs – To mount the network share using cifs software and with root privileges.
- //10.0.1.4/share – IP address and the name of the shared folder(this you need to change and to match your network settings)
- /mnt/share/nmshare/ – The mount point we created earlier where our network share will be placed.
- -o user=share,pass=share – Adding option to access the network share with credentials(adding username and password). Also, you can add option like this : -o username=share,password=share
If for your network share does not have credentials to access it, then you use the command to publicly mount the network share:
sudo mount.cifs //10.0.1.4/share /mnt/share/nmshare/
Mount permanently and automatically on boot
This method is optional and you do it if you want to.
!!!PLEASE PAY ATTENTION ON THIS STEP!!!
If you don’t do it properly, you could lock up your machine on the next restart. Fstab file is the boot process configuration file which has your HDD’s in it as well. So, if the file is not configured properly, you could prevent the machine from booting.
In order to make this configuration we need to access and edit the fstab config file. I kindly advise to backup the fstab config file first before making any changes to it. For this, we need to use the nano text editor and access the fstab file.

Use the command:
sudo -s nano /etc/fstab

You need to get a window like this. AT THE BOTTOM OF THE FILE add the following line(again the parameters needs to match your network settings):
//10.0.1.4/share /mnt/share/nmshare cifs username=share,password=share 0 0
This is an example if you have credentials set to access your network share. To mount the network share which does not have credentials, use this command:
//10.0.1.4/share /mnt/share/nmshare cifs guest,uid=1000 0 0
Once you finish with editing the file, save and exit.
Summary
This was the process how to mount a network shared drive on Linux using cifs-utils. Here we covered the process mounting the network shared drive for Debian / Ubuntu based distros and for CentOs as well. If this does not work out for you or you prefer the some other methods, there’s another way as well using the NFS tool which we mentioned at the beginning of the article we covered the procedure for that tool too.
Thank you very much for your time.
Item to backup before formating computer.
- photo
- software portable / software
- userscript
- plex data
- books
- Install apps
- rclone config files
- kodi addon / kodi
OpenWrt创建新用户&新用户ssh配置 - 代码先锋网
需求:
OpenWrt 开机默认为 root 用户,十分不安全,因此需要建立一个无特权用户作为日常使用用户。
实现步骤:
1. 安装依赖的软件包
- shadow-common
- shadow-useradd
2. 创建新用户
-
创建用户:
# useradd hess -
设置密码:
# passwd hess -
创建主目录:
# mkdir /home/hess -p -
修改权限:
# chown hess:hess /home/hess -
修改新用户参数:
# vi /etc/passwd
将如下语句 ```
hess:x:1000:1000::/home/hess:修改为``` hess:x:1000:1000:hess:/home/hess:/bin/ash
注意:
若没有创建主目录和修改新用户参数(即 / ete/passwd),无法通过新增用户进行 ssh 远程登录。
3. 安装 sudo 工具 (可选,主要用于在新用户下临时使用 root 权限)
-
添加 sudo 文件的写权限,命令是:```
chmod u+w /etc/sudoers
-
编辑 sudoers 文件 ```
vi /etc/sudoers
找到这行 `root ALL=(ALL) ALL`,在他下面添加下面四行中任意一条:``` xxx ALL=(ALL) ALL #允许用户xxx执行sudo命令(需要输入密码). %xxx ALL=(ALL) ALL #允许用户组xxx里面的用户执行sudo命令(需要输入密码). xxx ALL=(ALL) NOPASSWD: ALL #允许用户xxx执行sudo命令,并且在执行的时候不输入密码. %xxx ALL=(ALL) NOPASSWD: ALL #允许用户组xxx里面的用户执行sudo命令,并且在执行的时候不输入密码. -
撤销 sudoers 文件写权限,命令:```
chmod u-w /etc/sudoers
4. 安装 shadow-su 工具,用于命令行切换用户
5. 附加
如需创建用户组、添加用户至用户组以及删除用户,则需要另外安装软件
- shadow-groupadd
- shadow-usermod
- shadow-userdel
https://www.codeleading.com/article/60272232328/
Ubox 8 Review & Spec

Overview
Overall upgrade of hardware
Ubox8 PRO MAX has 4G RAM and 64G ROM, The memory are doubled and the wireless is upgraded dual band from single band. The special box bring you a bigger storage space and a better experience of watching. The android system with real 6K HD Hardware Decoding make everything be possible.
Super-large storage
The storage of Unblock UBOX8 PRO MAX up to 64GB, It’s much bigger than 16G or 32GB of other boxes on the market, it can install more APP, it support External equipment to expand storage either.
Super-fast storage
The RAM is upgraded to 4GB,it can open more APP in the same time, it behaves faster, it’s more fluent when you running game.
Dual band wireless
UBOX8 PRO MAX supports transmitting Dual band wireless, Enhancing signal, breaking complex living environment, it’s easy for ubox8 to process high Flow.
Immersion in watching TV
UBOX8 pro max has powerful decoding ability, it just like a video Processor running in a High-speed. It can process 60 frame 4K HD video in a second. The image of TV is more fluent and detailed and the sounds of TV is more smooth and lively when you watching TV.UBOX8 bring you a immersive experience of watching.
Faster with dual band wireless
UBOX8 PRO MAX I9 support transmitting dual band wireless, it enhances the experience of surfing the internet, it maximize the bandwidth; The 2.4G bandwidth is applying to Multi-obstacle and long-distance wireless transmission, It’s the main bandwidth in the wireless transmission; The 5G bandwidth has fewer interference and collecting with 802.11ac,it’s more fluent and faster when you surfing the internet. Make sharing faster and longer.
You could see a clearer world
The 4K HD box make you see a clearer world; It’s more detailing and colorful,UBOX8 rebuild the real world, dark gets darker, light gets lighter, the television pictures is more lively and detailing, the hierarchy of image is more distinct, the television pictures is more fluent, bring you an immersive enjoyment.
No regional restrictions , Seven days to look back
Traditional TV can only see a country’s live broadcasting, but UBOX can see live broadcasts from many countries, global CDN accelerated without limiting , Rich content can absolutely satisfy your needs .The video is encoded by H.265 & H.264 4K , The speed of download is faster and the picture is clearer. It also can look back the video you missed. It’s different from traditional TV that the function of looking back make you watch TV without catching the time. Wherever and whenever, seven days to look back make you never miss any wonderful program.
Faster / Smart / Safer
With the new generation of Android 10.0, the performance of UBOX has been greatly improved. Background running no longer occupies memory, we can enjoy the speed of fluent running . Free installation of software to achieve more functions, fitness, preschool education, food, health and so on which satisfy your family’s interest.
Strong as always
No matter hardware or software, UBOX8 is powerful as always, 4 core CPU , 8 core GPU , 4GB RAM , 64GB ROM , it can run most of APP fluently . Every function performs well , we also can enjoy the video and game on the bigger screen.

Specifications
Taken from UnblockTech’s website … http://www.unblocktech.com/en/ubox8/
|
Hardware specifications
|
| Operating system | Android 10.0 |
| Language | Chinese, English, multi-language support |
| Chip | H616 Quad core ARM Cortex-A53 |
| GPU | Mali-G31 |
| SDRAM | DDR3 4GB |
| NAND flash memory | 64GB eMMC |
| Storage expansion | Support MicroSD (TF), maximum support 32GB |
| Bluetooth | Bluetooth 5.0 |
| Power supply | DC 5V/1.5A |
|
Interface
|
| HDMI output | 1 × HDMI2.0 |
| USB port | 2 × USB 2.0 |
| Audio input | 1 × 3.5mm headphone jack |
| The internet | 1 × RJ45 LAN port |
| Power supply | 1 × DC Jack |
| Card reader | 1 × MicroSD(TF) Slot |
| antenna | Built-in Wi-Fi antenna |
|
Internet connection
|
| Wi-Fi | Support 802.11 b/g/n/ac wireless protocol 2.4G+5G |
| Wired network | 10M/100M BaseT |
| Supported Media Types |
| Audio format: |
- MP1
- MP2
- MP3
- WMA
- WAV
- OGG
- OGA
- APE
- FLAC
- M4A
- 3GPP
Support mp1, mp2, mp3, wma, wav, ogg, oga, ape, flac, m4a, 3gpp…etc audio format. Multiple synchronized EQ modes, support full page display of lyrics and lyrics.
|
| Audio output | HDMI |
| Video decoder |
- TP
- TRP
- TS
- VOB
- WMV
- M2P
- M2T
- M2TS
- MJPG
- MKV
- MOV
- MP4
- MPEG
- MPG
- MTS
- M2P
- FLV
- H.264-4K
Support TP, TRP, TS, VOB, WMV, M2P, M2T, M2TS, MJPG, MKV, MOV, MP4, MPEG, MPG, MTS, M2P, FLV, H.264-4K…etc
|
| Video encoder |
- IVX3
- DIVX4
- DIVX5
- H.264
- H.265
- MPEG-1
- MPEG2
- MPEG-4
- WMV
- Xvid
- VC-1
Support IVX3, DIVX4, DIVX5, H.264, H.265, MPEG-1, MPEG-2, MPEG-4, WMV, Xvid, VC-1…etc
|
| Resolution | Full 2160P@30fps |
| Image browsing |
- JPG
- JPEG
- BMP
- GIF
- PNG
Support JPG, JPEG, BMP, GIF, PNG… and other image formats.
|
| Text reading |
- TXT
- LRC
- Html
- Htm
Support TXT, LRC, PDF, Html, Htm… and other formats (depending on APK installation)
|
| Software extension | Support Google Play APK installation |
| DLNA protocol | Support DLNA protocol |
| Remote control | Support infrared remote control |
|
Package
|
| Machine size | 110mm*110mm*18.5mm |
| Net Weight | TBD |
| Packing box size | TBD |
|
Attachment list
|
| Standard packaging | 1×HDMI, 1×Manual, 1×Adapter(DC 5V/1.5A), 1×Infrared remote control |
Package comes with:
- 1x Unblock TV box
- 1x BT AI remote controller
- 1x Manual
- 1x HDMI
- 1x Power Adaptor (Default US/UK Socket)
Photo Gallery
The UBOX 8 Pro
The unit is compact and small, weighing in at around 1 pound and measures 110mm on all sides. The UBOX series of TV boxes are currently only available in white.
For connectivity, there are 2 x USB ports, 1 x SD Card slot, 1 x 100MB LAN, HDMI output and a AV jack. Other accessories include, a HDMI cable and the remote control.
Connected and Powered Up
The UBOX 8 Pro MAX is extremely easy to setup. Plug in the power cable, LAN cable and connect the HDMI cable to the TV and that’s it … you’re ready to go! I love the blue LED lighting strip that run along bottom othe unit itself … looks pretty cool.
Menu System
The first thing to do is to select the default language to English. Next of course, is to connect the UBOX 8 Pro to the internet via Wifi or LAN. There are other settings which you may need to change/adjust such as the display settings for TV screen calibration, network and internet settings, as well as BT and device preferences.
The UBOX 8 Pro MAX is Android based so you’re able to install as many Apps as you wish … for example, Netflix, YouTube, and Android-based games and various media players. There are also other KODI based players and popular media players from Asia. System settings, wall paper, and other options can be accessed from the main menu.
To access all the movies, TV series, documentaries, sports and cartoons … just select “UBVOD” which stands for UnBlock Video On Demand. Here, you’ll be able to select ‘UBLIVE‘ for live TV channels or select ‘Film‘ for all the latest movies. The ‘Secret cinema‘ (adult channel) can be accessed via a 4 digit pin…….
TV Channels
Just select UBLIVE and you’ll find that there are a ton of TV channels available from UK, US, Canada, South East Asia, including TV channels from Hong Kong, Taiwan, most of China, Japan, Singapore and many more. We also have tons of programs and movies …

Select UBLIVE

UBLIVE on UBVOD

Live Sports

Movie Channels

US Live TV

Canada Live TV

UK Live TV

Malaysia Live TV

HK/Macau Live TV
- TV channels – 1800+
- Sports – 39+ Channels
- Documentaries – 45+ Channels
- Cartoons – 39+ Channels
OMG! Look at all the content available. Over 11,595+ movies available to watch!

Select Film on UBVOD App

Playback settings

All the latest US movies (2021)

HK/Macau moviews

All movies catalogue

All the latest Documentaries
Verdict and Conclusion
The new UBOX 8 Pro MAX TV box (2021) is probably one of the best purchases I’ve made so far to date. The international version offers a ton of foreign TV channels which I needed, such as all the terrestrial TV channels from UK, US and most Asian countries like Hong Kong, Taiwan, Japan and Macau.
I’ve used many TV boxes in the past and most of them have been slow and sluggish (in response)…. not so with the UBOX 8 Pro MAX. This is all thanks to its super-fast H616 Quad core ARM Cortex-A53 CPU, plus a dedicated Mali-G31 6-core GPU, along with a sizeable 4GB DDR3 ram and 64GB flash ram.
With access to over 11,565+ movies and over 1,800+ Live TV channels, you will never have to leave the house again (no I’m only joking LOL!) I also like the fact, you can play Netflix and YouTube right off the bat.
NOTICE: Installing 3rd party apps and add-ons may infringe on copyright in the country you are located. We do not condone any piracy or illegal copyright infringement.
You can buy the Unblocktech – UBOX 8 Pro Max TV Box
at shopee malaysia for only starting from RM600
Hugo with Git Hub Pages on Windows - jsj's blog
I created this blog using Hugo and Git Hub Pages on windows.Hugo is a static site generator.Its very fast and written in Go language.Git Hub Pages lets you host the static sites created using Hugo.
Installing Hugo
First install Hugo on windows.I used the chocolatey package manager to install Hugo on windows.There are two versions available to install.I installed the extended version as it is required if you plan to customize the themes you will be using.
| ```
1
 | ```
choco install hugo-extended -confirm
|
After install check Hugo version to confirm if installed successfully
Git Repositories and folder structure
Now that we have installed Hugo let create our blog.Lets discuss the Git repositories and folder structure I will create two Git repositories.
- Development repository - This will contain all the Hugo files and the posts I create in markdown.
- Git Hub Pages repository - This will contain the output of Hugo which will the static sites for my blog.
Since I have two git repositories,I will have two folders for the same.First I will create a folder blog where the two folders will be.Inside blog folder using Hugo create a new site jsjblog.The jsjblog folder will be linked to the git development repository.Then the output of Hugo which will be static sites will be stored in jsjblog_site folder which I created in later steps.
| ```
1 2
 | ```
mkdir blog
hugo new site jsjblog
|
If you go inside the jsjblog folder you will find all the Hugo setup files.
| ```
1 2 3 4 5 6 7 8
 | ```
d-----         archetypes
d-----         content
d-----         data
d-----         layouts
d-----         resources
d-----         static
d-----         themes
-a----         config.toml
|
Hugo theme and config.toml file
The themes folder contains all the website design details.There are many custom Hugo themes available.I have decided to use the Even theme for my blog.I will download the theme from git instead of git clone as I don’t want any other git links in my development git repository.So after downloading and unzipping the theme,I have pasted the contents inside theme/even folder.Also as mentioned in Even theme page I copied the config.toml file from examples to the jsjblog folder and replaced the existing file.Now lets check our website using the below command
You can see the site by going to http://localhost:1313/ as mentioned in the terminal message.Since its a example website title,name etc needs to be changed.These all can be changed in the config.toml file under jsjblog.So after editing the config.toml file once you run the hugo server again you see the updated website with your details.
We can also edit the themes as required.Now as mentioned in Even theme page we can do many customizations to our website. I did a simple colour change inside themes/even/assests/sass/_variable.scss. Saved the change and now you see the colour change in the website
Create new blog post
Since there are no posts in the blog,lets add a new blog post.As mentioned in the Even theme page.We can create a new post using the below command
| ```
1
 | ```
hugo new post/initial_post.md
|
Note that post or posts in command will vary based on the theme you are using
Open initial_post from jsjblog\content\post and start writing the post.At the starting of the post there will me some meta data which Hugo populated automatically.Hugo needs this meta data for creating the static sites.Draft in the meta data should made to false once we have completed the post and are ready to publish.If its true, Hugo will not show the post in the website. You can add other meta data like tags,category,author ,etc.These all will depend upon the type of theme you use.So now after creating out first post lets run hugo server again. We can see out post on the site.
Git Repositories and going online
Now our development of the site with our first post is completed.Lets create the git repository for blog development.I created a jsjblog git repository without a README file.Then I linked the jsjblog folder to this git repository using the below commands
| ```
1 2 3 4 5 6 7
 | ```
echo "# jsjblog" >> README.md
git init
git add README.md
git commit -m "first commit"
git branch -M main
git remote add origin https://github.com/jithusjacob/jsjblog.git
git push -u origin main
Atention
use git status to check ,
git add --all
git commit -m "changelog"
git push
Above instead of adding only README.md I actually added all the files in jsjblog folder by using the below command
So our development setup is saved in Git Hub.So as on when new post is created.You can move the same to this Git Hub repository.
Now will create the Git repository for Git Hub Pages.While creating this repository we need to ensure the repository name has the format username.github.io where username is your Git username.Here also I created the repository without README file.Next we will create the Hugo output folder which will have the static sites and will be linked to this this repository. We can use hugo command to build the output files and it will be created inside jsjblog folder under a new folder called public .But Since I want to separate the jsjblog folder and output folder so that its easier to maintain different Git repositories will use -d flag to give the destination of the output files. blog folders
| ```
1
 | ```
hugo -d ../jsjblog_site
|
I gave the output folder as jsjblog_site inside blog folder.So now blog folder will have two folders corresponding to the two Git Hub repositories.
| ```
1 2
 | ```
d-----         jsjblog
d-----         jsjblog_site
|
Lets link the jsjblog_site folder with Git Hub Pages repository.So that we can finally see our blog online.
| ```
1 2 3 4 5 6
 | ```
echo "# jithusjacob.github.io" >> README.md
git init
git add README.md
git commit -m "first commit"
git branch -M main
git remote add origin https://github.com/jithusjacob/jithusjacob.github.io.git
|
Atention
use git status to check ,
git add --all
git commit -m "changelog"
git push
This time I did not do git add . as I was getting some error. I followed the above steps.Linked the Git repository to the folder.Then I added remaining files and moved to the Git repository.
So Now my Hugo blog is ready to be accessed on https://jithusjacob.github.io/
You can also see the above steps in my youtube video
Author jsj
LastMod 2021-06-14
https://jithusjacob.github.io/post/hugo_githubpages_window/#create-new-blog-post
linux - How to change permissions for a folder and its subfolders/files in one step - Stack Overflow
Save From : linux - How to change permissions for a folder and its subfolders/files in one step - Stack Overflow
Content
This answer is not useful
Show activity on this post.
For anyone still struggling with permission issues, navigate up one directory level cd .. from the root directory of your project, add yourself (user) to the directory and give permission to edit everything inside (tested on macOS).
To do that you would run this command (preferred):
sudo chown -R username: foldername .*
Note: for currently unsaved changes, one might need to restart the code editor first to be able to save without being asked for a password.
Also, please remember you can press Tab to see the options while typing the username and folder to make it easier for yourself.
Or simply:
sudo chmod -R 755 foldername
but as mentioned above, you need to be careful with the second method.
Note
NPM (Nginx Proxy Manager) Reverse Proxy ARIA2's JSONRPC - King Zone
This articles is published 426 days ago and last updated 266 days ago, some information may be out of date.
npm-aria2.jpg

aria2 is a lightweight multi-protocol & multi-source command-line download utility. It supports HTTP/HTTPS, FTP, SFTP, BitTorrent and Metalink.
The SSL certificate used by the Aria2 server does not support port 6800, so NPM (Nginx Proxy Manager) needs to be used to provide both HTTP(s) and Aria2 JSONRPC services.
Edit NPM (Nginx Proxy Manager)[](#Edit NPM (Nginx Proxy Manager) "Paragraph Link")
Proxy Host >> Advanced
2023-01-26_153027.png
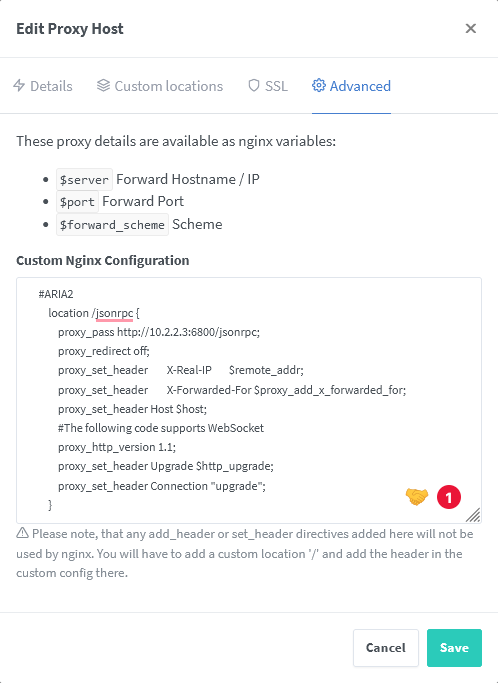
#ARIA2 location /jsonrpc { proxy_pass http://10.2.2.3:6800/jsonrpc; proxy_redirect off; proxy_set_header X-Real-IP $remote_addr; proxy_set_header X-Forwarded-For $proxy_add_x_forwarded_for; proxy_set_header Host $host; #The following code supports WebSocket proxy_http_version 1.1; proxy_set_header Upgrade $http_upgrade; proxy_set_header Connection "upgrade"; }
| Parameter | Description |
|---|---|
location /jsonrpc |
RPC address is //example.com/jsonrpc |
http://10.2.2.3:6800/jsonrpc |
The full path of the host (10.2.2.3 is host IP address) |
Final Result:[](#Final Result: "Paragraph Link")
2023-01-26_153126.png

2023-01-26_153139.png
You can now connect to ARIA2 RPC via "https" and "wss" (WebSocket Secure).
Reference:
How to Install Windows Subsystem for Android on Unsupported PC
In this guide, we will show you various methods to install the Windows Subsystem for Android on an unsupported PC. Out of all the features that were announced in the latest OS build, it was the ability to install and run Android apps on Windows 11 that managed to grab most of the limelight. However, while the Developer/Beta/Stable builds kept on relating, there was no update regarding this feature. But the wait time is now finally over and you could easily get hold of the desired Android apps onto your PC. Or is that really that easy?
Well, at least not for me and a few users out there. A slew of complaints has lined up across various forums that users are unable to download and install the Windows Subsystem for Android on their Windows 11 PC. If you are also in the same boat, then fret not, we won’t let it sink! In this guide, we will show you a nifty workaround through which you will be able to welcome this subsystem onto your PC without any issues. So without any further ado, let’s get started.
Requirements for Windows Subsystem for Android
For the unawares, the straightforward method involves just heading over to the Microsoft Store and installing the Windows Subsystem for Android from there. But if your PC isn’t qualifying any one of the app’s requirements, then you wouldn’t be able to install it from the Microsoft Store. In this regard, here are all the requirements that this app wants your PC to have. [As you could see from the below image, my PC didn’t have the SSD, hence I wasn’t able to install the app from the Store].

But then I realized that downloading apps from Microsoft Store isn’t the only way out! What if we get hold of the app’s Microsoft Servers download link, and download it from an alternate source? Upon testing, I found out that it was indeed possible and hence I was able to successfully install the Windows Subsystem for Android on my unsupported Windows 11 PC. And in this guide, we will show you how to do just that. Follow along for the instructions.
How to Install Windows Subsystem for Android on Unsupported PC

First off, you will have to checkmark some of the prerequisites of the list. We are listing the short and up to the point instructions for these requirements, if you wish to get in-depth steps for the same, then please refer to STEP 1 to STEP 5 of this guide.
Prerequisites
To begin with, you will need to be on the Windows 11 Beta Channel, with OS version 22000.xxx or higher. To check the current build number, open Run vis Windows+R shortcut keys, type in winver, and hit Enter. If you are on an older build, then head over to Settings > Windows Update and install the latest build right away.

Next up, make sure that Virtualization is enabled. For that, launch Task Manager via Ctrl+Shift+Esc shortcut keys and go to the Performance Tab. Then check the status of Virtualization. if enabled, well and good. Otherwise, boot to BIOS, go to the Advanced tab and enable the Virtualization Technology.

Moreover, as of now, this feature is only available to US users. So you would have to change your PC’s region to the US. To do so, head over to Settings > Time & language > Language & region > Select US from the drop-down menu.

Install Windows Subsystem for Android without Microsoft Store
-
To begin with, copy the Microsoft Store Link for Windows Subsystem for Android that we have provided below:
-
Now head over to the AdGuard Online link generator for the Microsoft Store and paste the link there.
-
Then click RP and select Slow from the drop-down menu. After that, click on the checkmark button next to it.
-
Now scroll to the end of the page and download the file which has the following name (it should be around 1.2GB in size):
MicrosoftCorporationII.WindowsSubsystemForAndroid_1.7.32815.0_neutral_~_8wekyb3d8bbwe.msixbundle
-
You might get a warning message on your browser, make sure to Allow/Keep it.
-
Once downloaded, go to the folder where you have downloaded this MSIX bundle file. Then right-click on it and select Copy as path.
-
Now head over to the Start Menu, launch PowerShell, and execute the below command. Make sure to replace the PATH keyword with the path that you had just copied
Add-AppxPackage -Path PATH
-
Make sure that the PATH remains within double inverted commas. For example, in my case, the above command transforms to:
Add-AppxPackage -Path "D:\MicrosoftCorporationII.WindowsSubsystemForAndroid_1.7.32815.0_neutral___8wekyb3d8bbwe.Msixbundle"
-
As soon as you execute the command, the Windows Subsystem for Android will start installing on your PC.
-
Once the installation is complete, you may open it from the Start Menu.
-
You will now get a notification prompt, click Continue.
-
The Windows Subsystem for Android shall now open on your PC.
-
You may now proceed ahead to install the Amazon App Store and then use it to install the Android app of your choice. Or you could also download and install apps from your preferred third-party sites as well. Refer to this guide to do so: How to Sideload Android Apps on Windows 11 [Without Amazon App Store]


So with this, we round off the guide on how you could install the Windows Subsystem for Android on an unsupported PC. If you have any queries concerning the aforementioned steps, do let us know in the comments. We will get back to you with a solution at the earliest.
- Drag and Drop for Taskbar in Windows 11: Officially Removed?!
- Where is the Never Combine Taskbar Buttons in Windows 11
- How to Disable the Windows 11 License Check, Officially!
- Windows 11 Screen Lags/Stutters/Freezes: How to Fix
About Chief Editor

Sadique Hassan
administrator
A technical geek by birth, he always has a keen interest in the Android platform right since the birth of the HTC Dream. The open-source environment always seems to intrigue him with the plethora of options available at his fingertips. “MBA by profession, blogger by choice!”
刀姐常说的“限制性信念”是个什么鬼? - 知乎
常听刀姐念叨的同学,一定对“限制性信念”这个词不陌生,尤其我团队的同学,估计耳朵已经起茧子了,感谢可爱的Rain多方搜集的资料和独家学习笔记,今天来讲讲 “限制性信念”到底是个什么鬼?
为了更形象的理解“限制性信念”,先给大家讲个耳熟能详的故事:
大象静静地站在园子里,只用一根细细的绳子拴着,这样一群庞然大物,既没有枷锁锁着也没有栅栏,想要想挣脱细绳是轻而易举的事。但是大象静静地站着,他们为什么没有这样做呢?
因为大象还很小的时候,管理员就用这根绳子把他们拴上了。现在他们虽然长大了,但已经确信那根绳子足以拴住他们,所以再没有想过要逃跑。
亲们,拴住大象的不是绳子,而是他们的“限制性信念”啊!
一、什么是限制性信念?
每个人不可能经历所有的事情,所以一个人的信念系统中的每个信念都是由某一个特定的情境产生的,这个信念可能只适用于某一个情境。但是生活是不断变化发展的,如果不能随之调整,就会给自己带来困扰。
直白点说,就是当时你是这么想的,或者是这么被教育的,现在情况变了,你也得敢于突破自己,甚至实现想法的反转,才能适应新的情况。如果没有及时转,那么这个信念就变成“限制性信念”了。
**“限制性信念”带来的直接影响就是负面的想法,**它是造成我们不幸福的头号原因。但大部分人已经认同了信念,变成了自己的惯性模式,只有很少的人意识到了这些信念的存在。
一个会使我们对更好的生活持不确定态度,让我们对自己可以拥有更好的明天产生怀疑的信念,就是限制性信念。通俗点说,就是每当你想做什么事,开始犹豫不定或者拖延,给自己找各种借口不去做的念头,就是限制性信念。
举个栗子,比如有一个小刀想减肥,她那么肥游泳圈都出来了肯定是应该减的,然后她会有一大堆的“现状和借口”冒出来:我工作太忙了!老板会不会认为我这么忙还有时间减肥是不饱和?!还得办健身卡!还得买衣服装备!哎呀太麻烦了,明天再减吧……
于是,这个正确的想法就被成功的“限制”了。要说咱天天没事干,能抽一堆时间忙活那些个“被制造出来的限制”也行,但是咱忙成狗啊,还扯那些那不啥梦想都泡汤了。
但是,对于一个没有“限制性信念”的小刀,一样是想减肥,那就减呗,两条而已:管住嘴、迈开腿:即刻取消外面的就餐、爬楼梯、每天做keep 20分钟。
其实细数下这些新增加的任务并没有多花多少时间,饭你总还是要吃的吧,爬楼和坐电梯时间差不多,可能还更快,一切都从走提速到跑,用来工作的时间还更长了。我曾经用这个方法进行的产后减肥,4个月差不多掉了40斤,同事们都说我变了个人,以为我花了多少时间多少钱,其实那全是他们的限制性信念,我压根没有时间,我也没有钱给减肥机构。
直到今天,当时相约一起减肥的妹子可能还是没迈腿……这就是有没有限制性信念的巨大区别。如果你经常遇到有的人说干个事要扯一大堆的“准备工作”,这就是“限制性信念”上身了,一句话就能治好:“要啥自行车儿,干就对了!~~~”
看完了生活里的例子,咱们再举个职场里例子:
一个被新提拔的业务负责人,以前不用做抛头露脸的事,干好上级安排的活儿就行了,现在要主动规划、主动汇报、主动推广产品;以前看见董事会成员大气儿不敢出,现在得自己去融资,包装好自己的梦想、战略和目标。
如果他还抱着以前的限制性信念,他会想:
- 凡事不要去主动挑大梁,啥时听指令按部就班就好。
- 哎呀,这些大老板不敢找啊,我磨不开面子,算了再等等看吧……
- 没人说让我去找,他们会不会很烦我啊,以后再说吧……
于是乎,磨叽磨叽天使轮的钱就花完了,导致业务被砍掉,业务负责人的头衔自然也就没了。
这就是情境变化了,但是人还抱着原来的信念,没有及时突破,结局自然是悲惨的。
二、最常见的限制性信念的三个领域
“限制性信念”通常都是围绕着无望、无助和无价值这三个议题。这三个信念的领域会对一个人的身心健康产生巨大的影响。
无望:一种认为“不管你的能力怎样,想要的目标是不可能达到的”的信念。
当一个人甚至不相信他想要的目标是可能的,他就会经验到无望。它的核心感觉是,“不管我做什么都不会有用的,我想要的是不可能得到的。这在我可以控制的范围之外。我是一个受害者。“
以前我团队有个姑娘,能力很强很聪明,但她就总是觉得自己的能力是被低估的,到哪都委屈,通常都干不过一年,在每家公司都是因为这个原因要离职。因为她的预期是在某个时间段应该被晋升,但如果没有,那么就一定是又被“冤枉”了,这个想法导致的行为就是:愤然离职!
但晋升的时机受很多因素的影响,业务的情况、团队其他人的情况等等,不可能随心所欲。稍微沟通或者忍耐一下,这都不是事,但如果抱有这种想法,本来职业周期可以更长,对长期发展更有利,但也只能通过离职来解决了。
无助:一种认为“尽管想要的目标是可以达成的,但是我没有能力去达成”的信念。
当一个人相信他想要的结果是存在的,也是有可能达成的,但是他不相信自己具有得到这个结果的能力时,他就会经验到无助。
比如业务团队有个leader,每次都被骂脑子不清楚、团队管理差,他明明稍微调整一下就会改善,但是自己弃疗了,他认为自己是搞法务的,管人不是他的工作也不是他的专业,所以搞不定人很正常,所以也完全不想花时间。这个信念一直没有扭转,结果呢?你懂的。
无价值感:一种认为“因为你做了某事或者你的身份,所以你不值得你想要的目标”的信念。
当一个人相信他想要的目标是可以实现的,并且他有能力去实现它,但是他不相信他值得去得到时,就会经验到无价值感。无价值的核心感觉是:“我是个冒牌货,我没有任何归属,我不值得幸福和健康,我作为一个人有些最基本和最重要的部分有问题,我应该遭受我现在所经验到的痛苦和困难。”
曾经有个小妹朋友,从小单亲家庭很不幸福,她想要尽快结束单身状态,但在择偶上就特别痛苦,因为她觉得每个家庭都是悲惨的,童年的经历使她总感觉自己“缺了一块”,对方会因此嫌弃自己,自己不值得被爱,所以男朋友是交一个分一个……
看了这么多“限制性信念”的悲伤案例,下面来看看解决方案吧!
三、消除限制性信念六步法
第一步,找出你的信念是什么?
第一步,先关照内心,在一张纸上把你认为是真实的信念写下来,特别是那些你认为对你的人生发展有阻碍的信念。
常见的信念包括:
- 我不重要
- 我不够好
- 我不够聪明
- 我太年轻了,没经验不要乱说话
- 我新来的,别人不把我当回事儿
- 我年纪太大了,不能再开始……
另外有一些是作者自己背负的,但现在已经放下的:
- 长相好的人都不牢靠
- 我不是一个好作者
- 我不值得一段美好的爱情关系
用头脑风暴和写下来的方法,你对这些信念有了知觉,并可以准备克服它们。
第二步,举出反例
从第一步写的信念里挑出一条,然后继续其余的步骤。找出具体的例子来推翻那条信念,可以是你经历的或者做过的,甚至其他人经历的也可以。
例如“我不是个好作者”这个信念是不对的,因为两年前我写了某某文章。
这一步能让你发现你的信念是有漏洞的,仔细地回忆过去的经历,找出反例。如果用了十分钟还不能找到反驳的例子,接下去第三步。
第三步,想想这些信念如何妨碍了你?
仔细想想这些信念怎样妨碍了你,或是让你没有采取行动争取自己想要的东西,或是对你的生活产生了负面影响,可能是一段关系,也可能是健康。“这些信念在过去如何伤害了我?”把它写下来。
改变发生在我们采取行动时,而痛苦能加剧我们想改变的愿望。当我们吃够了苦头,我们会希望采取行动作出改变。
现在闭上眼睛,再次想象那些信念带给你的痛苦。在你的头脑里看见、听见、感觉那一刻的情感,越真实越好。
第四步,找到信念产生的根源
挖掘记忆深处——童年、青少年时期、二十岁出头、或者是去年,是什么样的事件让你得出结论,产生的信念?把它们具体描述下来。例如对于信念——我不是一个好作者。Tina回想起来是她中学的英语老师告诉她,她的文章写得很差。可以闭上眼睛再现当时的场景,唤起当时的感觉。
第五步,给你信念的产生赋予新的解释
第4步中追溯的外在事件不一定会形成你的信念,而是你对所发生事件的诠释构成了你的信念。事情本身是无意义的,除非我们赋予它意义。现在再次头脑风暴对你认定的外部事件的解释。
Tina举了她自己的例子,老师告诉她文章写得很差,可能的解释还有:
- 老师可能心情不好
- 老师的写作风格和我不同
- 考试的时候我太紧张了所以没考好
- 我可能表现得不好,但这是个孤立事件
闭上眼睛,试着从新的角度来看待。看,你可以从不同角度来解释外部事件了。写下你原本的信念,再次检验你的感受。你的情绪反应是否减低或是消失了呢?
第六步,消除信念
第六步是一段自我暗示,需要配合催眠语音的提示。
首先闭上眼睛,想象在步骤四中发现的场景变得越来越暗淡越来越模糊,逐步逐步地远离自己。
然后睁开眼睛,写下一段与你原来限制性信念相反的陈述。例如我是一个好作者,我值得拥有好东西…
再次闭上眼睛,看到自己在刚刚创造的环境中。想象自己是个伟大的作家,正在伏案写作。看到得越具体越好。环绕四周看到了什么?听到了什么?触摸环境里的东西,感觉怎么样?感受从体内迸发的愉悦。你正在微笑。
继续想象直到你满意为止。
写在最后:
千万不要被自己的“限制性信念”吓倒。当你第一次发现自己的限制性信念时,这些信念就会接二连三的被发现,你会感叹自己的限制性信念是如此之多,但你仍然可以遵循以上的方法去一一消除他们,看到本来的你发出的光。
来说说自己都有哪些“限制性信念”吧!
让我们一起发现它、破除它,做发光的自己!
Glances系统资源监控程序
【Docker项目】之–Glances系统资源监控程序支持API调用
#手册 #教程 #工具 #Docker #Docker-compose #Linux #Ubuntu #系统 #安全防护
Glances是一个由python开发的跨平台系统资源监控程序,支持web查看、系统数据API调用等功能。
官网地址:https://nicolargo.github.io/glances
Github地址:https://github.com/nicolargo/glances
文档地址:https://glances.readthedocs.io/en/latest
Docker Hub:https://hub.docker.com/r/nicolargo/glances
1. 安装准备
系统:ubuntu 20.4
工具:docker和docker-compose
2. 搭建
Docer控制台运行效果。
`docker run --rm -v /var/run/docker.sock:/var/run/docker.sock:ro --pid host --network host -it nicolargo/glances:latest-full`

下面通过docker-compose搭建,实现web和API调用。
2.1. 创建数据存放位置
`mkdir -p /data/docker_data/glances   ## 创建文件夹

cd /data/docker_data/glances   ## 进入文件夹

vim docker-compose.yml   ## 创建docker-compose`
2.2. 编辑docker-compose.yml
`version: '3'

services:
  glances:
    image: nicolargo/glances:latest-full
    container_name: glances
    restart: always
    ports:
      - 61208-61209:61208-61209
    pid: host
    volumes:
      - /var/run/docker.sock:/var/run/docker.sock
    environment:
      - "GLANCES_OPT=-w"
    networks:
      - mynet

networks:                           # 连接外部网络,方便内部代理
  mynet:
    external: true`
2.3. 新建docker网络
已经创建的略过。
`# 创建一个公用的docker网络
docker network create mynet

# 查看docker网络情况
docker network ls

# 显示如下信息
NETWORK ID     NAME      DRIVER    SCOPE
0134ad30defd   bridge    bridge    local
29474e75ede0   host      host      local
33bc01a2e0d0   mynet     bridge    local    # 刚刚新建的网络`
2.4. 拉去镜像开始安装
`docker-compose up -d`
3. 使用及展示
打开浏览器访问:http://ip:61208
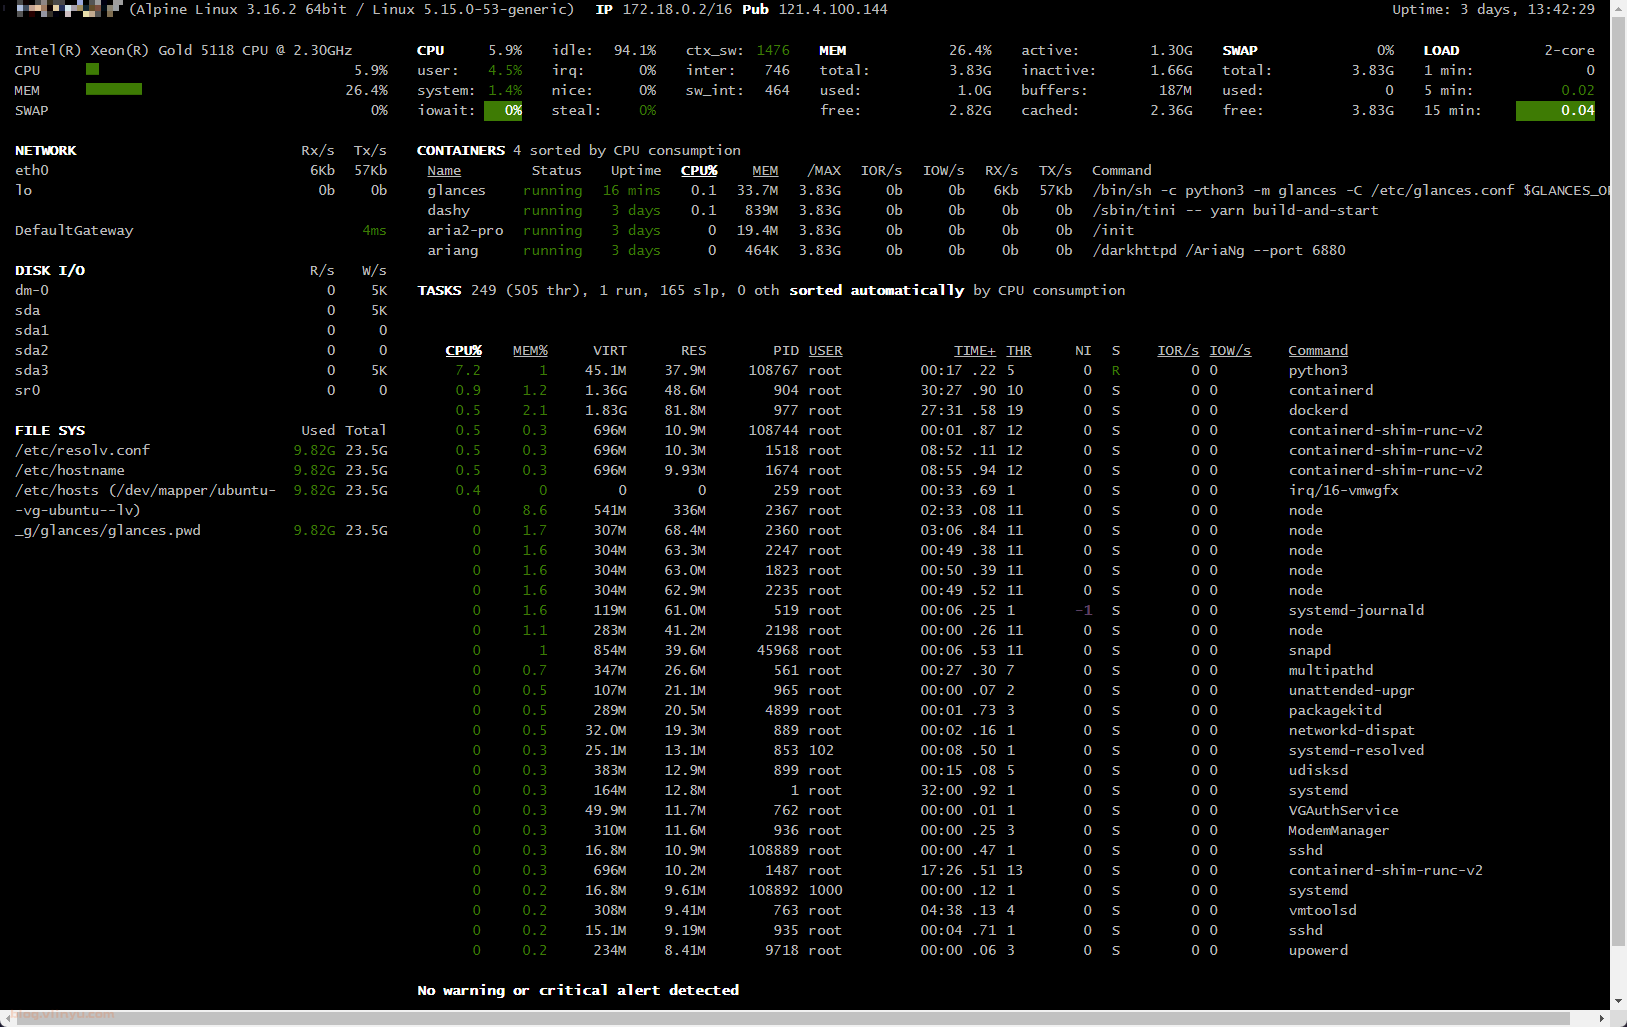
4. 设置用户密码访问
删除已创建的glances容器。
`root@ubuntu:/data/docker_data/glances# docker-compose down`
4.1. 创建密码存放位置
`## 创建密码文件存放位置
root@ubuntu:/data/docker_data/glances# mkdir -p /data/docker_data/glances/secrets
root@ubuntu:/data/docker_data/glances# vim docker-compose.yml`
4.2. 编辑docker-compose.yml
`version: '3'

services:
  glances:
    image: nicolargo/glances:latest-full
    container_name: glances
    restart: always
    ports:
      - 61208-61209:61208-61209
    pid: host
    volumes:
      - /var/run/docker.sock:/var/run/docker.sock
    environment:
      - "GLANCES_OPT=-w --password"
    secrets:
      - source: glances_password
        target: /root/.config/glances/glances.pwd
    networks:
      - mynet

secrets:
    glances_password:
      file: ./secrets/glances_password

networks:                           # 连接外部网络,方便内部代理
  mynet:
    external: true`
4.3. 获取密码文件
`## 运行glances项目
root@ubuntu:/data/docker_data/glances# docker run -d -e GLANCES_OPT="-w" -v /var/run/docker.sock:/var/run/docker.sock:ro  --name="glances" --pid host -it nicolargo/glances:latest-full
1b1e167607920b39da3f926cb9bb3c4ca5106a85bd1faa2d8077a6dec8863908

## 进入容器内部
root@ubuntu:/data/docker_data/glances# docker exec -it glances sh

## 设置密码,默认用户名为glances,可以通过--username修改(后续设置复杂不推荐)
/glances # glances -s --password

## 输入两次密码,并保存
Define the Glances server password (glances username):
Password (confirm):
Do you want to save the password? [Yes/No]: yes
Glances XML-RPC server is running on 0.0.0.0:61209
Announce the Glances server on the LAN (using 172.17.0.2 IP address)

## ctrl+c结束任务
^C^C^C^C^C
Exception ignored in: <module 'threading' from '/usr/lib/python3.10/threading.py'>
Traceback (most recent call last):
  File "/usr/lib/python3.10/threading.py", line 1567, in _shutdown
    lock.acquire()
  File "/usr/lib/python3.10/site-packages/glances/__init__.py", line 65, in __signal_handler
    end()
  File "/usr/lib/python3.10/site-packages/glances/__init__.py", line 71, in end
    mode.end()
  File "/usr/lib/python3.10/site-packages/glances/server.py", line 234, in end
    self.autodiscover_client.close()
  File "/usr/lib/python3.10/site-packages/glances/autodiscover.py", line 238, in close
    self.zeroconf.unregister_service(self.info)
  File "/usr/lib/python3.10/site-packages/zeroconf/_core.py", line 699, in unregister_service
    run_coro_with_timeout(
  File "/usr/lib/python3.10/site-packages/zeroconf/_utils/asyncio.py", line 86, in run_coro_with_timeout
    raise EventLoopBlocked from ex
zeroconf._exceptions.EventLoopBlocked:

## 退出容器
/glances # exit
root@ubuntu:/data/docker_data/glances#

## 复制生成的密码文件到宿主机
root@ubuntu:/data/docker_data/glances# docker cp glances:/root/.config/glances/glances.pwd ./secrets/glances_password

## 删除容器
root@ubuntu:/data/docker_data/glances# docker rm -f glances
glances`
4.4. 拉去镜像开始安装
`root@ubuntu:/data/docker_data/glances# docker-compose up -d
[+] Running 1/1
 ⠿ Container glances  Started                                                                                                                                   0.4s
root@ubuntu:/data/docker_data/glances#`
4.5. 登录效果
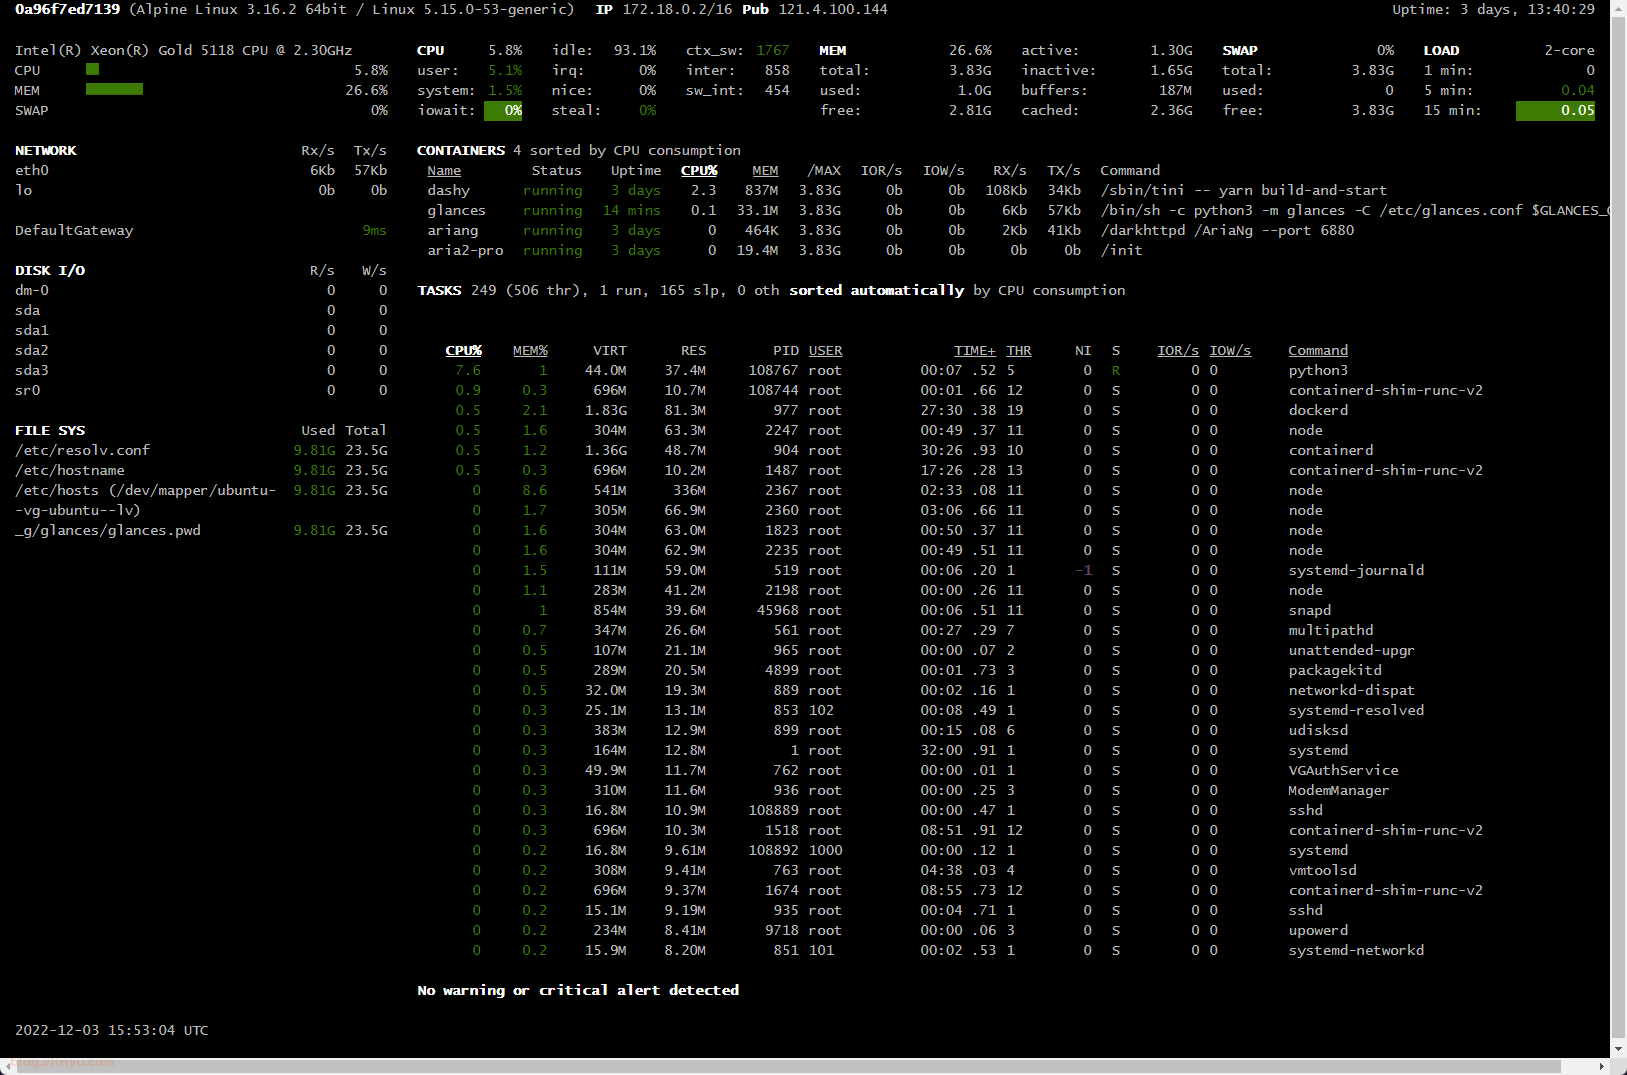
5. API调用
详细的调用方式查看文档:API (Restfull/JSON) documentation — Glances 3.3.0.1 documentation
`root@ubuntu:~# curl http://glances:[email protected]:61208/api/3/diskio
[{"time_since_update": 2.9525327682495117, "disk_name": "sr0", "read_count": 0, "write_count": 0, "read_bytes": 0, "write_bytes": 0, "key": "disk_name"}, {"time_since_update": 2.9525327682495117, "disk_name": "sda", "read_count": 0, "write_count": 0, "read_bytes": 0, "write_bytes": 0, "key": "disk_name"}, {"time_since_update": 2.9525327682495117, "disk_name": "sda1", "read_count": 0, "write_count": 0, "read_bytes": 0, "write_bytes": 0, "key": "disk_name"}, {"time_since_update": 2.9525327682495117, "disk_name": "sda2", "read_count": 0, "write_count": 0, "read_bytes": 0, "write_bytes": 0, "key": "disk_name"}, {"time_since_update": 2.9525327682495117, "disk_name": "sda3", "read_count": 0, "write_count": 0, "read_bytes": 0, "write_bytes": 0, "key": "disk_name"}, {"time_since_update": 2.9525327682495117, "disk_name": "dm-0", "read_count": 0, "write_count": 0, "read_bytes": 0, "write_bytes": 0, "key": "disk_name"}]
root@ubuntu:~#`
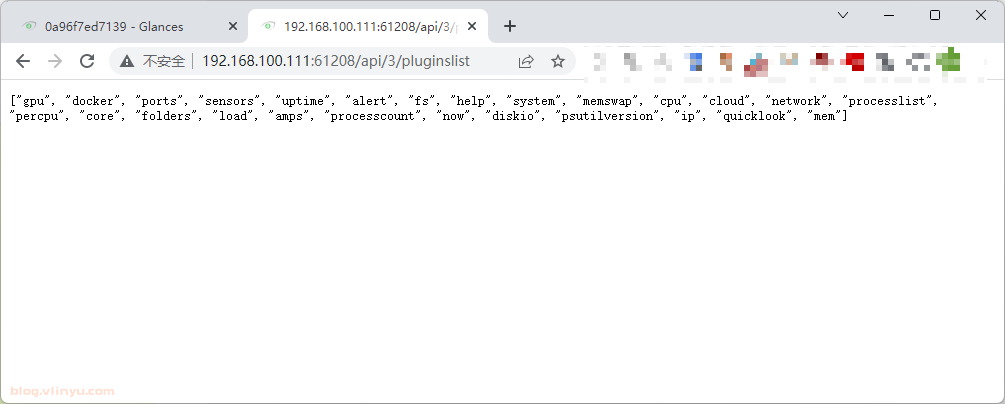
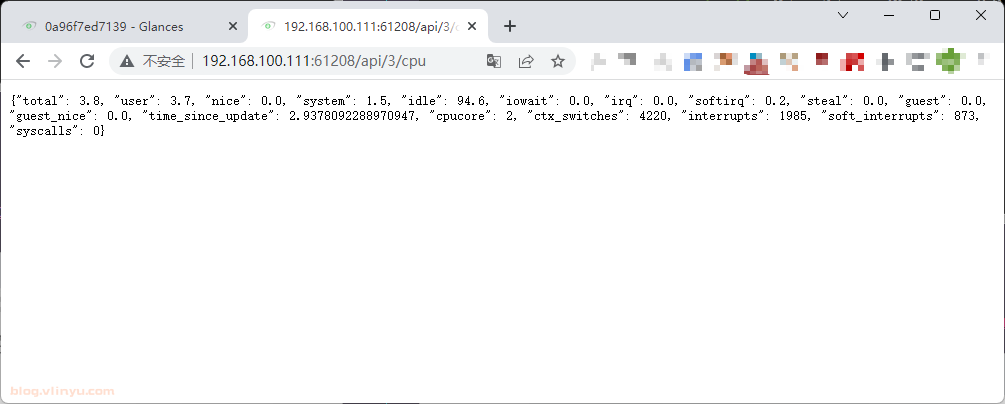
6. 关闭web访问
如果仅需要API调用,通过修改docker-compose.yml关闭web访问。
 `environment:
      - "GLANCES_OPT=-w --password --disable-webui"`
0
用 GitHub 搭建静态博客太繁琐?用这个小工具实现「傻瓜式」发布 - 少数派
除了作为程序员们分享与协作的平台,GitHub 同时也是一个绝佳的知识分享平台。尤其近几年静态博客逐渐兴起,借助 GitHub 的 Pages 功能托管个人博客成为了经济实惠、广受欢迎的一种方案,少数派此前也有许多文章介绍如何基于 Jekyll、Hexo 等工具将内容部署到 GitHub 上的方法。
在尝试了 WordPress、Typecho 等诸多建站工具后,如今我也决定回归静态博客。而和以往不同,这一次我认真总结了使用各个博客系统时遇到的问题与摸索出的一些技巧,把这些经验糅合在一起,最后的成果便是这篇文章的主角:一个名为 Maverick 的静态博客生成器,以及一套基于 Maverick 的博客写作自动化流程。
借助这套流程我实现了这些效果:
- 方便的图片管理
- 博客版本管理
- 在任何设备上写博客,包括浏览器
- 无需值守的自动化构建
- 免费、超快的全球 CDN
- 不需要在本地安装 NodeJS 这类运行环境(若要在本地写文章,需要安装 git)
若把 Markdown 文本和引用的图片比作面粉、鸡蛋,要把它们做成可口的蛋糕(静态博客),一般而言还需要一间厨房(比如你的电脑)以及一个烤箱(比如 Hexo)。在本文中我利用了 GitHub 提供的自动化服务 GitHub Actions,使博主可以专心提供更优质的「原料」而不用操心「烤制」的过程 —— 在这里,GitHub 充当了厨房与烤箱的角色。

大致思路
本文首先简要介绍使用 GitHub 写博客以及自己写生成器的若干原因。为避免枯燥乏味,我将通过一个逐步教程向大家介绍这个流程的操作方法,穿插一些基本概念的讲解。
为什么要使用 GitHub 写博客
除了免费、稳定之外,使用 GitHub 写博客还有诸多好处。
GitHub 的核心是 git,一套专业的版本管理系统。不限数量不限时间的版本回溯功能让内容管理十分便利;托管至 GitHub 上更是让安全性上升了一个等级。许多人写博客的不重视这一步,总爱把源文件放在电脑上某个随意的角落,或者直接发布到博客程序中而不加备份。
依我看这都是没有远见的做法。一旦坚持得久了,老旧的文章就是一笔财富;但电脑会坏,服务器可能被误操作删库,这都会造成无法挽回的损失。
除文本内容外,对图片等附件的管理也是相当棘手的问题。由于 Markdown 能力有限,人们倾向于把图片上传至第三方图床,然后在文章中通过链接引用。然而这算不得可靠的方案。今年年初就由于新浪突然对自己的图片服务增加访问限制,一众使用新浪图床的博主都只能叫苦连天。最好的方法是保证 Markdown 文本文件与图片文件位于同处,文章内通过相对位置(例如 ./images/1.png 这样的链接)引用图片,自给自足,以最大程度保证持久性与可访问性。
许多人可能没有意识到,GitHub 自身就是一个优秀的带有 Web 界面的内容管理系统(CMS)。一个博客系统应该有的功能,诸如对内容的增删改查,GitHub 都能轻松做到;通过将仓库克隆到本地,还能自由使用其它优质的编辑器进行写作。这个过程没有繁琐的拷贝、导入、导出,其体验是一致且连续的。
此外,GitHub 是十分开放且灵活的平台,从下文你将看到利用这个平台所提供的的自动化解决方案(GitHub Actions),写博客、发布博客这件事可以做到多么简便。
为什么我要自己写一个生成器
当然是因为现有的生成器,例如 Jekyll 和 Hexo 等,都多多少少有些不太便利的地方。
现有的生成器大多会要求将源文件以一定的目录结构放在指定的位置,例如生成器目录下,此外它们不太能处理通过相对链接引用图片的情景。以我去年写的文章 使用 Travis CI 自动生成与部署 Hexo 博客 为例,便不得不将生成器自身也纳入 git 版本管理,实在算不得优雅的解决方案。
Maverick 也是针对 Markdown 文本的静态博客生成器,但是与 Hexo 等有几点不同。
首先,Maverick 不限制源文件的存储位置,你可以把文章目录放在电脑上的任何路径下,例如 Dropbox、iCloud Drive,以便备份、同步、版本管理,以及在任何设备上用任何编辑器写作。
Maverick 也不限制源文件的组织结构,你可以按照你喜欢的方式组织它们,按时间、按类别都可以。以 Hexo 为例,它要求把文章存储在 hexo 目录 / source/_posts 这个路径下;而此时我使用 git 管理自己的博客源文件,目录结构如下:

此外是对图片的处理,Maverick 允许在 Markdown 文件中引用任何位置的图片,并且都能在生成网站时合适地处理它们。若你在原始文本中通过绝对路径或者相对路径引用本地图片,Maverick 会在生成网站时自动寻找它们,把它们复制到统一的位置,并对应处理引用链接;若通过 URL 引用了远程图片,则(可选地)可以将它们下载到本地缓存,按本地图片对待。
在 Hexo 与 Maverick 中分别新建一篇文章,内容如下:
## 通过网络链接引用

## 通过相对位置引用

## 通过绝对位置引用

分别执行生成,看看效果:

Hexo
可见 Hexo 不能处理通过相对与绝对位置引用的图片,发布后的网页占用仍然保持原来的引用链接;

Maverick
Maverick 则能自动搜索并将本地图片随网站发布,这使我们能更自由地插入图片。
此外,Maverick 支持大量静态博客生成器应该有的功能,例如 RSS 源生成、实时搜索、Sitemap 等;此外还包含了扩展的 Markdown 语法,提供代码高亮、行内脚注、数学公式、图片排版等常用功能。你可以在 这里 看到示例页面。
虽然目前还没有实现插件功能,但应该能满足个人博客需求。
现在,跟我一起动手实践吧
基于我 个人博客 的实践,我将整个流程做成了一个 示例仓库,请将这个仓库 fork 到自己的账户下(点击右上角的 Fork 按钮),然后跟我一起完成余下的步骤吧。
fork 之后请暂时不要更改仓库名称,保持 Blog-With-GitHub-Boilerplate 不变。
为仓库开启 Pages 服务
进入新 Fork 的仓库,点击右上角的 Settings 按钮,找到 GitHub Pages 相关设置 ,将 Source 设置为 gh-pages branch。

稍等片刻你就可以通过类似 https://<用户名>.github.io/Blog-With-GitHub-Boilerplate 这样的链接访问示例网站了。
虽然许多人知道可以把网站发布到 GitHub Pages 上,对背后到底发生了什么却不甚了解:仓库设置好 Pages 服务后,GitHub 为对应的仓库分配一个链接,当使用这个链接访问时,GitHub 就将具体的请求映射到仓库中的某个文件。例如 https://<用户名>.github.io/Blog-With-GitHub-Boilerplate/index.html 这个链接,对应的文件则是仓库根目录下的 index.html 文件,由于大家都用 index.html 这个文件名,因此也可以省略不写,其它链接同理。
目前,GitHub 上的所有仓库都可以开启 Pages 服务。仓库分为两类:
第一类,仓库名形如 <用户名>.github.io。开启 Pages 服务后可以直接通过 http://<用户名>.github.io 访问。
第二类,其它名称的仓库。对这些仓库,开启 Pages 服务后可以通过 http://<用户名>.github.io/< 仓库名 > 访问。
两类仓库都可以指定部署的内容来源,包括:
- master 分支(默认)
- master 分支中的 docs 文件夹
- gh-pages 分支
这两类仓库都可以绑定自定义域名,方法相同,在发布来源中创建 CNAME 文件或者在设置中绑定就行。此外,私有仓库也可以开启 Pages 服务,这十分适合用来发布博客,设想在 master 分支中存储源文件,是只自己可见的;将生成的网站发布到 gh-pages 分支,是公众可见的。这是兼具安全与便捷性的方案。
为仓库添加一个 token
为了后续能够通过 GitHub Actions 自动更新你的博客,我们需要为仓库添加一个 token。点击这个网址,点击右上角的 Generate new token,起个名字并勾选 repo 复选框:

点击页脚的 Generate Token,新的 token 会显示出来,把它复制下来,保存好。关了这个页面你就永远也看不到它了。

回到仓库中,进入 Setting,坐标找到 Secrets 选项卡,新建一个名叫 PERSONAL_TOKEN 的 secret:

在这里,我简要介绍什么是 GitHub Actions。
回顾我们的需求,是在仓库出现更改时自动更新构建与部署博客。其实,监视仓库并在有改动时自动执行一系列动作是非常广泛的需求。软件开发工作中,经常需要对新添加的代码随时进行测试,或者进行部署,都是通过这样的自动化流程实现的。实际上这类服务还有个 {{专门: 莫名其妙}} 的名字:「持续集成(Continuous Integration)/ 持续部署(Continuous Deploy)」,简称 CI/CD。
此前,最广泛使用的 CI 服务当属 Travis CI;现在 GitHub 也推出了自家的 CI 服务 GitHub Actions。相比起 Travis 来,GitHub Actions 更加 「native」,经我测试似乎也更敏捷、快速;此外,还能直接引用别人写好的规则。本文就基于 GitHub Action 描述构建流程。当仓库收到新的更新(push)时,GitHub 会根据仓库中 .github/workflows 文件夹下的 YML 配置文件启动 CI 流程。
💡 Note:新 fork 的仓库可能需要手动打开 Actions 服务。点击仓库顶部的 Actions 按钮,若出现 「Workflows aren’t being run on this forked repository」提示,请点击「I understand my workflows, go ahead and run them」按钮。
💡 Note:从这里开始我们会对仓库的文件做一些修改,如果你电脑上有安装 Git,可以把仓库 clone 到本地,完成修改后提交并 push 回去;如果没有安装,可以直接在浏览器中编辑文件。
尝试修改一下网站设置
回到仓库首页,点击 conf.py 文件,然后点击编辑按钮:
- 为你的网站起个名字,填写到
site_name这里 - 修改
author,email,description等选项为你的内容 - 其它选项也可以随意修改 ()

点击页脚的 Commit changes,稍等片刻再访问 https://<用户名>.github.io/Blog-With-GitHub-Boilerplate 看是不是已经更新了。如果没有,请点击仓库标题下方的 Actions 按钮,在里面查看自动构建状态。
在这一步中我们修改了网站的配置文件,当我们提交更改时,GitHub 会监测到这一动作并自动启动预定的构建与发布流程。这个流程是如何工作的呢?
不知你注意到没有,仓库中除了 conf.py 这个文件,还有一个 src 文件夹与一个叫做 Maverick 的文件夹。其中 src 文件夹中显然是保存着用以生成站点的文章;而点击 Maverick 目录则会跳转到我的 Maverick 仓库中。这是本流程一个特殊的地方。
你想的没错,GitHub Actions 是通过仓库中的 Maverick 来生成博客的;但是这个仓库并没有真的把完整的一个 Maverick 包含在里面,而只是存储了一个指向 Maverick 特定版本的链接(通过名叫 git submodule 的功能)。如此设计可以将生成器本身也纳入版本管理,同时不与仓库中的其它文件混为一谈。通过这种方式管理生成器,升级也十分方便。
尝试发布新的内容
点击进入仓库的 src 文件夹,并点击 Create new file:

文件名可以起 我的第一篇文章. md,内容参考如下:
---
layout: post
title: 我的第一篇文章
slug: my-first-awesome-post
date: 2019-12-17 20:34
status: publish
author: 熊猫小A
categories:
  - 默认分类
tags:
  - 博客
  - Maverick
  - GitHub
excerpt: Hello World!
---

这是我的第一篇文章。文章使用 GitHub 管理,并通过 GitHub Actions 自动构建与发布!
点击页脚的 Commit new file,稍等片刻再访问 https://<用户名>.github.io/Blog-With-GitHub-Boilerplate,可见新文章已经发布了。与上一步同理,GitHub 检测到了新的更改,并启动了构建与部署的自动化流程。
使用 jsDelivr 作为博客的 CDN 服务
先解释一下什么是 CDN 服务。
CDN 全名是 Content Delivery Network,即内容分发网络。由于国内特殊的网络环境,许多把博客部署到 GitHub Pages 的同学都觉得访问速度太慢,尤其是有大量图片、大体积 CSS、JS 文件时。CDN 服务通过在全世界各个角落部署服务器来缓解这个问题,这些服务把来自源站(这里是 GitHub)的文件缓存在自己的各台服务器上,当有用户访问时则就近选择一台服务器返回结果,如此一来便能大大提高访问速度。
jsDelivr 是众多的公共 CDN 服务商中的一家,长久以来通过稳定优质的服务赢得了不少口碑。尤其值得一体的是,据它官网上的说法:
jsDelivr is the only public CDN with a valid ICP license issued by the Chinese government, and hundreds of locations directly in Mainland China.
它的速度在**相当不错。而且还有一个重要特性:支持加速来自 GitHub 仓库的文件!只要构造一个类似这样的 URL:
https://cdn.jsdelivr.net/gh/<用户名>/<仓库名>@<分支名>/<文件路径>
例如:
https://cdn.jsdelivr.net/gh/AlanDecode/site-Blog@gh-pages/favicon.ico
就能直接访问对应文件。这一点可以被我们加以利用,用以加速博客上的 CSS、JS、图片等静态文件。
Maverick 自带了这个功能。回到仓库首页,点击 conf.py 文件,然后点击编辑按钮。修改 enable_jsdelivr 如下:
enable_jsdelivr = {
    "enabled": True,
    "repo": "<你的用户名>/Blog-With-GitHub-Boilerplate@gh-pages"
}
点击 Commit changes。然后修改你刚才添加的文章,在里面插入一张仓库中的图片:
这是我的第一篇文章。文章使用 GitHub 管理,并通过 GitHub Actions 自动构建与发布!

发布后稍等片刻再访问你的网站,此时网站的图片都通过 jsDelivr 传输的。不信的话在图片上右键选择「在新标签页中打开图片」,看链接是否以 cdn.jsdelivr.net 开头。
要插入你自己的图片,请把图片上传到 src/images 文件夹里,然后在文章中使用 Markdown 语法引用即可。
进行更多的自定义与创作
经过以上的步骤你已经学会了自定义网站、添加文章与修改文章,接下来就该你自由发挥了。
仓库中 conf.py 里面的内容都可以自定义修改,特别要注意格式,比如引号要使用英文引号之类的。针对网站的设置项请参考 Maverick/README.md。
仓库自带的 about.md 与 Typography 都可改可删,全看你。不过请保证仓库里至少有一篇文章。
仓库src/static 文件夹中有一个 logo.png,这是示例 logo。你可以在这个文件夹中上传新的 logo 图片,最好是方形的图片,然后在 conf.py 中修改 site_logo 为 "${static_prefix} 新的 logo.png" 即可。
现在可以把仓库名称改成你想要的名字了。改了之后,记得将 conf.py 中的 site_prefix 设置为 "/<新的仓库名>/"。如果要把仓库名修改为 <用户名>.github.io 的形式,那么 site_prefix 设置为 "/" 即可。
在本地进行创作
你可以把仓库 clone 到电脑上,修改后再将修改 push 回去。为了让这个过程方便一些,仓库中自带了 update_site.bat 、update_maverick.bat (Windows 用),以及 update_site.sh、update_maverick.sh (Linux、macOS 用)几个文件。update_site.xx 的作用是在本地修改了文章或者网站配置后,将修改推送到 GitHub;update_maverick.xx 则用于升级仓库中的 Maverick 版本。
Windows 用户只需要双击对应的 bat 文件就可以执行,macOS 或者 Linux 用户可能首先需要在终端中给文件执行权限:
chmod +x ./update_site.sh
chmod +x ./update_maverick.sh
然后就能直接在终端运行这两个 .sh 文件了。或者使用终端直接打开它们。
💡 Note:关于在电脑上使用 git
如果你之前没有使用过 GitHub,那么需要进行一定的设置。如果你的电脑是 macOS 或者 Linux,git 可能是默认安装在电脑上的;如果是 Windows,则需要到这里下载合适的 Git 安装到电脑上。记得安装时选中将 git 添加到 PATH。
在开始菜单中选择 Git - Git Bash(Windows)或者打开一个终端(Linux/macOS),输入:
git config --global user.name "你的GitHub用户名"
git config --global user.email "你的GitHub邮箱"
git config --global credential.helper store
之后到仓库右上角的 Clone or download 那里,复制仓库链接(建议使用 HTTPS):

在命令行中输入:
git clone <仓库链接>
若需要输入用户名密码则输入就行。这样仓库就克隆到了本地。在仓库中进行修改后,这样提交文件:
# cd 到仓库文件夹后

git add .
git commit -m "添加修改"
git push
这样本地的修改就推送到了 GitHub。
绑定自定义域名
如果你有自己的域名,请在域名解析商那里将域名 CNAME 设置为 <用户名>.github.io,然后回到仓库,在 src/static 文件夹中添加一个名叫 CNAME 的文件,内容填写你自己的域名。然后在 conf.py 中修改 site_prefix 为 "/"。稍等片刻,你的网站就能通过你的域名访问了。
结语
折腾出这一套流程工作量不小。考虑到我还专门自己写了一个生成器(就是 Maverick),这其实是相当庞大的工程。虽然过程曲折繁复,但最终的结果却是简约的,甚至可称得上傻瓜式。这一切都是为了让写博客再轻松、方便一点。
限于篇幅,关于 Maverick 还有许多功能与设置没有在本文详述,请参照 Maverick/README.md 开始你的探索。同时我也期待着你的反馈与建议。
最后,在个人博客式微的今天,希望大家都能再去试试这个纯粹、自由的媒介。在互联网上拥有属于自己的一亩三分地是很不错的体验。
> 下载少数派 客户端、关注 少数派公众号,让你的写作更有效率 ⏱
> 特惠、好用的硬件产品,尽在 少数派 sspai 官方店铺 🛒
https://sspai.com/post/58013
Docker容器间通信方法
几天前,为了解决日常在本地进行日常工作和开发测试之间的矛盾,利用docker在Windows系统中搭建了基于Linux的测试环境:借助Docker,在win10下编码,一键在Linux下测试。在这边文章里主要介绍了如何在本地通过docker构建与生产环境基本一致的环境并一键运行、测试我们的代码。Docker官方建议每个容器中只运行一个服务[1],但是我们的项目可能是由多个服务组成,在服务中可能会需要mysql、redis等中间件的支持,所以通常我们将一个项目的不同服务划分到不同容器中。这种做法虽然具有低耦合、高隔离性等优点,但是也增加了服务之间通信的复杂度。
Docker容器间的通信方式根据媒介可以分为:volume共享通信、网络通信等;根据通信范围也可以分为:同主机通信和跨主机通信等。而本文主要针对容器间的网络通信方法进行讨论。
1. Docker的网络驱动模型
Docker的网络驱动模型分类:
- bridge:Docker中默认的网络驱动模型,在启动容器时如果不指定则默认为此驱动类型;
- host:打破Docker容器与宿主机之间的网络隔离,直接使用宿主机的网络环境,该模型仅适用于Docker17.6及以上版本;
- overlay:可以连接多个docker守护进程或者满足集群服务之间的通信;适用于不同宿主机上的docker容器之间的通信;
- macvlan:可以为docker容器分配MAC地址,使其像真实的物理机一样运行;
- none:即禁用了网络驱动,需要自己手动自定义网络驱动配置;
- plugins:使用第三方网络驱动插件;
以上是Docker支持的几种网络驱动模型,它们都具有独特的特点和应用范围,为了更加详细地了解Docker的网络运行原理,下面挑选几种较为重要的网络模型进行研究。
2. bridge
2.1 docker的默认网桥
如上图所示为Docker中bridge驱动模式的示意图,其中蓝色的模块表示主机上的网卡。当Docker启动时会自动在主机上创建一个虚拟网桥docker0,使用默认网络模式创建docker容器时会自动创建一对儿veth pair接口,一端连接在docker容器中(如图容器中的eth0),一端连接在虚拟网桥docker0上(如图veth)。这种veth pair是一种虚拟网络设备,主要用于不同namespace中(意味着网络隔离)的网络通信,它总是成对存在的。在这里可以把它想象成一对儿靠虚拟网线连接起来的两个虚拟网卡,一端连接着docker容器,一端连接着虚拟网桥docker0。
通过这种方式,不同docker容器之间可以通过ip地址互相通信,也可以通过虚拟网桥访问主机上的网络eth0(添加iptables规则,将docker容器对目标地址发出的访问通过地址伪装的方式修改为主机对目标地址进行访问)。
如果想要外界网络访问docker容器时,需要在docker容器启动时加上参数'-p [主机端口]:[容器端口]'进行端口映射,原理也是通过修改iptables规则将访问[主机端口]的数据转发到docker容器的[容器端口]中,但是这种做法也存在着占用主机有限的端口资源的缺点。
在主机上通过命令docker network ls可以查看docker中存在的网络:
docker network ls
# 输出结果:
NETWORK ID          NAME                DRIVER              SCOPE
e79b7548b225        bridge              bridge              local
666d5f1f459d        host                host                local
d0d785cf4794        none                null                local
然后通过命令docker network inspect bridge查看bridge网络的详细配置:
docker network inspect bridge
# 输出结果:
[
    {
        "Name": "bridge",
        "Id": "e79b7548b225c3c80d0f70d0de0b5911ed70a7f39ac20f75a8ae71c5cef05b3a",
        "Created": "2019-05-17T13:01:27.6581642Z",
        "Scope": "local",
        "Driver": "bridge",         # bridge驱动模式
        "EnableIPv6": false,
        "IPAM": {
            "Driver": "default",
            "Options": null,
            "Config": [
                {
                    "Subnet": "172.17.0.0/16",          # 子网,docker容器的IP范围
                    "Gateway": "172.17.0.1"             # 网关,即docker0
                }
            ]
        },
        ...
        省略
        ...
        # 两个docker容器(一个mysql容器,一个Web服务容器)的网络配置
        "Containers": {
            # mysql容器
            "d6f33e9bbd60e10d02dd2eebea424a7fc129d9646c96742ec3fe467833017679": {
                "Name": "mysqld5.7",
                "EndpointID": "32e900f33367e3570c416c43a5618bd7a742cf94f36799e92895951ed1784736",
                "MacAddress": "02:42:ac:11:00:02",
                "IPv4Address": "172.17.0.2/16",         # 容器的IP
                "IPv6Address": ""
            },
            # 基于tornado的Web服务容器
            "dd292d535d16bbfe5382e29486756f4dddfea8e9b10af769db61618d739c5c4e": {
                "Name": "test_demo",
                "EndpointID": "eaf8e294f7b54aa50c6e6b30ac91f63b1a0ccbc5b56d6fbdcfeacd0471b15eb3",
                "MacAddress": "02:42:ac:11:00:03",
                "IPv4Address": "172.17.0.3/16",         # 容器的IP
                "IPv6Address": ""
            }
        },
        "Options": {
            "com.docker.network.bridge.default_bridge": "true",
            "com.docker.network.bridge.enable_icc": "true",
            "com.docker.network.bridge.enable_ip_masquerade": "true",
            "com.docker.network.bridge.host_binding_ipv4": "0.0.0.0",
            "com.docker.network.bridge.name": "docker0",
            "com.docker.network.driver.mtu": "1500"
        },
        "Labels": {}
    }
]
由上述配置信息可以看出,docker网桥的网关的IP为"172.17.0.1",也即docker0,而docker的子网为"172.17.0.0/16",docker将会为容器在"172.17.0.0/16"中分配IP,如其中的mysql容器的IP为"172.17.0.2/16"、test_demo容器的IP为"172.17.0.3/16"。由于不同容器通过veth pair连接在虚拟网桥docker0上,所以容器之间可以通过IP互相通信,但是无法通过容器名进行通信:
# 在test_demo容器中访问mysqld5.7容器(通过IP)
ping 172.17.0.2 -c 3
# 输出结果:
PING 172.17.0.2 (172.17.0.2) 56(84) bytes of data.
64 bytes from 172.17.0.2: icmp_seq=1 ttl=64 time=0.147 ms
64 bytes from 172.17.0.2: icmp_seq=2 ttl=64 time=0.185 ms
64 bytes from 172.17.0.2: icmp_seq=3 ttl=64 time=0.209 ms

--- 172.17.0.2 ping statistics ---
3 packets transmitted, 3 received, 0% packet loss, time 2057ms
rtt min/avg/max/mdev = 0.147/0.180/0.209/0.027 ms


# 在test_demo容器中访问mysqld5.7容器(通过容器名)
ping mysqld5.7
# 输出结果:
ping: mysqld5.7: Name or service not known
所以,默认的网桥bridge上的容器只能通过IP互连,无法通过DNS解析名称或别名。假如我们在container1中部署了Web服务,在container2中部署了mysql,container1中的Web服务往往需要连接container2的mysql,这是只能靠IP进行连接,但是docker也无法保证容器重启后的IP地址不变,所以更好的方式是通过别名进行互联,在网络中加入DNS服务器,将容器名与IP地址进行匹配,省去了手动修改Web服务中连接mysql的IP的过程。
为了实现不同容器通过容器名或别名的互连,docker提供了以下几种:
-
在启动docker容器时加入
--link参数,但是目前已经被废弃,废弃的主要原因是需要在连接的两个容器上都创建--link选项,当互连的容器数量较多时,操作的复杂度会显著增加; -
启动docker容器后进入容器并修改
/etc/host配置文件,缺点是手动配置较为繁杂; -
用户自定义
bridge网桥,这是目前解决此类问题的主要方法;
2.2 用户自定义bridge
用户自定义bridge相对于使用默认bridge的主要优势:
- 用户自定义bridge可以在容器化的应用程序提供更好的隔离效果和更好的互通性: 这段话看似有些矛盾,但是其中
更好的隔离效果是针对外界网络,而更好的互通性则是指同一bridge下的不同容器之间。还是以之前的分别部署了Web服务和mysql服务的两个容器container1、container2为例,container1只需要对外界网络暴露Web服务的80端口,而负责后端的container2只需与container1互连,不需要对外暴露,有效地保护了后端容器的安全性,提高了容器对外的隔离效果。而同属于用户自定义bridge的容器container1、container2之间自动将所有端口暴露,方便容器间进行无障碍的通信,而不会遭受到外界的意外访问。 - 用户自定义bridge在容器之间提供了自动DNS解析: 这也是本文讨论的重点,不同于默认bridge只能通过IP互连的限制,用户自定义的bridge自动提供了容器间的DNS解析功能,容器间可以通过容器名或别名进行通信。
2.2.1 如何使用用户自定义bridge
-
创建用户自定义bridge:
docker network create my-net # 创建了一个名为"my-net"的网络 -
将Web服务容器和mysql服务容器加入到"my-net"中,并观察变化:
docker network connect my-net test_demo         # 将Web服务加入my-net网络中
docker network connect my-net mysqld5.7         # 将mysql服务加入my-net网络中
# 查看my-net的网络配置
docker network inspect my-net
# 输出结果(省略部分内容):
[
    {
        "Name": "my-net",
        "Scope": "local",
        "Driver": "bridge",
        "EnableIPv6": false,
        "IPAM": {
            "Config": [
                {
                    "Subnet": "172.18.0.0/16",      # my-net的子网
                    "Gateway": "172.18.0.1"         # my-net的网关
                }
            ]
        },
        "Containers": {
            "d6f33e9bbd60e10d02dd2eebea424a7fc129d9646c96742ec3fe467833017679": {
                "Name": "mysqld5.7",
                "EndpointID": "7d0e8d70bb523cceb4d2d8d4e3f8231fc68332c70f7f9b4e5d4abccce2b31a65",
                "MacAddress": "02:42:ac:12:00:03",
                "IPv4Address": "172.18.0.3/16",         # mysql服务容器的IP,与之前不同
                "IPv6Address": ""
            },
            "dd292d535d16bbfe5382e29486756f4dddfea8e9b10af769db61618d739c5c4e": {
                "Name": "test_demo",
                "EndpointID": "f7802f1af81e258f77e227609dfdcdf66c49f19776381eb8b0dca6d9e794ccad",
                "MacAddress": "02:42:ac:12:00:02",
                "IPv4Address": "172.18.0.2/16",         # Web服务容器的IP,与之前不同
                "IPv6Address": ""
            }
        },
    }
]
如上所示,用户自定义网络
my-net的子网为"172.18.0.0/16",所以两docker容器在my-net网络中的IP分别为:"172.18.0.3/16"、"172.18.0.2/16",与之前的"172.17.0.2/16"、"172.17.0.3/16"不同。 -
通过容器名或别名互连: 进入到Web服务器container1中连接container2:
ping mysqld5.7 -c 3
# 输出结果:
PING mysqld5.7 (172.18.0.3) 56(84) bytes of data.
64 bytes from mysqld5.7.my-net (172.18.0.3): icmp_seq=1 ttl=64 time=0.066 ms
64 bytes from mysqld5.7.my-net (172.18.0.3): icmp_seq=2 ttl=64 time=0.145 ms
64 bytes from mysqld5.7.my-net (172.18.0.3): icmp_seq=3 ttl=64 time=0.143 ms

--- mysqld5.7 ping statistics ---
3 packets transmitted, 3 received, 0% packet loss, time 2048ms
rtt min/avg/max/mdev = 0.066/0.118/0.145/0.036 ms
如上所示,我们已经可以通过容器名"mysqld5.7"连接mysql服务器了。
-
断开网络: 由于我们的容器仍然连接着默认bridge
docker0,而现在我们已经不需要它,所以应该将容器与docker0的连接断开,执行以下操作:# 断开容器与docker0的连接 docker network disconnect bridge test_demo docker network disconnect bridge mysqld5.7
3. overlay
关键字:跨主机通信、集群
【待续。。】
- Run multiple services in a container. docs.docker.com/config/cont… ↩︎
VI Editor with Commands in Linux/Unix Tutorial
What is the VI editor?
The VI editor is the most popular and classic text editor in the Linux family. Below, are some reasons which make it a widely used editor –
-
It is available in almost all Linux Distributions
-
It works the same across different platforms and Distributions
-
It is user-friendly. Hence, millions of Linux users love it and use it for their editing needs
Nowadays, there are advanced versions of the vi editor available, and the most popular one is VIM which is Vi Improved. Some of the other ones are Elvis, Nvi, Nano, and Vile. It is wise to learn vi because it is feature-rich and offers endless possibilities to edit a file.
To work on VI editor, you need to understand its operation modes. They can be divided into two main parts.
In this tutorial, you will learn more about-
@media(max-width: 499px) { .videocontentmobile {min-height: 280px; } } @media only screen and (min-width: 500px) and (max-width: 1023px){.videocontentmobile {min-height: 100px;}} @media(min-width: 1024px) { .videocontentmobile {min-height: 250px; } }
if (typeof(pubwise) != 'undefined' && pubwise.enabled === true) { pubwise.que.push(function() { pubwise.renderAd('div-gpt-ad-9092914-1'); }); }else{ googletag.cmd.push(function () { googletag.display('div-gpt-ad-9092914-1'); googletag.pubads().refresh([gptadslots['div-gpt-ad-9092914-1']]); }); }
- vi Command mode
- vi Editor Insert mode
- How to use vi editor
- vi Editing commands
- Moving within a file
- Saving and Closing the file
Click here if the video is not accessible
vi Command mode:
.jpg)
- The vi editor opens in this mode, and it only understands commands
- In this mode, you can, move the cursor and cut, copy, paste the text
- This mode also saves the changes you have made to the file
- Commands are case sensitive. You should use the right letter case.
vi Editor Insert mode:
- This mode is for inserting text in the file.
- You can switch to the Insert mode from the command mode by pressing ‘i’ on the keyboard
- Once you are in Insert mode, any key would be taken as an input for the file on which you are currently working.
- To return to the command mode and save the changes you have made you need to press the Esc key
@media(max-width: 499px) { .content2 {min-height: 100px !important; }} @media(min-width: 500px) { .content2 {min-height: 91px !important; } }
if (typeof(pubwise) != 'undefined' && pubwise.enabled === true) { pubwise.que.push(function() { pubwise.renderAd('div-gpt-ad-9092914-2'); }); }else{ googletag.cmd.push(function () { googletag.display('div-gpt-ad-9092914-2'); googletag.pubads().refresh([gptadslots['div-gpt-ad-9092914-2']]); }); }
How to use vi editor
To launch the VI Editor -Open the Terminal (CLI) and type
vi <filename_NEW> or <filename_EXISTING>
And if you specify an existing file, then the editor would open it for you to edit. Else, you can create a new file.

VI Editing commands
- i – Insert at cursor (goes into insert mode)
- a – Write after cursor (goes into insert mode)
- A – Write at the end of line (goes into insert mode)
- ESC – Terminate insert mode
- u – Undo last change
- U – Undo all changes to the entire line
- o – Open a new line (goes into insert mode)
- dd – Delete line
- 3dd – Delete 3 lines.
- D – Delete contents of line after the cursor
- C – Delete contents of a line after the cursor and insert new text. Press ESC key to end insertion.
- dw – Delete word
- 4dw – Delete 4 words
- cw – Change word
- x – Delete character at the cursor
- r – Replace character
- R – Overwrite characters from cursor onward
- s – Substitute one character under cursor continue to insert
- S – Substitute entire line and begin to insert at the beginning of the line
- ~ – Change case of individual character
Note: You should be in the “command mode” to execute these commands. VI editor is case-sensitive so make sure you type the commands in the right letter-case.
Make sure you press the right command otherwise you will end up making undesirable changes to the file. You can also enter the insert mode by pressing a, A, o, as required.
@media(max-width: 1023px) {.content61 {min-height: 91px !important; }} @media(min-width: 1024px) {.content61 {min-height: 280px !important; }}
if (typeof(pubwise) != 'undefined' && pubwise.enabled === true) { pubwise.que.push(function() { pubwise.renderAd('div-gpt-ad-9092914-6'); }); }else{ googletag.cmd.push(function () { googletag.display('div-gpt-ad-9092914-6'); googletag.pubads().refresh([gptadslots['div-gpt-ad-9092914-6']]); }); }
Moving within a file
- k – Move cursor up
- j – Move cursor down
- h – Move cursor left
- l – Move cursor right
You need to be in the command mode to move within a file. The default keys for navigation are mentioned below else; You can also use the arrow keys on the keyboard.
Saving and Closing the file
- Shift+zz – Save the file and quit
- :w – Save the file but keep it open
- :q – Quit without saving
- :wq – Save the file and quit
You should be in the command mode to exit the editor and save changes to the file.

Summary:
-
The vi editor is the most popular and commonly used Unix text editor
-
It is usually available in all Linux Distributions.
-
It works in two modes, Command and Insert
-
Command mode takes the user commands, and the Insert mode is for editing text
-
You should know the commands to work on your file easily
-
Learning to use this editor can benefit you in creating scripts and editing files.
How to Add User to Sudoers or Sudo Group on Ubuntu
Introduction
The sudo command is the preferred means to handle elevated permissions. In supported versions of Ubuntu, using the sudo command will grant elevated permissions for 15 minutes.
Standard user accounts are restricted from performing sensitive tasks, such as viewing the contents of the /root directory. This prevents the accidental use of commands with massive consequences. It also makes it more difficult for intruders to compromise a system. However, sometimes you need to run an administrative command. Sudo – or Super User Do – grants you privileges to run sensitive tasks.
This simple tutorial will show you how to add a new user on Ubuntu and provide sudo access.

Prerequisites
- A system running a supported version of Ubuntu
- Access to a root user account or another account with sudo privileges
- Access to a terminal window/command line (Ctrl–Alt–T)
Note: Linux Sudo Command tutorials also available for CentOS and Debian.
Steps to Add Sudo User on Ubuntu
Step 1: Create New User
-
Log into the system with a root user or an account with sudo privileges.
-
Open a terminal window and add a new user with the command:
adduser newuser
The adduser command creates a new user, plus a group and home directory for that user.
You may get an error message that you have insufficient privileges. (This typically only happens for non-root users.) Get around it by entering:
sudo adduser newuser
-
You can replace
newuserwith any username you wish. The system will add the new user; then prompt you to enter a password. Enter a great secure password, then retype it to confirm. -
The system will prompt you to enter additional information about the user. This includes a name, phone numbers, etc. – these fields are optional, and can be skipped by pressing **E****nter**.
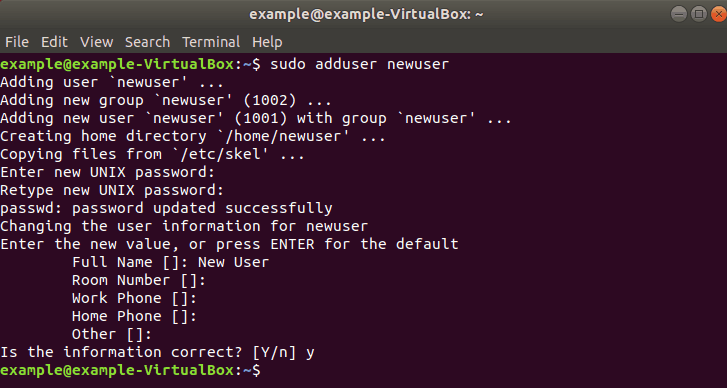
Step 2: Add User to Sudo Group
Most Linux systems, including Ubuntu, have a user group for sudo users. To grant the new user elevated privileges, add them to the sudo group.
In a terminal, enter the command:
usermod -aG sudo newuser
Replace newuser with the username that you entered in Step 1.
Again, if you get an error, run the command with sudo as follows:
sudo usermod -aG sudo newuser
The -aG option tells the system to append the user to the specified group. (The -a option is only used with G.)
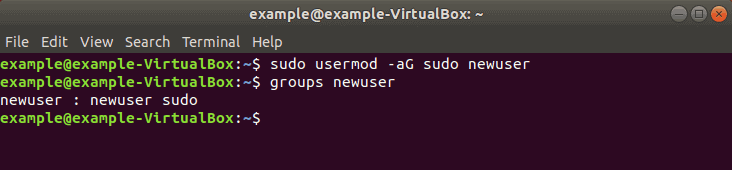
Step 3: Verify User Belongs to Sudo Group
Enter the following to view the groups a user belongs to:
groups newuser
The system will respond by listing the username and all groups it belongs to, for example: newuser : newuser sudo
Step 4: Verify Sudo Access
Switch users by entering:
su - newuser
Replace newuser with the username you entered in Step 1. Enter your password when prompted. You can run commands as normal, just by typing them.
For example:
ls /home
However, some commands or locations require elevated privileges. If you try to list the contents of the /root directory, you’ll get an access denied error: ls /root
The command can be executed with:
sudo ls /root
The system will prompt for your password. Use the same password you set in Step 1. You should now see the contents of the /root directory.
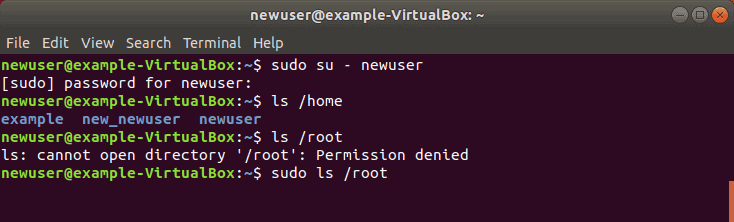
Conclusion
Now you know how to add and create a user with sudo privileges on Ubuntu.
Before sudo, users would log in to their systems with full permissions over the entire system with the su command. This was risky as users could be exploited by tricking them into entering malicious commands. These vulnerabilities were solved by limiting account privileges. However, administrators still had to log out of their account and into an admin account to perform routine tasks.
The sudo command in Ubuntu strikes a balance – protecting user accounts from malicious or inadvertent damage while allowing a privileged user to run administrative tasks. To learn more about the difference between these commands, check out Sudo vs. Su.
https://phoenixnap.com/kb/how-to-create-sudo-user-on-ubuntu
Win10 , win 11 SMB1文件共享不安全不能连接文件共享咋办
在windows文件管理器中使用IPv6地址,用减号-代替冒号:并在最后加上.ipv6-literal.net后缀。
在IE浏览器或者火狐浏览器中,在地址两头加上方括号[]即可。
例如:\fd00::2\share,转换成:\fd00--2.ipv6-literal.net\share
例如:http://[fd00::2]/
————————————————
版权声明:本文为CSDN博主「WTCLLB」的原创文章,遵循CC 4.0 BY-SA版权协议,转载请附上原文出处链接及本声明。
原文链接:https://blog.csdn.net/WTCLLB/article/details/123274310
在Windows10系统中无法连接共享文件,提示因文件共享不安全而不能连接文件共享,出现这样的情况怎么办呢?下面就来看看解决的方法吧。

方法/步骤1
-
1
在Windows10桌面,依次点击“开始/Windows系统/控制面板”菜单项。
-
2
在打开的Windows控制面板窗口中,点击“程序”图标
-
3
在打开的程序和功能窗口中,点击“启用或关闭Windows功能”快捷链接。
-
4
在打开的启用或关闭Windows功能窗口中,勾选“Smb1.0/cifs文件共享支持”前面的复选框,最后点击确定按钮即可。
END
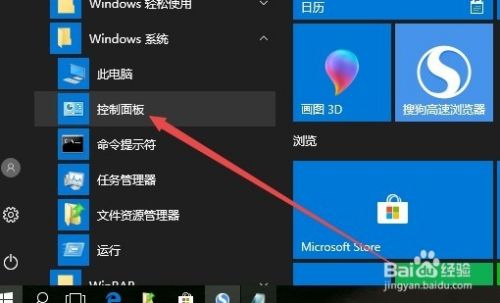


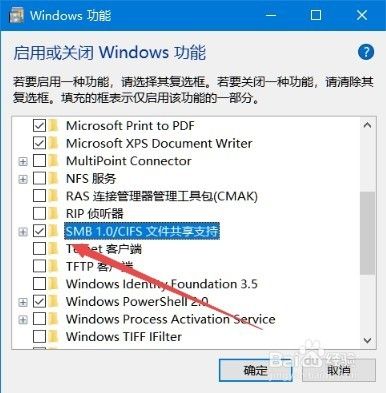
方法/步骤2
-
1
在Windows10桌面,右键点击开始按钮,在弹出菜单中选择“运行”菜单项。
-
2
在打开的运行窗口中,输入命令gpedit.msc,然后点击确定按钮。
-
3
这时会打开本地组策略编辑器窗口,依次点击“计算机配置/管理模板/网各/Lanman工作站”菜单项。
-
4
在右侧的窗口中找到“启用不安全的来宾登录”设置项,同时右键点击该菜单项,在弹出菜单中选择“编辑”菜单项。
-
5
在打开的编辑窗口中,选中“已启用”设置项,最后点击确定按钮就可以了。
END
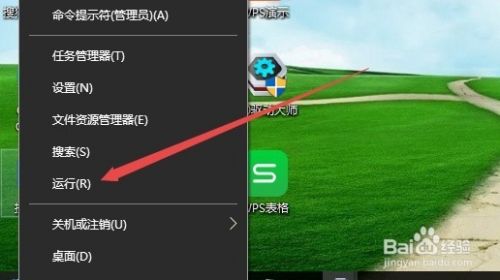
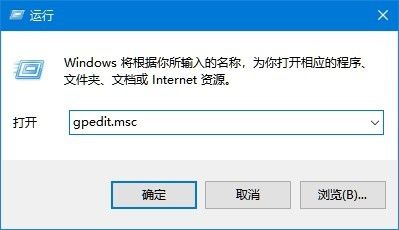
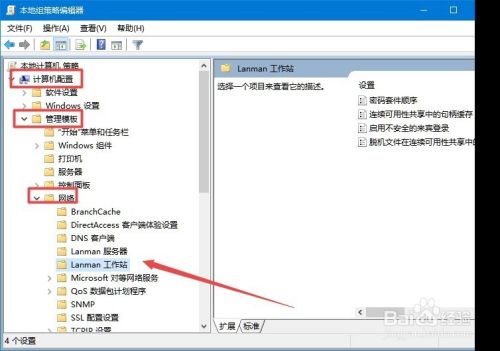

注意事项
-
本经验系PCgame2007独自创作,并首发于百度经验。
-
如果您觉得本经验有帮助,不要忘记“投票”或者“分享”哦,谢谢!
经验内容仅供参考,如果您需解决具体问题(尤其法律、医学等领域),建议您详细咨询相关领域专业人士。
_作者声明:_本篇经验系本人依照真实经历原创,未经许可,谢绝转载。
/etc/fstab mount not working on startup but no errors - Linux Mint Forums
Save From : /etc/fstab mount not working on startup but no errors - Linux Mint Forums
Content
Re: /etc/fstab mount not working on startup but no errors
Post by altair4 » Sat Feb 22, 2020 8:25 am
The entry you have in fstab is being executed during the boot process before the network stack is up and operational on Mint.
One way around this is a systemd automount which will make it so it mounts on demand ( when accessed ) rather than mounting it at boot. Easy enough to accomplish but first you need to change your mount point to something other than under /media or your home directory - For Example:
Code: Select all
sudo mkdir /mnt/BackupDrive
Then change your fstab expression to mount to the new mount point and add two more options: noauto and x-systemd.automount.
Code: Select all
//192.168.101.193/6tb /mnt/BackupDrive cifs defaults,rw,username=(redacted),password=(redacted),iocharset=utf8,vers=3.0,noauto,x-systemd.automount 0 0
[1] Unmount the share if you already mounted it:
Code: Select all
sudo umount /media/adriaan/BackupDrive
[2] The do the systemd 2-step:
Code: Select all
sudo systemctl daemon-reload
sudo systemctl restart remote-fs.target
Now check /mnt/BackupDrive to confirm everything is there.
Side note: There is an additional option you can use that will unmount the share automatically when the system detects no activity on the share: x-systemd.idle-timeout=30 If the share in inactive for 30 seconds ( you can change that to whatever you want ) the system will unmount the share.
Note
2023 New Arrival - Unblock Tech UBox 10 - Unblock Gen 10 TV Box for Sale (International Version),Unblock TV Box
2023 New Launch - Unblock Tech Ubox 10 TV Box
International Versions / Universal Versions

6 Reasons why buy Unblock UBox10 TV Box:
➤. 4G RAM + 64G ROM: high-speed storage, smooth operation, large storage, more freedom, large memory, install more applications as you will;
➤. H618 Flagship Processor: Strong Power, Soaring Performance, More Powerful;
➤. 6K high-definition picture quality: HD picture quality is more delicate and vivid, and the details of light and shade are better;
➤. AI intelligent voice system: intelligent AI remote control, intelligent AI and intelligent life. Added a variety of gameplay, more convenient, more intelligent, a remote control that can learn by itself;
➤. WIFI6: Compatible with 2.4G/5G, low latency, high speed, stable signal, faster transmission;
➤. Global 200+ CDN cloud acceleration: No matter which country you come from, you can use it smoothly, without lag, more efficiently and more stable;
The speed is super fast, the strength is advanced, and the new arrival is beyond your imagination;
UBox 10 TV box has a super fast speed, strength is ahead, 2023 brand new launched, beyond your imagination;

Unblock Ubox 10 Review - Everything you need to know
**①.**New Design, Cardiac Choice, Lock your Sight in One Second
➥ Colorful stylish atmosphere lights, ingenious fashion design.


**②.**Brief but Rather Complicated - Performance Upgraded in 2023
➥ The new generation UBOX10 adopts the H618 processor, which can play 6K and H. 265 video, annual upgrade, advanced technology, strong heart, inspiring the audience.

**③.**6K High-Definition Picture Quality, Image Upgrade and Details are very Interesting
➥ Support 6K ultra-clear image quality, faster decoding, smoother viewing, and more delicate pictures.

④. 4G + 64G Large Storage, Special XL Large Capacity
➥ 4GB of running memory, 64GB of large storage space, can be installed with more applications you want.

⑤. Smart AI Voice Remote Control
➥ Intelligent AI voice remote control, easy one-click, say your needs, Old people and children can use it easily, making life full of fun.

⑥. UBox 10 - Let your Home be a KTV
➥ During festivals, family and friends get together. Your living room could become a KTV in seconds, pick up the microphone and sing with friends at any time.

⑦. Multi-Screen Interaction, Just Play with the UBox10
➥ UBOX10 supports device screen casting, getting rid of the shackles of the small screen, and the big screen is more shocking.
What you want to watch and play, you can easily cast the screen with one click.

⑧. UBox 10 TV Box - Global CDN Cloud Acceleration
➥ 10 data centers, 30+ countries and regions, global full coverage of more than 200 CDN cloud acceleration, no matter where you are, you can experience a smooth viewing experience.

⑨. UBox Gen10 - 2.4G + 5G Dual-Band WIFI
➥ The dual-band WIFI signal is more stable, the transmission is faster, and the viewing experience is improved in all aspects.

⑩. Various Interfaces, More Ways to Play
➥ Connecting a TV, monitor or projector with the HDMI. Dual USB interfaces could expand more smart devices.

Have the UBOX10, You Can Have the World
➥ Wonderful content, all applications, more surprises, waiting for you to discover...
➥ All our UBox10 TV boxes are International Versions (Also named Universal versions). You could use it worldwide, without any area restrictions. Please rest assured to buy.

Top 7 Features of UBox Gen 10 TV Box:
Key Feature 1 - One-time purchase, Free Forever
➥ Watching movies and blockbusters at home, domestic and foreign movies are all available, enjoy at home.
1. No regional restrictions;
2. Permanent free OTA upgrade;
3. 24 hours online customer service;
4. 365 days of technical maintenance;

Key Feature 2- 7 days of Playback, will Never Miss the Highlights
➥ Unique 24 hours * 7 days review function, you will never miss any exciting content.

Key Feature 3- Happiness does not Need to Wait
➥ Unblock Tech spends huge sums of money to create an exclusive video library, synchronous TV dramas, popular variety shows, blockbusters, animation and children...
There is no waiting for any advertisements, making it easier to follow dramas.

Key Feature 4- Childlike Innocence, Watch What you Want at Home
➥ National comics, Japanese comics, 3D, healing, cute, funny, passionate, reasoning, only what you can't think of, nothing you can't see.

Key Feature 5- Massive Videos, Movies, TV Shows and WorldWide TV Channels to Watch
➥ Popular and variety of TV shows, movies, children's animation, adults, and documentaries, a small TV box can meet the viewing needs of the whole family.
➥ You are able to watch 2000+ Free live TV channels worldwide. Such as ESPN, ABC, NBC, CBS, FOX, CNN and lots of smooth and clear local city TV channels.


Key Feature 6- Enjoy Live HD Sports Games
➥ World Cup, Olympics, NBA, NCAA, NFL, MLB, NHL, Formula One... Don't miss any of the popular events.

Key Feature 7- Timeless Elegance
➥ You could also have a dance, yoga or sports at home... You can also develop a good figure and temperament at home.

Rich Plug Types Optional for Unblock UBox Gen 10:
No matter which country you come from, we will provide you with a power plug that complies with local codes.
Such as US, UK, EU and AU plug types. Which makes you use it with confidence.
Please contact us if you're not sure which one to choose.

What you will get after buying the Unblock UBox Gen 10?
1. UBox10 OTT
2. UBox10 AI remote controller
3. UBox10 Power Adapter (According to the plug type you choose)
4. HDMI Cable
5. User Manual

What are the updates of Unblock UBox10? What are the differences between UBox 10 and UBox 9?
Unblock UBox Gen 10 TV Box is the upgraded version of UBox9, which launched in Dec 2022. Which is the latest and most popular product from Unblock Tech.
➤. Latest H618 CPU.
➤. New Android 12 system.
➤. CPU is fully upgraded, with stronger compatibility, faster speed and better stability.
➤. WiFi supports the latest WiFi 6.
➤. Increases the acceleration of global CDN nodes, and makes the transmission faster and more stable.
➤. Bluetooth and infrared integrated remote control with digital buttons, more user-friendly, more comprehensive voice functions, key learning functions and forced firmware repair functions, the operation is more convenient and smarter.
➤. Inheriting the excellent tradition of Unblock UBox in the past generations, the UI display is continuously improved, and the operation is smoother.
Unblock UBox10 - With ten years of development, just to give you the Best Smart TV Box!

第四代谷歌网盘Clone术:Fclone
简介 Fclone是目前最新最强的Rclone衍生产品 与rclone和gclone兼容 同时与gclone相比,能有几十上百倍的转存速度 常规转存速度也达50+files/s 相当于装满一个团队盘(40W文件),单开的情况下,只需要135分钟左右 如果将参数拉高,使用性能较好的机器,速度可达150F/s,此速度下一个盘还不要一个小时 而且如果sa够多,还能无限拉升,不怕不够快,就怕你sa不够冲 可以说是几十上百倍的提升,而且稳定性大幅提升,不会受到众多小文件影响 而且还支持参数调整,可以充分利用高配主机的性能 所有前代产品均通用,无须额外修改,安装新程序后换个命令就能用
宝塔面板的安装 宝塔可以简化文件编辑上传管理等操作,请根据自己水平选择 同时记住配置文件地址并备份,也可以快速搭建clone环境 官方教程:https://www.bt.cn/bbs/thread-19376-1-1.html
Linux一键脚本: curl -sSO http://download.bt.cn/install/install\_panel.sh && bash install_panel.sh
Rclone(第一代)的安装 官方教程:https://rclone.org/install/
Linux一键脚本 curl https://rclone.org/install.sh | sudo bash
项目地址 https://github.com/xyou365/AutoRclone
安装方法 首先安装 python 3和 AutoRclone: yum install -y python3 python3-pip git # 安装系统依赖 git clone https://github.com/xyou365/AutoRclone # 拉取 AutoRclone 项目 cd AutoRclone # 进入项目文件夹 pip3 install -r requirements.txt # 安装项目依赖
然后打开这个地址:https://developers.google.com/drive/api/v3/quickstart/python
点击【Step 1: Turn on the Drive API】下面的 Enable the Drive API 按钮
弹出的【Configure your OAuth client】对话框中保持默认的Desktop app 不要动,点击右下角CREATE按钮
开启成功之后点击DOWNLOAD CLIENT CONFIGURATION下载生成的credentials.json
再用宝塔面板将下载到本地的credentials.json上传至服务器的AutoRclone文件夹下 (不知道在哪里请用宝塔搜索)
快速方法 此时回到 SSH ,执行 python3 gen_sa_accounts.py --quick-setup 1 ,复制返回的网址至浏览器打开,登陆上一步生成 credientials.json 文件时使用的账号,选择 允许 ,然后复制返回的授权代码,粘贴至 SSH 终端,再复制新返回的网址至浏览器打开,使用刚才的账号登陆,点击 启用 ,回到 SSH 终端内按下回车,此时应该开始创建 SA 了,稍等片刻完成后可以看到 /root/AutoRclone/accounts/ 目录下出现了一大堆 .json 后缀的 SA 授权文件。 重复创建的话需要加上--new-only
手动方法 回到 SSH ,执行 python3 gen_sa_accounts.py --list-projects; 如果之前没有创建过项目的话返回值应该是空的,那么此时执行 python3 gen_sa_accounts.py --create-projects 1 来新建一个项目,之后再次 python3 gen_sa_accounts.py --list-projects,复制一下新建的项目名称,下一步要用到; 如果已存在项目,且要使用已有项目来生成 SA(请确保你知道自己在做什么),那么复制一下想要生成 SA 的项目名称,否则参考上一条的步骤来新建一个项目; 执行 python3 gen_sa_accounts.py --enable-services ProjectName 为项目开启所需要的服务,ProjectName 为上一步复制的项目名称,开启方法参考上文【快速方法】中的描述; 执行 python3 gen_sa_accounts.py --create-sas ProjectName 为项目生成 SA; 执行 python3 gen_sa_accounts.py --download-keys ProjectName 下载项目中 SA 的授权文件,稍等片刻 ~/AutoRclone/accounts/ 目录下应该出现了一大堆 .json 后缀的 SA 授权文件。
赋予权限 将群组邮箱加入至团队盘,并设置为“内容管理员”
安装方法 Linux一键脚本: bash <(wget -qO- https://git.io/gclone.sh) gclone --version
在宝塔文件管理,找到文件夹位置/root/.config/rclone,新建一个空白文件rclone.conf 填写,示例如下
[gc] type = drive scope = drive service_account_file = /root/AutoRclone/accounts/1.json service_account_file_path = /root/AutoRclone/accounts/
转存用法 gclone copy gc:{【源盘】ID} gc:{【目的盘】ID} --drive-server-side-across-configs
Fclone(第四代)的安装和使用 项目地址 https://github.com/mawaya/rclone 发布地址 https://github.com/mawaya/rclone/releases
安装方法 下载对应版本的zip文件 在本地解压获得fclone文件 上传至/usr/bin目录里 chmod +x /usr/bin/fclone来赋予权限(或者直接宝塔面板赋予fclone权限)
超级转存方法
A:低配VPS推荐 --drive-server-side-across-configs --stats=1s --stats-one-line -vP --checkers=128 --transfers=128 --drive-pacer-min-sleep=1ms --check-first
B:低配VPS推荐 --drive-server-side-across-configs --stats=1s --stats-one-line -vP --checkers=128 --transfers=256 --drive-pacer-min-sleep=1ms --check-first
C: --drive-server-side-across-configs --stats=1s --stats-one-line -vP --checkers=256 --transfers=256 --drive-pacer-min-sleep=1ms --check-first
D: --drive-server-side-across-configs --stats=1s --stats-one-line -vP --checkers=256 --transfers=256 --drive-pacer-min-sleep=1ms --drive-pacer-burst=5000 --check-first
E:中高配独服以上推荐 --drive-server-side-across-configs --stats=1s --stats-one-line -vP --checkers=320 --transfers=320 --drive-pacer-min-sleep=1ms --drive-pacer-burst=5000 --check-first
示例 fclone copy remote:{1} remote:{2} flag
参数说明 --drive-server-side-across-configs #服务端传递 --stats=1s --stats-one-line -vP #日常参数 --checkers=数字 #越大越快 --transfers=数字 #越大越快 --drive-pacer-min-sleep=数字ms #越小越快 --drive-pacer-burst=数字 #越大越快 --check-first #fmod必须参数 团队盘转存个人盘 上述方法都是个人/团队盘转存到团队盘中 由于谷歌限制,不能直接传到个人盘中 所以需要先转存到团队盘 再全部"移动至"个人盘即可
王阳明心物合一论的一个重要命题:“意之所在便是物”
阳明用孟子 “良知” 那两个字来解释《大学》的 “知” 字。良知是 “不学而能” 的,即是主观的 “是非之心”。欲诚其意者,必先致其有是非之心的良知,这样一来,诚意与致知确能生出联络关系了。却是“致知在格物” 那一句又解不通。若如就说解格物为 “穷至事物之理”,则主观的良知与事物之理又如何能有直接关系呢? 欲对于此点得融会贯通,非先了解阳明的心物合一论不可,阳明说:要知身心意知物,是一件。问:“物在外,如何与身心意知是一件?” 答道:
“耳目口鼻四肢,非心安能视听言动,心欲视听言动,无耳目口
鼻四肢亦不能,故无心则无身,无身则无心。但指其充塞处言之谓之
身,指其主宰处言谓之心,指心之发动处谓之意,指意之灵明处谓之
知,指意之涉着处谓之物。只是一件,意未有悬空的必着事物……”(《传习录》陈惟濬记)
又说:
身之走便是心,心之所发便是意,意之本体便是知,意之所在
便是物。(《传习录》徐爱记)
又说:
心者身之主也,而心之虚灵明觉,即所谓本然之良知也。其虚灵明觉之良知感应而动者谓之意,有知而后有意,无知则无意矣、加忠之本体乎。意之所用必有其物,物即事也。如意用于事亲,即来为一物;意用于治国,则治国为一物;意用于读书,即读书为一物意用于听讼,即开讼为一物。凡意之所在,无有无物者……
又说:
日无体,以万物之色为体耳无体,以万物之声为体:耳无体,以
万物之声为体…… 心之体,以天地万物感应之是非为体。(《传习录》黄省曾记)
案语:
王守仁心学理论的一个重现命题是 “意之所在便是物”(《传习录》上)。认为“意” 是“心之所发”的一种意念、动机,故说“意之本体便是知”(同上),意念所及,动机发出,其内容无论是关于道德伦理还是行为感觉等等都是对象。例如,只要意在事亲,意在事君、意在仁人爱物、意在视听言动,都可称作“物”。所以他又说“物者,事也。凡意之所发必有其事,意所在之事谓之物”(《大学问》),以此论证意、知、物、事以及闻见行动均统一于一心,主观客观合而为一。
现在请综合以上四段话来下总解释,阳明主张 “身心意知物是一件”,这句话要分两解部才能说明。第一步从生理心理学上说明身心意知如何会是一件。第二从论理学上或认识论上说明主观的身心意知和客观的物如何会是一件。
先讲第一步。身与心,骤看起来像是两件,但就生理和心理的关系稍为按实一下,则 “耳目口鼻四肢非心不能视听言动,心欲视听言动,离却耳目口鼻四肢亦不能”,这是极易明之理,一点破便共晓了。心与意的关系“心之发动便是意”,这是人人所公认,不消下解释。比较准解的是意与知的关系。“意之本体便是知” 这句话,是阳明毕生大头脑。他晚年倡 “良知是本体” 之论,不外从此语演进出来。他所郑重说明的 “有知即有意,无知则无意” 这句话。我们试内省心理历程,不容我不首肯,然则知为意的本体亦无可疑了。阳明把生理归纳到心理上,再把心理的动态集中到意上,再追求他的静态,发现出知为本体。于是 “身心意知是一件” 的理论完全成立了。
再论第二步。主观的心和客观的物各自独立,这是一般人最易陷的错误。阳明解决这问题,先把物字下广义的解释。所谓物者不专限于有形物质,连抽象的事物如事亲治国读书等凡我们认识的对象都包括在里头,而其普遍的性质是 “意之所在” 意之所涉着处。再回头来看心理状态则 “意之所在所涉,未有无物者”“意不能悬空发动,一发动便涉着到事物”,层层推剥不能不归到“心无体以万物之感应为体” 的结论。然则从心理现象观察,主观的心不能离却客观的事物即单独存在较然甚明,这是从心的方面看出心物合一。
免责声明:本文来自腾讯新闻客户端自媒体,不代表腾讯网的观点和立场。
https://new.qq.com/omn/20200216/20200216A0EGK100.html
No.763 哈里·G.法兰克福 | 意志的自由和人的概念
一种近来开始被哲学家们当作对人的概念的分析而接受的分析,实际上根本不是关于那个概念的。斯特劳森的用法代表了当前的标准,他认为人的概念就是“这样一种类型的实体的概念:归结意识状态的谓词和归结肉体特征的谓词可以同等地只应用于那种类型的实体的一个单独个体”。但是除了人之外,还有许多实体既具有精神的性质也具有肉体的性质。似乎(尽管这显得有些非同寻常)在英语中根本没有一个共用的单词来代表斯特劳森所想的那种类型的实体,一种不仅包括人类而且也包括各种更低物种的动物的类型。尽管如此,这完全不能辩护对一个有价值的哲学术语的挪用。
某种动物的成员是否是人,当然不只是通过确定除了赋予肉体特征的谓词,将赋予意识状态的谓词同样应用于它们是不是正确就可以决定,准许将“人”这个语词用于那些为数众多的动物的确歪曲了我们的语言——它们的确既具有心理的也具有的物质的性质,但是在那个语词的任何正常意义上,它们都显然不是人。对语言的这个错用毫无疑问没有任何理论的错误。但是尽管这个冒犯只是“措词上的”,它却产生了重大的损害。因为它无故地减少了我们的哲学词汇,而增加了我们忽视“人”这个语词最自然地联系着的那个重要的探究领域的可能性。人们可能一直以为,没有什么问题比理解我们自己本质上是什么为哲学家们更加重要和持久的关注。然而这个问题被如此普遍地忽略,以至于如果我们偷偷拿走它的那个名称也几乎可以一直不被察觉,并且显然也不会引起任何普遍的失落感。
在某种意义上,“人”(person)这个词只不过是“人们”(people)的单数形式,在这个意义上,两个词所指的斗不过是某个生物学种的成员。然而,在这个词的那些有着更大哲学意义的含义中,判断某个东西是不是人的标准,主要并不是用于区分我们自己这个物种的成员与其他物种的成员。相反,那些标准的本意乃是抓住作为我们最人道的自我关注的对象,和我们认为是我们生活中最重要和最有疑问的那些东西的来源的那些特征。既然如此,即使这些特征实际上不是人类这个物种的成员所特有和公有的,它们对我们仍然具有同样的意义。在人类的处境中最引起我们兴趣的东西,如果也是其他动物的处境的一个特征的话,我们对它的兴趣也不会减少。
因此,我们把自己作为人看待的那个自我概念,不应该被理解为必然是关于物种特有的那些特征的概念。小说中的人物甚或某个我们熟悉的非人类物种的成员是“人”,这在概念上是可能的;而人类物种的某些成员不是“人”在概念上同样是可能的。另一方面,我们的确认为没有任何其他物种的成员是一个人。因此就有这样一个假定:对人来说本质性的东西,在于一套我们一般认为(不管是对还是错)只有人才有的特征。
在我看来,人与其他动物之间的一个本质区别应该是在人的意志结构中发现。欲望和动机并不是人类所独有的,也不是只有人类才能作出选择。某些其他物种的成员与人类一样拥有这些特征,它们中的某些甚至似乎能够进行慎思,并在之前的思考的基础上做出决定。然而这一点却似乎是人类特有的特征:它们能够形成我将称为“二阶欲望”或者“属于二阶的欲望”的那种欲望。
除了想要、选择和被推动去这样或那样做之外,人可能也想要具有(或不具有)某些欲望和动机。他们能够在偏爱和目的上,想要不同于他们实际的样子。许多动物似乎具有我将称为“一阶欲望”或“属于一阶的欲望”的那种能力,这些欲望只不过是做或不做这事那事的欲望。然而,除了人以外,似乎没有其他的动物具有显示在二阶欲望的形成中的那种反思性的自我评价能力。
1
“想要”(to want)这个词所指的那个概念,格外地难以捉摸。一个“A像要X”(A wants to X)——脱离一个用来详细或具体说明其含义的语境而单独使用——这种形式的陈述,传达的信息是非常少的。例如,这样一个陈述可能与下面每一个陈述都是相容的:(1)对于做X的愿望,并不在A内部诱导出任何感觉或可反省到的情感的响应;(2)A未意识到他想要X;(3)A相信他不像要X;(4)A想要克制自己不做X;(5)A想要Y,并且相信对他来说既Y又X是不可能的;(6)A不“真的”想要X;(7)A宁可死也不愿X;等等。因此,仅仅提出当某人想要做或不去做某事的时候他具有一个一阶欲望,当他想要具有或不具有某个一阶欲望的时候他具有一个二阶欲望,以此来表明一阶欲望和二阶欲望的区别,就像我刚才做的那样,肯定是不够的。
大家将会看到,在我的理解当中,“A想要X”这种形式的陈述,包括的可能性的范围非常宽。甚至当从(1)到(7)的陈述都为真的时候,它们都可能为真:当A没有意识到任何有关X这种行动的感觉的时候,当他没有意识到他想要X的时候,当他在想要什么上欺骗了自己、错误地相信他不想要X的时候,当他同时还有其他与他想要的X的欲望相冲突的欲望的时候,或者当他举棋不定的时候。所讨论的这些欲望可以是有意识的或者无意识的,他们不需要是一一明确的,而且A可以误解了它们。然而,就那些鉴别某人的欲望的陈述来说,其不确定性有一个更深层的来源,因此对我的目标加以限制在这里是很重要的。
首先让我们考虑那些鉴定一阶欲望的“A想要X”形式的陈述——也就是说,其中X这个词指的是一个行为的那些陈述。这种陈述单独地并不指示A对X的欲望的相对强度。它并不使这一点清楚地显示出来:这个欲望是否可能在A实际上做或试图做的行为中起一种决定性的作用。因为即便当A对X 的欲望只是他的欲望中的一个,并且当它远非其中最重要的一个的时候,似乎也可以正确地说A想要X。因此,当他强烈地偏向于采取其他行为作为代替的时候,A想要X仍然可能是真的;他可能是真的想要,尽管有这样的事实:当他行动的时候,激发他采取实际上的那个行为的,并不是想要X的那个欲望。另一方面,一个说A想要X的人,可能想要传达这样一个意思:正在激发或推动A去做他实际上正在做的那个行为的,正是这个欲望;或者当A行动时,他将实际上被这个欲望所推动(除非他改变了主意)。
假定我打算采纳的是“意志”的这种特殊的用法,那么只有在它以第二种方式使用的时候,那个陈述才鉴定A的意志。鉴定一个行为者的意志,不是去鉴定在他所实施的行为中作为动机的那个欲望(或那些欲望),就是去鉴定当他行动的时候将会成为他动机或者它愿意成为他的动机的那个欲望(或那些欲望)。一个行为者的意志,因此就等同于他的一个或者更多的一阶欲望。但是我目前正在使用的这种意志概念,与一阶欲望的概念不是同延的。它不是某个仅仅在某种程度上使一个行为者倾向于以某种方式行动的东西的概念。更确切地说,它是一个有效欲望的概念——一个一直把某个人推动(或者将会、可能会推动)到行动阶段的欲望。因此意志的概念与一个行为者想要做的东西的概念不是同延的。因为即便某个人可能有一个确定的意图去做X,但是由于尽管他有那样的意图,但是他做X的欲望弱于某个与它冲突的欲望,或者不如那个欲望有效,他可能采取另一个行动而不是做X。
现在,让我们考虑那些鉴别二阶欲望的“A想要X”形式的陈述——也就是说,其中X这个词指一个一阶欲望的那些陈述。这里同样有两种情况,A想要具有对X的欲望可能是真的。想要具有一个去X的欲望对A也许是真的,尽管有这样一个事实:他具有一个明确无误的(完全没有冲突和含糊)不要去X的欲望。换句话说,某人也许想要具有某个欲望。但是明确地想要那个欲望不要得到满足。
让我们想象这样一个情形:有一个从事对致幻剂上瘾者进行心理治疗的医师,他相信,如果他更好地理解对他们来说渴望他们上瘾的那种毒品是什么样子,就能提高他帮助病人的能力。假设在这种想法的引导下,他想要具有一个对毒品的欲望。如果他想要的是一个真实的需要,那么他想要的,就不仅仅是感受当上瘾者被对毒品的欲望所控制时他们所特有的那种感觉。就那个医师想要具有一个欲望而言,他想要的,是在某种程度上倾向于或者被推动去使用那种毒品。
然而,这种情况是完全可能的:尽管他想要被一个使用毒品的欲望虽推动,但并不想这个欲望是有效的。他可能不想被这个欲望一直推动到行动的阶段。他不必对搞清楚使用毒品是什么样有兴趣。就他目前想要的只是想要使用毒品而不是使用毒品而言,在他目前想要的东西当中,没有什么是毒品本身能够满足的;他可能非常谨慎地安排,以便如果他想要毒品的欲望最终由可能被满足时,他根本不可能满足他将具有的那个欲望。
因此,从那个医师现在想要有使用毒品的欲望的事实,推出他已经的确有欲望使用毒品就不是正确的。他的想要具有对毒品的二阶欲望,并不带来他具有一个使用毒品的一阶欲望的必然结论。如果现在给他毒品,可能也不能使得包含在他的想要想要使用毒品的欲望中的任何欲望得到满足。当他想要具有使用毒品的欲望的时候,他可能根本没有任何使用它的欲望;可能他想要的仅仅是体验对毒品的欲望。也就是说,他想要具有某个他不具有欲望的欲望,可能不是一个希望他的意志也不同于他实际的样子的欲望。
某个仅仅以这种截断的方式向要一个对X的欲望的人,近乎于矫揉造作,而且他想要一个对于X的欲望的事实也与对他的意志的坚定无关。然而,还存在可以用“A想要具有对X的欲望”描述的第二种情况;当被用于描述一个属于这第二种情况的情况时,那个陈述就确实是与A像要他的意志是怎样关联的。在这样的情况下,这个陈述意味着A想要对于X的那个欲望成为有效推动他行动的欲望。这不仅仅是他想要对X的那个欲望是在这样或那样的程度上推动他或者使他倾向于行动的欲望中的一个。他想要这个欲望是有效的——也就是说,提供他实际上采取行动的动机。当A想要具有一个对于X的欲望的陈述以这种方式使用时,它的确就使A已经具有一个对X的欲望成为必然的结论。A想要对于X的欲望推动他行动,和A不像要X,是不可能同时为真的。只有他确实想要X,他才能自我连贯地想要对于X的欲望不仅仅是他的欲望之一,而是更加决然地想要它是他的意志。
设想有一个人,他想要专注于工作的欲望成为自己的行动动机。如果这个假定是真的,这一点就必然是真的:他已经具有一个专注地做工作的欲望。这个欲望现在是他的欲望中的一个。但是他的二阶欲望是够得到实现的问题,并不仅仅依赖于他想要的那个欲望是否是他的欲望之一。它依赖于这个欲望是否如他所愿是有效欲望或意志。如果在最后关头的确是专注于工作的欲望推动他实施了行动,那么在那个时刻他想要的,的确(在相关的意义上)就是他想要具有的那个欲望。另一方面,如果实际上是某个其他的欲望在他行动的时候推动了他,那么在那个时刻他想要的,就不是(在相关的意义上)他想要具有的那个欲望。即便专注于工作的欲望依然是他的欲望之一,这一点也不会改变。
2
当一个人仅仅是想要具有某一个欲望,或者当他想要某一个欲望成为他的意志的时候,他就具有一个二阶的欲望。在后一种情形中,我将把他的二阶欲望称为“二阶决断”或者“属于二阶的决断”。我认为,作为一个人必不可少的,是具有二阶决断,而不是一般性地具有二阶欲望。可能存在具有二阶欲望但不具有二阶决断的行为者,尽管不太可能真有这样的人,但在逻辑上是可能的。在我看来,这样一个生物不是一个人。我将永“放任者”这个术语来指称具有一阶欲望但不能算是人的行为者,因为不论他们是否具有二阶的欲望,他们都没有二阶决断。
一个“放任者”的本质特征,是他不关心他的意志。他的欲望推动他做某些事情,而不需要他必然想要被那些欲望所推动,或他更愿意被另外的欲望所推动。“放任者”那个种类,包括具有欲望的所有非人类的动物和所有年幼的孩童,也许同样包括某些成年人。无论如何,成年人可能或多或少是放任自己的;他们或多或少经常响应他们对其没有二阶决断的一阶欲望,放任自己行动。一个放任者不具有二阶决断,并不意味着他的每一个一阶欲望都被不加注意地马上转化为行为。他可能没有任何机会去按照它的某些欲望来行动。除此之外,他的欲望转化为行为的过程可能被耽搁或阻止,或者受到他的冲突的一阶欲望或慎思的干涉。因为一个放任者可能拥有和使用属于高阶的理性能力。放任者的概念中没有任何东西暗示了他不能进行推理,或者他不能进行关于如何去做让想要做的事情的慎思。区别理性的放任者与其他的理性行为者的,是他不关心他的欲望本身的可欲性。他忽略他的意志应该是什么的问题。无论什么行为,只要是他最强烈地倾向于实施的,他都会去实施,不仅如此,他也不关心他的哪一个倾向是最强烈的。
这样,一个理性的生物(他思考某个行为过程对他的欲望的合适性),却有可能是一个放任者。当我主张作为一个人,他的本质不在于理性而在于意志的时候,我绝不是主张没有理性的生物可能是一个人。因为只有借助于他的理性能力,一个人才能批判地意识大自己的意志和形成二阶决断。一个人的意志的结构,因此预设了他是一个理性存在者。
一个人与一个放任者之间的区别,也许可以用两个有毒瘾的区别来阐明。让我们假设,说明毒瘾的那个生理状况在两个人身上是相同的,两个人都不可避免地屈服于他们对毒品(令他们上瘾的毒品)的周期性欲望。他尝试了所有它认为可能战胜自己 对毒品的欲望的方法。但是这些欲望对他来说强大得无法抵挡,因此,最终它们总是征服了他。他是一个不情愿的上瘾者,无助地受着自己欲望的侵犯。
这个不情愿的上瘾者具有互相冲突的一阶欲望:他想要使用毒品,他也想不让自己使用它。然而除了这些一阶欲望以外,他具有一个二阶决断。相对于发生在使用与克制的欲望之间的冲突,他不是中立的。他希望构成他的意志的,是后一个而不是前一个欲望;他想要后者而不是前者是有效的,希望它提供他在自己实际的行动中寻求实现的目的。
另一个上瘾者是一个放任者。他的行为反应了他的一阶欲望系统的状况,但是不需要关心推动他行动的欲望是否是他希望推动他行动的欲望。如果他在获得毒品或者使用的过程中遇到了什么问题,他对使用它的强烈欲望的反应可能就涉及慎思。但是他永远不会想到要考虑他是不是想要他的欲望之间的关系最终导致他具有他所具有的那个意志。无论如何,就他不关心而言,他与动物是没有分别的。
第二个上瘾者,可能经受着与第一个上瘾者类似的一阶冲突。不管他是不是人类,放任者可能既想使用毒品,也想克制自己不要使用它(也许是由于条件作用)。然而不像那个不情愿的上瘾者,他并不是更愿意他的相互冲突的欲望中的某一个在重要性上超过其他的欲望;他并不是更想要某一个一阶欲望而不是另一个构成他的意志。说他对欲望间的冲突是中立的,可能是误导的,因为这可能暗示他认为它们具有同等程度的可接受性。除了一阶欲望他没有任何同一性,下面这点就是真的:他既不是喜欢一个超过另一个,也不是更愿意不采取任何立场。
他的相互冲突的一阶欲望中的哪一个最终取胜,对于那个座位人的不情愿的上瘾者是重要的。确实,两个欲望都是他的;不管最终他是用了毒品还是成功地克制了自己,他的行动都满足了在某个字面的意义上属于他的欲望。在两个情况下他都做了他自己想要做的事情,并且它做它不是因为某个其目的恰好与他自己的目的相符的外部影响,而是因为他自己的想要做它的欲望。但是,这个不情愿的上瘾者,通过一个二阶决断的形成,将自己认同为他的冲突的一阶欲望中的一个而不是另一个。他使得它们中的一个更加真实地属于自己,而且通过这样做,他使自己与另一个欲望分离开。正是借助于在二阶决断的形成中实现这个认同和分离,那个不情愿的上瘾者可以有意义地作出这样一个在分析上令人迷惑的声明:推动他使用毒品的那个力量,是一个对他来说异己的力量,而且这个力量推动他使用毒品,并不是出于他的自愿,而是违反了他的意志。
放任的上瘾者不能够关系或者不关心他的相互冲突的一阶欲望中的哪一个最终取胜。他对此不关心不是因为他没有能力为偏爱找到一个有说服力的基础。那或者是因为他缺少反省的能力,或者是因为他对于评价自己的欲望和动机的无所谓的冷漠态度。在他的一阶冲突可能导致的斗争中只存在一个问题:在他的相互冲突的欲望中,是这一个还是那一个是最强烈的。由于两个欲望对他都有推动力,不管哪一个成为有效的,他都不会对他所做的感到完全的满足。但是,是他的渴望还是反感占了上风,对他来说都一样。他根本没在它们之间的冲突中下注,因此,不像那个不情愿的上瘾者,他既不可能赢得也不可能输掉自己参与的斗争。当一个人行动的时候,推动他行动的那个欲望,或者是他想要的那个意志,或者是一个他希望自己没有的意志。当一个放任者行动的时候,推动他的欲望既不是前者也不是后者。
3
在形成二阶决断的能力与另一个对人来说具有本质性的能力(一个一直以来经常被看作人类境况的区别性标志的能力)之间有一个非常紧密的关系。只是因为一个人具有二阶决断,他才基于可能享有意志自由,也有可能缺乏意志自由。因此,人的概念,不仅是一种具有一阶欲望而且具有二阶决断的实体的概念。它也可以被解释为这样一种实体的概念:它的意志的自由对它自己可能构成一个问题。这个概念把一切低于人类的和人类的放任者排除在外,因为它们不能满足享有意志自由的一个本质条件。如果有意志必然自由的超人类的存在,这个概念也将这样的存在排除在外。
意志的自由究竟是哪种自由?这个问题要求对人类经验的一个特殊领域有一个识别,与其他种类的自由概念不同,意志自由的概念与这个领域有着特别密切的关系。在对这个领域进行讨论的时候,我的目的将主要是确定,当一个人关心他的意志自由的时候,他最直接地关心的问题是什么。
根据一个我们熟知的传统,自由基本上就是做某个人想要做的事。现在,一个做它想要做的事的行为者的概念,绝不是一个全然清楚的概念:不管是“做”,还是“想要”,还是它们之间恰当的关系,都需要说明。但是,尽管这个概念的焦点有待于清晰,对它的说明有待于精炼,我相信这个概念的确抓住了至少部分地暗含在一个自由地行动的行为者概念中的洞穴。然而,它完全遗漏了那个相当不同的行为者(他的意志是自由的)概念的独特内容。
我们并不认为动物享有意志的自由,尽管我们承认一个动物可能自由地向任何它想要的去的方向奔跑。因此,具有做想做的事情的自由,对于具有自由的意志不是一个充分条件。它也不是一个必要条件。因为剥夺一个人行动的自由并不必然破坏他的意志的自由。当一个行为者意识到有某些事情是他不能自由地去做的,这无疑会影响他的欲望和他能够做出的选择的范围。但是假设有一个人,在没有意识到这一点的情况下,事实上已经失去了或者被剥夺了行动的自由。即使他不能够自由地将他的欲望转化为行动,或者根据他的意志的决定行动,他可能仍然形成那些欲望,像他的行动自由还没有被损害时一样自由地做那些决定。
当我们问一个人的意志是否自由时,我们并不是在问他是否能够将他的一阶欲望转化为行动。那是关于他是否具有按照自己的喜好行动的自由的问题。意志自由的问题,并不关系到他的作为与他想要的作为之间的关系。而是,它关系到他的欲望本身。然而关于他们的什么问题呢?
以一种与我们解释一个行为者是否享有行动自由的问题十分类似的方式来解释一个人意志是否自由的问题,在我看来既自然又有帮助。行动的自由是(至少粗略地)做一个人想要做的事情的自由。那么,类似地,一个人享有意志的自由的宣称意味着(也是粗略地),他在想要他想要的东西方面是自由的。更准确地说,它意味着,在意愿他想要意愿的东西方面或者在具有他想要的意志方面,他是自由的。正如关于一个行为者的行动自由的问题与那是否是他想要执行的行动有关,关于他的意志自由的问题与那是否是他想要具有的意志有关。
因此,正是在保证他的意志与二阶决断的一致中,一个人行使了意志的自由。正是在他的意志与二阶决断的分裂中,或者在他意识到它们的一致不是他自己的所作所为的结果而只是一个令人愉快的运气中,一个不具有这个自由的人感受到了它的缺乏。那个不情愿的上瘾者的意志是不自由的。这一点通过这个事实表明了:那不是他想要的意志。尽管以一种不同的方式,那个放任的上瘾者的意志也不是自由的。那个放任的上瘾者既不具有他想要的意志,也不具有一个不同于他想要的意志的意志。因为他没有二阶决断,意志的自由对他来说就不能构成一个问题。可以说,他是因弃权而没有意志的自由。
一般来说,人们比我对人的意志的结构的这种粗略说明所表明的要复杂得多。比如,就像一阶欲望的情况,关于二阶欲望存在同样多模棱两可、冲突和自我欺骗的可能性。如果在一个人的二阶欲望之间有一个没有解决的冲突,那么他就处在没有任何二阶决断的危险中;因为除非这个冲突得到解决,否则他就没有任何关于他的哪一个一阶欲望应该成为他的意志的偏好。如果这个状态严重到阻碍了他以一种具有足够决定性的方式认同他的相互冲突的一阶欲望中的任何一个的程度,就摧毁了他的人格。因为它或者倾向于使他的意志瘫痪,使他根本不可能行动,或者倾向于将他与他的意志分开,这样他的意志就是在没有他参与的情况下工作的。在两种情况中,他都像那个不情愿的上瘾者一样,变成了那个推动他的力量的无助旁观者,尽管是以一种不同的方式。
另一个复杂性是,一个人可能具有高于二阶的更高阶的欲望和决断。尤其是如果他的二阶欲望处于冲突之中的话。理论上,这种层次的上升是没有任何界限的;除了尝试,或许还有保留性的疲劳外,没有什么能够阻止一个人在他形成了一个更高一级的欲望之前,强迫性地拒绝认同自己的任何一个欲望。产生这一系列形成欲望的行动的倾向(也许是一种失控的人性化的情况),也会导致一个人格的毁灭。
然而,无需任意的切断而终止这样一系列的行动是可能的。当一个人决定性地认同自己的一个一阶欲望的时候,这个承诺就会始终“回响”在潜在无限的更高等级的序列中。让我们作这样的思考:一个人无保留或无冲突地想要专注于自己工作的欲望成为自己的动机。他的希望被这个欲望推动的二阶决断是决定性的,意味着不存在提出更高阶欲望或决断是否适当的问题的任何余地。假设有人问他是够想要想要想要专注于他的工作,他可以恰当地坚持,这个第三阶的欲望的问题并不产生。这样的声称可能是错误的;因为他没有考虑他是否想要自己已经形成的那个二阶决断,他根本不关心他想要自己的意志符合的是这个还是其他决断的问题。他已经做出的那个承诺的决定性,意味着它已经下定决心,没有恩和关于他的二级决断的进一步的问题,在任何更高的层次上,仍然有待询问。我们是通过说这个承诺暗中产生了一个确认更高阶欲望的无限序列来解释这一点,还是通过说那个承诺等于瓦解了所有关于更高阶欲望的相关性来解释这一点,是相对不重要的。
如不情愿的上瘾者的例子,可能使人以为,二阶或更高阶的决断一定是深思熟虑地形成的,并且一个人会努力保证它们得到满足。但是一个人的意志符合他的高阶决断,可能袁飞这样深思熟虑和自觉。有些人当他们想要对人友善的时候,就很自然地被善意所激发,在想要卑鄙的时候就很自然地被卑鄙的意图所激发,而不需要任何显而易见的预先考虑,也不需要任何强有力的自我控制。还有一些人,当他们想要对人友善的时候被卑鄙所激发,而当他们打算卑鄙的时候就会被善意所激发,同样不需要预先的深思熟虑,不需要积极抵抗这些对他们的高阶欲望的违反。享有自由对有些人是轻而易举的,有些人却必须通过艰巨的努力才行。
4
我的意志自由理论很容易说明这一现象:我们不愿承认任何低于我们自己的物种的成员享有这个自由。它也通过为什么应该认为意志的自由是值得想望的变得清楚明白,满足了另一个任何这样的理论都必须满足的条件。享有一个自由的意志,意味着某些欲望(二阶或更高阶的欲望)得到满足,繁殖,它的缺乏意味着它们的受挫。这些得失悠关的满足,是那些使一个人变得更强的满足,对于这样一个人,我们可以说他的意志是他自的。相应的挫败是这样的挫败:对于一个遭受了这种挫败的人,我们可以说,他与自己疏离了,或者说他发现自己是那些推动他的力量的一个无助的或者被动的旁观者。
一个能够自由地做他想要做的事的人,却可能不能够具有他想要的意志。然而,让我们假设他既享有行动的自由也享有意志的自由。那么他不仅能够自由地做他想要做的事,他也能够自由地想要他想要要的东西。在我看来,这种情况下,他似乎就具有所有可能欲求或设想的自由。在生活中还有其他好东西,他可能并不拥有它们中的某些。但是,就自由而言他什么也不缺少。
某些其他的意志自由理论是否满足了这些基本的然而本质性的条件是完全不清楚的:也就是说,为什么我们想要这个自由,为什么我们拒绝说动物也拥有它,这些应该是可理解的。比如,让我们看一看罗德里克·齐硕姆的那个人类自由必然导致因果决定关系不在场的学说的奇怪版本。根据齐硕姆的观点,每当一个人实施了一个自由的行动,那都是一个奇迹。当一个人移动他的手的时候,他的手的运动就是一系列物理原因的结果;但是这个系列中的某个事件,“可能是发生在他的大脑中的一个事件,是由那个行动者引起而不是被任何其他的事件引起的”。一个自由的行动者,因此具有“一个有些人只愿意归于上帝的特殊能力:当我们行动的时候,我们每一个人都是一个不被推动的原动者”。
这个说明未能为怀疑属于低于人类的五种的动物享有它所定义的那种自由提供任何基础。为什么一只兔子移动它的腿的时候,看上去不太可能像一个人移动他的手的时候一样是实现了一个奇迹?齐硕姆并没有为此提供任何说明。但是无论如何,为什么一个人(无论是谁)应该关心他是否能够以齐硕姆所描述的那种方式打断因果的自然顺序呢?齐硕姆没有为相信这一点提供任何理由:在一个当他移动手时就奇迹般地发动了一个因果序列的人的经验,与一个移动自己的手却没有打破任何这样的正常因果顺序的人的经验之间,存在一个可辨别的差别。似乎不存在任何具体的根据,支持对这一事态而不是另一事态的偏爱。
人们一般认为,除了满足我所提到的那两个条件以外,一个令人满意的意志自由理论,必然对道德责任诸多条件中的一个条件进行分析。实际上最近理解意志自由问题的最普遍的一个方法,一直是询问某人对他所做的事负有道德责任的假设会带来什么样的必然结论。然而,在我看来,道德责任和意志自由之间的关系一直受到了非常普遍的误解。一个人只有在他做某事时意志是自由的情况下才能为他所做的事承担道德责任,这并不是真的。即使他的意志那时完全不是自由的,他也可能对作了它负道德责任。
一个人的意志,只有在他能够自由地具有他想要的意志的情况下才是自由的。这意味着,关于他的任何一个一阶欲望,他或者是自由地使那个欲望成为他的意志,或者是自由地使某一个另外的一阶欲望代替那个欲望成为他的意志。因此,不论他的意志是什么,意志是自由的那个人的意志当时可能另外的样子;他那时能够采取其他行动,而不是像他世纪上的那样构成他的意志。不过,在这样的语境中应该怎样理解“他本来能够采取其他行动”,是一个争论不休的问题。但是,尽管这个问题对于自由理论是重要的,它与道德责任理论却无关。因为一个人为他已经实施的行为负有道德责任的假设,并不必然带来那个人当时拥有任何他想要的意志的结论。
这个假设的确必然带来那个人是自由地做他所做的事,或者他是出于自愿做那件事的结论。然而,相信只有当某人有自由做他想要做的任何事的时候他才自由地行动,或者只有他的意志是自由的时候他才能出于自愿而行动,是错误的。让我们假设有这样一个人:他已经做了他想要做的,他做它是因为他想要做它,而且当他做它的时候,推动他的那个意志是他的意志,因为那是他想要的意志。那么,他是自由地和出于自愿地做它的。即使假设他当时能够具有不同的意志,他当时也不愿他的意志不同于他实际上的那个意志。此外,由于在他行动的时候推动他的那个意志是他的意志,因为那是他想要它成为他的意志,他就不能声称他的意志是被强加给他的,或者对于那个意志的构成他是一个被动的旁观者。在这些情况下,询问那些他选择放弃的取舍当时对他是否真的可能,与对他的道德责任的评价是完全不相关的。
为了清楚地说明这个问题,让我们考虑第三种上瘾者。假设他的毒瘾有与那个不情愿的上瘾者以及放任的上瘾者同样的生理基础和不可抗拒的力量,但是他对于自己的这种情况感到高兴。他是一个心甘情愿的上瘾者,他不想事情是其他样子。如果毒瘾的控制力竟然(万一)不知何故减弱了,他愿意尽其所能恢复它;如果他对毒品的欲望竟然(万一)开始渐渐消失,他愿意采取措施恢复它的强度。
这个心甘情愿的上瘾者的意志不是自由的,因为使用毒品的欲望总会是有效的,不论他是否想要这个欲望构成他的意志。但是当他使用了毒品,他是自由地和出于自愿地使用它的。我倾向于认为,他的境况与他的使用毒品的一阶欲望的超决定性是(直接)有关的。这个欲望之所以是他的有效欲望,是因为他已经在生理上有瘾了。但是它之所以是他的有效欲望,同样是因为他想要它是。他的意志不在他的控制之内,但是由于他对毒品的欲望应该成为有效欲望这个二阶欲望,他使得这个意志成为他自己的。倘若因此它对毒品的欲望之所以成为有效的欲望不仅仅是因为他的毒瘾,那么它就与可能对使用毒品负道德责任。
我对意志自由的设想在决定论的问题上似乎是中立的。一个人自由地想要他想要的东西,可能是因果地决定的,这似乎是可以设想的。如果这是可以设想的,那么一个人享有自由的意志就可能是被因果决定的。这个主张中只是有一个无害的表面的自相矛盾:有些人具有自由的意志而有些人没有,是不可避免地由他们无法控制的力量决定的。在这个命题中也没有任何不连贯:一个人自己的能动力之外的某些力量,对他享有或者未能享有意志的自由这个事实负责(甚至道德责任)。一个人应当为他出于自愿所做的事承担道德责任,同时某个其他的人也应该对这个人做了那件事承担道德责任,这是可能的。
另一方面,一个人自由地具有他想要的意志可能是偶然发生的,这似乎也是可以设想的。如果这是可设想的,那么某些人享有意志的自由而某些人不享有,就可以是一个机会的问题。或许像许多哲学家相信的,事态以一种偶然的或作为一个自然的因果顺序的结果之外的方式发生,也是可以设想的。如果有关事态以第三种方式产生确实是可以设想的,那么一个人以第三种方式实现意志自由的享有也是可能的。

[美]哈里·G.法兰克福:《事关己者》,段素革译
浙江大学出版社,2011年版
本文原载[美] 哈里·G.法兰克福:《事关己者》,浙江大学出版社2011年版,第12-28页。返回搜狐,查看更多
人間佛教的「治心十法」
前言
人在世間上,需要我們管理的,有人事、親情、感情,這些人情事故,追究源頭,都是來自於我們的內心是否管理得當,因此,我們最要管理好的是自己的心。
我們的心、我們的**是一個很奇異的團隊,特別需要我們的管理和關照。我們的**是否正確?我們的見解可以嗎?我們的看法中道嗎?這些都要管理。能可以了解、觀照自己的**看法合理不合理,對我們的人生會有很大的幫助。**看法合理,凡事都會很順利;如果不合理、不安心,就會很煩惱,表示你對自己的心理上很多的問題不善管理。
管理順利,人我相處,自在逍遙;不去理會他,久而久之就會出問題。就像水溝,平常不去疏通、清理,就會積垃圾、長蚊蟲,對生活的環境帶來髒亂。同樣的,人心不去管理、治理,就會不斷的製造煩惱,可以說,人的一生,從身到心,從內到外,從家庭到社會國家,都離不開心的管理。
「人心不同,各如其面。」心的管理非常的麻煩,因為眾生的心念錯綜複雜,不過,佛教對治的法門也無量無邊,只要我們勇敢、面對我們的煩惱,汙泥也會生出蓮花的。
接下來,從我寫的一筆字,人間佛教「治心百法」中,列舉數點意見,提供給大家參考。由於萬變不離其宗──我們的心,因此,本文將「認識自心,一心二門」做為總說,其他九說是為別說。以下一一做說明。
一、認識自心,一心二門
每個人都有一顆心,但是卻很少有人能夠真正認識自己的心、懂得自己的心;正如唐朝石頭希遷禪師說:「從來共住不知名,任運相將只麼行;自古上賢猶不識,造次凡流豈可明。」
人,因為不能認識自己的心,所以做不了自己的主人,也不知道自己的本家在哪裡;因為找不到回家的路,只能在人生的大海裡隨波逐流,沒有方向、目標,也找不到生命的意義、價值在哪裡,這樣的人生是很可悲的。
因此,我們要想主宰自己,管理自己,乃至管理世間的一切,首先就是要認識自己的心。因為大至宇宙虛空,小至微塵剎那,都通之於心;心不明,對一切就會愚昧無知,那麼前途可就足堪憂慮了,所以認識自己的心,其重要性,不言可明。
根據《大乘起信論》說,我們的心是「一心開二門」。所謂「二門」,就是「心真如門」與「心生滅門」。也就是說,我們每個人與生俱來,都有一顆與佛同等的「真如心」,那是清淨無染、永恆不滅的佛性,這就是我們生命的本體,稱為「心真如門」。只不過凡夫眾生不懂,不能認識自己的「真心」,因此心中有寶卻不自知,只有「懷珠作丐」,流浪街頭,迷失在茫茫的人海裡,載浮載沉,就如大海之漚,忽生忽滅,這就是「心生滅門」。
「心真如門」就是正的、善的、好的、淨的;「心生滅門」就是邪的、惡的、壞的、染的。換句話說,我們的心可正可邪、可善可惡、可好可壞、可真可假、可大可小、可上可下、可染可淨、可迷可悟、可聖可凡……
心的力量其大無比,心是我們的主人。我們平時身體所作的行為、口中所說的語言,都是受到「心」的鼓動而造作出來的。如果我們的心好,就會做好事,說好話;相反的,心惡,就會做壞事,就會惡口罵人。
「身口意」三者,就是造業的主人翁,如果我們能把這三者都管理好,讓自己每天所思所想、所言所行,都是正的、善的、好的、美的;每天都能用真心誠意做人處事,那麼我們的生命就會不斷向上提升,往四聖之路的佛道上邁進;相反的,心懷造惡,就會向下沉淪,生生世世在六道裡輪迴,甚至在三惡道裡受苦。
正如《雜阿含經》說:「心惱故眾生惱,心淨故眾生淨。」因為「心」關係著我們人生的苦樂,乃至生命的輪迴,所以佛教講「修行要修心」,也就是要把我們這顆飄忽不定、難以捉摸的心管理好。
我們的心,平時都是隨著「眼耳鼻舌身」五根,向外追逐「色聲香味觸」各種聲色貨利、五欲六塵,於是生起貪染愛著、瞋恨嫉妒、分別計較,乃至人我是非、自私無明等雜念妄想紛飛,讓我們的心一刻都不得安寧。因此,我們要想管理好自己的心,除了要認識它,而且要有方法處理它。
在《佛遺教經》裡提到:「縱此心者,喪人善事;制之一處,無事不辦。」就是教我們要「制心一處」,把心安住於一境,不受外面的世界干擾。「一」很重要,如剛才所說,世間萬法,生滅不已,世間萬象,紛陳雜亂,因此難免有麻煩,所以還是一真法界,最為究竟。就如我們的生活裡,夫妻之間,一夫一妻,不要有小二、小三,家庭才會健全;從事任何行業,也要一心一意,不要三心二意,事業才能成功。
但是,如何才能「制心一處」呢?佛教裡有各種的修行法門,如:參禪、念佛、持咒、觀心、數息,甚至抄經、禮懺、拜佛、朝山等,都是為了安定我們的這一顆心。不過,我想最重要的,還是要自我肯定「我是佛」;如果我們念念都能想著「我是佛」,自然不會去侵犯別人,進而會用佛心去成就別人、利益他人。
能夠自我肯定「我是佛」,就能懂得「心佛眾生,三無差別」,那麼不但人我是一如的,甚至山河大地、情與無情,都是我心中的眾生,我都應該尊重他、包容他。如此一來,就能把自己的心管理成「我看花,花自繽紛;我見樹,樹自婆娑;我覽境,境自去來;我觀心,心自如如」,那麼當下就能認識自己,就是自我管理成功了。
二、用自覺對治無知
有一道謎題說:「三點若星相,橫勾似月斜;披毛因它起,成佛也由它。」這個答案說的,就是我們的「心」。
我們的心,不是只有父精母血、因緣和合而有的「肉團心」;之外,我們每天都在對境生起「緣慮心」、「思量心」、「積聚心」,也就是對人、對事、對境,生起種種的好惡、分別,種種的比較、計較,甚至怨恨、不平、自私、執著等種種虛妄不實的心。
這些不好的心,如果我們不把它管理好,任由它翻雲覆雨、興風作浪,帶著我們上山下海、升天入地,那麼不只是今生受苦受難,來生還可能披毛戴角,不復為人。所幸,我們每個人都還有一顆「真如心」,只要我們懂得把心管好,把內在的佛性開發出來,那麼不只是今生可以有大成就,甚至將來成聖成賢、成佛作祖都綽綽有餘。
只不過凡夫眾生累劫以來,積聚的習氣太重,所以要調伏這顆「頑固難化」的心,也不是那麼容易。佛陀在經典裡,曾把我們的心作了種種的譬喻。例如說:心如猿猴難控制、心如電光剎那間、心如野鹿逐聲色、心如盜賊劫功德、心如冤家身受苦、心如童僕諸惱使、心如國王能行令、心如泉水流不盡、心如畫師描彩繪、心如虛空大無邊等等。
因此,如何把這顆如猿猴般時刻跳動不停的心看管好,如何把如強盜般劫取我們功德法財的盜賊擒拿住,在經典裡也有種種的方法,如「四念住」、「五停心」、「六妙門」、「九住心」、「九想觀」等等。但是我想,最重要的,還是要靠「自覺」。
我常說,一個人平時有老師教育我們,給我們覺悟,那是「緣」;而「因」,就是自覺。所謂「自覺」,就是自我要求、自我肯定、自我啟發、自我覺悟。也就是佛陀教我們的「自依止、法依止、莫異依止」。
佛陀要我們皈依自己、相信自己、肯定自己,這就叫「自依止」;皈依法、皈依真理、皈依自性的光輝,就是「法依止」;不要隨便給人牽著鼻子走,就是「莫異依止」。這就等於禪門的教育,禪師教育弟子,他不會跟你作說明,而是要讓你自己去參;因為自己覺悟的,才是自己的,自己不覺悟,我說的還是我的!
這也如同自己的身體,血管裡的血液是自己的,是自發的營養,對增進健康有最大的功效與幫助;如果靠打針、注射營養劑,這些總是外來的,利益有限。所以禪門裡也有所謂的「由門入者,不是家珍;從心流出,才是本性。」
一個人如果能夠時時自我覺悟,例如:自覺自己對人不夠好、對自己要求不夠嚴格、對做事不夠賣力、對求學不夠用功,或是對父母家人不夠盡心、對親朋好友不夠盡力,甚至對國家社會的服務奉獻不夠;能夠時時自覺自己不好、不夠、不足,就會不斷精進,努力向上。
如此日積月累,你的道德人格自然會日日增上,你的人緣福德,也會日日增加,甚至你的智慧覺性都能日日增長;有了覺性,一旦有不好的念頭生起,自能即時察覺,即刻阻斷外緣。如此一來,雖然王陽明先生說:「捉山中之賊易,擒心中之賊難」,但是有了自覺,還怕心中的盜賊不能手到擒來嗎?所以,「自覺」就是最好的管理;唯有透過「自覺」,才能把自己的身心管理好。
三、用知足對治貪婪
《三時繫念》云:「諸苦盡從貪欲起,不知貪欲起於何,因忘自性彌陀佛,異念紛馳總是魔。」因為貪心、自私、不滿足,對於不能順從己意的人事,瞋恨煩惱就接踵而來,給自己和身邊的人,帶來許多的痛苦,不得自在灑脫。
有一首不知足的歌,形容一個人「心無厭足」是非常貼切的。歌云︰
終日忙忙只為饑,才得飽來又思衣;
衣食兩般皆俱足,房中又少美貌妻;
娶得嬌妻並美妾,出入無轎少馬騎;
騾馬成群轎已備,田地不廣用支虛;
買得良田千萬頃,又無官職被人欺;
七品五品皆嫌小,四品三品仍嫌低;
一品當朝為宰相,又想君王做一時;
心滿意足為天子,更望萬世無死期;
總總妄想無止息,一棺長蓋抱恨歸。
《八大人覺經》云:「心無厭足,惟得多求,增長罪惡。」貪欲愈多,增長的罪惡就愈多。
貪欲如水,不知道要控制,任由物欲橫流、四處流竄,不僅危害了社會自然,最終也會殃及自己及後代子孫。我們一個人擁有再多的金錢,每天也只是「千棟房屋一張床,萬貫家財三碗飯。」再怎麼吃、怎麼用,都是很有限的,總不可能每個晚上換三張床睡覺休息;就是腸胃再好,也不能毫無節制的暴飲暴食。佛法講中道,凡事都要適可而止,過與不及,都不是正確的生活態度。
那麼如何來管理我們貪得無厭的心?知足,可以讓我們遠離貪婪、比較的心。如《太子瑞應本起經》所云:「無病第一利,知足第一富,善友第一親,無為第一安。」幸福安樂,不是取決於我們擁有、占有多少,而是能有一顆知足的心。
相對的,貪欲就像無底洞,會讓我們不斷的希望擁有更多,但在實際的生活中,卻未必真的用得了那麼多,大家在需要和想要之間,要能權衡,多一些考量,人與自己,人與人,人與自然,都要在互利、互助的情形下,才能發揮和平、和諧、穩定的永續發展。
只要心中常常自忖:生活雖然沒有萬貫家財,但是,我擁有樸素、幸福的家庭;吃飯雖然沒有滿漢全席,每天的菜根香,我也能甘之如飴。每天活在歡喜、希望中,這不就是活在天堂裡,世界上最富有的人了嗎?就像佛陀的堂弟跋提王子,跟隨佛陀出家做了比丘,體悟到人生儘管沒有錦羅綢緞,山珍海味,但能悠閒於林中坐禪,衣食簡單,自由的經行,安心的睡覺,沒有任何不安,就是人生最快樂的事了。
《佛遺教經》也說:「知足之人,雖臥地上,猶為安樂;不知足者,雖處天堂,亦不稱意。」若問天堂、地獄在哪裡?貧、富在哪裡?就看他知不知足。多一分貪欲,便多一分煩惱,若時時以知足、感恩、惜福,來管理貪欲的習氣,人生就更自在灑脫了。
四、用慈悲對治瞋恚
「一念瞋心起,八萬障門開」,在佛教裡,把瞋恨心比喻成火,能燒掉功德之林;瞋恨也如同刀劍,會傷害我們的法身慧命。在《法苑珠林》中記載,瞋恚有六點過患:失善法、墮惡道、造惡口、喪法樂、竊善心、遭禍患。瞋心所造成的缺失,造成人生的旅途上,障礙難行。
瞋恨之火一旦燃起,再好的男女朋友,再相愛的夫妻,可以馬上反目成仇,甚至恨不得馬上置對方於死地,所謂「愛之欲其生,惡之欲其死。」瞋恨,會讓我們失去親人、朋友、自己,乃至各種好因好緣,也不得別人的認同和接受,如《佛遺教經》說:「瞋恨之害,則破諸善法,壞好名聞,今生後世,人不喜見。」
如何消滅內心瞋恨的火焰?必須用慈悲的法水讓它熄滅。「慈」是予樂,「悲」是拔苦,多一分慈悲,自然會少一分瞋恚。其實,人我之間會起衝突,都是因為我們缺乏同理心、包容的心,以自己的立場、需要來要求對方,當對方不能按照我們心中的期望時,就會因為生氣憤怒,失去理性,不擇手段的去傷害對方。
生氣,不僅不能解決問題,還會造成人際關係的障礙。每次因為生氣,要發怒指責、傷害對方時,不妨試著深呼吸,先讓自己冷靜下來,仔細想想,有沒有其他的管道,可以來解決問題,或者,請教善知識,討論應對的方法,如古德所云:「向前三步想一想,退後三步思一思,瞋心起時要思量,熄下怒火最吉祥。」
慈悲沒有障礙,慈悲沒有敵人。有些人的能力很好、很強,但是脾氣、個性不好,大家不歡喜和他共事,不能給人接受,也不能發揮自己的才華。同樣的,有些人能力不怎麼樣,但是,處處替人著想,慈悲善良,肯吃虧,需要幫忙時,朋友紛紛出手相助,反而容易成就。
有青年問我:「要怎麼控制自己的瞋恨心?」我說:「問你自己。」說和不說,做和不做,決定的關鍵都是取決於自己。因為一時瞋恨、衝動,失去自己的人生,衡量得失後,你還會衝動?不能控制嗎?
觀世音菩薩「慈眼視眾生,福聚海無量。」慈悲待人,培養我們的福德因緣。
一個人寧可什麼都沒有,但是不能沒有慈悲。「愛人者,人恆愛之;敬人者,人恆敬之。」彼此之間,我多一分慈悲給你,你多一分愛心給我,多一點善緣,少一分瞋恚,不要給人難堪,不要讓人為難,彼此退一步想,留個將來見面相處的機會,這樣,彼此人生的空間反而更寬廣。
每一個人都能用慈悲來管理瞋恨,設身處地為他人著想,自他交換,將心比心,不要以大欺小,以強欺弱,那麼人與人之間沒有對立,國與國之間沒有了戰爭,世界和平便能早日到來。
五、用律己對治欲望
我們的欲望,如無底洞一樣,沒有滿足的一天,如果不能加以控制,當欲望得不到需求時,就可能會犯下殺盜淫妄等不當的罪業,致使自己、他人,痛苦不已,嚴重的,甚至造成整個社會的負擔和遺憾。
欲望有二種,分別是善法欲和惡法欲。善法欲的力量,會促使我們歡喜聽聞正法,努力上進,不斷的自我突破、超越,許多各行各業成功人士,或學有所成者,都是源自善法欲的動機;惡法欲,則是在貪求無厭中,不知反省自己,不願務實做人,只想透過侵犯、傷害別人、討便宜,達到自己的目的。
每一個人的欲望,都有內憂外患,內憂是我們內在對財、色、名、食、睡五欲的習氣追求;外患是不斷的刺激、誘惑我們的色、聲、香、味、觸、法六塵,要想在這二者之間,獲得自在、解脫的人生,不被欲望奴隸,就要在心地上下功夫,在行為上自我轉化。
如何對治欲望?透過戒律的管理,可以約束、節制我們對欲望盲目的追求。其中,五戒中的不殺生、不偷盜、不邪淫、不妄語、不酗酒,就是提升、淨化我們欲望的法藥。
比方說:有些人在感情受到挫折,得不到對方的愛,就不希望別人也得到,因此萌生殺意。如果,他持了不殺生戒,就會產生一種自制的力量,不會去殺害別人了。
看到喜歡的東西,心生占為己有的心,持了不偷盜戒,就會自我提醒,應以正當的經濟行為,獲取應得的東西。結了婚以後,在交際場合遇到談得來的對象,想到自己受持五戒,就會把持自己的行為,不要逾矩,以免落人口舌,造成婚姻危機。遇到財務困難,想要行使詐騙的手段時,想到誠信建立的不易,一旦失去信用,就無立足之地,在行為上就會謹慎小心。生意往來,難免喝酒,若能以茶代酒,當然最好,若不能,也要能節制,不要因為酗酒,而犯下了殺、盜、淫、妄的過失,因小失大,毀了自己的人生,侵犯別人的生命、名譽,後悔難追。
我們的一生離不開金錢、愛情、權力等各種的欲望,因此,我在推動人間佛教的過程中,提出「合理的經濟生活,正義的政治生活,服務的社會生活,慈悲的道德生活,尊重的倫理生活,淨化的感情生活」,這就是「勤修戒定慧,熄滅貪瞋痴」。皈依三寶成為佛教徒,受持五戒,是行為的改善,趨向佛道的開始,依著五戒的準則來管理欲望,你不侵犯我,我尊重愛護你,人我之間建立互助、互信,一家受五戒,家庭美滿幸福;人人受五戒,社會必然和諧安定。
六、用謙虛對治傲慢
傲慢,是五毒、六根本煩惱之一。我為人處世傲慢嗎?不妨檢視一下平常自己的起心動念,行為舉止。
傲慢的人,因為自視甚高,不易服從他人,也不歡喜和人配合,不接受他人的意見;由於無視他人的存在,坐沒坐相,站沒站相,大放厥詞,覺得自己高人一等,或者覺得自己和他人不一樣,看不起別人,也怕被人看不起,甚至男人看不起女人,資深員工欺負新人等,這些都是常見的傲慢。
「我慢山高,不見德水。」性格傲慢的人,因為自視甚高,目中無人,不會想要主動去請教他人,聽聞到善法也不會著意,也就障礙學習進步的因緣,和錯失親近善知識的機會,在團體中不得好人緣,覺得自己懷才不遇,抱怨、不滿的情緒接踵而來,得不償失。
如何降伏傲慢?謙虛是管理傲慢的法門。《法華經》中的常不輕菩薩,就是降伏我慢的修行代表了,他尊敬人人皆有佛性,當來成佛,不管對方是什麼身分、地位、性別、年紀,他都合掌恭敬,讚歎他人:「汝等皆當成佛,我不敢輕視汝等。」
善財童子五十三參,拜訪各行各業,尋師訪道,不分貧富貴賤、男女老少,在謙虛受教中,得到大家的讚許、接受,在參訪的過程中,降伏我慢的習氣,擴大人生的視野,也增進自己的智慧、道德。
其實,人外有人,天外有天,每一個人所知道的,在浩瀚無垠的宇宙中,不過如微塵一般。發明萬有引力的科學家牛頓,在他的回憶錄中,謙虛的表示:「我不知道這個世界會如何看我,但對我自己而言我僅僅是一個在海邊嬉戲的頑童,為時而發現一粒光滑的石子或一片可愛的貝殼而歡喜,而我面前的偉大的真理的海洋依然未經探索。」愈是偉大的人,愈是明白自己所知有限,也因此更為謙卑。
「謙受益,滿招損。」為人處世,以此惕勵自己,不因小小成就而自滿、自傲,而失去許多學習的機會,要更加虛心的向師長們求教,並時時心存感謝;唯有懂得謙恭才能使自己真正的受益!
我慢的習氣,與生俱來,因此,四十年前,在建設佛光山淨土洞窟時,特別建設了一道大門,高只有四尺,提醒我們五尺之身在認識真理之前,要懂得低頭、謙卑,才能有所收穫。
謙卑的人,成熟穩重,慈悲莊嚴,讓人一見就被他的涵養所攝受,心生尊敬;傲慢的人,不可一世,讓人心生排斥。謙卑,如同成熟的稻穗,頭垂得愈低;結實纍纍的水果,愈是將枝葉彎得更沉。學會謙卑的自我管理,給人接受,終生受用不盡。
七、用喜捨對治慳吝
有一些人,因為個性慳吝,平常不願與人太多往來,凡事貪小便宜,只圖個人利益,擔心和人交往就得要付出、給予,深怕自己吃虧不討好,給人占了便宜,把自己關在銅牆鐵壁的監牢裡,造成自己的人際關係疏離,活得鬱鬱寡歡。
台灣俚語說:「一個錢,打二十四個結。」就是形容這種性格慳吝的人,當花費的時候,他捨不得花費,該布施時,他也捨不得奉獻給予,這種慳吝的性格,把人生弄得一點歡喜、希望也沒有,要改善這種人生,就得靠喜捨來對治慳貪吝施的習氣。
眾生是我們的福田,喜捨布施是世間最有保障的投資,不管財施、法施、無畏施,布施就能得到福報,所以又稱為「種福田」。雖然,布施分成「心田事不同,果報分勝劣」,只要發自內心,誠心誠意的供養布施,聖賢、父母、貧病者乃至一切眾生,都是我們無上的福田。
人要學習布施,即使只是給人一個點頭、一個微笑、一句好話,或是給人一點點方便都是布施,布施是一種習慣,習慣要從平常的行為中養成。佛經中記載,有一位家財萬貫而又慳吝、貪心的大富翁,一天,聽聞佛陀開示布施的利益,可以獲得今生安樂和來生富足。這位富人聽完後,便左思右想:「我現在雖然生活的很富裕,但是,銀行的存款總有用完的時候,我應該去請教佛陀,如何繼續培福,才能生生世世都做一個富有的人。」
因此,這位大富翁就前去請教佛陀,如何學習布施法門,讓自己生生世世都能夠安樂富有。佛陀告訴富人,布施看起來是給人,事實上,種子播到土地裡面,等到時節因緣到了,你還怕它不能開花結果嗎?不能有所得嗎?世出世間都不離因果二字,布施如同播種,只要時節因緣成熟,還怕不開花結果嗎?
佛陀於是從地上拔了一支草,放在大富翁的右手,教導他說:「你現在將你右手的草,放到你的左手。」富人聽完佛陀的開示,就開始練習將右手的草布施給左手,由於平常沒有習慣付出,在這個互相給予的過程中,富人非常的掙扎和不捨,他想:「這是我右手的草,為什麼要給左手呢?」
就這樣反反覆覆,掙扎不已,幾次猶豫之後,富人體悟到一個道理:「右手是我的手,左手也是我的手,給左手也是給我自己啊!」布施看起來是給別人,其實是給自己,既然別人也是自己,又何必斤斤計較要將金錢占為己有呢?在佛光山的檀信樓,有一副對聯:「十方來,十方去,共成十方事;萬人施,萬人捨,同結萬人緣。」就是布施最好的寫照了。
布施分成有相的布施和無相的布施,有相的布施,雖然獲得人天的福報,依舊在六道輪迴,雖然能夠享受布施的福報,總免不了許多煩惱。因此,我們要從有相的布施,提升到無相的布施──「三輪體空」。布施的我、接受的你、所施的物之間的關係要能超越,不分彼此、大小、多少,認識施者、受者及受施物三者的本體都是空,不起貪戀執著,這就是清淨的布施。
許多父母,掛念自己往生後,兒孫的家計生活,因此,千方百計的留了許多錢財。其實,子孫有德有能,無需我們留給他,他自有辦法;子孫要是無德無能,就是留給他家財萬貫,也是坐吃山空。何妨將身外之財用來廣施十方,厚植福德,來生得生善處,也能庇蔭子孫。
總而言之,喜捨結緣的管理,才能改造慳貪的習氣;唯有捨去慳貪,才能獲得身心的自在,廣結善緣於人間。
八、用正念對治煩惱
《心經》云:「菩提薩埵,依般若波羅蜜多故,心無罣礙,無罣礙故,無有恐怖,遠離顛倒夢想,究竟涅槃。」心無罣礙的自在境界,人人嚮往;同樣的,煩惱掛礙,如同人的影子一樣,不相捨離。
如何可以活得心無罣礙?少煩少惱?提起正念可管理各種煩惱。在禪堂參禪打坐時,維那師父常常會提醒提起正念。如何讓心住在正念中,對外境不生迷惑,佛法以四念住,來引導幫助我們活在自在灑脫之中。
四念住的法門:一、觀身不淨;二、觀法無我;三、觀受是苦;四、觀心無常。我們的痛苦執著,大體來說,都是來自我執和我所執,執著自己的看法意見;或者愛著他人,不肯割捨,這些種種的困擾,以致造成許多自他的痛苦。這四念住法門,從身、心、法、受,最為密切,難以割捨的境界對治我們的煩惱。
「觀身不淨」,如摩登伽女執著阿難尊者,佛陀以善巧方便接引他到僧團生活、修行,在佛陀的指導開示下,摩登伽女以觀身不淨,對情愛心生厭離。
「觀法無我」,了解世間萬物緣生緣滅,任何人都沒有主宰性、自主性,只是依憑各種因緣和合而成,緣聚則生,緣散則滅,就能隨遇而安,隨緣自在。
「觀受是苦」,人生苦樂參半,偶爾擁有的快樂,卻因世間萬法變幻無常、時空的變化而消失。所以不要太在乎一時心情的起落,凡事,既來之,則安之,靜觀其變。
「觀心無常」,我們的心念隨著外境波動,時好時壞,時善時惡,不要因為一時情緒的起伏,犯下讓自己難以回頭的因緣。
遇到境界,逃避是不能解決問題的,唯有提起正念,才是究竟之道。有一位學僧請問洞山禪師:「寒暑來時,如何躲避?」洞山禪師回答:「何不向無寒暑處去?」學僧再問:「如何是無寒暑處?」洞山禪師道:「寒時寒殺闍黎,熱時熱殺闍黎。」學僧不解的再問:「你不是說到一個既不寒又不熱的地方,為什麼又寒殺熱殺呢?」洞山禪師泰然一笑:「寒冷時用寒冷來鍛鍊你自己,熱惱時用熱惱來鍛鍊你自己。」
《華嚴經》云:「心如工畫師,能畫種種畫,五蘊悉從生,無法而不造。」這世間的千差萬別,好壞順逆,無不從我們的起心動念而來,因此,透過四念住的法門,讓我們常保持慈悲、真誠、勤勞、樂觀、與人為善的正念,善緣好運自然隨之而來。
「千年暗室,一燈即明。」正念,就是我們人人心中那盞佛性的光明燈,只要將心中的燈光點亮了,不管走到哪裡,光明都會跟著我們,人生便沒有黑暗,再多的困難,都不怕,因為,有佛法就會有辦法。
九、用願力對治習氣
「煩惱易改,習氣難除。」行為養成習慣,習慣成為自然,一旦變成根深蒂固的習氣,則生生世世難以去除。比方,像已經證悟阿羅漢的大迦葉,聽到音樂仍舊會不自覺的起舞;佛弟子憍梵波提吃完飯後,嘴巴常常咀嚼不停。這些都是因為過去世殘留的習氣,影響到此生的原因。
其實,習慣有好、有壞,好的習慣,如勤勞、誠信、謙虛、禮貌、忍辱等,都能增長我們的道德慈悲,廣結善緣。相對的,像傲慢、懶惰、散漫或者性格多疑的壞習慣,則會造成我們人際關係的障礙,帶來許多不必要的麻煩和困難。
煩惱習氣,和業力一樣,影響今生與後世。因此,佛陀將「業」比喻為「如種」、「如習」,說明在無常的定律下,業力習氣能三世相續,輪迴不已,所以往生的三個要素,隨重、隨念、隨習,也是重要的關鍵。平常養成正面、樂觀、積極的習慣,影響我們生死事大。
雖然人人都有一些與生俱來的習慣,但是,佛教不是宿命論者,佛教主張人人都可以透過因地上用功,人我互動的結緣,來改變習慣、性格,進而改善我們的人生。如何不受煩惱習氣的束縛,更進一步的養成良好的習慣呢?首先就是發願,透過發願──下定決心來革除自己的習氣,就像在心田上,播下了一顆好的種子。
佛陀如良醫,應病與藥,佛教因而有各種不同的法門,來對治我們眾生的煩惱,幫助我們轉迷為悟,轉習氣為正氣。但是,常常有很多人,說時似悟,對境生迷,看到別人修行有成,自己也心生羨慕,但是自己卻只能望而興歎,自愧不如,這其中成功的關鍵,就是「發願」。發願的人下定決心;發願的人,目標明確;發願,可以幫助我們度過習氣的難關。
如我在《佛光菜根譚》所云:「消得一分習氣,便得一分光明;除得十分煩惱,便得少分菩提。」要改變不好的習氣,就要能養成好的習慣。因此,在發願之後,八正道可以做為我們的依循和指導。
每一個人的成功,都是靠立志、發心、願力來成就的。像釋迦牟尼佛在菩提樹下,金剛座上發出「若不成佛,誓不離此座」,最終證悟宇宙人生的真理;地藏菩薩以地獄為道場,發願「地獄不空,誓不成佛;眾生度盡,方證菩提。」阿彌陀佛發「四十八大願」發心建設無憂無慮的西方淨土,藥師佛的「十二大願」給現世的人們帶來消災延壽,觀世音菩薩尋聲救苦的悲心等,都是靠菩提願心來圓滿功行的。
如《勸發菩提心文》云:「心發則佛道堪成,願立則眾生可度。」一個人自覺不好的習氣障礙自己的進步以及未來的前程,為了加強自己改變的決心,實踐的動力,經由發願管理負面的習氣,給自己設定願景、目標,人生一旦有了方向,就不容易為習氣左右,就是過程很千辛萬苦,他也會想辦法去克服的。
十、用無我對治執著
唯識學,把人的意識分成八識,其中,人之所以有強烈的自我意識,就是由第七識所生出來的一種我執,產生根本的四大煩惱──我見、我慢、我痴、我愛。這第七識強拗的執取第八識,不肯捨離,才使有情眾生迷惑顛倒,執著痴迷。
因為習以為常的我執,進而執著自己所擁有的一切人事物,挑三揀四,愛憎分明,凡是和自己意見不同的,就否定、排斥他人。
做主管的,因為太有我了,主觀太強,凡事要屬下聽他的,造成員工覺得自己懷才不遇,萌生他去之心;做屬下的,固執己見,不能接受主管的指導,主管只好另請高明。同事之間,不能與人和樂相處,也是因為以自我為中心,自私的結果。做父母的,覺得兒女是自己生養的,強烈的想要占有和支配,導致親子關係惡劣。兒女覺得父母凡事為我準備是應該的,不知感恩、報恩,造成親情的傷害。
不管是職場或是家人之間的相處,人我之間的衝突、對立,都是因為太執著自己的意見、看法,缺乏接受差異性,失去開闊自己人生的機會,也失去了與人廣結善緣。
因此,要管理與生俱來的執著,就從無我的管理去思考。無我,是一種空性的智慧,面對好的、壞的,喜歡的,不喜歡的,都能夠包容、接受、化解、承擔,在接受中,無限、無量、無邊的擴大自己,日日修來日日功,因為落實了無我,最後得以無所不能。
無我的管理,是最高的管理,因為無我,包容異己,接受不同的聲音、意見,同中存異,異中求同,就像一座美麗的花園,雖然每一株植物都不一樣,但是,各展所長,百花盛放,這樣的人生不就多采多姿了嗎?
一個無我的人,面對任何人、事、物,都能保持開闊、樂觀、喜悅的性格去面對。因為無我,沒有框框,不會自我囿限,好因緣來時,歡喜接受;困難、挫折來時,則當做是一種人生的鍛鍊,愈挫愈勇。
春風夏雨可以滋潤人生;秋霜冬雪,也是磨鍊自己的好因好緣。以無我管理我執的人,在各種不同因緣中,懂得觀照因緣,不輕舉妄動,不會隨意喜怒形於色,隨緣度日,隨遇而安,隨喜生活,在每個當下,結緣利人天。
結語
以上十點,讓我們認識了解自己的身心,也提供對治身心煩惱的法門,讓我們得以轉迷為悟,化煩惱為菩提。
人生雖然紛紛擾擾,煩惱無量,追溯其根源主要還是自己的心,只要把心管理好,一切自然順理成章,花開見佛,如《憨山老人夢遊集》中提到:「拋卻身心見法王,前程不必問行藏;但能識得娘生面,草木叢林盡放光。」我們要能認識自己的心,管理好自己的心,到處都是佛光普照了。
雖然我們的煩惱無量,然而,佛教對治、管理的法門,也是重重無盡的,由於無法一一表述所有管理治心的法門,附上「治心百法」的內容,提供吾人煩惱起現行時,思惟其中意涵,相信必能「行到水窮處,坐看雲起時」。
用律己對治欲望,用負責對治敷衍,用勤勞對治懶惰,用謹慎對治草率,
用務實對治投機,用穩重對治輕浮,用承擔對治推諉,用實踐對治空談,
用正派對治諂曲,用積極對治被動,用目標對治盲從,用熟練對治生疏,
用靈巧對治愚拙,用專注對治散亂,用耐煩對治急躁,用尊嚴對治自卑,
用立志對治消沉,用勇敢對治怯弱,用真誠對治虛假,用厚道對治刻薄,
用謙虛對治傲慢,用禮讓對治爭執,用包容對治怨恨,用信任對治猜忌,
用知足對治貪婪,用淡泊對治虛榮,用大方對治小氣,用成熟對治幼稚,
用寬容對治嚴厲,用尊重對治侮辱,用威儀對治散漫,用高雅對治庸俗,
用風儀對治醜態,用莊嚴對治失態,用從容對治慌張,用靜思對治妄動,
用放鬆對治壓力,用單純對治複雜,用寬闊對治狹隘,用灑脫對治拘謹,
用幽默對治呆板,用樂觀對治消極,用喜悅對治瞋怒,用善良對治惡念,
用同樂對治獨占,用溫柔對治粗暴,用熱忱對治冷漠,用微笑對治愁容,
用鼓勵對治責備,用讚美對治毀謗,用啟發對治教訓,用善語對治惡口,
用愛護對治傷害,用祝福對治詛咒,用無言對治**,用仁德對治殘暴,
用公平對治不義,用同情對治不仁,用忠誠對治奸邪,用感恩對治無情,
用平等對治差別,用公益對治缺德,用善緣對治結怨,用和諧對治對立,
用和眾對治孤僻,用合作對治分裂,用授權對治干涉,用創新對治守舊,
用發展對治封閉,用自覺對治無知,用正念對治煩惱,用正見對治邪知,
用正行對治惡習,用正業對治邪命,用誠敬對治輕慢,用隨喜對治計較,
用護生對治殘殺,用律法對治侵犯,用惜福對治浪費,用慚愧對治無恥,
用精進對治懈怠,用發心對治自私,用願力對治習氣,用方便對治官僚,
用慈悲對治瞋恚,用喜捨對治慳吝,用道念對治俗情,用般若對治愚痴,
用禪心對治妄念,用自在對治掛礙,用無我對治執著,用清涼對治熱惱,
用光明對治黑暗,用清淨對治汙染,用妙有對治頑空,用真理對治戲論,
用圓融對治缺陷,用緣起對治成敗,用中道對治偏執,用圓滿對治生滅。
http://books.masterhsingyun.org/ArticleDetail/artcle9674
Automatic mount rclone on debian.
Automatically Mounting rclone Remote Directory on Debian 11
To automatically mount the remote directory using rclone on system restart in Debian 11, you can create a systemd service unit. Here's how you can do it:
-
Create a systemd service unit file: Open a terminal and create a new service unit file using your favorite text editor. For example:
sudo nano /etc/systemd/system/rclone-mount.service
-
Add the following content to the file:
[Unit]
Description=RClone Mount Service
After=network-online.target

[Service]
Type=simple
User=<YOUR_USERNAME>
ExecStart=/usr/bin/rclone mount pikpak: /mnt/data/media/pikpak --vfs-cache-mode writes --allow-non-empty --allow-other
Restart=always
RestartSec=5

[Install]
WantedBy=multi-user.target
Replace
<YOUR_USERNAME>with your actual username. -
Save and close the file: In Nano, you can do this by pressing
Ctrl + Oto write the file, thenEnter, and finallyCtrl + Xto exit. -
Reload systemd: After saving the service unit file, reload the systemd daemon to ensure it recognizes the new service:
sudo systemctl daemon-reload
-
Enable the service: You need to enable the service so it starts automatically on system boot:
sudo systemctl enable rclone-mount.service -
Start the service: You can manually start the service now:
sudo systemctl start rclone-mount.service
Now, your remote directory should be mounted automatically on system startup.
Remember to replace pikpak: and /mnt/data/media/pikpak with your actual rclone remote and local mount path. Also, make sure rclone is installed in /usr/bin/rclone or specify the correct path in the ExecStart directive.
Note: If your rclone binary is installed in a different location, you'll need to specify the correct path in the ExecStart directive of the systemd service unit file.
To find out where rclone is installed on your system, you can use the which command:
which rcloneAfter making this change, save the file, reload systemd, and restart the service as described in the previous instructions.
Disabling Automatic Mounting
If you no longer want the remote directory to be automatically mounted on system startup, you can remove the systemd service unit that you created earlier. Here's how you can do it:
-
Disable the service: First, you should disable the systemd service to prevent it from starting automatically on system boot:
sudo systemctl disable rclone-mount.service
-
Stop the service: Next, stop the running instance of the service:
sudo systemctl stop rclone-mount.service
-
Remove the service file: Finally, you can remove the systemd service unit file that you created:
sudo rm /etc/systemd/system/rclone-mount.service
After completing these steps, the automatic mounting of the remote directory should be disabled, and the systemd service unit file will be removed from your system.
I can't add lucaVOD, cherryTV, xChannel and xCinema to my 8P
Hi, I am using 8P Indonesian version.
After inputting the password 898989, I got an error asking for authorization code to watch those channels (cherryTV, xChannel etc).
Can you help with the authorization code? My seller knows nothing about it.
How To Remove Docker Images, Containers, and Volumes | DigitalOcean
Introduction
Docker makes it easy to wrap your applications and services in containers so you can run them anywhere. As you work with Docker, however, it’s also easy to accumulate an excessive number of unused images, containers, and data volumes that clutter the output and consume disk space.
Docker gives you all the tools you need to clean up your system from the command line. This cheat sheet-style guide provides a quick reference to commands that are useful for freeing disk space and keeping your system organized by removing unused Docker images, containers, and volumes.
How to Use This Guide:
- This guide is in cheat sheet format with self-contained command-line snippets.
- Jump to any section that is relevant to the task you are trying to complete.
Note: The command substitution syntax, command $(command), used in the commands is available in many popular shells, such as bash, zsh, and Windows Powershell.
Purging All Unused or Dangling Images, Containers, Volumes, and Networks
Docker provides a single command that will clean up any resources — images, containers, volumes, and networks — that are dangling (not tagged or associated with a container):
To additionally remove any stopped containers and all unused images (not just dangling images), add the -a flag to the command:
Removing Docker Images
Remove one or more specific images
Use the docker images command with the -a flag to locate the ID of the images you want to remove. This will show you every image, including intermediate image layers. When you’ve located the images you want to delete, you can pass their ID or tag to docker rmi:
List:
Remove:
Remove dangling images
Docker images consist of multiple layers. Dangling images are layers that have no relationship to any tagged images. They no longer serve a purpose and consume disk space. They can be located by adding the filter flag -f with a value of dangling=true to the docker images command. When you’re sure you want to delete them, you can use the docker image prune command:
Note: If you build an image without tagging it, the image will appear on the list of dangling images because it has no association with a tagged image. You can avoid this situation by providing a tag when you build, and you can retroactively tag an image with the docker tag command.
List:
Remove:
Removing images according to a pattern
You can find all the images that match a pattern using a combination of docker images and grep. Once you’re satisfied, you can delete them by using awk to pass the IDs to docker rmi. Note that these utilities are not supplied by Docker and are not necessarily available on all systems:
List:
Remove:
Remove all images
All the Docker images on a system can be listed by adding -a to the docker images command. Once you’re sure you want to delete them all, you can add the -q flag to pass the image ID to docker rmi:
List:
Remove:
Removing Containers
Remove one or more specific containers
Use the docker ps command with the -a flag to locate the name or ID of the containers you want to remove:
List:
Remove:
Remove a container upon exiting
If you know when you’re creating a container that you won’t want to keep it around once you’re done, you can run docker run --rm to automatically delete it when it exits:
Run and Remove:
Remove all exited containers
You can locate containers using docker ps -a and filter them by their status: created, restarting, running, paused, or exited. To review the list of exited containers, use the -f flag to filter based on status. When you’ve verified you want to remove those containers, use -q to pass the IDs to the docker rm command:
List:
Remove:
Remove containers using more than one filter
Docker filters can be combined by repeating the filter flag with an additional value. This results in a list of containers that meet either condition. For example, if you want to delete all containers marked as either created (a state which can result when you run a container with an invalid command) or exited, you can use two filters:
List:
Remove:
Remove containers according to a pattern
You can find all the containers that match a pattern using a combination of docker ps and grep. When you’re satisfied that you have the list you want to delete, you can use awk and xargs to supply the ID to docker rm. Note that these utilities are not supplied by Docker and are not necessarily available on all systems:
List:
Remove:
Stop and remove all containers
You can review the containers on your system with docker ps. Adding the -a flag will show all containers. When you’re sure you want to delete them, you can add the -q flag to supply the IDs to the docker stop and docker rm commands:
List:
Remove:
Removing Volumes
Remove one or more specific volumes - Docker 1.9 and later
Use the docker volume ls command to locate the volume name or names you wish to delete. Then you can remove one or more volumes with the docker volume rm command:
List:
Remove:
Remove dangling volumes - Docker 1.9 and later
Since the point of volumes is to exist independent from containers, when a container is removed, a volume is not automatically removed at the same time. When a volume exists and is no longer connected to any containers, it’s called a dangling volume. To locate them to confirm you want to remove them, you can use the docker volume ls command with a filter to limit the results to dangling volumes. When you’re satisfied with the list, you can remove them all with docker volume prune:
List:
Remove:
Remove a container and its volume
If you created an unnamed volume, it can be deleted at the same time as the container with the -v flag. Note that this only works with unnamed volumes. When the container is successfully removed, its ID is displayed. Note that no reference is made to the removal of the volume. If it is unnamed, it is silently removed from the system. If it is named, it silently stays present.
Remove:
Conclusion
This guide covers some of the common commands used to remove images, containers, and volumes with Docker. There are many other combinations and flags that can be used with each. For a comprehensive guide to what’s available, see the Docker documentation for docker system prune, docker rmi, docker rm, and docker volume rm. If there are common cleanup tasks you’d like to see in the guide, please ask or make suggestions in the comments.
For a detailed look at the different components of a Docker container, check out The Docker Ecosystem: An Introduction to Common Components.
https://www.digitalocean.com/community/tutorials/how-to-remove-docker-images-containers-and-volumes
如何使用 Markdown 語言撰寫文件 | Adobe Experience Cloud
Adobe 技術文件中的文章是以名為 Markdown 的精簡化標記語言寫成,這種語言容易閱讀及學習。
我們目前是將 Adobe 文件內容儲存在 GitHub,而 GitHub 使用的 Markdown 版本稱為 GitHub Flavored Markdown (GFM),可提供額外功能滿足常見的格式需求。 此外,Adobe 更適度擴充 Markdown 效能,以支援註釋、提示和內嵌影片等特定的說明相關功能。
Markdown 基本介紹
以下章節介紹使用 Markdown 撰寫的基礎知識。
標題
若要建立標題,請在文字行的開頭使用井字號 (#):
基本文字
使用 Markdown 時,標示段落並不需要特殊語法。
若要將文字的格式設為粗體,請以雙星號括住文字。 若要將文字的格式設為_斜體_,請以單星號括住文字:
若要略過 Markdown 格式字元,請在該字元前使用「\」:
編號清單與項目符號清單
若要建立項目符號清單,請在文字行的開頭使用 1. 或 1),但同一份清單內請勿混用不同格式。 您不必指定編號, GitHub 會自動完成編號工作。
顯示結果:
- This is step 1.
- This is the next step.
- This is yet another step, the third.
若要建立項目符號清單,請在文字行的開頭使用「*」、「-」或「+」,但同一份清單內請勿混用不同格式。 (請勿在同一份文件中混用項目符號格式,例如 * 和 +)。
顯示結果:
- First item in an unordered list.
- Another item.
- 再來一個項目。
清單內也可以內嵌清單,並在清單項目間新增內容。
顯示結果:
-
Set up your table and code blocks.
-
Perform this step.
-
Make sure that your table looks like this:
-
This is the fourth step.
-
Do another step.
表格
表格並非 Markdown 核心規格的一部分,但 Adobe 可在某些情況下支援表格。 Markdown 的儲存格不支援多行清單。 避免在表格中輸入多行文字,會是最理想的作法。 您可以使用直立線 (|) 字元勾勒出行、列,藉此建立表格。 連字號會建立各欄標題,直立線符號則能分隔各欄。 在表格前面加上一個空白行,以確保表格成功轉譯。
顯示結果:
| Header | Another header | Yet another header |
|---|---|---|
| row 1 | column 2 | column 3 |
| row 2 | row 2 column 2 | row 2 column 3 |
Markdown 要呈現簡單的表格沒有問題。 不過,若表格的儲存格內包含多個段落或清單,就會難以呈現。 如果是這類內容,建議您使用其他格式,例如改為標題與文字。
如需建立表格的詳細資訊,請參閱:
- GitHub 的使用表格組織資訊
- Markdown Tables Generator 網頁應用程式
- 將 HTML 表格轉換為 Markdown
連結
內嵌連結使用的 Markdown 語法是由超連結文字的 [link text] 部分,以及緊接在後的連結網址或檔案名稱 (file-name.md) 部分所組成。
[link text](file-name.md)
顯示結果:
若連結的是同一存放庫內的文章 (交叉參照),請使用相對連結。 您可使用所有相對連結運算元,例如「/」(目前目錄)、「…/」(上一層目錄) 和「…/…/」(上兩層目錄)。
如需連結的詳細資訊,請參閱本指南中的連結一文,瞭解連結語法。
影像
顯示結果:
程式碼片段
Markdown 支援將程式碼片段內嵌在句子中,或以「包圍型」獨立片段形式插入句子之間。 如需詳細資訊,請參閱 Markdown 對程式碼片段的原生支援
使用反引號 (`) 在段落中建立內嵌程式碼樣式。若要建立特定的多行程式碼區塊,請在程式碼區塊前後加上三個反引號 ( `) (在 Markdown 中稱為「包圍型程式碼區塊」,在 AEM 中只是一個「程式碼區塊」元件)。若要使用包圍型程式碼區塊,請在第一組反引號之後加上程式碼語言,讓 Markdown 可以正確地標示程式碼語法。範例:` javascript
範例:
顯示結果:
This is inline code within a paragraph of text.
這是包圍型程式碼片段:
自訂 Markdown 擴充功能
Adobe 文章中大部分的文章格式都會使用標準 Markdown,例如段落、連結、清單與標題。 若需要更豐富的格式變化,可在文章中使用 Markdown 擴充功能,例如:
- 註釋區塊
- 內嵌影片
- 翻譯標記
- 元件屬性,例如為標題指定不同標題 ID 並指明影像大小
在每一行的開頭使用 Markdown 區塊引號 (「>」),繫結擴充元件 (例如註釋)。
部分常見的 Markdown 元素 (例如標題和程式碼區塊) 會包含擴充屬性。 如需變更預設屬性,請在元件之後新增參數,並置於大括弧內 (「/{ /}」)。 擴充屬性會以實例說明。
註釋區塊
您可以選擇使用這些註釋類型,以吸引讀者注意特定內容:
[!NOTE][!TIP][!IMPORTANT][!CAUTION][!WARNING][!ADMINISTRATION][!AVAILABILITY][!PREREQUISITES][!ERROR][!ADMINISTRATION][!INFO][!SUCCESS]
一般來說,註釋區塊應節制使用,註釋太多可能會造成干擾。 雖然註釋區塊也支援程式碼片段、影像、清單和連結,但請試著讓註釋區塊簡單明瞭。
顯示結果:

影片
原生 Markdown 不會轉譯內嵌影片,但您可以使用此 Markdown 擴充功能達成此目的。
顯示結果:
類似項目
AEM 中的「類似項目」元件會出現在文章結尾處。 這會顯示相關連結。 文章輸出時,可採用相同的第 2 層標題 (##) 格式,不必加入迷你目錄。

顯示結果:
UICONTROL 和 DNL
我們所有 Markdown 說明內容一開始會使用機器翻譯工具來進行本地化。 如果說明內容從未進行過本地化,那麼我們將保留機器翻譯。 但是,如果說明內容過去已經進行過本地化,那麼機器翻譯的內容將充當預留位置,而內容部分則在進行人工翻譯中。
``
在進行機器翻譯期間,系統會勾選標示為 `` 的項目,並根據本地化資料庫來決定適當的翻譯。 若 UI 當未經過本地化,此標記將允許系統保留該特定語言的英文 UI 參照 (即 義大利文的 Analytics 參照)。
範例:
- 前往 Run Process 畫面。
- 選擇 File > Print > Print All 以列您伺服器上的所有檔案。
- 隨即顯示「Processing Rules」對話框。
來源:
注意
在三個標記選項中,這是提高品質內容最重要的一項,且屬於強制規定。
[!DNL]
我們使用「不要翻譯」列表來設定規則,讓機器翻譯引擎知道哪些應該保留英文內容。 最常見的項目為解決方案的完整名稱,如「Adobe Analytics」、「Adobe Campaign」和「Adobe Target」。 但是,可能有我們需要強制引擎使用英文的情況,因為所考慮的名詞可能是用作特定專業用語或是一般用語。 最明顯的情況為解決方案的簡短名稱,如「Analytics」、「Campaign」和「Target」等。 機器很難理解這些是解決方案名稱而不是通用名詞。 該標記也可以用作一定要保留為英文或文字較短部分的第三方名稱/特性,例如必須保留為英文的短語或句子。
範例:
- 使用 Target 可建立 A/B 測試以找出最佳用法
- Adobe Analytics 是收集您網站上分析資料的強大解決方案。 Analytics 還可以幫助您製作報告以輕鬆地摘要資料。
來源:
Gotcha 與疑難排解
替代文字
包含底線的替代文字無法正確轉譯。 舉例來說,請避免使用下列文字:
我們最理想的作法是在檔名中使用連字號 (「-」) 而非底線 (「_」)。
單引號與雙引號
您將文字複製到 Markdown 編輯器時,這些文字可能會含有「聰明」(彎曲) 的單引號或雙引號。 這些引號需要編碼或變更為基本的單引號或雙引號。 否則檔案發佈後,畫面可能會出現奇怪的字元,像是:It’s
在此提供這些標點符號的「聰明版」編碼:
- 左雙引號:
“ - 右雙引號:
” - 右單引號:
’ - 左單引號 (不常使用):
‘
角括弧
若要在檔案中的文字 (而非程式碼) 使用角括弧 (像是要表示預留位置),請手動編碼角括弧。 否則,Markdown 會認為這些角括弧代表 HTML 標籤。
舉例來說,請將 <script name> 編碼如下 <script name>
標題中的 & 符號
不可在標題中使用 & 符號。 請改用「與」或「和」,或使用 & 編碼。
另請參閱
Markdown 資源
Markdown - 易編易讀,優雅的寫文吧! - iT 邦幫忙::一起幫忙解決難題,拯救 IT 人的一天
Markdown 是一種輕量級標記式語言, 它有純文字標記的特性,讓編寫的可讀性提高,這是在以前很多電子郵件中就已經有的寫法,而目前也有很多網站都使用 Markdown 來撰寫說明文件或是在論壇上發表文章與發送訊息。常見網站例如:GitHub、wordpress、Slack、FB Messenger、IT 邦幫忙文章發表等等。
Markdown 優點
- 相較 HTML 之下,不會夾雜很多不必要的標籤,讓可讀性提高。
- 不需要像程式碼一樣縮排。
Markdown 缺點
- 若使用在像 wordpress 的網站時,要調整一些樣式變化是不太方便的。
- 需習慣 Markdown 的編輯方式。
關於 Markdown 的語法這邊就不一一介紹,以下為兩個了解 Markdown 語法的網站,第一個是寫完 Markdown 即時顯示出來的網站,但要注意這個網站並沒有儲存的功能,所以一但重新整理後就沒有紀錄了,第二個直接將寫好的 HTML 內容轉換為 Markdown 語法。
- 即時編譯 Markdown 語法所顯示的版面
- 將 HTML 語法轉為 Markdown
上面有提到有許多網站都可以使用 Markdown 語法,但在每個網站可以接受的 Markdown 的語法都不太一樣,我們就挑幾個來聊聊。
GitHub
有使用過 GitHub 都一定有看過 README.md,而 md 表示的意思其實就是 Markdown ,所以如果在開發時會使用 README.md 的人,就一起來看看在 README.md 上如何用 Markdown 撰寫吧!這邊介紹幾個常用的語法:
字體
字體樣式是使用在一般文字中加強文字重要性,或是表示標題,粗體通常會用在一段文字中,強調某些字是這個語句中的重點,而標題字會依照字體大小來表示出這個標題的主要性,使用標題字的 Markdown 語法要特別注意 # 號越少標題越大,也就代表標題的重要性越高。
粗體
**bold**
標題字
# This is an <h1> tag
次標題字
#
小標題字
#
顯示畫面

列表
在同一個主題之下要一一列出內容時,我們常用列表來表示,例如:討論專案中需要哪些功能,或是說明要修改的內容有哪些。
* Item 1
* Item 2
  * Item 2a
  * Item 2b
顯示畫面

CheckBox
CheckBox 常用在確認事情是否完成,在使用 Checkbox 要注意,中括號中的 x 就代表這個項目是被打勾的,它並不會主動紀錄勾選過的內容,所以使用時要確認勾選過的內容是否有增加 x,避免混亂。
- [x] This is a complete item
- [ ] This is an incomplete item
顯示畫面
區塊
區塊分為小區塊跟大區塊,通常用於一段相關內容的撰寫,一小段文字或是註釋都可能會用小區塊來表示,而篇幅較大又不希望與一般段落內容混在一起的文字,就會使用大區塊來包覆。
小區塊語法:
`Format one word or one line`
大區塊語法:
code (4 spaces indent)
顯示結果:

程式碼
在 GitHub 上,提到程式碼是極為常見的事情,如果以純文字來貼程式碼,大概會被罵翻吧!除了格式不一致很難閱讀以外,也無法用顏色來區分程式碼內容,閱讀上真的是極為不容易,所以在 GitHub 上了解如何使用 Markdown 語法來呈現高亮程式碼介面是相當重要且實用的。語法也相當簡單,只要使用三個反引號加上語言簡稱就可以了,來看看範例吧!
高亮程式碼顯示語法 (前後三個反引號 *``` *+ 語言)
    ```js
    這邊是程式碼
    ```
顯示結果:

圖片
在撰寫文件時,也會加上一些圖片來搭配文字的說明,畢竟文字還是比較抽象的,而圖片可以讓人直接看到畫面並理解要表達的東西為何,在 README.md 中加入圖片也是相當簡單的,請看範例!
插入圖片語法

顯示結果:

階層式區塊
階層式區塊在表現結構或功能關係上是相當好用的呈現形式
階層式區塊語法:
> Quote one sentences
>>Quote two sentences
>>Quote two sentences
>>>Quote three sentences
顯示結果:

更多詳細內容可以參考:https://guides.github.com/features/mastering-markdown/
在 GitHub 上除了 README.md 可以使用 Markdown 語法來制定書寫格式以外,大家常用的 Issue 也是可以使用的哦!Issue 是專案中讓大家討論專案內容及技術交流的空間,你可以在 Issue 提出對於專案的疑問,也可以紀錄待修改的內容,甚至可以交付工作並指定同在專案中的對象。而撰寫 Issue 的時候,要呈現清楚的文章架構,就要靠 Markdown 語法來讓內容的可讀性提高,也讓團隊的開發效率或是專案的完整度更高。
Slack
Slack 是一套適合團隊溝通的通訊軟體,有別於其他的通訊軟體,以下列出幾點 Slack 的優點:
- 可以在同一個大群組裡開小群組或是私人的群組:你可以依照不同的需求開設討論頻道,如果是公開頻道則群組內的人都可以接受到資訊,也可以選擇特定幾位對象來參加私人群組,以上各種的群組仍是在一個大群組之下分流,也就是基於這個類群而延伸出來的小群,這樣的方式就可以避免一次創出太多不同群組而搞混。
- 互動性高,干擾性低: Slack 也有各種表情符號可以發送,甚至可以針對一則訊息給予反應,而這個反應會顯示在訊息下方一角,相較於 Line 這點實在好用很多,舉例來說:老闆發了一則任務,以 Line 來說,如果每個人都已讀後都回覆一個貼圖或文字表示自己收到,那這則任務訊息很快地就被刷上去了,多人時容易造成漏收訊息,而 Slack 針對訊息做的反應會被整理在這則訊息的下方,如下圖:

而第 3 點也是最重要的一點,Slack 在傳送訊息上可以使用 markdown 語法來變換訊息的格式,使訊息更方便閱讀,以下為在 Slack 上常用的 Markdown 語法:
粗體:
*your text*
斜體:
_your text_
刪除線:
~your text~
階層:
>Quote one sentence
>>> Quote multiple sentences
小區塊:
`Format one word or one line*`
大區塊:
    ```
    Format blocks of text
    ```
對照圖
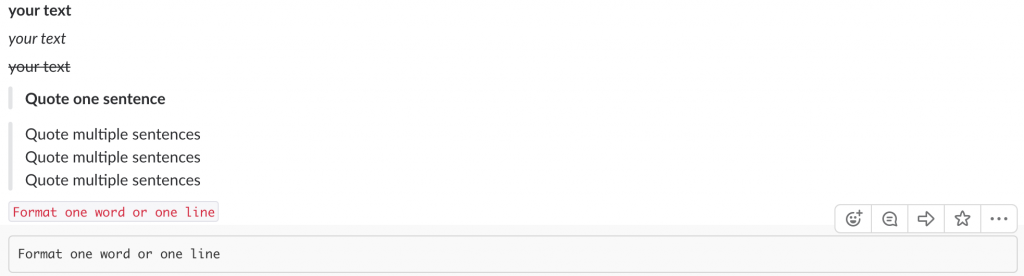
更詳細的內容可以看這篇:
https://get.slack.help/hc/en-us/articles/202288908-Format-your-messages
懂得利用 Markdown 的格式來發送訊息有多重要呢?這邊就展示一個例子!如果同一個人發送小明說和小花說,沒有使用區塊分隔(圖片上半部)則兩則訊息的段落就變得不清楚,但如果兩則訊息都使用了大區塊來區分,在閱讀上就會清楚很多

如果你有在使用 Slack,一定要了解一下 Markdown 呀!
Facebook Messenger
除了 Slack 這套通訊軟體以外,大家熟悉的 Facebook 聊天工具 Messenger 在傳送訊息時也可以使用 markdown 語法來改變訊息樣式,常用的語法介紹如下:
粗體
*your text*
斜體
_your text_
刪除線
~your text~
小區塊
`Format one word or one line`
大區塊
    ```
    Format blocks of text
    ```
顯示畫面
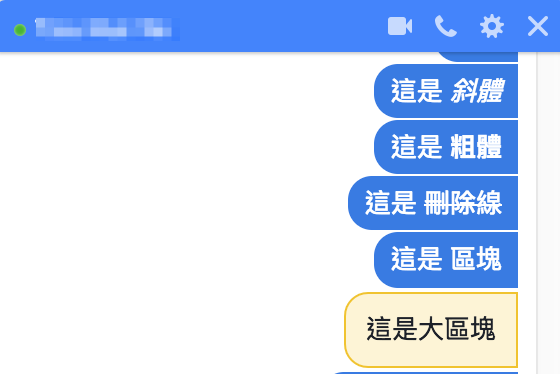
要在 Messenger 使用 Markdown 語法來改變訊息格式有一點需要注意,行動裝置版本的 Messenger 是不會改變訊息格式的,會直接連帶將符號一起傳送(如下圖),只有電腦網頁版(上圖)才會顯示出改變,而上一個介紹的 Slack 則沒有這個問題,不論是電腦網頁版或是手機版都可以顯示出不同的文字格式。

以上簡單介紹幾個例子,Markdown 因為易讀易寫的原則已經廣大的被使用,了解 Markdown 的語法可以在撰寫文件上,用簡單的方式寫出易讀性高的文章,不論是用在團隊開發溝通的文件,還是發佈給大家看的內容,都可以統一且美觀的呈現。
https://ithelp.ithome.com.tw/articles/10203758
Basic writing and formatting syntax - GitHub Docs
Link
Comment: markdown guide from official website.
How To Install Python 3 11 On Debian 11
Python is a high-level, object-oriented and multipurpose programming language that is extremely popular thanks to its simple and easy-to-learn syntax. It is widely used in various IT disciplines such as data analytics and visualization, web development, gaming development, AI, and machine learning.
Run the below command to update the system and install the required dependencies for the python 3.11.
apt upgrade

apt install build-essential zlib1g-dev libncurses5-dev libgdbm-dev libnss3-dev libssl-dev libreadline-dev libffi-dev libsqlite3-dev wget libbz2-dev
At the time of writing this article, the latest version of 3.11 is version 3.11.3. We recommend you check Python's official site to get the latest version for your installation, https://www.python.org/downloads/
wget https://www.python.org/ftp/python/3.11.3/Python-3.11.3.tgz

tar -xvf Python-3.11.3.tgz
If a different version has been downloaded, ensure you extract the correct file.
Next, cd into the extracted directory, in our case it is Python-3.11.3 (the name may vary if a different version has been downloaded).
And run the configure command to verify if all the dependencies are met for the Python installation.
cd Python-3.11.3

./configure --enable-optimizations
Let's get the number of CPU cores your machine has,
nproc
This will print a number, use that in the below command, make will start the build process and the number 4 represents the number of CPU cores.
make -j 4
The default Python installation is /usr/bin. If you want to install Python under /usr/local/bin instead of overwriting the default, do this:
make altinstall
Run the below command to get the version of the installed Python:
python3.11 --version
Output:
root@vps:~/Python-3.11.3# python3.11 --version
Python 3.11.3
This concludes our topic of installing Python 3.11 version.
Quick fix for apt-get update with error Err:9 https://download.docker.com/linux/ubuntu bullseye Release
sudo nano /etc/apt/sources.list.d/docker.list
change
https://download.docker.com/linux/ubuntu bullseye stable
to
https://download.docker.com/linux/debian bullseye stable
一个好用的 Telegram 文件批量上传/下载工具 · Dejavu's Blog
一个好用的 Telegram 文件批量上传/下载工具 · Dejavu's Blog
一个好用的 Telegram 文件批量上传/下载工具
2021 年 07 月 21 日·2775 字·约 6 分钟
本文目录
前言 #
平时为了满足自己的“松鼠癖”在服务器上部署了一些文件下载/同步服务如:Aria2 Pro、qBittorrent Enhanced、Resilio Sync 等。服务器/VPS 上远程下载好了,如果想要把文件分享给 Telegram 联系人,又不想不通过服务器直链分享文件,就需要手动下载文件再上传到 Telegram;另一种情况就是 Telegram 上收的一些文件需要上传到 OneDrive 进行归档,这样在平时的使用中就会增加不少时间和流量成本。
不久前我发现一个 Python 写的开源项目 telegram-upload 可以很方便的在服务器/VPS 和 Telegram 之间进行文件的上传和下载操作(上传 OneDrive 下回再讲)
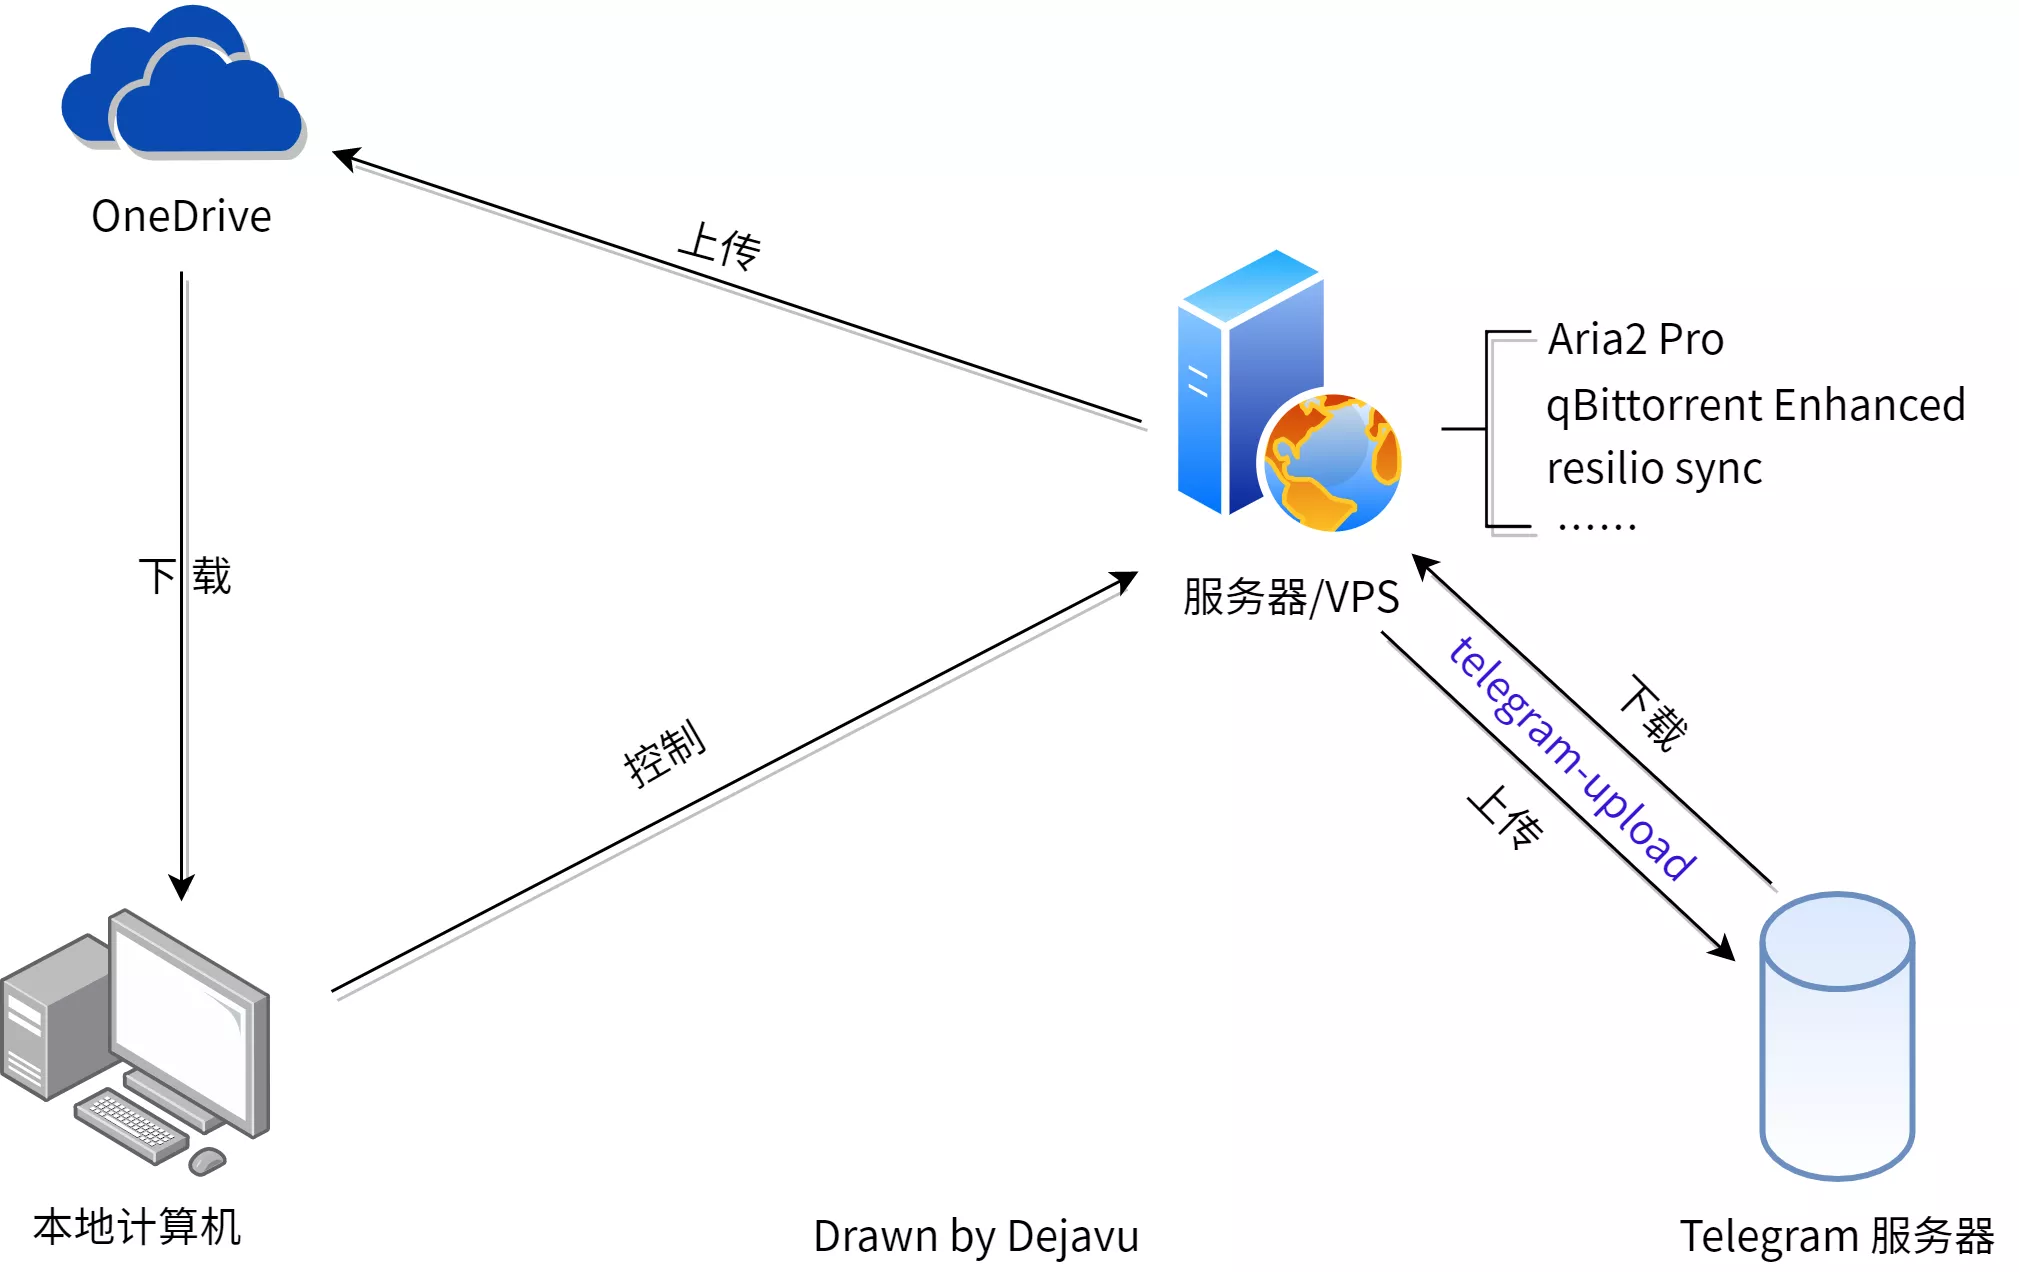
个人文件管理方案
特性 #
telegram-upload 使用个人 Telegram 账户上传和下载文件,单个文件最大支持 2GB(Telegram Bot 限制 50MB)| 文档(英文)
- 上传多个文件
- 下载文件
- 上传视频添加缩略图信息(需要 ffmpeg)
- 上传/下载完成后删除本地/远程文件

telegram-upload
安装 #
安装 Python 和 Pip #
服务器需要 安装 Python,下面我将以 Debian 10 下 Python3 安装 telegram-upload 为例,其他操作系统详见 Python 安装指南
Tips: Python2 已经过时,建议安装使用 Python3
复制```
Debian 刷新软件源 sudo apt-get update # 安装 Python3 sudo apt-get install python3 # 安装 Pip3 sudo apt-get install python3-pip # 安装完成后验证一下版本 python3 -V pip3 -V # 类似下面输出就代表没问题了 root@debian:# python3 -V Python 3.7.3 root@debian:# pip3 -V pip 18.1 from /usr/lib/python3/dist-packages/pip (python 3.7)
### 安装 ffmpeg(可选) [#](#%e5%ae%89%e8%a3%85-ffmpeg%e5%8f%af%e9%80%89)

如果你需要上传视频文件的话,需要确保安装 ffmpeg,否则会导致上传的视频无法在线播放或者显示缩略图

复制```
# 对于 Debian/Ubuntu,使用下面命令安装 ffmpeg sudo apt-get update && sudo apt-get install ffmpeg # 检查 ffmpeg 安装 ffmpeg -version
安装 telegram-upload #
安装稳定版
稳定版是推荐的版本,默认情况下会默认安装最新的稳定版 telegram-upload
复制```
sudo pip3 install -U telegram-upload
**指定版本号**

使用以下命令从 [Pypi](https://pypi.org/) 安装已发布的其他版本,`<version>` 是具体版本号

复制```
pip install telegram-upload==<version>
从 GitHub 仓库安装
已经安装有 Git 的情况安装,<branch> 是 GitHub 分支名
复制```
pip install git+https://github.com/Nekmo/telegram-upload.git@#egg=telegram_upload
系统没有安装 Git 的情况下安装,`<branch>` 是 GitHub 分支名

复制```
pip install https://github.com/Nekmo/telegram-upload/archive/<branch>.zip
配置 #
注册 Telegram App #
用 Telegram 注册的手机号登录 My Telegram,登录完成后应该会看到如下几个菜单
Your Telegram Core
进入 API development tools,可以看到下图的界面
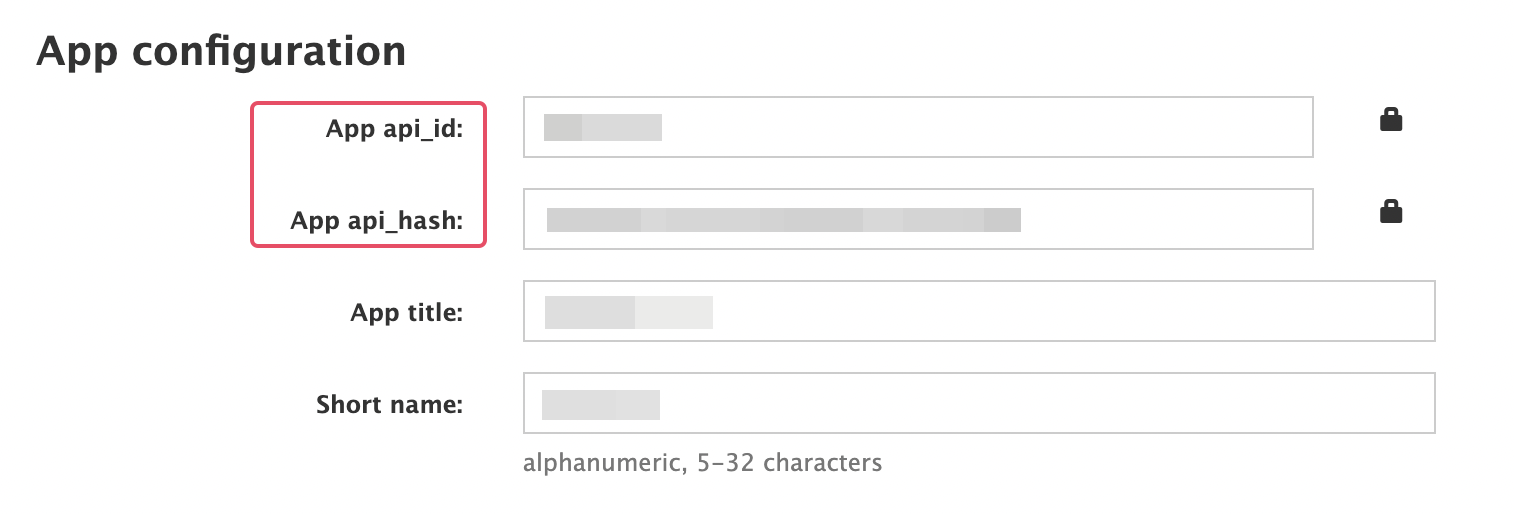
Telegram App 设置
App api_id 和 App api_hash 是等下需要的应用 ID 和应用机密,复制保留备用;App title 和 Short name 可以随便填,拉到页面底部 Save changes 保存设置
经过和 xiaoxinhuozhu 同学的验证,如果此步骤注册 API 应用过程中出现莫名 Error,很可能是因为国内 +86 手机号被 Telegram 限制,建议使用其他国家的手机号,目前使用 Google Voice 美国 VoIP 手机号没问题
请注意,此页面的应用 ID、机密和密钥等信息非常非常非常重要,千万不要泄露!
生成配置文件 #
随便准备一个小文件,上传到自己 Telegram 的收藏夹:
复制```
telegram-upload [文件路径] telegram-upload /telegram/[ATFMaker]白修女.zip
第一次登录会提示输入 Telegram `手机号` 其他 Telegram 设备收到的 `验证码`

> 注意手机号需要带国际电话区号,美国/加拿大是 +1…

复制```
Please enter your phone: +1********** Please enter the code you received: ***** Signed in successfully as [Telegram Nick Name]
文件会开始上传,我们可以再终端里看到上传进度,上传完成后,你应该能看到文件在你的 Telegram 收藏夹了 🤠
复制```
xxxxxuser@b1s:~telegram-upload /telegram/[ATFMaker]白修女.zip Uploading "[ATFMaker]白修女.zip" [####################################] 100%
默认情况下我们生成的配置文件路径为 `/root/.config/telegram-upload.json`,该文件包含你的Telegram App 登录的机密信息,请妥善保存,之后的登录就不需要在输入机密信息了

使用 [#](#%e4%bd%bf%e7%94%a8)
---------------------------

现在我们的服务器上 [telegram-upload](https://github.com/Nekmo/telegram-upload) 安装和配置都没问题了,下面根据 [官方文档](https://docs.nekmo.org/telegram-upload/usage.html) 介绍一下它的用法,这里主要分为 Telegram 上传和 Telegram 下载两部分

### Telegram 上传 [#](#telegram-%e4%b8%8a%e4%bc%a0)

默认情况下,使用 Telegram 个人账户上传一个或多个文件到你的 `收藏夹`,单个文件最大限制 2GB,用法:

复制```
telegram-upload [选项] [文件路径]
[选项]
-
--to <to>电话号码、用户名、邀请连结或收藏夹(保存的消息),默认为收藏夹 -
--config <config>要使用的 Telegram App 配置文件路径,默认为
/root/.config/telegram-upload.json -
-d,--delete-on-success上传成功后删除本地文件
-
--print-file-id上传完成后打印上传文件的 id
-
--force-file强制作为文件发送,文件名将被保留,但预览将不可用
-
-f,--forward<forward>将文件转发给聊天(昵称/ ID)或用户(用户名/手机号码/ID),此选项可以多次使用(发送给多个频道/群组/联系人)
-
--directories<directories>定义如何处理目录,默认情况下不接受目录,并且会出现错误提示(fail),可选递归目录(recursive)
选项:
fail|recursive -
--large-files<large_files>定义如何处理 Telegram 不支持的大文件,默认情况下,不接受大文件,并且会出现错误提示(fail),可选大文件切割上传(split)
选项:
fail|split -
--caption<caption>更改文件描述。默认为文件名。
-
--no-thumbnail禁用生成缩略图,对于一些已知的文件格式(如图片、视频等),Telegram 可能仍会生成缩略图或显示预览
注意:此参数与参数互斥:[thumbnail-file]
-
--thumbnail-file<thumbnail_file>用于指定上传文件的预览文件(缩略图)的路径
注意:此参数与参数互斥:[no-thumbnail]
-
-p,--proxy<proxy>对于一些无法连接 Telegram(如**)使用代理,支持
http、sock4、sock5、mtproxy等代理类型,具体使用见后文 -
-a,--album将视频或照片作为相册发送
Telegram 下载 #
下载聊天中的所有最新消息,默认情况下从收藏夹(保存的消息) 下载,建议将要下载的文件转发到 收藏夹(保存的消息) 并使用参数 --delete-on-success,下载完成后转发的消息将自动从聊天中删除,例如下载队列,用法:
复制```
telegram-upload [选项]
*   `-f`, `--from` `<from_>`

    手机号码、用户名、频道/群组 ID 或者 收藏夹(保存的消息),默认为 `收藏夹`

*   `--config` `<config>`

    要使用的 Telegram App 配置文件路径,默认为 `/root/.config/telegram-upload.json`

*   `-d`, `--delete-on-success`

    下载成功后删除电报信息,用于创建下载队列

*   `-p`, `--proxy` `<proxy>`

    对于一些无法连接 Telegram(如**)使用代理,支持 `http`、`sock4`、`sock5`、`mtproxy` 等代理类型,具体使用见后文


### 代理 [#](#%e4%bb%a3%e7%90%86)

`mtproxy` 和 `sock4` 代理可直接在 `-p` 或者 `--proxy` 参数后使用,对于 `http` 或 `sock5` 代理需要安装 `pysocks`

复制```
pip install pysocks
mtproxy 代理
复制```
mtproxy://@
**其他代理**

复制```
<protocol>://[<username>:<passwd>@]<address>:<port>
比如
复制```
http 类型 http://username:[email protected]:1987 # socks4 类型 socks4://username:[email protected]:1980 # socks5 类型 socks5://username:[email protected]:1980
上传文件的过程指定代理使用参数 `-p` 或者 `--proxy` 加上代理格式

复制```
telegram-upload image1.jpg --proxy mtproxy://[email protected]:443 telegram-upload image2.jpg --proxy http://username:[email protected]:1987 telegram-upload image3.jpg --proxy socks4://username:[email protected]:1980 telegram-upload image4.jpg --proxy socks5://username:[email protected]:1980
环境变量
除了设置代理参数你还可以使用环境变量,就可以不用每次都指定代理了,可以在终端定义环境变量以定义一下代理之一:TELEGRAM_UPLOAD_PROXY、HTTPS_PROXY 或 HTTP_PROXY
复制```
导入环境变量代理 export HTTPS_PROXY=socks5://username:[email protected]:1980 # 然后可以直接上传文件无需再设置代理 telegram-upload image.jpg # 如果需要禁用代理 export TELEGRAM_UPLOAD_PROXY= export HTTPS_PROXY= export HTTP_PROXY=
注意:代理参数 `-p` 或者 `--proxy` 比环境变量指定的代理拥有更高的优先级,环境变量 `TELEGRAM_UPLOAD_PROXY` 优先级高于 `HTTPS_PROXY` 并且它优先于 `HTTP_PROXY`

防止任务中断 [#](#%e9%98%b2%e6%ad%a2%e4%bb%bb%e5%8a%a1%e4%b8%ad%e6%96%ad)
-------------------------------------------------------------------

telegram-upload 在终端里执行,如果终端断开,其进程就可能中断,因此在 Linux 下我们需要使用 screen 命令来让进程在后台执行会话

对于 Debian/Ubuntu 安装 screen

复制```
sudo apt-get update sudo apt-get install screen
在安装好 screen 后,可以使用 screen 会话让我们的上传操作在后台进行且不会因为 SSH 断开而终止了
复制```
新建一个名为 tg 的 screen 会话(注意大小写) screen -S tg # 然后在里面执行我们的 telegram-upload 命令,比如: telegram-upload /telegram/xxx.zip # 按Ctrl+A,再按"D"键,保留会话在 SSH 断开后继续执行 # 未来需要恢复名为 tg 的会话 screen -r tg # 任务完成,需要关闭 tg 这个会话 exit

作者
Dejavu Moe
Not for success, just for growing.
* * *
[←→ Clash for Windows 优雅地使用 TUN 模式接管系统流量 2021 年 07 月 14 日](/posts/cfw-tun/) [Windows Terminal+PowerShell 7 打造 Windows 下最好用的终端 2021 年 07 月 27 日 →←](/posts/windows-terminal/)
* * *
表情图片预览
发送
1 条评论
* 最新
* 最热
* 最早
* 作者
关闭评论
通知中心

xm 2023-09-17 佐治亚亚特兰大Edge 116Windows 10
window能也能用吗,准备用来备份资料
赞同 (0)反对 (0)回复折叠已审置顶编辑删除
Powered By [Artalk](https://artalk.js.org "Artalk v2.5.5")
加载更多
[↑](#the-top "回到顶部")
* [版权声明](/copyright/ "版权声明")
* [隐私政策](/privacy/ "隐私政策")
* [网站地图](/sitemap.xml)
* [运行状态](https://uptime.dejavu.moe/status/monitor)
全站约 142,319 字 / 相当于写完了一本《狂人日记》
© 2023 [Dejavu Moe](/)
Built with [Hugo](https://gohugo.io/) & [Congo](https://git.io/hugo-congo)
▲
x▼
Docker Guide | WikiArr
Docker Guide | WikiArr
WikiArr
Search...
Browse
[
Home
](/)
Media Automation
[
Radarr
](/en/radarr)[
Sonarr
](/en/sonarr)[
Lidarr
](/en/lidarr)[
Readarr
](/en/readarr)
Indexer Management
[
Prowlarr
](/en/prowlarr)
Contribute
[
Donate
](/en/donate)
Report a Bug
Suggest a Feature
Docker Guide
Page Contents
Table of Contents
The Best Docker Setup
Portainer
Introduction
Multiple users and a shared group
Permissions
UMASK
PUID and PGID
Example
Single user and optional shared group
Ownership and permissions of /config
Consistent and well planned paths
Examples
Issues
Running containers using
Docker Compose
docker run
Systemd
Helpful commands
List running containers
Shell inside a container
Prune Docker
Get docker run command
Get docker-compose
Troubleshoot networking
Recursively chown user and group
Recursively chmod to 775/664
Find UID/GID for user
Examine files for hard links
Interesting Docker Images
Custom Docker Network and DNS
Common Problems
Correct outside paths, incorrect inside paths
Running Docker containers as root or changing users around
Running Docker containers with umask 000
Getting Help
Chat Support (Discord)
Forum Support (Reddit)
Last edited by
Administrator
02/06/2022
¶ Table of Contents
- Table of Contents
- The Best Docker Setup
- Portainer
- Introduction
- Multiple users and a shared group
- Single user and optional shared group
- Ownership and permissions of /config
- Consistent and well planned paths
- Running containers using
- Helpful commands
- Interesting Docker Images
- Custom Docker Network and DNS
- Common Problems
- Getting Help
¶ The Best Docker Setup
TL;DR: An eponymous user per daemon and a shared group with a umask of 002. Consistent path definitions between all containers that maintains the folder structure. Using one volume (so the download folder and library folder are on the same file system) makes hardlinks and instant moves (atomic moves) possible for Sonarr, Radarr, Lidarr and Readarr. And most of all, ignore most of the Docker image’s path documentation!
Note: Many folks find TRaSH's Hardlink Tutorial helpful and easier to understand than this guide. This guide is more conceptual in nature while TRaSH's tutorial walks you through the process.
¶ Portainer
Portainer should be avoided for setting up docker containers
- Portainer gives a pretty GUI for managing containers, but that is all it is useful for.
- Portainer should only for viewing docker container logs / container status.
- It's strongly suggested to use Docker compose and to not use Portainer.
- Portainer has many issues, such as:
- Incorrect order of source and target of mounts
- Inconsistent case-sensitivity
- No automatically created custom networks for inter-container communication
- Inconsistent compose implementations on different architectures
- Pulls every tag on update when you don't set a specific tag
- Capabilities are hidden and some don't work at all on ARM platforms
See this Docker Guide and TRaSH's Docker Tutorial instead for how to setup Docker Compose.
¶ Introduction
This article will not show you specifics about the best Docker setup, but it describes an overview that you can use to make your own setup the best that it can be. The idea is that you run each Docker container as its own user, with a shared group and consistent volumes so every container sees the same path layout. This is easy to say, but not so easy to understand and explain.
Reminder that many folks find TRaSH's Hardlink Tutorial helpful and easier to understand than this guide. This guide is more conceptual in nature while TRaSH's tutorial walks you through the process.
¶ Multiple users and a shared group
¶ Permissions
Ideally, each software runs as its own user and they are all part of a shared group with folder permissions set to 775 (drwxrwxr-x) and files set to 664 (-rw-rw-r--), which is a umask of 002. A sane alternative to this is a single shared user, which would use 755 and 644 which is a umask of 022. You can restrict permissions even more by denying read from “other”, which would be a umask of 007 for a user per daemon or 077 for a single shared user. For a deeper explanation, try the Arch Linux wiki articles about file permissions and attributes and UMASK.
¶ UMASK
Many Docker images accept -e UMASK=002 as an environment variable and some software can be configured with a user, group and umask (NZBGet) or folder/file permission (Sonarr/Radarr), inside the container. This will ensure that files and folders created by one can be read and written by the others. If you are using existing folders and files, you will need to fix their current ownership and permissions too, but going forward they will be correct because you set each software up right.
¶ PUID and PGID
Many Docker images also take a -e PUID=123 and -e PGID=321 that lets you change the UID/GID used inside to that of an account on the outside. If you ever peak in, you’ll find that username is something like abc, nobody or hotio, but because it uses the UID/GID you pass in, on the outside it looks like the expected user. If you’re using storage from another system via NFS or CIFS, it will make your life easier if that system also has matching users and group. Perhaps let one system pick the UID/GIDs, then re-use those on the other system, assuming they don’t conflict.
¶ Example
You run Sonarr using hotio/sonarr, you’ve created a sonarr user with uid 123 and a shared group media with gid 321 which the sonarr user is a member of. You configure the Docker image to run with -e PUID=123 -e PGID=321 -e UMASK=002. Sonarr also lets you configure the user, group as well as folder and file permissions. The previous settings should negate these, but you could configure them if you wanted. An UMASK of 002 results in 775 (drwxrwxr-x) for folders and 664 (-rw-rw-r--) for files. and the user/group are a little tricky because inside the container, they have a different name. Typically they are abc or nobody.
¶ Single user and optional shared group
Another popular and arguably easier option is a single, shared user. Perhaps even your user. It isn’t as secure and doesn’t follow best practices, but in the end it is easier to understand and implement. The UMASK for this is 022 which results in 755 (drwxr-xr-x) for folders and 644 (-rw-r--r--) for files. The group no longer really matters, so you’ll probably just use the group named after the user. This does make it harder to share with other users, so you may still end up wanting a UMASK of 002 even with this setup.
¶ Ownership and permissions of /config
Don’t forget that your /config volume will also need to have correct ownership and permissions, usually the daemon’s user and that user’s group like sonarr:sonarr and a umask of 022 or 077 so only that user has access. In a single user setup, this would of course be the one user you’ve chosen.
¶ Consistent and well planned paths
Many folks find TRaSH's Hardlink Tutorial helpful and easier to understand than this guide. This guide is more conceptual in nature while TRaSH's tutorial walks you through the process.
The easiest and most important detail is to create unified path definitions across all the containers.
If you’re wondering why hardlinks aren’t working or why a simple move is taking far longer than it should, this section explains it. The paths you use on the inside matter. Because of how Docker’s volumes work, passing in two volumes such as the commonly suggested /tv, /movies, and /downloads makes them look like two different file systems, even if they are a single file system outside the container. This means hardlinks won’t work and instead of an instant/atomic move, a slower and more IO intensive copy+delete is used. If you have multiple download clients because you’re using torrents and usenet, having a single /downloads path means they’ll be mixed up. Because the Radarr in one container will ask the NZBGet in its own container where files are, using the same path in both means it will all just work. If you don’t, you’d need to fix it with a remote path map.
So pick one path layout and use it for all of them. It's suggested to use /data, but there are other common names like /shared, /media or /dvr. Keeping this the same on the outside and inside will make your setup simpler: one path to remember or if integrating Docker and native software. For example, Synology might use /Volume1/data and unRAID might use /mnt/user/data on the outside, but /data on the inside is fine.
It is also important to remember that you’ll need to setup or re-configure paths in the software running inside these Docker containers. If you change the paths for your download client, you’ll need to edit its settings to match and likely update existing torrents.. If you change your library path, you’ll need to change those settings in Sonarr, Radarr, Lidarr, Plex, etc.
¶ Examples
What matters here is the general structure, not the names. You are free to pick folder names that make sense to you. And there are other ways of arranging things too. For example, you’re not likely to download and run into conflicts of identical releases between usenet and torrents, so you could put both in /data/downloads/{movies|books|music|tv} folders. Downloads don’t even have to be sorted into subfolders either, since movies, music and tv will rarely conflict.
This example data folder has subfolders for torrents and usenet and each of these have subfolders for tv, movie and music downloads to keep things neat. The media folder has nicely named tv, movies, books, and music subfolders. This media folder is your library and what you’d pass to Plex, Kodi, Emby, Jellyfin, etc.
For the below example data is equivalent to the host path /host/data and the docker path /data
data
├── torrents
│  ├── movies
│  ├── music
|  ├── books
│  └── tv
├── usenet
│  ├── movies
│  ├── music
│  ├── books
│  └── tv
└── media
    ├── movies
    ├── music
    ├── books
    └── tv
Copy
The path for each Docker container can be as specific as needed while still maintaining the correct structure:
¶ Torrents
data
└── torrents
    ├── movies
    ├── music
    ├── books
    └── tv
Copy
Torrents only needs access to torrent files, so pass it -v /host/data/torrents:/data/torrents. In the torrent software settings, you’ll need to reconfigure paths and you can sort into subfolders like/data/torrents/{tv|books|movies|music}.
¶ Usenet
data
└── usenet
    ├── movies
    ├── music
    └── tv
Copy
Usenet only needs access to usenet files, so pass it -v /host/data/usenet:/data/usenet. In the usenet software settings, you’ll need to reconfigure paths and you can sort into subfolders like/data/usenet/{tv|movies|music}.
¶ Media Server
data
└── media
    ├── movies
    ├── music
    └── tv
Copy
Plex/Emby only needs access to your media library, so pass -v /host/data/media:/data/media, which can have any number of subfolders like movies, kids movies, tv, documentary tv and/or music as sub folders.
¶ Sonarr, Radarr and Lidarr
data
├── torrents
│  ├── movies
│  ├── music
│  └── tv
├── usenet
│  ├── movies
│  ├── music
│  └── tv
└── media
    ├── movies
    ├── music
    └── tv
Copy
Sonarr, Radarr and Lidarr get everything using -v /host/data:/data because the download folder(s) and media folder will look like and be one file system. Hard links will work and moves will be atomic, instead of copy + delete.
¶ Issues
There are a couple minor issues with not following the Docker image’s suggested paths.
The biggest is that volumes defined in the dockerfile will get created if they’re not specified, this means they’ll pile up as you delete and re-create the containers. If they end up with data in them, they can consume space unexpectedly and likely in an unsuitable place. You can find a cleanup command in the helpful commands section below. This could also be mitigated by passing in an empty folder for all the volumes you don’t want to use, like /data/empty:/movies and /data/empty:/downloads. Maybe even put a file named DO NOT USE THIS FOLDER inside, to remind yourself.
Another problem is that some images are pre-configured to use the documented volumes, so you’ll need to change settings in the software inside the Docker container. Thankfully, since configuration persists outside the container this is a one time issue. You might also pick a path like /data or /media which some images already define for a specific use. It shouldn’t be a problem, but will be a little more confusing when combined with the previous issues. In the end, it is worth it for working hard links and fast moves. The consistency and simplicity are welcome side effects as well.
If you use the latest version of the abandoned RadarrSync to synchronize two Radarr instances, it depends on mapping the same path inside to a different path on the outside, for example /movies for one instance would point at /data/media/movies and the other at /data/media/movies4k. This breaks everything you’ve read above. There is no good solution, you either use the old version which isn’t as good, do your mapping in a way that is ugly and breaks hard links or just don’t use it at all.
¶ Running containers using
¶ Docker Compose
This is the best option for most users, it lets you control and configure many containers and their interdependence in one file. A good starting place is Docker’s own Get started with Docker Compose. You can use composerize or ghcr.io/red5d/docker-autocompose to convert docker run commands into a single docker-compose.yml file.
The below is not a complete working example! The containers only have PID, UID, UMASK and example paths defined to keep it simple.
# sonarr
Sonarr:
    image: cr.hotio.dev/hotio/sonarr
    volumes:
        - /path/to/config/sonarr:/config
        - /host/data:/data
    environment:
        - PUID=111
        - PGID=321
        - UMASK=002

# deluge
Deluge:
    image: binhex/arch-delugevpn
    volumes:
        - /path/to/config/deluge:/config
        - /host/data/torrents:/data/torrents
    environment:
        - PUID=222
        - PGID=321
        - UMASK=002

# SABnzbd
SABnzbd:
    image: cr.hotio.dev/hotio/sabnzbd
    volumes:
        - /path/to/config/sabnzbd:/config
        - /host/data/usenet:/data/usenet
    environment:
        - PUID=333
        - PGID=321
        - UMASK=002

# plex
Plex:
    image: cr.hotio.dev/hotio/plex
    volumes:
        - /path/to/config/plex:/config
        - /host/data/media:/data/media

    environment:
        - PUID=444
        - PGID=321
        - UMASK=002
Copy
¶ Update all images and containers
docker-compose pull
docker-compose up -d
Copy
¶ Update individual image and container
docker-compose pull NAME
docker-compose up -d NAME
Copy
¶ docker run
Like the Docker Compose example above, the following
docker runcommands are stripped down to only the PUID, PGID, UMASK and volumes in order to act as an obvious example.
# sonarr
docker run -v /path/to/config/sonarr:/config \
           -v /host/data:/data \
           -e PUID=111 -e PGID=321 -e UMASK=002 \
           cr.hotio.dev/hotio/sonarr

# deluge
docker run -v /path/to/config/deluge:/config \
           -v /host/data/torrents:/data/torrents \
           -e PUID=222 -e PGID=321 -e UMASK=002 \
           binhex/arch-delugevpn

# SABnzbd
docker run -v /path/to/config/sabnzbd:/config \
           -v /host/data/usenet:/data/usenet \
           -e PUID=333 -e PGID=321 -e UMASK=002 \
           cr.hotio.dev/hotio/sabnzbd

# plex
docker run -v /path/to/config/plex:/config \
           -v /host/data/media:/data/media \
           -e PUID=444 -e PGID=321 -e UMASK=002 \
           cr.hotio.dev/hotio/plex
Copy
¶ Systemd
For maintaining a few Docker containers just using systemd is an option. It standardizes control and makes dependencies simpler for both native and Docker services. The generic example below can be adapted to any container by adjusting or adding the various values and options.
# /etc/systemd/system/thing.service
[Unit]
Description=Thing
Requires=docker.service
After=network.target docker.service

[Service]
ExecStart=/usr/bin/docker run --rm \
                          --name=thing \
                          -v /path/to/config/thing:/config \
                          -v /host/data:/data
                          -e PUID=111 -e PGID=321 -e UMASK=002 \
                          nobody/thing

ExecStop=/usr/bin/docker stop -t 30 thing

[Install]
WantedBy=default.target
Copy
¶ Helpful commands
¶ List running containers
docker ps
Copy
¶ Shell inside a container
docker exec -it CONTAINER_NAME /bin/bash
Copy
For more information, see the docker exec documentation.
¶ Prune Docker
docker system prune --all --volumes
Copy
Remove unused containers, networks, volumes, images and build cache. As the WARNING this command gives says, this will remove all of the previously mentioned items for anything not in use by a running container. In a correctly configured environment, this is fine. But be aware and proceed cautiously the first time. See the Docker system prune documentation for more details.
¶ Get docker run command
Getting the docker run command from GUI managers can be hard, this Docker image makes it easy for a running container (source).
docker run --rm -v /var/run/docker.sock:/var/run/docker.sock assaflavie/runlike CONTAINER_NAME
Copy
¶ Get docker-compose
Additionally, you may check out TRaSH's Guide for docker-compose
Getting a docker-compose.yml from running instances is possible with docker-autocompose, in case you’ve already started your containers with docker run or docker create and want to change to docker-compose style. It is also great for sharing your settings with others, since it doesn’t matter what management software you’re using. The last argument(s) are your container names and you can pass in as many as needed at the same time. The first container name is required, more are optional. You can see container names in the NAMES column of docker ps, they're usually set by you or might be generated based on the image like binhex-qbittorrent. It is not the image name, like binhex/arch-qbittorrentvpn.
docker run --rm -v /var/run/docker.sock:/var/run/docker.sock ghcr.io/red5d/docker-autocompose $CONTAINER_NAME $ANOTHER_CONTAINER_NAME ... $ONE_MORE_CONTAINER_NAME
Copy
For some users this could be:
docker run --rm -v /var/run/docker.sock:/var/run/docker.sock ghcr.io/red5d/docker-autocompose lidarr prowlarr radarr readarr sonarr qbittorrent
Copy
¶ Troubleshoot networking
Most Docker images don’t have many useful tools in them for troubleshooting, but you can attach a network troubleshooting type image to an existing container to help with that.
docker run -it --rm --network container:CONTAINER_NAME nicolaka/netshoot
Copy
¶ Recursively chown user and group
chown -R user:group /some/path/here
Copy
¶ Recursively chmod to 775/664
chmod -R a=,a+rX,u+w,g+w /some/path/here
          ^  ^    ^   ^ adds write to group
          |  |    | adds write to user
          |  | adds read to all and execute to all folders (which controls access)
          | sets all to `000`
Copy
¶ Find UID/GID for user
id <username>
Copy
¶ Examine files for hard links
ls -alhi
42207934 -rw-r--r--  2 user group    0 Sep 11 11:55 # hardlinked
42207936 -rw-r--r--  1 user group    0 Sep 11 11:55 # no hardlinks
42207934 -rw-r--r--  2 user group    0 Sep 11 11:55 # original

stat original
  File: original
  Size: 0               Blocks: 0          IO Block: 4096   regular empty file
Device: 803h/2051d      Inode: 42207934    Links: 2
Access: (0644/-rw-r--r--)  Uid: ( 1000/ user)   Gid: ( 1001/ group)
Access: 2020-09-11 11:55:43.803327144 -0500
Modify: 2020-09-11 11:55:43.803327144 -0500
Change: 2020-09-11 11:55:49.706660476 -0500
 Birth: 2020-09-11 11:55:43.803327144 -0500
Copy
¶ Interesting Docker Images
- rasmunk/sshfs
- hotio’s The documentation and Dockerfile don’t make any poor path suggestions. Images are automatically updated 2x in 1 hour if upstream changes are found. Hotio also builds our Pull Requests (except Sonarr) which may be useful for testing.
- sonarr
- radarr
- lidarr
- readarr
- prowlarr for usenet and torrent tracker searching
- qbittorrent
- NZBGet
- SABnzbd
- qflood
- ombi for requesting media
- overseerr for requesting media
- jackett for torrent tracker searching
- nzbhydra2 for usenet indexer searching
- bazarr for subtitles
- pullio for auto updating containers
- unpackerr is useful for packed torrent extraction across a variety of torrent clients where unpacking is lacking or missing entirely.
- linuxserver.io images have images for a lot of software and they’re well maintained. However, avoid their 'suggested (optional)' paths.
- binhex another popular maintainer
¶ Custom Docker Network and DNS
One interesting feature of a custom Docker network is that it gets its own DNS server. If you create a bridge network for your containers, you can use their hostnames in your configuration. For example, if you docker run --network=isolated --hostname=deluge binhex/arch-deluge and docker run --network=isolated --hostname=radarr binhex/arch-radarr, you can then configure the Download Client in Radarr to point at just deluge and it’ll work and communicate on its own private network. Which means if you wanted to be even more secure, you could stop forwarding that port too. If you put your reverse proxy container on the same network, you can even stop forwarding the web interface ports and make them even more secure.
¶ Common Problems
¶ Correct outside paths, incorrect inside paths
Many people read this and think they understand, but they end up seeing the outside path correctly to something like /data/usenet, but then they miss the point and set the inside path to /downloads still.
- Good:
/host/data/usenet:/data/usenet/data/media:/data/media
- Bad:
/host/data:/downloads/host/data:/media/data/downloads:/data
¶ Running Docker containers as root or changing users around
If you find yourself running your containers as root:root, you’re doing something wrong. If you’re not passing in a UID and GID, you’ll be using whatever the default is for the image and that will be unlikely to line up with a reasonable user on your system. And if you’re changing the user and group your Docker containers are running as, you’ll probably end up with permissions issues on folders like the /config folder which will likely have files and folders in them that got created the first time with the UID/GID you used the first time.
¶ Running Docker containers with umask 000
If you find yourself setting a UMASK of 000 (which is 777 for folders and 666 for files), you’re also doing something wrong. It leaves your files and folders read/write to everyone, which is poor Linux hygiene.
¶ Getting Help
¶ Chat Support (Discord)
¶ Forum Support (Reddit)
Powered by Wiki.js
Browse by Tags
▲
Github Pages + Hugo 搭建个人博客 - 渣渣的夏天
利用 Hugo + Github Page 搭建个人博客,主要流程和配置记录,包含:第一次搭建过程、日常文章操作、谷歌分析、访问计数、部署脚本、网站运行时间等细节优化和部分个人总结。
版权声明:本文为博主原创文章,遵循 CC BY-NC-SA 4.0 版权协议,禁止商用,转载请附上原文出处链接和本声明。
本次配置最终效果图:
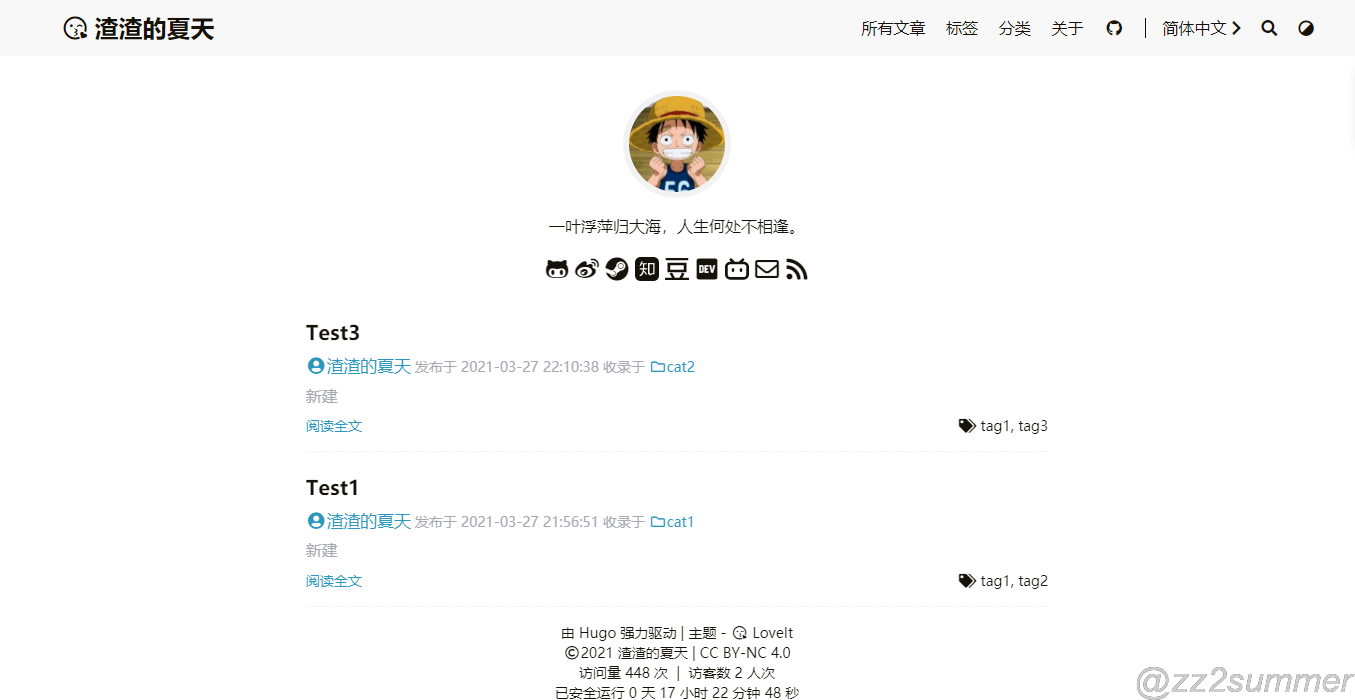

快速搭建方式,直接下载修改后的模板改也是可以的:https://github.com/zz2summer/blog-hugo-theme-LoveIt
完成步骤一、二、三,然后下载上述文件到 blog 目录下就可以跳过第四步了。
-
打开 Github ,新建一个库。
-
输入项目名,要与 Github 用户名一致。比如我的是 zz2summer,那么输入的 Repository name 就是
zz2summer.github.io,README 也一并勾选上。 -
查阅 Hugo 安装指南:Install Hugo | Hugo,找到对应系统的安装操作。
基本上都是使用各个包工具安装,本人 Win10,比较嫌麻烦就直接下载使用。
-
打开 Github 中的 Hugo 库,打开右侧的 Realeases,下载最新的版本,本次下载为:hugo_extended_0.82.0_Windows-64bit.zip
下载 extened 版本是因为有些主题的需要利用进行 SCSS/SASS 构建,如果下普通版就可能会报错显示: you need the extended version to build SCSS/SASS
-
解压后,将其中的
hugo.exe放到指定的安装目录,比如D:\softwares\Hugo\bin,然后将该目录添加到系统环境变量(win+R → sysdm.cpl → 高级 → 环境变量 → 系统变量 Path)的Path下。 -
打开命令行,输入
hugo version,显示版本号即为安装成功 -
本地下载 Git ,Win10直接下载 exe ,点击下一步就好了。
-
新建一个目录,用于存放 Hugo 网站的文件,比如:H:\HugoWebsite
-
打开命令行,切换到该目录,执行命令新建一个 Hugo 网站
| ```
1 2| ``` # blog 是网站文件夹名 hugo new site blog|
-
打开 hugo theme 的网站,选择合适的主题,以Tranquilpeak 举例。
Hugo Themes: https://themes.gohugo.io
-
将选中的主题下载到本地
| ```
1 2 3 4 5 6| ``` # 进入网站目录 blog cd blog # 进入 themes 目录,一般默认有,如果没有自行创建:mkdir -p themes cd themes # 下载主题到 tranquilpeak 文件夹下 git clone https://github.com/kakawait/hugo-tranquilpeak-theme.git tranquilpeak|
-
此处建议选择的这个主题相较适合第一次尝试,配置文件比较详细明了。待熟悉后,可以自行选择主题。
Hugo主题库:https://themes.gohugo.io,个人推荐主题:https://github.com/dillonzq/LoveIt.git
-
在 Hugo 网站的根目录下(上文提及的 HugoWebsite)配置 config.toml
详细配置参考:hugo-tranquilpeak-theme/user.md at master · kakawait/hugo-tranquilpeak-theme
-
当前工作目录:H:\HugoWebsite\blog,备份 config.toml 原文件,然后将 themes/tranquilpeak/exampleSite/config.toml 复制过来覆盖原文件,打开 config.toml 阅读并修改配置
简单讲就是利用已经配置好的主题配置文件进行修改。
-
进入网站文件夹根目录:H:\HugoWebsite\blog,鼠标右键选择 Git Bash Here
-
新建文章:first-post.md,**注意区分主题的要求,有些主题新建文章的目录是 posts **
| ```
1| ``` hugo new post/first-post.md|
-
编辑文章内容,保存。
-
启动 Hogo server
-
打开网址 http://localhost:1313/ 可以进行预览
如果发现预览效果不满意,可以 编辑 config.toml 文件
-
构建 Hugo 网站
在 Hugo 网站文件夹的根目录(H:\HugoWebsite\blog)下执行
hugo命令构建Hugo 会将构建的网站内容默认保存至网站根目录下的 public/ 文件夹下。
-
将网站文件夹与 GitHub 建立联系**(仅第一次运行需要)**
-
进入 H:\HugoWebsite\blog\public 目录,初始化 Git 库
生成的 HTML 文件保存在 “public” 目录中,“public” 文件夹会被转换为 Git 库。
-
将 Git 本地库关联至远程库
在 H:\HugoWebsite\blog\public 目录下,为 Git 本地库添加远程库,“[email protected]:your-github-id/your-github-id.github.io.git”
| ```
1| ``` git remote add origin [email protected]:zz2summer/zz2summer.github.io.git|
-
-
提交修改
在
H:\HugoWebsite\blog\public目录下,通过如下命令提交:| ```
1 2 3 4 5 6| ``` # 查看当前修改状态 git status # 添加修改过得文件, . 表示所有,也可以指定文件 git add . # ""里面的内容就是提交内容的说明信息 git commit -m "first commit"|
-
提交修改至远程库
在
H:\HugoWebsite\blog\public目录下,通过如下命令提交:| ```
1| ``` git push -u origin master|
然后如果按照博客顺序操作,第一次应该失败的。
因为本地的 git 库和远程的库并不是一致的,需要进行一次 pull 操作才能继续 push。
第一种解决办法就是加参数 -f ,强制推送,但是这样很危险,会导致其他的更新提交失败,也就是说原来该库下所有文件都会被删除掉,只剩下本次提交的文件了。日常不建议这么操作,但是其实本次第一次是可以的,因为当前库下没有还没有有效文件。
| ```
1| ``` git push -u -f origin master|
第二种方案为:先把除 .git 文件夹外的所有文件复制到其他目录备份,然后 git pull 当前库下的文件下来,然后把这些文件和自己需要的文件结合处理好(本次就是删除这些文件,再把原文件复制回来),重新提交即可。日常推荐这种方法,养成好习惯。
| ```
1 2 3 4 5 6 7 8 9| ``` # 1.移动除 .git 外的文件到另一个目录下 # 2.pull 该库当前文件,最后的参数是因为合并两个不相关的项目(即,不知道彼此存在并且提交历史不匹配的项目)时,会发生Git错误:fatal: refusing to merge unrelated histories,此时出现记录文件,先按住 ctrl+:,再输入 wq 即可。 git pull origin master --allow-unrelated-histories # 3.合并这些文件和第一次移动出去的文件,本次就是删除这些文件,把那些文件移动回来就好了 # 4.提交本地 git add . git commit -m "first commit" # 5.提交远程 git push -u origin master|
-
好了,第一次初始化配置也就成功完成了!输入:https://zz2summer.github.io/ 就可以访问部署的网站了。
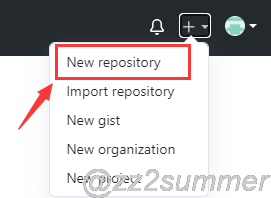
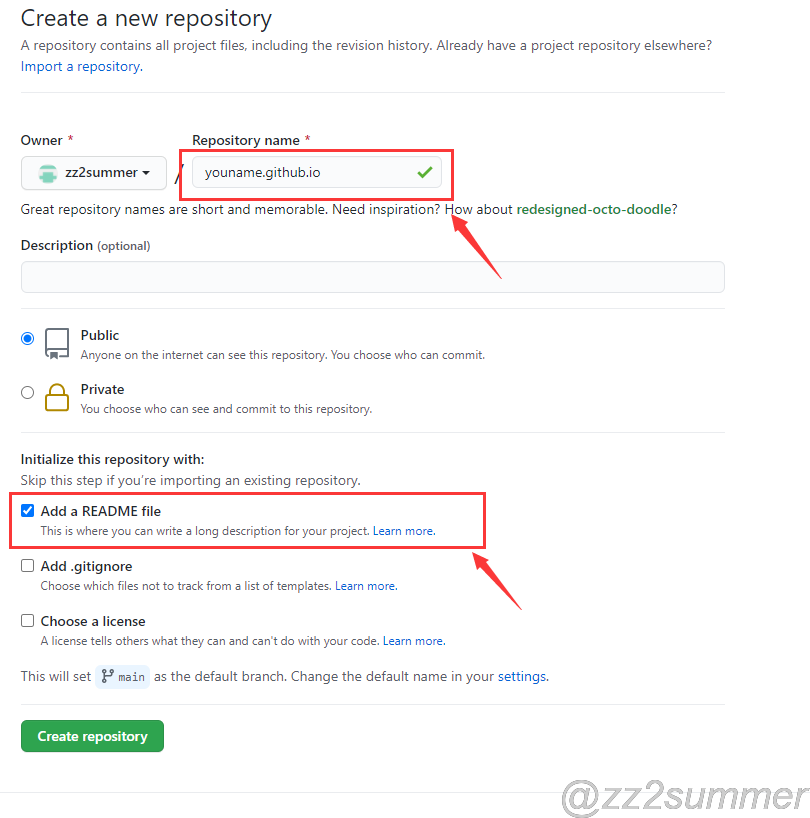

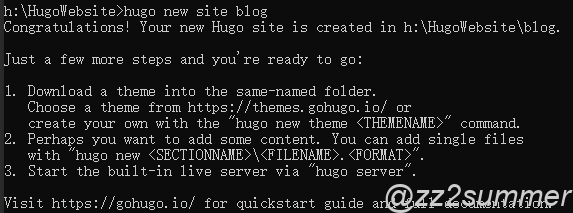


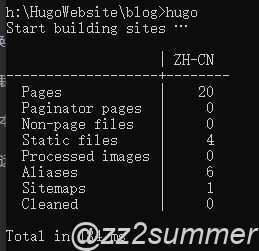

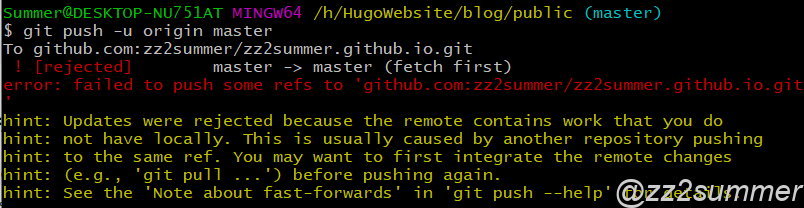
| ```
1 2 3 4 5 6 7 8 9 10 11 12
 | ```
# 1.新建一篇文章,在网站根目录:H:\HugoWebsite\blog
hugo new post/第二篇测试博客.md
# 2.在目录 H:\HugoWebsite\blog\content\post 下找到对应文件进行修改
# 3.本地预览, http://localhost:1313/
hugo server -D
# 4.构建 Hugo 网站
hugo
# 5.切换到目录 H:\HugoWebsite\blog\public ,提交修改至本地库
git add .
git commit -m 'commit info'
# 6.将修改推至远程库
git push -u origin master
|
| ```
1 2 3 4 5 6 7 8 9 10 11 12
 | ```
# 1.当前工作目录:H:\HugoWebsite\blog
# 2.在目录 H:\HugoWebsite\blog\content\post 下找到对应文件
进行修改
# 3.本地预览, http://localhost:1313/
hugo server -D
# 4.构建 Hugo 网站
hugo
# 5.切换到目录 H:\HugoWebsite\blog\public ,提交修改至本地库
git add .
git commit -m 'commit info'
# 6.将修改推至远程库
git push -u origin master
|
| ```
1 2 3 4 5 6 7 8 9 10 11 12 13
 | ```
# 1.当前工作目录:H:\HugoWebsite\blog
# 2.删除两处文件
在目录 H:\HugoWebsite\blog\content\post 、H:\HugoWebsite\blog\public  下找到对应文件进行删除
其中 public 下文件不删除也不影响显示,只是该文件就会一直存在,另外该目录下即便文件(除.git)删错或者全部删除也是不影响的,应为 hugo 命令会全部重建
# 3.本地预览, http://localhost:1313/
hugo server -D
# 4.构建 Hugo 网站
hugo
# 5.切换到目录 H:\HugoWebsite\blog\public ,提交修改至本地库
git add .
git commit -m 'commit info'
# 6.将修改推至远程库
git push -u origin master
|
Hugo 的配置文件和文章中引用图片都是从static作为根目录的。(H:\HugoWebsite\blog\static)
也就是说首先要将图片放置到 static 文件夹下,以 static 为相对路径,然后进行引用,方式为:,当然这样该 .md 文件中是不会显示,本地预览和部署后是可以看到的
正常做法:
- 写文章时,在该文章目录下新建文件夹存放照片,引用时采用相对路径。
- 完成之后,在引用路径前加个
/,比如原来引用方式,需要修改为。 - 之后将该图片文件夹移动到 static 目录下即可。
注意:如果该文件夹名包含空格可能会不能被显示,支持中文,但是不支持含空格。
-
找一份字体放到根目录下(H:\HugoWebsite\blog)。
(win10自带字体文件目录:C:\Windows\Fonts)
-
创建 watermark.py
-
然后每次写完一篇文章可以运行
python watermark.py postname添加水印。如果第一次运行要给所有文章添加水印,可以运行
python watermark.py all。
| ```
1 2 3 4 5 6 7 8 9 10 11 12 13 14 15 16 17 18 19 20 21 22 23 24 25 26 27 28 29 30
 | ```
# -*- coding: utf-8 -*-
import sys
import glob
from PIL import Image
from PIL import ImageDraw
from PIL import ImageFont

def watermark(post_name):
    if post_name == 'all':
        post_name = '*'
    dir_name = 'static/' + post_name + '/*'
    for files in glob.glob(dir_name):
        im = Image.open(files)
        if len(im.getbands()) < 3:
            im = im.convert('RGB')
            print(files)
        font = ImageFont.truetype('arial.ttf', max(30, int(im.size[1] / 20)))
        draw = ImageDraw.Draw(im)
        # draw.text((im.size[0] / 2, im.size[1] / 2), u'@yourname', fill=(0, 0, 0), font=font)
        text_size_x, text_size_y = draw.textsize(u'@yourname', font=font)
        draw.text((im.size[0] - text_size_x, im.size[1] - text_size_y), u'@yourname', fill=(0, 0, 0, 85), font=font)
        im.save(files)

if __name__ == '__main__':
    if len(sys.argv) == 2:
        watermark(sys.argv[1])
    else:
        print('[usage] <input>')
|
-
获取 跟踪ID,https://analytics.google.com/
-
添加如下代码到
<head>标签中| ```
1 2 3 4 5 6 7 8 9| ``` <!-- Global site tag (gtag.js) - Google Analytics --> <script async src="https://www.googletagmanager.com/gtag/js?id=UA-xxxxxxxxx-x"></script> <script> window.dataLayer = window.dataLayer || []; function gtag(){dataLayer.push(arguments);} gtag('js', new Date()); gtag('config', 'UA-xxxxxxxxx-x'); </script>|
参考如下代码,添加到想要加入的位置即可。
-
显示单页面访问量
要显示每篇文章的访问量,复制以下代码添加到你需要显示的位置。
算法:pv的方式,单个用户点击1篇文章,本篇文章记录1次阅读量。
| ```
1 2 3| ``` <span id="busuanzi_container_page_pv"> 本文总阅读量<span id="busuanzi_value_page_pv"></span>次 </span>|
-
显示站点总访问量
要显示站点总访问量,复制以下代码添加到你需要显示的位置。有两种算法可选:
算法a:pv的方式,单个用户连续点击n篇文章,记录n次访问量。
| ```
1 2 3| ``` <span id="busuanzi_container_site_pv"> 本站总访问量<span id="busuanzi_value_site_pv"></span>次 </span>|
算法b:uv的方式,单个用户连续点击n篇文章,只记录1次访客数。
| ```
1 2 3| ``` <span id="busuanzi_container_site_uv"> 本站访客数<span id="busuanzi_value_site_uv"></span>人次 </span>|
注:本地测试时数据会任意显示,部署后即正常
在目录 H:\HugoWebsite\blog 新建 deploy.sh ,在 Git bash 下运行:sh deploy.sh
| ```
1 2 3 4 5 6 7 8 9 10 11 12 13 14 15 16 17 18 19 20 21 22 23 24 25 26 27 28
 | ```
#!/bin/bash
echo -e "\033[0;32mDeploying updates to GitHub...\033[0m"

# Build the project.
hugo # if using a theme, replace with hugo -t <YOURTHEME>

# Go To Public folder
cd public
# Add changes to git.
git add .

# Commit changes.
msg="rebuilding site `date` "

echo -e "\033[0;32m$msg\033[0m"

if [ $# -eq 1 ]
  then msg="$1"
fi
git commit -m "$msg"

# Push source and build repos.
git push origin master

# Come Back up to the Project Root
cd ..
|
在想要添加的位置(基本是 footer 文件)加入以下代码,其中开始运行的时间需要自行修改
| ```
1 2 3 4 5 6 7 8 9 10 11 12 13 14 15 16 17 18 19 20 21 22 23 24 25 26 27 28 29 30 31 32 33 34 35 36 37 38 39 40 41 42 43
 | ```
<script>
    function siteTime() {
        var seconds = 1000;
        var minutes = seconds * 60;
        var hours = minutes * 60;
        var days = hours * 24;
        var years = days * 365;
        var today = new Date();
        var startYear = 2021;
        var startMonth = 3;
        var startDate = 27;
        var startHour = 19;
        var startMinute = 15;
        var startSecond = 11;
        var todayYear = today.getFullYear();
        var todayMonth = today.getMonth() + 1;
        var todayDate = today.getDate();
        var todayHour = today.getHours();
        var todayMinute = today.getMinutes();
        var todaySecond = today.getSeconds();
        var t1 = Date.UTC(startYear, startMonth, startDate, startHour, startMinute, startSecond);
        var t2 = Date.UTC(todayYear, todayMonth, todayDate, todayHour, todayMinute, todaySecond);
        var diff = t2 - t1;
        var diffYears = Math.floor(diff / years);
        var diffDays = Math.floor((diff / days) - diffYears * 365);
        var diffHours = Math.floor((diff - (diffYears * 365 + diffDays) * days) / hours);
        var diffMinutes = Math.floor((diff - (diffYears * 365 + diffDays) * days - diffHours * hours) /
            minutes);
        var diffSeconds = Math.floor((diff - (diffYears * 365 + diffDays) * days - diffHours * hours -
            diffMinutes * minutes) / seconds);
        if (startYear == todayYear) {
            //document.getElementById("year").innerHTML = todayYear;             document.getElementById("sitetime").innerHTML = "已安全运行 " + diffDays + " 天 " + diffHours +
                " 小时 " + diffMinutes + " 分钟 " + diffSeconds + " 秒";
        } else {
            //document.getElementById("year").innerHTML = startYear + " - " + todayYear;             document.getElementById("sitetime").innerHTML = "已安全运行 " + diffYears + " 年 " + diffDays +
                " 天 " + diffHours + " 小时 " + diffMinutes + " 分钟 " + diffSeconds + " 秒";
        }
    }
    setInterval(siteTime, 1000);
</script>
<span id="sitetime">载入运行时间...</span>
|
方法一:
部分主题自带了 lightgallery 效果,在配置文件设置为 true 即可。
方法二:
-
加载
jqury和fancybox文件,在博客文件footer.html中添加下面的文件| ```
1 2 3 4| ``` <script src="https://cdn.jsdelivr.net/npm/[email protected]/dist/jquery.min.js"></script> <link rel="stylesheet" href="https://cdn.jsdelivr.net/gh/fancyapps/[email protected]/dist/jquery.fancybox.min.css" /> <script src="https://cdn.jsdelivr.net/gh/fancyapps/[email protected]/dist/jquery.fancybox.min.js"></script>|
-
在博客文件中需要加载图片的地方插入下面html代码
| ```
1| ``` <a data-fancybox="gallery" href="图片链接"><img src="图片链接"></a>|
-
可以将主题下相关文件复制到 blog 网站根目录下,因为这样可以直接渲染网站效果,而又不影响主题本身的内容。
主要是
themes\LoveIt\exampleSite目录下文件 -
发布文章如果有参数 draft ,记得将值设为 false,或者删除 draft,不然会被认定为草稿只能本地运行而不能运行到网站上。
-
基本上就是安装 Hugo ,建站,下载主题,配置主题参数,然后部署就是了。
【1】How To Build A Personal Website with Hugo | Matteo Courthoud
【2】使用Hugo和GitHub搭建博客. 折腾了几天博客的框架终于搭建起来了。研究了一番之后,最终还是选择使用Hugo和G… | by Félix | Medium
占卜方法中的“变爻”是什么意思_百度知道
Save From : 占卜方法中的 “变爻” 是什么意思_百度知道
Content
以前我说过,占卜时,将硬币任意一面作为阳面(习惯上以有字的面为阳面),一面作为阴面,将三个硬币合在一起,乱摇一阵后丢下来,这里要注意的是丢下时,一定要选择水平整洁的平面,让硬币着地时受力均匀,以搞高占卜的准确性。 所谓 “变爻”,就是如果三个硬币着地静止后全是阳面,叫作老阳,就是变爻,要变阴,阳极则阴生。如果三个硬币着地静止后全是阴面,叫作老阴,要由阴变阳。记录的顺序是由下向上依次排列,第一次所卜得的为初爻,第二次为第二爻,依次上去最后到上爻。在完成六次后,就组成一个“卦象”。这时,就要分析六爻中,有几个变爻: (1)若六爻皆为不变爻,则以“本卦” 的卦辞去占断;(2)若六爻皆为变爻,则以变后的 “之卦” 的卦辞去占断;(3)若六爻中只有一个变爻,则要以该变爻的爻辞占断;(4)若六爻中有 5 爻是变爻,只有一爻不变,则以该不变爻的爻辞占断;(5)若六爻中变爻多于不变爻,则以变后的 “之卦” 去占断;(6)若六爻中变爻少于不变爻,则以 “本卦” 的变爻爻辞占断;(7)若六爻中变爻等于不变爻,则以 “本卦” 和“之卦”的卦辞占断。 用这种方法占卜,只能给你在决定事情时提供参考,但经过实践证明,所问的事情方向绝对是正确的,你只要朝这个方向努力,才能得到你所问事情的最佳结果。
Note
How to Disable Suspend and Hibernation Modes In Linux
In this article, we take you through how to disable suspend and hibernation modes on a Linux system. But before we do that, let’s briefly have an overview of these two modes.
When you suspend your Linux system, you basically activate or put it into sleep mode. The screen goes off, even though the computer remains very much powered on. Also, all of your documents and applications remain open.
Suspending your system helps save power when you are not using your system. Getting back to using your system requires a simple mouse-click or a tap on any keyboard button. Sometimes, you may be required to press the power button.
There are 3 suspend modes in Linux:
- Suspend to RAM (Normal Suspend): This is the mode that most laptops automatically enter incase of inactivity over a certain duration or upon closing the lid when the PC is running on the battery. In this mode, power is reserved for the RAM and is cut from most components.
- Suspend to Disk (Hibernate): In this mode, the machine state is saved into swap space & the system is completely powered off. However, upon turning it on, everything is restored and you pick up from where you left.
- Suspend to both (Hybrid suspend): Here, the machine state is saved into swap, but the system does not go off. Instead, the PC is suspended to RAM. The battery is not used and you can safely resume the system from the disk and get ahead with your work. This method is much slower than suspending to RAM.
Disable Suspend and Hibernation in Linux
To prevent your Linux system from suspending or going into hibernation, you need to disable the following systemd targets:
$ sudo systemctl mask sleep.target suspend.target hibernate.target hybrid-sleep.target
You get the output shown below:
hybrid-sleep.target
Created symlink /etc/systemd/system/sleep.target → /dev/null.
Created symlink /etc/systemd/system/suspend.target → /dev/null.
Created symlink /etc/systemd/system/hibernate.target → /dev/null.
Created symlink /etc/systemd/system/hybrid-sleep.target → /dev/null.
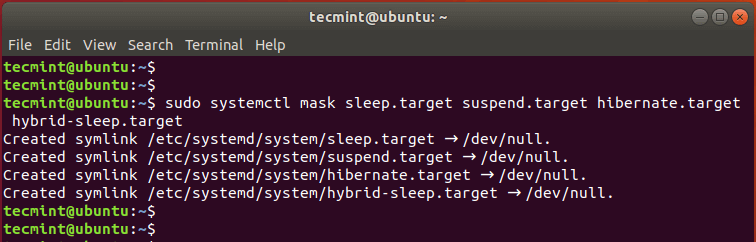
Disable Suspend and Hibernation in Ubuntu
Then reboot the system and log in again.
Verify if the changes have been effected using the command:
$ sudo systemctl status sleep.target suspend.target hibernate.target hybrid-sleep.target
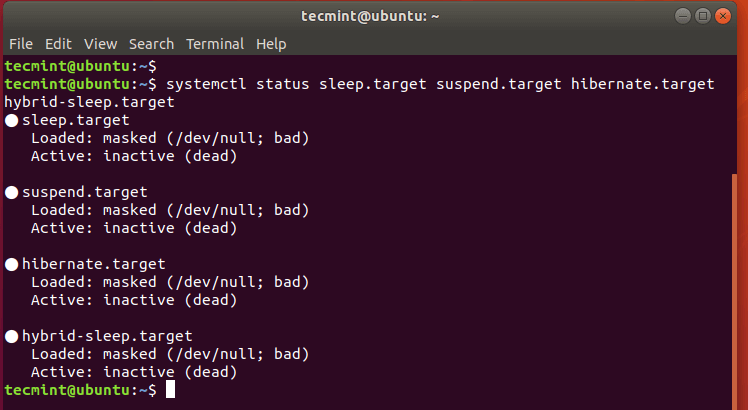
Verify Suspend and Hibernation in Ubuntu
From the output, we can see that all four states have been disabled.
Enable Suspend and Hibernation in Linux
To re-enable the suspend and hibernation modes, run the command:
$ sudo systemctl unmask sleep.target suspend.target hibernate.target hybrid-sleep.target
Here’s the output that you will get.
Removed /etc/systemd/system/sleep.target.
Removed /etc/systemd/system/suspend.target.
Removed /etc/systemd/system/hibernate.target.
Removed /etc/systemd/system/hybrid-sleep.target.
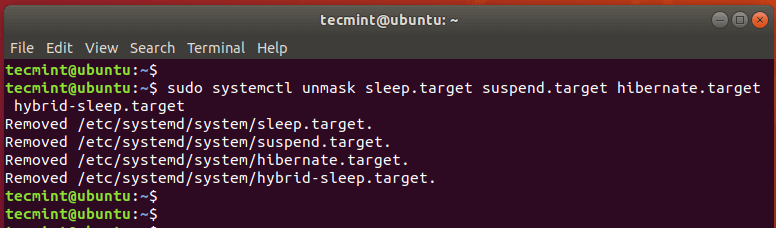
Enable Suspend and Hibernation in Ubuntu
To verify this, run the command;
$ sudo systemctl status sleep.target suspend.target hibernate.target hybrid-sleep.target
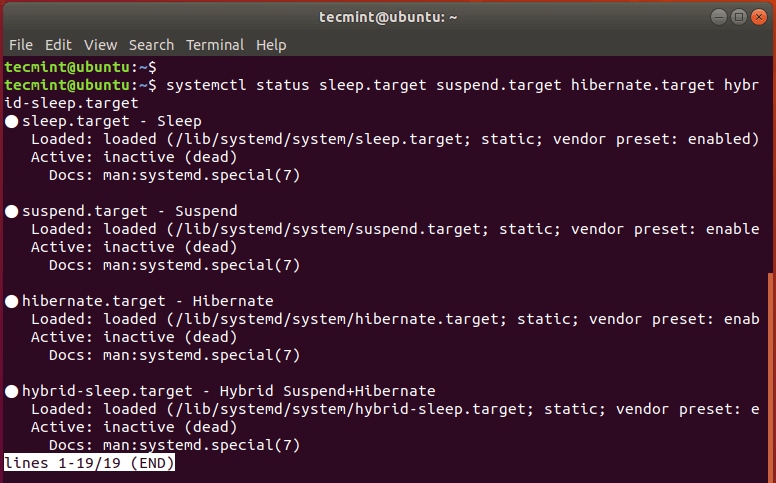
Verify Suspend and Hibernation in Ubuntu
To prevent the system from going into suspend state upon closing the lid, edit the /etc/systemd/logind.conf file.
$ sudo vim /etc/systemd/logind.conf
Append the following lines to the file.
[Login]
HandleLidSwitch=ignore
HandleLidSwitchDocked=ignore
Save and exit the file. Be sure to reboot in order for the changes to take effect.
This wraps our article on how to disable Suspend and hibernation modes on your Linux system. It’s our hope that you found this guide beneficial. Your feedback is most welcome.
If You Appreciate What We Do Here On TecMint, You Should Consider:
TecMint is the fastest growing and most trusted community site for any kind of Linux Articles, Guides and Books on the web. Millions of people visit TecMint! to search or browse the thousands of published articles available FREELY to all.
If you like what you are reading, please consider buying us a coffee (or 2) as a token of appreciation.

We are thankful for your never ending support.
https://www.tecmint.com/disable-suspend-and-hibernation-in-linux/
Mount Google Drive on Ubuntu/Debian and Upload Files -ocamlfuse
Google Drive is a fantastic cloud storage service that allows you to upload, share, and sync data across several computers. Other sub-services that are part of an office suite, such as Google Docs, Google Sheets, and Google Slides, are included in Google Drive. The cloud storage is free up to 15 Gigabytes (GB), but there are additional premium alternatives open up to 30 Terabytes (TB).
On the other hand, google-drive-ocamlfuse is an OCaml-based FUSE-based file system for Google Drive. It allows you to access your Google Drive from a Linux computer. The project is maintained on GitHub, where the most recent development version can be found.
In this brief tutorial I will demonstrate How To Mount Google Drive on Ubuntu / Debian Linux and Upload files or Directories to the drive.
Features of google-drive-ocamlfuse
google-drive-ocamlfuse features include the following:
- Ordinary files and folders have full read/write access.
- Access to Google Docs, Sheets, and Slides on a read-only basis (exported to configurable formats).
- Support for multiple accounts.
- Handling of duplicate files.
- Garbage collection (.Trash directory).
- Permissions and ownership in Unix.
- Symbolic connections
- When streaming, read-ahead buffers are used.
- Getting access to content that has been shared with you (requires configuration).
- Support that is driven by the team.
- Support for Service Accounts.
- Support for OAuth2 on Devices.
Install google-drive-ocamlfuse on Ubuntu / Debian Linux
We will install google-drive-ocamlfuse on different Linux distributions.
Install google-drive-ocamlfuse on Ubuntu
Run the following command to install google-drive-ocamlfuse on Ubuntu:
sudo add-apt-repository ppa:alessandro-strada/google-drive-ocamlfuse-beta
sudo apt-get update
sudo apt-get install google-drive-ocamlfuse
Install google-drive-ocamlfuse on Debian
On Debian we will install Install google-drive-ocamlfuse as follows:
sudo apt install -y software-properties-common dirmngr

sudo cat > /etc/apt/sources.list.d/alessandro-strada-ubuntu-ppa-bionic.list << EOF
deb http://ppa.launchpad.net/alessandro-strada/ppa/ubuntu xenial main
deb-src http://ppa.launchpad.net/alessandro-strada/ppa/ubuntu xenial main
EOF

sudo apt-key adv --keyserver keyserver.ubuntu.com --recv-keys AD5F235DF639B041
sudo apt update
sudo apt install -y google-drive-ocamlfuse
Install google-drive-ocamlfuse on Arch (Bonus)
Use the following command to install google-drive-ocamlfuse on Arch Linux:
$ yaourt -S google-drive-ocamlfuse
Mounting Google Drive on Ubuntu / Debian Linux
Launch google-drive-ocamlfuse to set your Google drive folder.
$ google-drive-ocamlfuse
When you Launch google-drive-ocamlfuse it will launch your regular browser and prompt you to log in to your Google account.

Go through the process of logging in. You’ll receive a success message if it’s successful. The browser can now be closed.

Create a mount point for Google Drive
Let’s make a subdirectory under the home folder.
mkdir ~/MyGDrive
To inform google-drive-ocamlfuse to mount your Google Drive folder at the specified location, run the following command.
google-drive-ocamlfuse ~/MyGDrive
Check if the directory is mounted:
$ **df -h**
Filesystem              Size  Used Avail Use% Mounted on
udev                    7.8G     0  7.8G   0% /dev
tmpfs                   1.6G  2.0M  1.6G   1% /run
/dev/nvme0n1p2          234G  187G   35G  85% /
tmpfs                   7.8G  214M  7.6G   3% /dev/shm
tmpfs                   5.0M  4.0K  5.0M   1% /run/lock
tmpfs                   7.8G     0  7.8G   0% /sys/fs/cgroup
/dev/loop1               56M   56M     0 100% /snap/core18/2246
/dev/loop2              101M  101M     0 100% /snap/dukto/16
/dev/loop3               56M   56M     0 100% /snap/core18/2253
/dev/loop0              128K  128K     0 100% /snap/bare/5
/dev/loop5              165M  165M     0 100% /snap/gnome-3-28-1804/161
/dev/loop4               62M   62M     0 100% /snap/core20/1242
/dev/loop6              219M  219M     0 100% /snap/gnome-3-34-1804/77
/dev/loop7              248M  248M     0 100% /snap/gnome-3-38-2004/87
/dev/loop8               66M   66M     0 100% /snap/gtk-common-themes/1519
/dev/loop9               63M   63M     0 100% /snap/gtk-common-themes/1506
/dev/loop10              33M   33M     0 100% /snap/snapd/13640
/dev/loop12             219M  219M     0 100% /snap/gnome-3-34-1804/72
/dev/loop11              51M   51M     0 100% /snap/snap-store/547
/dev/nvme0n1p1          511M  5.3M  506M   2% /boot/efi
/dev/loop13             261M  261M     0 100% /snap/kde-frameworks-5-core18/32
/dev/loop15              55M   55M     0 100% /snap/snap-store/558
/dev/loop16             140M  140M     0 100% /snap/skype/190
/dev/loop17              43M   43M     0 100% /snap/snapd/14066
tmpfs                   1.6G   28K  1.6G   1% /run/user/1000
/dev/loop18             135M  135M     0 100% /snap/skype/194
**google-drive-ocamlfuse   15G   62M   15G   1% /home/frank/MyGDrive**
Now, check how well the synchronization works. In the following screen-shot you see that the files in My Google Drive has been synced to my Computer Locally.

Upload Files to Google Drive mounted on Linux
To upload files to Google Drive, Drag and drop file to ~/MyGDrive folder:
Here are the files we drag and drop in ~MyGDrive:

Now we can confirm if they have been uploaded to Google Drive:

As you can see in the screen-shot above that upload is successful
Conclusion
Our tutorial on How To Mount Google Drive on Ubuntu and Upload Files has come to a conclusion. We hope you found this information helpful. Cheers!
More Guides:
- How To Run PostgreSQL in Podman Container
- Create Locally Trusted SSL Certificates with mkcert on Debian
- How To Enable Nested Virtualization on KVM / Qemu
- Using SSH and SSH Keys on Debian
Your support is our everlasting motivation,
that cup of coffee is what keeps us going!
As we continue to grow, we would wish to reach and impact more people who visit and take advantage of the guides we have on our blog. This is a big task for us and we are so far extremely grateful for the kind people who have shown amazing support for our work over the time we have been online.
Thank You for your support as we work to give you the best of guides and articles. Click below to buy us a coffee.
https://techviewleo.com/mount-google-drive-on-ubuntu-debian-and-upload-files/
Headless Usage & Authorization · astrada/google-drive-ocamlfuse Wiki
In the basic procedure described in Usage, you need a web browser for the authorization step. On a headless server without a GUI interface or a web browser, you can get it to work by using a web browser on a separate computer, and pasting the results into the ~/.gdfuse/default/config (or ~/.gdfuse/label/config if you use labels) file of your headless server.
Caveat: I do not know whether this is the "optimal" way to do this. I was in a pinch, and this approach worked. At first, I had a difficult time getting it to work, but Alessandro responded immediately with help, and we got it to work. These are the steps I followed, and of course, please edit this page if you have tips or a better approach.
(I used the "Alternate Authorization Mode" although the Standard Authorization mode using the GAE (Google App Engine) service may work too.)
-
Install normally as per the Installation page
-
On the computer with the web browser, create an OAuth2 application and credentials. These steps are similar to those described in the "Alternate Authorization Mode" section in Authorization. The following steps are what I did, based on my notes:
- Sign in to your Google account and create a project: https://console.cloud.google.com/
- Enable the Google Drive API
- In the left-hand pane (Navigation menu), open "APIs & Services" -> "Library", this will take you to https://console.cloud.google.com/apis/library
- Click on "Google Drive API", this will open https://console.cloud.google.com/apis/library/drive.googleapis.com . Click "ENABLE API".
- Get your client ID and client secret
- Open the Navigation menu (click the hamburger icon at the top left), open "APIs & Services" -> "Credentials", this will open https://console.cloud.google.com/apis/credentials
- Then click on the button "Create Credentials", and choose choose "OAuth client ID", this will take you to https://console.cloud.google.com/apis/credentials/oauthclient .
- For Application type, choose "Other" or "Desktop"
- For Name, input something personal, for example "My OCAMLDrive".
- Click "Create". You will get a Client ID, a Client Secret.
-
Authorization: Back in your headless server, run
google-drive-ocamlfusefor the first time. I used labels (in this document, I use the label "me") because I plan on using multiple accounts. However you can also run it without the-labelparameter and it will use a default name for the label called "default". You will need the Client ID and secret you got from google above.From version 0.5.3, you should use the
-headlessoption:$ google-drive-ocamlfuse -headless -label me -id ##yourClientID##.apps.googleusercontent.com -secret ###yoursecret#####You will get an output like this:
Please, open the following URL in a web browser: https://accounts.google.com/o/oauth2/auth?client_id=##yourClientID##.apps.googleusercontent.com&redirect_uri=urn%3Aietf%3Awg%3Aoauth%3A2.0%3Aoob&scope=https%3A%2F%2Fwww.googleapis.com%2Fauth%2Fdrive&response_type=code&access_type=offline&approval_prompt=forceThen, you should open the URL above in a graphical web browser, get the verification code from Google and put it here:
Please enter the verification code: -
That's it. You should be ready to mount.
mkdir /my_mnt_dir google-drive-ocamlfuse -label me /my_mnt_dir -
Finally, to unmount, elsewhere in the instructions it says to use
fusermount -u mountpoint. That did not work for me for some reason, butumount mountpointdid.
Troubleshooting
When I first tried to mount my drive, I got an error message:
    Cannot retrieve auth tokens.
    Failure("OAuth2 error: invalid_grant (HTTP response code: 400)")
I then ran the same command above, with the addition of the -debug parameter, and still got an error:
	Starting application setup (label=me).
	Opening log file: /root/.gdfuse/me/gdfuse.log
	Cannot retrieve auth tokens.
	Failure("OAuth2 error: invalid_grant (HTTP response code: 400)")
This is where I got stuck but Alessandro helped me right away. The problem was that my verification code had expired. I don't know what the timeout period is, but I just went back to the google page mentioned above, clicked on"Reset client secret…", which gave me a new secret id and secret, re-ran the auth page to get a new verification code, pasted the new values into the config file, and then it worked like a charm.
Simple another way
- make a dummy script to just output the autohize URL, named xdg-open, firefox, ...
$ echo $'#!/bin/sh\necho $* > /dev/stderr' > xdg-open
$ chmod 755 xdg-open
- call google-drive-ocamlfuse with the path in the above dummy script
$ env PATH=`pwd`:$PATH google-drive-ocamlfuse
https://accounts.google.com/signin/oauth/consent?....
- access the output URL with your browser and authorize it
- then the command will output "Access token retrieved correctly.", it works
reference: http://moguno.hatenablog.jp/entry/2016/03/24/010502 (Japanese)
Even simpler third way
Access the server using X-forwarding i.e.:
This will forward a graphical browser session to your local machine (provided the remote server has a browser).
https://github.com/astrada/google-drive-ocamlfuse/wiki/Headless-Usage-&-Authorization
好兄弟你知道博客那个怎么搞吗

9 大眼周按摩穴道,舒緩近視、消除眼睛疲勞有一套! - Heho健康
在眼部的周圍,有許多穴位可以有效地紓緩近視以及散光等狀況。藉由按壓這些穴位,不但可以消除眼睛的疲累,同時也可以預防一些眼部的疾病。讓我們匯集所有的穴位,徹底地來個眼睛穴位的按摩吧!
步驟 1:使用大拇指指腹輕輕地按壓眉毛的周圍。(從眼頭按壓至眼尾)

步驟 2:使用食指的指腹輕輕地按壓眼部的周圍。(從眼頭按壓至太陽穴)

春睏族注意!春天總是疲倦、睡不飽?飲食調理 4 原則助改善

眼周 9 大護眼穴位

1. 攢竹穴:眉毛靠近鼻側的一端,在眼頭上方一點點略為凹陷的位置。
功效:乾眼症、眼睛疲勞
2. 陽白穴:以黑眼球的中心為準,在眉毛上方約一根大拇指距離的位置。
功效:眼睛疲勞、眼睛模糊
3. 魚腰穴:眉毛的三大穴位之一,位於眉毛的中心點。
功效:白內障、老花眼、散光
4. 絲竹空穴:位於眉尾外側略微凹陷的位置。
功效:眼睛疲勞、眼暈
5. 晴明穴:左右眼骨附近的穴位。
功效:近視、白內障
6. 承泣穴:位於黑眼球正下方,眼眶骨邊緣的穴位。
功效:功效眼睛疲勞、眼睛模糊、眼部充血
7. 四白穴:位於黑眼球下方,眼骨下方的穴位。
功效:眼睛疲勞、眼部痙攣
8. 瞳子髎穴:位於眼尾外側,眼眶骨上的穴位。
功效:眼睛疲勞、眼睛模糊
9. 太陽穴:位於眉尾及眼尾中間,靠近顳顬附近的穴位。
功效:眼睛疲勞、眼睛模糊
圖片來源 / 由尖端提供,未經同意不得轉載。
※ 內容授權自《給眼睛的 31 堂保健練習》,作者為本部千博,尖端出版。

一般人常用「視茫茫」來形容年長者的眼力,意思是不但有老花問題,還會感覺有一層雲霧感,以致眼前事物看不太清楚。眼睛是靈魂之窗,最能反映一個人老化的程度,如果不想讓視力更加惡化,必需從護眼保健開始著手。而按摩也是眼睛保健重要的一環,多按摩可促進眼周循環,讓眼睛壓力舒緩無負擔。
整理包/確診流感怎麼辦?從流感疫苗預防到症狀治療一次懂
穴位手指測量法

年長者眼茫茫,舒緩疲勞眼,按壓4穴位
建議年長或眼睛疲勞者,平日可以多按壓眼眶四周的4穴位

(一)【攢竹穴】
位置
在臉部,左右眉毛的内側,即眉頭的凹陷處,左右各一
效用
(1)主治一切眼睛疾病。
(2)如 : 急慢性結膜炎、淚液過多、眼睛疼痛。
(3)上述病症連帶引起的頭痛,視茫茫,眼睛如有翳霧,眼睛紅腫,視力不清。
(4)並能調治風熱,痰濕引起的腦昏頭痛、眉陵骨痛。
(二)【陽白穴】
位置
陽白穴位置在前額部,當瞳孔直上,眉上1寸為陽白穴位所在之處。
效用
按摩陽白穴先將雙手搓暖後用指腹去按壓陽白穴,力度由輕到重,速度緩和不要太快。具有治療目眩,目痛、眼睛疾患、頭痛等功效。平常可以用中指點按,力度由輕到重,在慢慢放開,做為日常保健。另外,陽白穴對眼睛酸痛有相當程度改善效果。
(三)【四白穴】
位置
中指與食指併攏,中指側邊貼著鼻翼,食指所在位置即是四白穴
功效
四白穴是一個明目穴,效果非常顯著。它是胃經的循經的上口,點揉四白穴,就把氣血引過來了,可以預防黑眼圈;眼保健操中就有按摩四白穴一節,對於上學的孩子,拿它來治療近視;對於中年人可防止黑眼圈;對於老年人,還可以防止老花眼。此外,如果有人經常眼睛癢,或者脹痛,也揉四白穴。四白穴的位置,有時也是三叉神經痛的位置,所以它還對三叉神經痛有一定療效。
(1)雙手食指伸直。
(2)以食指指腹揉按左右穴位。
(3)每次1~3分鐘。
(四)【絲竹空穴】
位置
位於外眼角上方,眉毛尾端凹陷處
功效
按摩絲竹空穴建議用大拇指、食指或中指腹按壓穴位,按壓同時吐氣,每回6秒鐘重複6次,早晚各一次。
指壓時力道適當,以有酸脹感即可。具有治療頭痛、目眩、目赤痛、眼瞼跳動等作用功效。
外另,按摩絲竹空穴,能促進血液循環,改善細胞代謝,消除眼部魚尾皺紋及眼睛保健作用。
延伸閱讀:
罗素:神秘主义与逻辑(贾可春译)
|
|

形而上学试图凭借思维把世界构想为一个整体;从最初的时候起,它就是通过两种非常不同的人类冲动的联合与冲突而发展起来的。在这两种冲突中,一种使人朝向神秘主义,另一种使人朝向科学。一些人单独由其中的一种取得了丰硕的成果,另一些人单独由其中的另一种取得了丰硕的成果:例如,在休谟身上,科学的冲动占据着**地位,且完全未受抑制,而在布莱克[①]身上,一种对科学的强烈敌意与深刻的神秘洞见共存。但是,在最伟大的哲学家们看来,科学和神秘主义都是必需的:他们的生命就在于企图使两者协调起来,而且此种企图意味着始终必须让哲学成为——根据某些人的看法——一件比科学和宗教都伟大的事情,尽管存在很大的不确定性。
在试图对科学的及神秘的冲动进行详尽的描述之前,我将通过若干例子来阐述它们。这些例子来自两位哲学家,我指的是赫拉克利特和柏拉图。他们的伟大之处就在于将这两种冲动非常紧密地融合在一起。
每个人都知道,赫拉克利特相信一切皆流:时间成就又毁灭一切事物。从留存下来的少许残篇中,很难发现他是如何得出其结论的,但是其中有些说法强烈地暗示着科学观察就是其结论的源泉。
他说,“能看到、听到及学到的东西是我最看重的”。这是经验论者的语言;而对经验论者来说,观察是真理的唯一保证。“太阳每天都是新的” 是又一残篇;若不考虑其有悖常理的特征,这个结论显然受到了科学反思的鼓舞,而且在他看来,这无疑消除了在理解下述问题上的困难:太阳如何能在夜间偷偷地从西边溜到东边。实际的观察一定也已让他想到了其中心学说,即火是唯一的永恒实体,而所有可见之物都是火所经历的诸多阶段。在燃烧时,我们看到事物完全变了样,而火焰和热却升入空中,并逐步消失。
“这个世界对所有事物都是相同的”,他说,“它不是神或人创造的;但是,它曾经是、现在是并且将来永远是一团不灭之火,按一定的标准燃烧,又按一定的标准熄灭。”
“火首先变成海水;海水的一半成为陆地,一半成为旋风。”
这种理论,尽管已不再能为科学所接受,却仍有科学的气质。柏拉图提到过一句著名格言,即 “你不能两次踏进同一条河流,因为流经你的始终是不同的河水”;而这句格言或许也是科学的结晶。但是,在现存的残篇中,我们也发现了另一种陈述:“我们踏进又不踏进同一条河流;我们是又不是。”
这个陈述是神秘的,而柏拉图所引用的那个陈述则是科学的;把两者作一比较,就可以看出这两种倾向在何等密切的程度上融合于赫拉克利特的体系中。神秘主义本质上不过是具有一定强度和深度的情感,此种情感是针对我们在宇宙问题上的所信之物而言的;而且这种情感使得赫拉克利特以自身的科学为根据,在生命与宇宙问题上提出了一些令人感到异常酸楚的格言,比如:
“时间是一个玩跳棋的孩子,支配权就由孩子掌握着。”
这是诗一般的想象,而非科学。它把时间描述成世界的一个专横的君主,而且这个君主表现出儿童的一切不负责任的轻率行为。同样,也正是神秘主义导致赫拉克利特断言相反事物的同一性:他说,“好与坏是一”;又说,“对于神,一切事物都是合理的、善的、恰当的,但人们认为有些事物是不恰当的,有些事物是恰当的。”
赫拉克利特伦理学的背后隐藏着许多神秘主义的东西。确实,单单科学决定论也许就会使人作出这样的陈述,即 “人的性格就是其命运”;但是,唯有神秘主义者才会说:
“每一种动物都是通过打击而被驱赶到草场的。” 他还说:
“与一个人内心的愿望作斗争是困难的。不论它希望得到什么,它都是以灵魂为代价而获得的。” 他还说:
“智慧是一件事情它,就在于认识那通过万物引导万物的**。”[②]
例子可以大量地增加,但已经给出的这些例子足以表明此人的性格:他眼中的科学事实向其心灵内注入了火焰,而且在火光中,通过反思其自己的迅速跳动着的穿透性的火,他洞察了世界的深度。在这样的一种性情中,我们看到了神秘主义者与科学家的真正联合;我认为,这样的联合是在思维世界中有可能获得的最高声誉。
同样的双重冲动存在于柏拉图身上,尽管在这两者中,神秘的冲动明显强于科学的冲动,且每当这种冲突变得尖锐时,最后的胜利总是属于它的。他相信知识与实在;他关于洞穴的描述是对这种信念的经典陈述,这种陈述比关于感官的陈述更真实、更实在。
“想象有许多人生活在一个地下洞穴内,在洞穴入口处有光线照进来,并一直照到最深处;洞穴中的人自儿童时代起就被铐住了脖子和腿,只能一动不动地坐在那里往前看,因为锁链使他们无法转头。再想象在他们后上方的一定距离处有一把明亮的燃烧着的火,并且有一条高铺的路在火和囚犯之间经过,沿路建有一座矮墙,而矮墙就像魔术师们置于观众面前并在上面展示其奇迹的屏幕。
“我想像了,他回答道。
“你也可以向自己描绘这样一幅景象:有许多人正在这座墙后走,他们随身携带着用木材、石头及各种材料做成的人的塑像和其它动物的图像,还有种种其它物件,那些携带物都高出这座墙;而且如你所预料的那样,可以让一些路人说话,别的路人保持安静。
“你在描述一个奇特的场景和一些奇特的囚犯。
“他们跟我们一样,我回答道。
“现在思考一下:假如在事情的进展中以如下方式解除他们的脚镣,并治好他们的愚疾,那么会发生什么情况呢?我们且设想,他们当中有一个人被释放了,并突然被迫站起来,转过头来并张开双眼走向光亮处,而且我们还设想,他是带着痛苦做完所有这些行为的,并且那刺眼的光芒使其不可能看清他过去只见到其影子的那些对象。假如有一个人告诉他,在那些日子里他看到的是可笑的幻相,但现在他在某种程度上更接近于真实,面向了更真实的东西,而且看得也更正确了,那么你预料他会作出什么样的回答?尤其是,假如那个人把正在经过的那几个对象指给他,然后向他提问,并强迫其回答所见为何,那么你又预料他将如何回答呢?你难道不会预料他将感到迷惑,并认为以前看到的东西比现在强迫他去注意的对象更真实吗?
“是的,要真实得多…。
“因此,我认为,要使其能够感知到那个较高处的世界中的对象,必需有一个习惯的过程。首先,他将极成功地认出阴影,然后将辨清人和其它事物在水中的倒影,而后看出真实的东西;经过这些步骤之后,他将抬眼遇见月光和星光,并会发现在夜里察看天体和天空本身比在白天察看太阳和阳光的难度要小些。
“毫无疑问。
“最后,我想象,他将能够观察和揣摩真实的太阳;这里所说的太阳,并非指出现在水中或其它区域中的太阳,而是处于其本来位置上的真实的太阳。
“当然。
“下一步他将得出这样的结论:太阳造成了季节交替与岁月往复,并是可见世界中一切事物的守护者;而且,它还以某种方式作为他及其同伴过去看到的所有那些事物的原因。
“显然,这将是他下一步的结论…
“我亲爱的格劳孔,现在你必须把这想象的情景中的每一个部分都应用到我们先前叙述的事情上来,并把眼睛所看到的区域比作囚屋,把那里的火光比作太阳的力量;而且,假如你从洞穴上升到地面并对上面的世界加以思考,从而理解灵魂向可知区域的攀升,那么你就能猜中我自己是如何推测的了(既然你希望得知这一点)。至于我的推测是否正确,实际上只有神才知道。但尽管如此,在这个问题上,我的观点的大意可以陈述如下。在知识领域,基本的善的理念就是我们的探求的极限,而且几乎不能被理解;但是,当被理解时,我们会不由自主地断言,它无论在什么情况下都是所有光明的及美好的东西的源泉:它为可见世界制造了光和光源,在可知世界中它又成了真理和理性的直接而又决定性的源泉;——而且任何愿意在私人领域或公共领域明智行事的人,都必须发现善的理念。”[③]
但是,在这段引文中,就像在柏拉图的绝大部分教学活动过程中一样,善与真正的实在被等同了起来。这种等同曾体现于哲学传统中,并且在我们的时代仍然起着很大的作用。在以这种方式给予善一种合法的功能时,柏拉图就在哲学与科学之间制造了一种分离;在我看来,此后两者都遭受了这种分离的煎熬,并且现在仍然如此。科学家在研究自然时,不管他的希望是什么,都会把它们放置一边;哲学家若要获得真理,也须这么做。仅当真理被探明时,伦理的考虑才能出现:它们能够而且也应该出来决定我们对待真理的情感,亦决定我们如何基于真理而安排我们的生活,但它们自身不能出来陈述真理是什么。
在柏拉图的对话中,有些段落表明他似乎清楚地意识到了这一点;它们出现在阐述其心灵的科学的一面的那些段落中。在其中的一段对话中,年轻的苏格拉底正在向巴门尼德解释理念论;这段话是最值得注意的。
苏格拉底解释说,存在一个善的理念,但并不存在诸如头发、烂泥及污物之类的东西的理念。听了苏格拉底的解释后,巴门尼德建议他 “不要鄙视甚至最无价值的事物”;这个建议表明了真正的科学倾向。假如哲学要实现自身最大的可能性,那么正是这种不偏不倚的倾向,才是神秘主义者在对更高级的实在及隐蔽性的善作出表面上的洞察时所必须去结合的;而且,正是因为他们没有做到这一点,这么多的唯心论哲学才显得单薄、没有生气、软弱无力。唯有在与世界的结合中,我们的理想才能结出果实;如果与其分离,它们就仍将是不毛之地。但是,一种回避事实或事先要求世界与其愿望相一致的理想,是无法与世界相结合的。
巴门尼德自已就是一种异常有趣的神秘主义的源头,这种神秘主义渗透在柏拉图的**中;它可被称为 “逻辑的”,因为它体现在诸多逻辑理论中。就西方而言,这种形式的神秘主义好像始自巴门尼德;它支配着从他那个时代到黑格尔及其现代门徒时代的所有最伟大的神秘主义形而上学家的推理。他说,实在是非创造的、不可毁灭的、不会变化的、不可分割的,它“没有开端,没有结束,被禁锢在强有力的锁链之中不能移动,因为生成和毁灭已被驱离得很远了,而且真实的信念已把它们抛弃。” 其探究的基本原理被陈述在一个也符合黑格尔**的句子中:“你不能知道什么东西不存在(那是不可能的),也不能说出它,因为能被思维者与能够存在者是同一种东西。”而且他还说:“情况必然是这样的:能被思维和提及者存在,因为它存在是可能的,而不存在者存在是不可能的。”变化的不可能性就出自这条原理,因为过去的东西能被提及,并因此——根据这条原理——仍然存在。
在任何年代及世界任何地方,神秘主义哲学都是以某些信念为特征的。这些信念为我们一直在思考的这些学说所阐明。
首先,神秘主义哲学相信洞见,而反对零散的分析的知识:它们相信一种智慧的、突然的、穿透性的及强制性的方式,这种方式与一种完全依赖感官的科学对外部现象所做的缓慢而易错的研究形成了对照。所有能专注于一种内在的强烈情感的人,都一定间或经历了那种奇特的关于普通对象的非实在性的感受,即与日常事物的联系的丧失;在这种丧失中,外部世界失去了其稳固性,而心灵则似乎在完全的孤寂中从自身深处产生了奇异幻相的疯狂舞动,这些幻相迄今是作为不受约束的真实而又有生气的东西出现的。这是神秘主义传授中的否定性一面:怀疑普通知识,并为接纳一种看似更高级的智慧的东西扫除障碍。许多熟悉这种否定性经验的人并没有超越它,但对神秘主义者来说,它只是通往一个更广阔的世界的入口。
神秘主义的洞见始于对一种被揭去面纱的神秘之物的感觉,这种神秘之物是一种现在突然走出可疑境地并变得确定的隐蔽性智慧。对启示及确定性的感觉出现在任何明确的信念之前。神秘主义者产生的明确信念,是对在洞见时刻所获得的无法清楚表达的经验进行反思的结果。时常,与这个时刻没有真实联系的一些信念紧接着被吸收进了**核;因而,除了所有神秘主义者所共有的那些确信的东西之外,我们在许多神秘主义者那里都发现了另外一些更具地域性及时间性的信念,这些信念无疑与因为他们主观的确信而成为本质性的神秘之物的东西结合到了一起。我们可以忽略这样的非本质性附加物,并把自己限定于所有神秘主义者所共有的那些信念。
在心灵获得顿悟的那一刻所得到的最先且最直接的结果,是对一种获取知识的方式之可能性的信念。这种方式可称为启示、洞见或直觉,它与感觉、理性及分析形成了对照,而后面这些则被视为造成幻觉困境的盲目向导。与这种信念密切联系在一起的,是一种实在概念;这个实在处于现象世界的背后,并且完全相异于它。人们是怀着一种时常导致崇拜的赞美之情看待这种实在的;人们感觉它时时处处被紧紧地把握着,它披着一层薄薄的感官印象的面纱,而且对于可以接受的心灵来说,它甚至乐意穿透人类显而易见的愚蠢与邪恶而在其荣光中闪耀。诗人、艺术家及热爱它的人是那种荣光的寻求者:他们所追求的那种萦绕心头的美是其光辉的微弱的反光。但是,神秘主义者生活在完全的幻觉之光中:他靠一种知识来了解其他人在模糊地追寻什么,与那种知识无关的所有其它知识都不是真正的知识。
神秘主义的第二个特征,在于它相信统一性,并拒绝承认任何地方的对立或分割。我们发现赫拉克利特说 “善与恶是一”,而且他还说“上升的路与下降的路是同一条路”。同样的态度也出现在对矛盾命题的同时断言上,比如:“我们踏进又踏不进同一条河流;我们是又不是。” 巴门尼德断言实在是一且不可分,这一断言也来自同一种趋向统一的冲动。在柏拉图身上,这种冲动不怎么显著,它为其理念论所抑制;但是,在其逻辑所能允许的程度上,它再次出现在关于善的首要性的学说中。
几乎为所有神秘主义形而上学所共有的第三个标志,是对时间实在性的否认。这是否认分割的结果;假如一切是一,那么过去与未来的区分就一定是虚幻的。我们看到这种学说在巴门尼德那里是很引人注目的,而且在近现代人中间,它在斯宾诺莎及黑格尔的体系中是根本性的。
神秘主义诸学说的最后一个标志,在于它相信所有恶都只是现象,或者说,是由分析理智的分割与对立所制造出来的一种幻觉;我们必须认真考虑这一标志。神秘主义不认为像残忍——比如说——这样的事物是善的,但否认它们是真实的:它们属于那个低级的幻相世界,我们将因为洞悉幻觉而从那个世界中解放出来。有时,不仅恶被认为是虚幻的,而且善亦被认为是虚幻的,比如在黑格尔那里就是这样,而且至少从字面上讲,在斯宾诺莎那里也是这样;但是尽管如此,人们会自然地把对被视为实在的东西的情感态度与实在是善的这一信念联系在一起。在一切情况下,神秘主义的伦理特征都在于缺乏愤怒和抗议、愉快地授受以及不相信关于好和坏这两个敌对阵营之划分的终极真理。这种态度是神秘主义体验的本性所产生的一种直接结果:与统一意识联系在一起的是一种无限安宁的情感。确实,人们可以猜想这种安宁的情感产生了——正如各种情感在梦中的表现那样——由联系在一起的诸信念所形成的整个体系,而那些信念构成了神秘主义学说的主体部分。但这是一个困难的问题,而且我们不能期待人类会在这个问题上达成一致。
因此,在考虑神秘主义是真是假时产生了四个问题,即:
(1)存在两种可以分别称之为理性与直觉的认识方式吗?而且,假如这样的话,其中一种比另一种更可取吗?
(2)一切复多与分割都是虚幻的吗?
(3)时间是非实在的吗?
(4)哪一类实在属于善与恶?
在这所有四个问题上,尽管充分发展了的神秘主义在我看来是错误的,但我仍然相信,通过加以充分的抑制,可以从神秘主义的情感方式中习得一种智慧的成份,而这种成份似乎不可通过任何其它途径获得。假如真是这样,神秘主义将被颂为一种对待生活的态度,而非一种关于世界的信条。我将认为,形而上学的信条是这种情感的一种错误的结果,尽管这种情感,当对所有其它**和情感加以影响和渗透时,就是人类身上一切最美好的东西的唤起者。甚至科学对真理所作的谨慎而又耐心的研究,也可以通过神秘主义生活并行走于其中的极端敬畏之心加以促进和滋养,而那种研究似乎是神秘主义迅速确信行为的完全对立面。
(一)理性与真觉[④]
我对神秘主义世界的实在性或非实在性一无所知。我不想否认它,甚至也不想宣称揭示它的洞见并非真正的洞见。我确实希望坚持的是——而且正是在这里,科学的态度是必须的——未经检验且未经证实的洞见是真理的一种不充分的保证,尽管许多最重要的真理都是通过这种方式首次被提出的。人们通常谈及本能与理性的对立。在十八世纪,这种对立是以有利于理性的方式形成的;但是,在卢梭及浪漫主义运动的影响下,本能受到了偏爱,而偏爱本能的首先是那些反对非自然的政体及思维形式的人,然后,随着对传统神学的纯理性主义辩护变得越来越困难,所有在科学中感觉到某些信条受到威胁的人也产生了对本能的偏爱,而所说的那些信条,指的是他们将其与一种关于生活及世界的纯洁脱俗的观点联系在一起的信条。柏格森以 “直觉” 的名义把本能提到了形而上学真理的唯一裁决者的地位。但事实上,本能与理性的对立基本上是虚幻的。本能、直觉或洞见首先产生一些信念,理性随后又证实或反驳了那些信念;但是,只要证实是可能的,那么在最后的分析中,证实就是由与另外一些信念的一致构成的,而另外那些信念的本能性丝毫不亚于原先的信念。理性,与其说是一种创造性力量,还不如说是一种协调和控制的力量。甚至在最纯粹的逻辑领域,也正是洞见首先发现了新的东西。
在本能和理性有时确实发生冲突的地方,这种冲突是关于一些单个信念的。这些单个信念本能地被人持有,而且人们在持有它们时是非常坚决的,以至于无论它们与其它信念多么不一致,也不会被人抛弃。本能,像人类的所有能力一样,是易于出错的。那些理性能力弱的人,在涉及其自身时,时常不愿意承认这一点,尽管在涉及别人时所有人都是会承认的。本能最不容易在实际的事情上出错;在这些事情上,正确的判断有助于生存:例如,他人身上的友好和敌意时常是通过超常的鉴别力并透过非常仔细的伪装而被感觉到的。但是,甚至在这样的事情上,他人的沉默寡言或阿谀奉承也可能造成一种错误的印象。在不太具有直接的实际性质的事情上,比如在哲学所处理的那些事情上,非常强烈的本能信念有时整个都是错误的,我们可以通过它们与其它同样强烈的信念之间那种明显的不一致而知道这一点。正是这些原因使得理性的协调斡旋成为必要;理性通过信念间的相容来检验信念,并在可疑的情况下从一面及另一面考察错误的可能源泉。在这方面,不存在对作为一个整体的本能的反对意见;我们只是反对盲目地依赖于本能的某一有趣的方面,而排除掉其它一些更寻常但并非可信度更低的方面。正是这样的片面性而非本能自身,才是理性旨在纠正的。
通过应用到柏格森对 “理智” 的反对及对 “直觉” 的辩护上来,这些或多或少有点老生常谈的道理可以得到说明。他说,有“两种根本不同的认识一个事物的方式”。第一种方式意味着我们围绕对象转,第二种方式意味着我们进入对象。第一种方式依赖于我们所处的观察角度以及我们用以表达自身的符号,而第二种方式既不依赖于某一观察角度,亦不依赖于任何符号。第一种知识可以说停在了相对上,而第二种知识,在可能出现的情况下,可以说达到了绝对[⑤]。第二种方式就是直觉;柏格森说,它是 “这样一种理智的共鸣,一个人通过这种共鸣而把自身置于一个对象内,以与该对象中独一无二并因而不可表达的东西相契合”(第 6 页)。为了举例说明,他提到了自我认识:“至少有一种实在,我们全都经由直觉而非简单的分析从内部捕获了它。那就是在时间中流动的我们自己的人格,即绵延的自我”(第 8 页)。柏格森哲学的其余部分,就在于透过不完美的语词媒介来传达通过直觉而获得的知识,并由之全面谴责一切源自科学及常识的所谓的知识。
由于在冲突中偏袒本能信念,这种方法迫切需要通过证明一方的信念比另一方的信念更具可信性而得到辩护。柏格森试图通过两种方法进行辩护:首先,他解释说,理智是一种旨在保证生物学成功的纯粹实际的能力,其次,他提到动物拥有一些令人吃惊的本能的技巧,并指出世界的某些特征虽可以为直觉所理解,而当他进行解释时却会使理智困惑不懈。
柏格森指出,理智是在生存斗争中发展起来的一种纯粹实际的能力,而非真实信念的一种来源。对于这种理论,我们可以说,首先,唯有通过理智,我们才了解生存斗争及人类的生物学祖先:假如理智是误导人的,这个仅仅是推论出来的历史可能全都是不真实的。另一方面,假如我们同他一道认为,进化是以达尔文所信的方式发生的,那么不仅理智,而且我们的所有能力,都是在实际效用的重压下发展起来的。在其直接有用的地方,例如在涉及他人的品质与性情时,直觉最容易被发现。柏格森显然认为,相比于纯数学能力(比如说),这种认识能力很少能用生存斗争来解释。然而,被虚假的友谊欺骗的野蛮人很可能为他的错误付出生命的代价;可是甚至在最文明的社会中,人们也不会因为数学方面的不称职而被处以极刑。柏格森所举的这些关于动物本能的最突出的例子,都具有一种非常直接的生存价值。当然,实际情况是这样的:直觉和理智都是因为自身是是有用的而发展起来的,而且一般说来,当它们提供真理时,它们就是有用的,而当它们提供错误时,它们就是有害的。像艺术能力一样,文明人身上的理智,有时在对个体有用的范围之外得到了发展;另一方面,从总体上看,直觉似乎随着文明的进步而变弱了。通常,在直觉能力上,儿童强于成人,未受过教育的人强于受过教育的人;在狗身上,它很可能胜过在人类身上所发现的任何东西。但是,在这些事实中看到直觉之优点的人,应该回到丛林中可供奔跑的野地里,用靛蓝染身,以野山楂与蔷薇果为生。
下面我们来考察一下直觉是否拥有某种如柏格森所宣称的不可错性。根据柏格森,最好的例子是对自我的亲知;然而众所周知,自我认识是罕见的,也是困难的。比如说,绝大多数人天生卑劣、虚荣、有嫉妒心,然而他们完全意识不到,尽管连其最好的朋友也可以毫无困难地看出来。确实,直觉是令人信服的,而这一点正是理智所缺乏的:当直觉出现时,我们几乎不可能怀疑它是真的。但是,假如我们经过考察,发现它似乎至少与理智一样可错,那么其更大程度的主观的确定性就成了一种缺点,而此种缺点只能使其具有更加不可抗拒的欺骗性。人们相信自己对所爱的人有所认识;除了自我认识以外,直觉的最显著的例子就是这种认识了:不同人格之间的屏障似乎变得透明了,而且人们认为他们可以像看穿自己的心灵一样看穿另一个人的心灵。然而在这些情况下,欺骗也常常能被成功地实施;而且甚至在并无存心欺骗的地方,经验也逐步证明了下面这一点:通常,人们想象中的洞见是虚幻的,而且从长期看,理智的那种相对缓慢且更具摸索性的方法是相对可靠的。
柏格森认为,理智只能处理一些与过去经验到的东西相似的事物,而直觉有能力领会永远属于每一个新的时刻的独特性与新鲜性。确实,每一个时刻都有某种独特的东西;同样确实的是,这种东西不可用理智的概念充分表达出来。唯有直接的亲知才能让我们知道独特的及新的东西是什么。但是,这种直接的亲知是在感觉中被充分地提供的,而且就我能看到的而言,这种亲知并不需要任何特殊的直觉能力就可以被领会。既不是理智,也不是直觉,而是感觉,提供了新的材料;但是,当材料以任何引人注目的方式表现为新的时,理智相比于直觉更有能力处理它们。孵了一窝小鸭的母鸡无疑有一种直觉,这种直觉似乎使其成了它们中的一员,而不仅仅是分析地认识了它们;但是,当小鸭走到水边时,全部貌似真实的直觉就被发现是虚幻的,而母鸡只有绝望地留在岸上。事实上,直觉是本能的一个方面与发展,而且像所有本能一样,在塑造了所说的动物的习惯的那些通常环境中,它是令人钦佩的;但是,一旦环境发生变化,以致需要某种非习惯性的行为模式时,它就完全不能胜任了。
从理论上理解世界是哲学的目标;对动物或野蛮人,甚至对绝大多数文明人来说,这种理解并不具有很大的实际意义。因此,几乎不会有人设想,本能或直觉的那种快速、粗糙且容易的方法,会在这个领域内发现一种赞同其应用的理由。正是那些比较古老的活动表现了最高水平的直觉,并显示出我们与动物及半人类祖先遥远世代的亲缘关系。在诸如自我保存及爱这样的事情上,直觉有时(尽管并非总是)会以一种令批判的理智感到吃惊的迅速而精确的方式行动。但哲学并不是阐明我们与过去的亲缘关系的一种活动:它是一种高度精确、高度文明的活动,而且这种活动若要取得成功,就必须在某种程度上从本能生活中解放出来,有时甚至必须在一定程度上远离一切世俗的希望与恐惧。因此,并不是在哲学中我们才能期待看到最高水平的直觉;恰恰相反,因为哲学的真实对象及理解这些对象所需要的思维习惯是陌生的、不寻常的、遥远的,所以正是在这里,而几乎不是在任何别的地方,理智才被证明是高于直觉的,并且快速的未经分析的信念最不应该非批判地加以接受。
在提倡以科学的方式进行抑制与平衡,并以此反对大胆依赖直觉的孤行专断时,我们仅仅是在知识领域里鼓励人们在广阔的范围中加以研究,鼓励人们要秉持一种不受个人情感影响的客观态度,鼓励人们从对实际事情的专注中解放出来——而那种专注已为世界上一切伟大的宗教所反复灌输。因而,不管我们的结论可能以什么样的方式与许多神秘主义者的明确的信念相冲突,它本质上并不相悖于产生那些信念的精神,相反,它是这同一种精神应用于**领域所产生的结果。
(二)统一性与复多性
神秘主义解释中最令人信服的一个方面,就是对万物一体性的貌似真实的揭示;它导致宗教中的泛神论及哲学中的一元论。一门始于巴门尼德并终结于黑格尔及其追随者的精致的逻辑已经逐渐发展了起来;而其发展的目的就是在于证明,宇宙是一个不可分的全体,而且似乎是其部分的东西,假如被看作实质性的及自存的,就只是一种幻觉。巴门尼德把关于一个实在的概念引进了西方哲学;这个实在完全不同于现象世界,它是不可分的、不变的唯一性实在。巴门尼德引进这个概念,至少从名义上看并非出于神秘主义的或宗教的原因,而是基于一种关于非存在的不可能性的逻辑论证。在巴门尼德之后,许多形而上学体系都是这种基本**的产物。
用来为神秘主义辩护的逻辑似乎是错误的,并易于招致技术上的批评。关于这一点,我已在别的地方作过解释。这里我将不再重复这些批评,因为它们是冗长的、复杂的;但是相反地,我将试图对神秘主义逻辑由之产生的心灵状态作出分析。
人们相信有一种实在,它完全不同于出现在感官面前的东西。这种信念带着不可抗拒的力量出现在某些情绪中,而那些情绪是绝大多数神秘主义及绝大多数形而上学的来源。当这样的一种情绪起支配作用时,人们就觉得不再需要逻辑了;因而,更彻底的神秘主义者不使用逻辑,而直接诉诸其洞见力的当下释放。但是,这种充分发挥的神秘主义在西方是罕见的。当来自情感的确定性变弱时,一个具有推理习惯的人将为在自己身上所发现的信念寻找有利的逻辑根据。但是,由于这个信念已经存在,他将乐于接受他所想到的任何根据。表面上被他的逻辑所证明了的矛盾确实是神秘主义的矛盾,并且假如他的逻辑要与洞见相一致,那么这些矛盾就是他认为他的逻辑所须达到的目标。由此产生的逻辑使得绝大多数哲学家不能对科学及日常生活世界给予任何描述。假如他们渴望给出这样的一种描述,那么他们很可能会发现他们的逻辑错误;但是,他们当中绝大多数人并不怎么渴望理解科学及日常生活世界,而是要表明它是非实在的,以衬托一个超感觉的 “实在的” 世界。
正是在这方面,那些原本信奉神秘主义的伟大哲学家们追寻了逻辑。但是,由于他们通常认为对神秘情感的那种假想的洞见是不成问题的,他们的逻辑学说是以某种干瘪的形式呈现的,并且他们的信徒们认为那些学说完全独立于它们从中产生的那种顿悟。不过,那些学说与其根源紧系在一起,而且在涉及科学与常识世界时他们仍然是——借用桑塔亚那[⑥]先生的一个有用的词——“有恶意的”。唯有如此,我们才能解释哲学家们在接受其学说与某些事实的不一致时所具有的那种自鸣得意;所说的某些事实指的是,所有那些似乎已被充分确认且最可信的通常的及科学的事实。
神秘主义逻辑自然要表明任何邪恶的东西所固有的缺陷。当神秘的情绪占据支配地位时,逻辑的冲动就不会被感觉到;随着那种情绪的逐渐减弱,它会重新肯定自身,但它将希望保留逐渐消失的洞见,或者至少希望证明它曾经是洞见,并证明似乎与其矛盾的东西都是虚幻的。由此产生的逻辑并不是完全没有好恶倾向或者说公正的,而且受到对它所应用于其中的日常世界的某种厌恶的驱动。这样的态度自然不会趋向最好的结果。每个人都知道,仅仅为了反驳一个作者而去读他的作品,并不是理解那个作者的方式;而在读大自然这本书时确信它全是虚幻的,同样不可能导致对大自然的理解。假如我们的逻辑要发现日常世界是可理解的,那么这种逻辑必须没有恶意,但我们必须通过对日常世界的一种真正接纳去激励它;而在形而上学家中间,我们通常发现不了这种接纳。
(三)时间
时间的非实在性是许多形而上学体系的一个基本学说。这种学说时常在名义上以逻辑论证为基础,而且在巴门尼德那里就已经如此了。但是,它原本来自神秘洞见的时刻所出现的那种确定性——至少在新体系的建立者那里是这样的。这就如同波斯的一位伊斯兰教苏菲派诗人[⑦]所说的那样:
“过去和未来遮住我们的双眼,
让我们看不到真主,
放火烧掉它们吧!
这些碎片将把你作为芦苇来分割,
还要分割多久?”[⑧]
最终是实在的东西一定是永恒的这种信念,是很司空见惯的:它产生了形而上学的实体观念,而且甚至到现在,它也在诸如能量与质量守恒这样的科学学说中发现了一种完全的合理的满足。
我们难以理清这种观点中的对与错。我认为,那些关于时间是非实在的及感官世界是虚幻的这一论点的论证必须被视为谬误。不过,在某种意义上,时间是实在的一个无关紧要的表面特征;所说的这种意义不易陈述,但易于感觉。我们必须承认过去和未来与现在一样实在,而且对于哲学思考来说,让时间在某种程度上摆脱奴役是绝对必要的。时间的重要性与其说是理论的,不如说是实践的,而且与其说与真理有关,不如说与我们的愿望有关。我们可以从一个永恒的外部世界把事物描绘成进入时间之流的东西,也可以依据一种视时间为吞噬一切存在之物的暴君的观点而做到这一点;但我认为,一种相对真实的世界图景是通过前一种方式获得的。在**中及在情感中,尽管时间是实在的,认识到它的无关紧要就跨进了智慧之门。
如果我们问一问自己,为什么对过去的情感如此不同于对未来的情感,那么我们立即就可以看到这一点。这种差别的原因总体来说是实践上的:我们的愿望能够影响未来,但不能影响过去;未来在某种程度上受控于我们的力量,而过去则不可更改地固定下来了。但是,每一个未来都会在某一天会成为过去:假如我们现在真实地回望过去,那么当它曾经还是未来时,它一定恰恰就是我们现在所看到的这个样子;而且,从目前所看到的未来一定恰恰就是当它已经成为过去时我们将会看到的那个样子。因此,过去和未来之间的那种被感觉到的差异,并不是内在的差异,而只是相对于我们的:对于客观的研究而言,它就不复存在了。而且,知识领域中研究的客观性完全就是行为领域中作为正义与无私而出现的那种公正的品性。任何希望真实地看世界的人,若在要思考中免受实际愿望的暴政,就都必须学着去克服在对待过去与未来的态度上的差别,并以一种综合的眼光去勘查全部的时间之流。
在我看来,时间不应该以某种方式进入我们的理论性的哲学思考;已与进化观念联系在一起并典型地体现在尼采、实用主义及柏格森那里的哲学,可以作为使用这种方式的例子。这种哲学以从最低级的生命形式上长升到人类的进化为基础,在进步中发现了宇宙的基本法则,并因此允许早的与晚的之间的差别进入真正的守护其思辨风景的城堡。我不想对其过去的及未来的世界史表示反对,尽管那种历史是猜测性的。但我认为,在陶醉于一种迅速的成功时,我们需要用来真正理解宇宙的许多东西都已被遗忘了。在能从青年时期的激情中走出并进入成年时期的成熟智慧之前,其匆忙作出的西方式的大胆断言,必须与希腊文化及东方人顺从精神中的某种东西结合起来。尽管它求助于科学,但我认为,真正的科学的哲学是某种更艰巨且更超脱的东西;它较少求助于世俗的希望,而且为了取得实践上的成功,它需要一种更严格的训练。
达尔文的《物种起源》使世人相信,动物及植物的不同的种之间的差异并非像其表面看起来的那样是固定不变的。自然种类学说曾使得生物分类变得容易而又确定;它在亚里士多德传统中被奉为神圣,并受到了它对于正统教条的假想的必要性的保护。但是,该学说突然被从生物学领域永久清除了。对于人类的自负而言,人与低等动物之间的差异似乎是巨大的。这种差异被表明是逐渐形成的,它包含一些无法确定性地被置于人类这个家族的内部或外部的居间生物。拉普拉斯[⑨]已经表明,太阳和行星很可能是从一种或多或少未分化的原始星云中形成的。因而,已往那些固定的界标变得动摇而又不分明了,并且所有鲜明的轮廓都模糊了。事物和物种都失去了它们的界限,没有人能够说它们从何处开始,又在何处结束。
假如人类的自负曾因其与类人猿之间的亲缘关系而一时动摇过,那么它很快就会发现一种重新肯定自身的方式,而且那种方式就是进化的 “哲学”。对于哲学家来说,从阿米巴到人的过程显然是一种进步,尽管阿米巴是否同意这一点尚不得而知。因此,这种过程因为揭示了宇宙中的一条向善的发展的规律而受到了欢迎;这里所说的发展,指的是理想缓慢地将自身转化现实的进化或展现。科学已表明,这整个的变化过程就是过去的可能的历史。但是,这样的一种观点,尽管可以让斯宾塞以及那些我们可以称之为黑格尔派进化论者的人满意,却不能让那些更赤诚的崇拜变化的人承认它是充分的。对那些人来说,世界连续向其靠近的一种理想,由于太无活力、太过静态,从而无法激励人心。愿望和理想都必须在进化过程中有所变化与发展:一定不存在固定的目标,而只存在生命的冲动所导致的新的需求的连续形成,该冲动单独赋予这种过程以统一性。
在这种哲学中,生命是一个连续的流,并且对生命之流的一切分隔都是人为的、不真实的。独立的事物、开端与终结,都只是方便的虚构:只存在流畅的连续的变化。今天的信念在今天可以算作真实的,假如它们载着我们沿生命之流前行;但在明天,它们将是错误的,并且必须被适应新环境的新信念所取代。我们的一切思考都是由方便的虚构即生命之流在想象中的凝滞所组成的。尽管有我们的一切虚构,实在还在继续流动;而且尽管我们能经历它,它还是不能在**中被想象。在这种哲学中,未来虽是我们无法预见的,却会比过去或现在好,所以它的读者类似于一个因被告知要张开嘴、闭上眼而期待吃到一块糖果的孩子;既然如此,这种哲学就相当于在无意中以某种方式作出了一个保证,尽管没有清晰地把它陈述出来。逻辑、数学及物理学都在这种哲学中消失了,因为它们过于 “静态” 了;真实的东西是朝向一个目标的冲动和运动,而这个目标像彩虹一样,我们前进时它后退,并且在我们在到达每一个地方时,都使得那个地方不同于其先前从远处所表现出的样子。
我不打算着手对这种哲学进行技术上的考察。我只想断言,激发它的动机与兴趣仅是实践上的,而且它所处理的问题是很特殊的,以至于几乎不能认为它触及了任何在我看来构成了真正的哲学的问题。
进化论的支配一切的兴趣是在人类的命运问题上,或至少是关于生命的命运的。与其说它对知识本身感兴趣,不如说它对道德和幸福感兴趣;必须承认,同样的说法也适用于许多其它哲学,而且对哲学所能给予我们的那种知识的期望是非常罕见的。但是,假如哲学要获得真理,哲学家首先必须具备那种无关利害的理智的好奇心;这种好奇心是真正的科学家所特有的。在某些狭窄的范围内,关于未来的知识是可能的;假如我们要了解人类的命运,这种知识是我们必须去寻求的。我们说不出随着科学的进步这些范围会扩大多少。但显然,任何关于未来的命题都根据其题材而分属于某种特殊的科学,并且假如终究能被确定的话,它是通过那门科学的方法而被确定的。哲学不是一条获得如其它科学所取得的那类结果的捷径:假如它要成为一种真正的研究,它必须有自己的领域,并瞄准其它科学既不能证明也不能反驳的结果。
进化论将自身奠基于进步观念,这种进步是从较坏到较好的变化。在我看来,进化论允许时间概念成为其暴君而非奴仆,并因此丧失研究的客观性,而那种客观性是哲学**与情感中一切最好的东西的来源。如我们所看到的那样,形而上学家常常全然否定时间的实在性。我不想这么做,而只想保留激发这种否定的精神面貌,即一种**态度;这种态度认为,过去与现在一样实在,并且与未来一样重要。斯宾诺莎说[⑩],“只要心灵根据理性的命令去构想一个事物,无论所得到的观念是关于未来的事物、过去的事物,还是关于现在的事物的,它都将受到同样的影响。”我发现,正是这种 “根据理性的命令的构想” 才是建立在进化论基础上的哲学所缺少的。
(四)善与恶
神秘主义认为所有恶都是虚幻的,而且有时它在善的问题上也持同样的观点,但更多的时候认为所有的实在都是善。两种观点都可在赫拉克利特那里被发现:他说,“好与坏是一”,但又说,“对于神,一切事物都是合理的、善的、恰当的,但人们认为有些事物是不恰当的,有些事物是恰当的。”一种类似的双重立场也可在斯宾诺莎那里被看到;但是,当他想提及并非仅属于人的善时他使用 “完善” 这个词。他说,“我用实在和完善意指同一种东西”[11];但在别的地方,我们会发现这样的定义:“我将用善意指我们确切知道其对我们有用的东西”[12]。因此,完善属于实在本身,但善的性质是相对于我们自己及我们的需要的,而且在客观的考察中它就消失了。我认为,为了理解神秘主义的伦理观,作出这样的某种区分是有必要的:有一种低级的世俗的善与恶,它们把现象世界分成看似冲突的若干部分;但亦有一种高级的神秘的善,它属于实在,且不被任何一种相关的恶所反对。
如果不承认善与恶是主观的,也就是说,如果不承认善的东西只是我们对其有一种情感的东西,而恶的东西只是我们对其有另一种情感的东西,那么就难以对上述立场给出一种逻辑上站得住脚的描述。在我们的现实生活中,当我们不得不进行选择并在两种可能的行动中更愿择此弃彼时,在善与恶之间,或至少在较善的与较恶的之间,拥有一种区分是有必要的。但是,像涉及行为的一切事物一样,此种区分如果仅因为本质上与时间相关,那么就属于神秘主义视之为虚幻的那个世界。在我们的沉思生活中,当不要求做出行为时,我们就有可能达致客观并克服行为所要求的伦理两重性;只要我们保持纯粹的客观,我们就可以满足于这样的说法,即行为中的善与恶都是虚幻的。但是,假如我们发现——我们若有神秘主义眼光则必须发现——整个世界是值得爱和崇拜的,而且假如我们看到
“这大地,及一切寻常景致…
都披着神圣的光辉,”[13]
那么我们将说,有一种比行为中的善更高级的善,并且这种更高级的善属于整个的实际的世界。通过这种方式,神秘主义的两重性态度及显而易见的踌躇就得到了解释,并被证明是正当的。
这种普遍渗透于一切存在中的爱与欢乐的可能性,对于行为及生活的幸福而言是极端重要的,而且对于神秘主义情感而言,若不是建立于其上的那些信念,这种可能性将赋予其无可估量的价值。但是,假如我们不想获得错误的信念,准确地认识神秘主义情感揭示了什么是有必要的。它揭示了人性的一种可能性即一种生活的可能性,此种可能的生活比任何能够通过其它方式过上的生活更高贵、更幸福、更自由。但是,它总体上并没有揭示任何关于非人类或关于宇宙性质的东西。好与坏,甚至神秘主义所发现的那种无处不在的高级的善,都是我们自己的情感在其它事物上的反映,而不是事物自身的本质的一部分。因此,一种客观的研究,当摆脱对自我的全部专注时,将不会认为事物是好的或坏的,尽管它很容易与无处不在的爱的情感结合起来;而那种情感引导神秘主义者说整个世界是善的。
经由进步观念,进化哲学与好和坏的伦理两重性紧密相联;因而,它不仅被排除于把善与恶一起从自身观点中抛弃了的那种考察,而且也无法拥有一切事物都有善性的那种神秘主义信念。通过这种方式,善与恶的区分,像时间一样,成了这种哲学中的暴君,并把无止境的行为选择引入了**。善与恶,也像时间一样,好像在**领域中并不是一般的或根本性的,而是知识等级体系中新来的且高度专业化了的成员。
尽管我们看到,在解释神秘主义时,可以通过某种方式使其赞同这样的观点,即善和恶不是知识上根本的;但必须承认,在这里,我们不再是口头上对过去的绝大多数伟大的哲学家及宗教教师表示赞同。然而我相信,从哲学中扫除除伦理的因素既是科学上必要的,也是——这尽管看似矛盾——伦理学的一种进步。我们必须为这两种论点做简要的辩护。
我们希望更多的人类愿望得以满足,也就是说,希望证明这个世界具有这种或那种值得期待的伦理特征;但就我所能看到的而言,这样的希望是一种科学的哲学无论做什么样的事情都无法满足的。一个好的世界与一个坏的世界之间的差别,是存在于这些世界中的特殊事物在特殊性质上的差别:它不是哲学上的一种足够抽象的差别。比如说,爱与恨是伦理的对立物;但对哲学来说,它们是极其类似的对待对象的态度。对待对象的这些态度构成了心理现象,它们的一般形式与结构是一个哲学问题;但是,爱与恨的差别并不是形式或结构的差别,因此与其说它属于哲学,不如说它属于心理学这门特殊的科学。因此,时常激励着哲学家们的伦理的兴趣必须退居幕后:某种伦理的兴趣可以激励整个研究,但任何伦理的兴趣都不必闯入研究细节中,或者说,我们不必在所寻求的特殊结果中期待它。
如果这种观点乍看上去是令人失望的,那么我们可以提醒自己说,一种类似的变化已经在所有其它科学中被发现是必要的。我们现在不要求物理学家或化学家去证明离子或原子在伦理上是重要的;我们也不期待生物家去证明他所解剖的植物或动物有什么用处。在前科学时期,情况并不是这样的。例如,人们以前之所以研究天文学,是因为他们相信占星术:人们那时认为,行星运动对人类生活具有最直接、最重要的关系。大概,当这种信念变弱且无关利害的天文学研究开始时,许多已发现占星术极为有趣的人就会判定,天文学对人的关心太少,以至于不值得研究。物理学,例如就像在柏拉图的《蒂迈欧篇》中那样,充满伦理的观念:物理学目的的一个必不可少的部分,就在于表明地球是值得赞美的。相反,现代物理学家尽管不希望否认地球是值得赞美的,但作为物理学家,他们并不关心其伦理的属性:他只想发现事实,而不想考虑它们是好是坏。在心理学中,相比于在物理科学中,科学的态度甚至来得更晚,而且来得更艰难:人们自然会想人性要么是好的要么是坏的,并猜想,好和坏之间的差别既然在实践上如此至关重要,在理论上一定也是重要的。只是在上一世纪,一门伦理上中立的心理学才成长起来,而且在这里也一样,伦理的中立性是取得科学的成功所必不可少的。
迄今为止,在哲学领域,很少有人追求伦理的中立性,而且人们也几乎不曾获得它。人们记住了自己的愿望,并评判那些与它们的愿望相关的哲学。由于从特殊科学中被驱赶,善恶观念一定提供了打开理解世界之门的钥匙这一信念,已在哲学中找到一个藏身之所。但是,假如哲学将不再保留一组令人愉悦的梦想,我们甚至必须将此信念从这最后的藏身之所中往外驱赶。一种寻常的现象是,幸福大半不是由直接寻求它的那些人获得的,而且就善而言,似乎也如此。无论如何,在**中,相比于透过其自身的愿望这一扭曲的媒介看世界的人,那些忘记善与恶并且只想认识事实的人更有可能获得善。
这因而又让我们想起了我们的那个虚假的矛盾:相比于如进化论及绝大多数传统体系那样永远在评价宇宙并试图在其中发现当前理想的一种体现的哲学,一种不想把自身的善恶概念强加于世界的哲学,不仅更有可能获得真理,而且也是一种更高级的伦理立场的结果。在宗教及每一种极严肃的关于世界和人的命运的观点中,都有一种屈从的成份,即一种对人的能力的限度的认识;而在现代世界中,因有了物质上的迅速成功及关于进步之无限可能性的傲慢信念,这种认识在某种程度上是缺乏的。“爱惜自己生命的,就会丧失生命”[14];而且存在这样的一种危险,即通过对生命的过分自信的爱,生命自身会丧失许多给予其最高价值的东西。从精神实质上看,宗教在行为上反复灌输的屈从,其实就是科学在**上教给我们的东西;而且它借以取得胜利的伦理中立性,就是那种屈从的结果。
与我们利害攸关从而需要我们记住的善就是我们有能力去创造的善,即我们自己的生命中和我们对待世界的态度中的善。坚信能从外部实现这种善,属于一种形式的狂妄自信;这种狂妄自信,非但不能确保获得它所期待的外部的善,还会严重削弱我们有能力获得的内部的善,并摧毁对事实的敬畏;而这种敬畏,既构成人的谦恭中有价值的东西,也构成科学品性中富有成效的东西。
当然,人不可能完全超越其本性;如果仅由利害关系来决定我们的注意力的方向,某种主观的东西就一定会保留在我们的全部**中。但是,科学的哲学比任何其它的人类研究活动更接近客观,并因此为我们提供了与外部世界间的那种近乎不变的、最密切的并有可能被获得的关系。在原始人看来,每样事物要么是友善的,要么含敌意的;但经验已经表明,友善和敌意并不是世界由之被理解的概念。与任何一种前科学的信念或想象相比,科学的哲学因而代表了一种高级的**形式,尽管它迄今为止还仅处于初级状态;像每一种自我超越的途径一样,它在增加**的范围、宽度及广度方面为自已带来了丰厚的回报。进化论尽管求助于特殊的科学的事实,但并没有成为一门真正的科学的哲学,这既因为它受时间的奴役,它对伦理问题过分关注,也因为它对我们的世俗关切及命运具有一种压倒性兴趣。一门真正的科学的哲学将是更谦恭的,更注重通过零碎积累而进步,也是更艰巨的,而且较少通过提供外部幻景的光华来满足不合理的希望;但是,它对命运更中立,更有能力接受这个世界,而又不会把我们的人的短暂的需求蛮横地强加于它。
[①] 威廉. 布莱克(1757-1827),英国诗人和版画家,著有诗集《天真之歌》、《经验之歌》等。——译者注
[②] 上述所有引文都来自伯尼特的《早期希腊哲学》(1908 年第 2 版),第 146-156 页。
[③] 《理想国》,514,戴维斯和沃恩译。
[④] 这一节,还有后面几节中的一两段文字,都已印在一期课程中。该课程即名为《我们关于外间世界的知识》的洛威尔讲演,这些讲演已由欧朋. 考特出版公司出版。但是,由于这就是原先写作那些文字时的背景,我把它们放在了这里。
[⑤] 《形而上学导论》,第 1 页。
[⑥] 桑塔亚那(George Santyanna,1863~1952),系美国批判实在论哲学家。——译者注
[⑦] 这里指的是莫拉纳. 贾拉尔丁. 鲁米(1207-1273),著名的神秘主义诗人,其主要作品有六卷本的诗集《玛斯纳维》。——译者注
[⑧] 《玛斯纳维》,文费尔德译本(特吕伯内尔,1887),第 34 页。
[⑨] 拉普拉斯系十八至十九世纪法国物理学家。——译者注
[⑩] 《伦理学》第 4 部分,命题 62。
[11] 《伦理学》第 2 部分,定义 5。
[12] 《伦理学》第 4 部分,定义 1。
[13] 此两句系十八、十九世纪英国著名浪漫主义诗人威廉 · 华兹华斯《永生颂》中的片断。——译者注
[14] 此语系出《圣经. 新约》中的《约翰福音》第 12 章。——译者注
分享:
原文
https://www.douban.com/note/629358269/
Installing Homer Dashboard with docker-compose or nginx on Ubuntu 20.04 ·
Install Docker
Update the repo to get latest versions
sudo apt update
Install the latest version
sudo apt install docker.io
Set Docker to start on startup
sudo systemctl enable --now docker
Give your user permissions to docker, replacing user with your username
sudo usermod -aG docker user
Once you have run this command close and reopen your session if you accessing remotely. This is to apply the permissions in the above step
Test it has installed correctly by getting the docker version
docker --version
Docker Compose
I also install docker-compose as some dockers need you to compose from a yml file. This downloads 1.29.2, just change this if the version updates to a later version
sudo curl -L "https://github.com/docker/compose/releases/download/1.29.2/docker-compose-$(uname -s)-$(uname -m)" -o /usr/local/bin/docker-compose
Give permissions to this
sudo chmod +x /usr/local/bin/docker-compose
Test it has installed correctly by getting the docker-compose version
docker-compose --version
Install Homer
I keep all my dockers in a dockers folder in my home directory. If it doesn’t exist already, create this folder:-
mkdir ~/dockers
Now create a folder for Homer to live in.
mkdir ~/dockers/homer
Create a folder for the assets
mkdir ~/dockers/homer/assets
Change directory to this folder
cd ~/dockers/homer
Create a docker-compose.yml file
nano docker-compose.yml
Paste the following. Change the 89 part of 89:8080 if you want it to listen on an alternative port to port 89.
---
version: "2"
 services:
   homer:
     image: b4bz/homer
     container_name: homer
     volumes:
       - ./assets/:/www/assets
     ports:
       - 89:8080
     environment:
       - UID=1000
       - GID=1000
     restart: unless-stopped
Save the file with ctl + x, then y to save.
Run the docker-compose file with the following:-
docker-compose up -d
- Browse to the server ip and the port mentioned in the compose file, eg http://1.1.1.1:89 and you should get the default dashboard.
-
Now it’s all installed, to configure, edit the following file.
sudo nano /home/dockers/homer/assets/config.yml
Installing nginx if it’s not installed
-
First, update the repo to get latest versions
sudo apt update -
Install nginx
sudo apt install nginx -
Enable the service to start on boot
sudo systemctl enable nginx
Installing Homer Dashboard
-
First download the latest release from the github repo. From your home directory run the following.
wget "https://github.com/bastienwirtz/homer/releases/latest/download/homer.zip" -
Next, extract homer into the nginx folder
sudo unzip homer.zip -d /usr/share/nginx/homer -
If the above command fails because you haven’t got unzip intalled, use the following to install, then re-run the above command.
sudo apt install unzip -
Amend the permissions on the homer folder
sudo chown www-data:www-data /usr/share/nginx/homer/ -R -
Get the default config from homer dist
sudo cp /usr/share/nginx/homer/assets/config.yml.dist /usr/share/nginx/homer/assets/config.yml -
Create nginx config file
sudo nano /etc/nginx/conf.d/homer.conf -
Paste the following in for a basic site setup (change the
server_namefor your server name/ip. Changelistento a port you want this to listen on. I’m using :89 as my custom port. The default from homer docker is 8080, so you would uselisten 8080in the below along withlisten [::]:8080)server { listen 89; listen [::]:89; server_name homer.example.com; # Path to the root of your installation root /usr/share/nginx/homer/; access_log /var/log/nginx/homer.access; error_log /var/log/nginx/homer.error; } -
Test the nginx config.
sudo nginx -t -
If the above comes back successfully, restart nginx service.
sudo systemctl reload nginx -
Browse to the site mentinoed in the config file, eg http://homer.example.com:89 and you should get the default dashboard.
-
Now it’s all installed, to configure, edit the following file.
sudo nano /usr/share/nginx/homer/assets/config.yml
https://www.llewellynhughes.co.uk/post/installing-homer-manual/

How do I increase swap memory in debian? - Server Fault
To add a swap file:
- Create the file. This command creates a 1 gigabyte file:
dd if=/dev/zero of=/swap bs=1M count=1000 - Format the swap file:
mkswap /swap chmod 0600 /swapswapon /swap- Add the new swap file to /etc/fstab
nano /etc/fstab- Copy and insert
/swap swap swap defaults 0 0 - save & exits
- Run
swapoff -a && swapon -ato activate the new swap.
You can run free -m to find the swap space used in megabytes before and after the allocation of swap space.
https://serverfault.com/questions/218122/how-do-i-increase-swap-memory-in-debian
how to fix issue signalr on arr automation media management
reset permission omv use gui reset-perm
grant chown appuser owner command line
docker-compose stop
reboot
docker-compose start
sudo chmod -R 755
sudo find /data -type f -exec chmod 644 {} ;
change docker-compose umask from 022 to 002 and docker-compose up -d
sudo find /data -type d -exec chmod 775 {} ;
Temporally signalr problem no appear using meximux.
useful command
chmod -R a=,a+rX,u+w,g+w /some/path/here #Recursively chmod to 775/664
sudo find /data -type d -exec chmod 775 {} \;
sudo find /data -type f -exec chmod 644 {} \;
useful link
https://tecadmin.net/how-to-search-recently-modified-files-in-linux/
部署 Tiny Tiny RSS 遇见的坑 - 谷中望月

笔者按照教程和文档[1] [2] [3],在 VPS 上部署了 Awesome Tiny Tiny RSS (以下简称 TTRSS)。在这个过程中,踩了很多坑,在此记录下来。
环境
- Ubuntu 20.04 LTS
- 宝塔面板
- LNMP (用面板安装)
- Docker (另行安装)
用管理员身份执行
安装 docker、部署 TTRSS、用 docker-compose 命令操作 TTRSS 时,每条命令都需要用管理员身份执行。
Postgres 数据库的密码
在 docker-compose.yml 文件中,POSTGRES_PASSWORD 和 DB_PASS 这两项,需要在部署 TTRSS 之前就设置好。
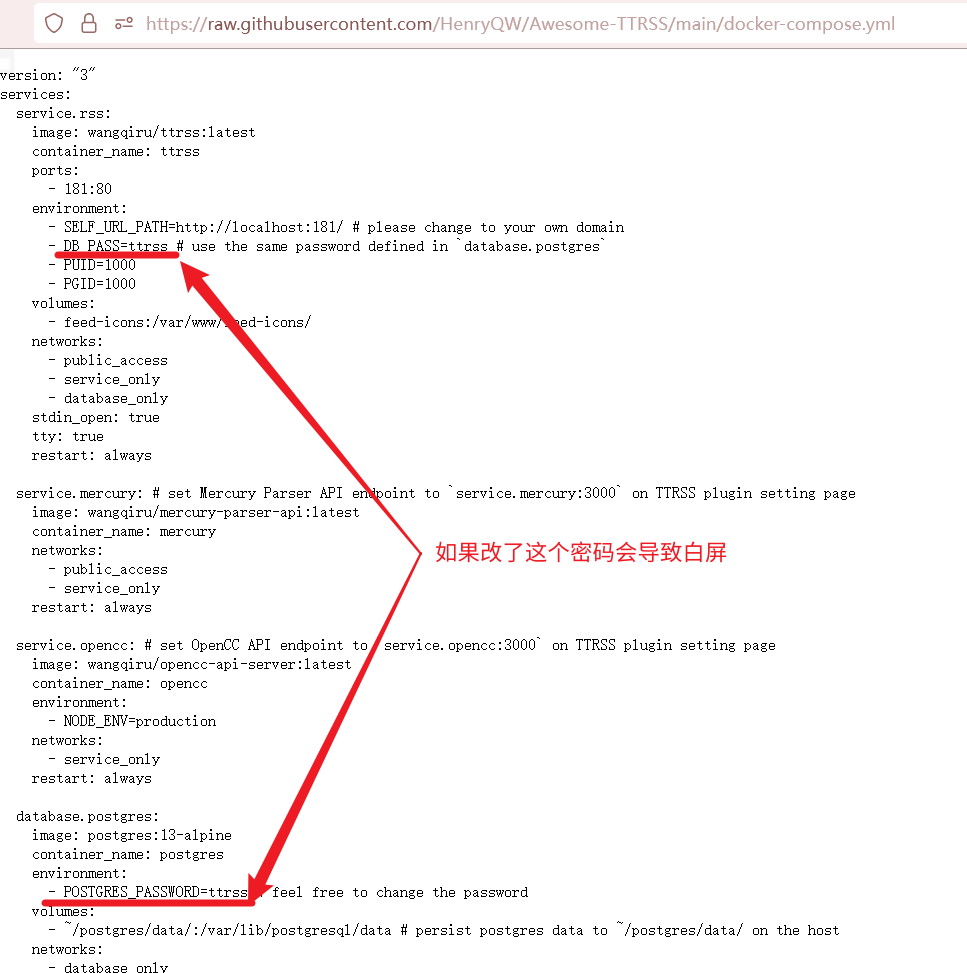
如果部署 TTRSS 之后再修改这两个密码,那么在访问 TTRSS 的 URL时,会得到一个空白页面(白屏)。
我不会重置密码,只能用 sudo rm -rf /root/postgres/data 命令强行删除全部的 Postgres 数据库 🤷♀️。
SSH 连接到 VPS,执行:
如果 curl 返回如下内容:
说明 TTRSS 已在后台运行,需要正确地配置反向代理。
配置 HTTPS 与反向代理
编辑 nginx 配置文件,加入以下内容:
在 nginx 配置文件中找到以下内容,注释掉,或者删除掉。
笔者找到了TTRSS 的第三方 iOS 客户端:tiny Reader。它是免费的(有内购),有 macOS 与 iOS 版(其实 macOS 版没必要,用浏览器就好了)。注意,它是通过 TTRSS 本身的 API 来连接的,不是通过 Fever API!
App store 链接:https://apps.apple.com/us/app/tiny-reader-rss/id689519762
手机端登录方法
首先,在 TTRSS 的【偏好设置】→【偏好设置】→【通用】中勾选【启用 API:允许外部客户端通过 API 来访问该账户】。
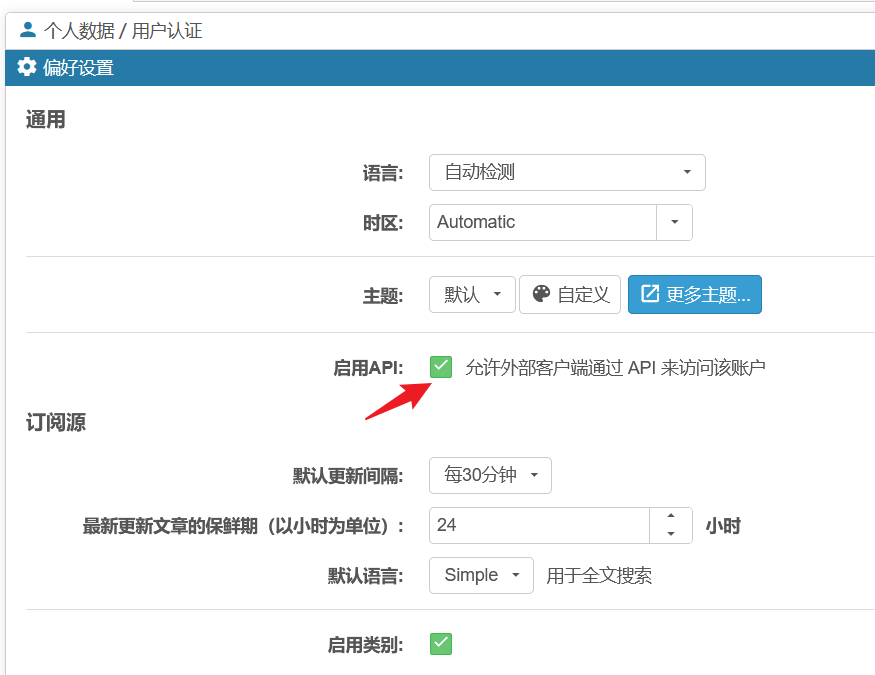
然后,在手机端启动 tiny Reader,它首次启动后会自动进入 Account 设置界面,将 SERVER ADDRESS 设置为 TTRSS 的 URL,LOGIN 设置为你设置的账号名(我在默认账号 admin 之外又建立了一个新的账号),PASSWORD 设置为你为账号设置的密码。这样就可以了。
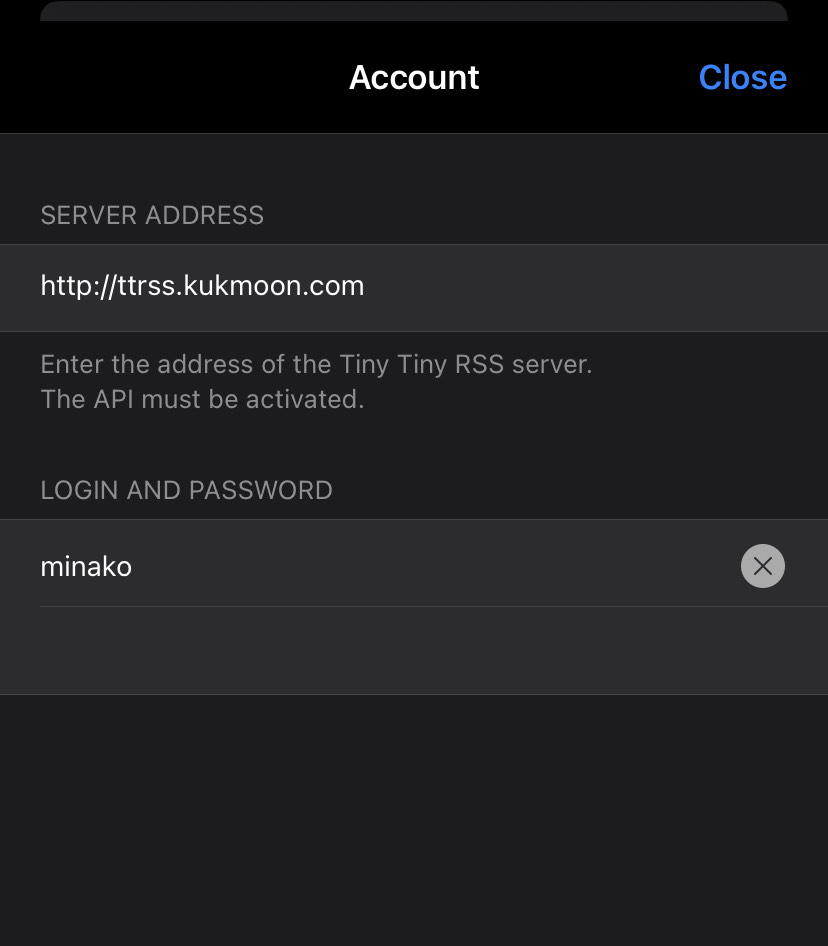
图片版权
题图:自制(其中 Tiny Tiny RSS 的图标版权归开发者所有)
头图:https://www.wallpaperbetter.com/en/hd-wallpaper-tolen
参考文献
使用ChatGPT快速阅读一本书 - 知乎
使用ChatGPT快速阅读一本书 - 知乎
切换模式
写文章

使用ChatGPT快速阅读一本书

2 人赞同了该文章
发布于 2023-04-28 10:44・IP 属地北京 ,编辑于 2023-04-28 12:02・IP 属地北京
Cloud wisdom, AI assistant

你还在购买纸质书和电子书吗?下面我们分享下如何使用ChatGPT来快速阅读一本书。
ChatGPT是一个基于GPT-3.5的大型语言模型,可以帮助我们更高效地获取信息和知识。

1 - 获取书的摘要
使用ChatGPT的文本摘要功能。ChatGPT可以为您提供摘要,这是一种从长篇文本中提取最重要信息的方法。您可以将章节或段落输入到ChatGPT中,并请求它生成一个包含该部分主要信息的摘要。
提取这本书的摘要:[作者:稻盛和夫] [书名:活法]
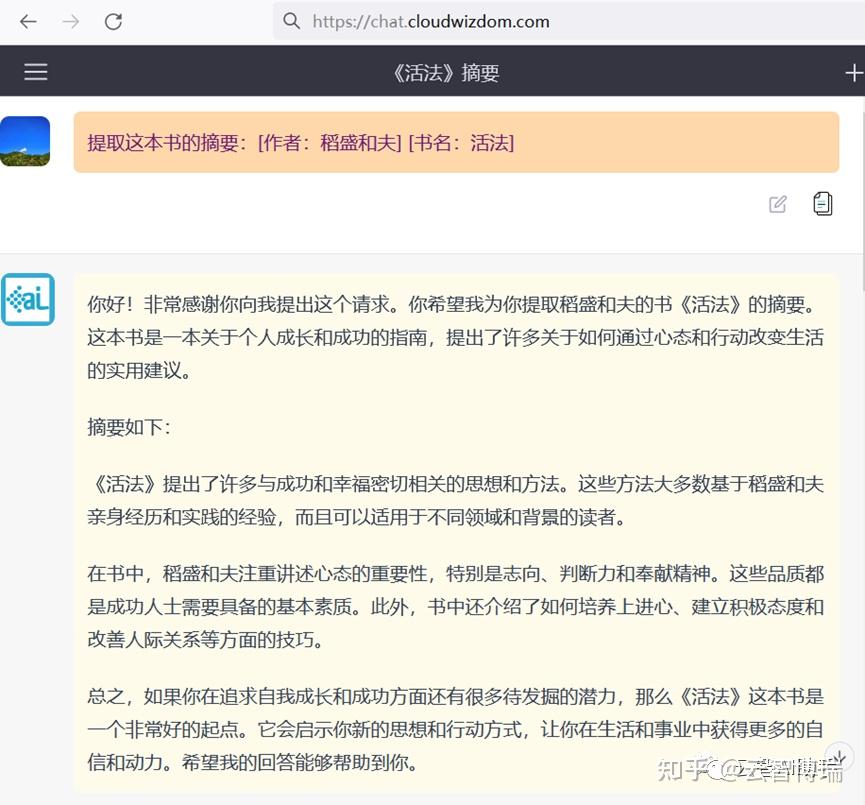
2 - 获取书的关键词
使用ChatGPT的关键词提取功能。关键词提取是一种从文本中提取最重要词汇的方法。您可以将章节或段落输入到ChatGPT中,并请求它生成该部分的关键词列表。这可以帮助您更好地理解文章的主题和内容。
再提取这本书的关键词
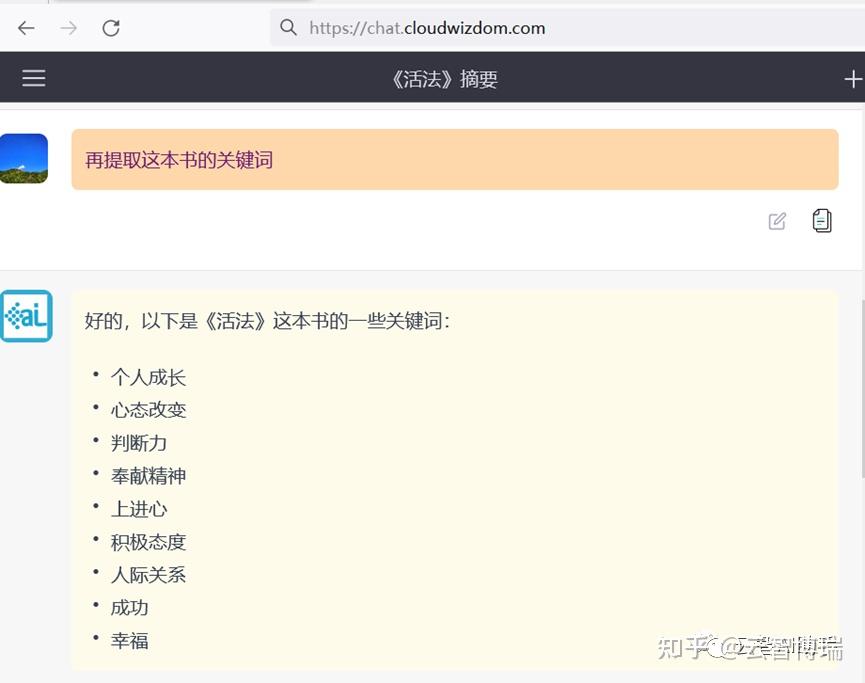
因为在**ChatGPT中文版(知否AI问答)**中问答是上下文相关的,所以这里并不用再提及书的信息,就像是一个熟悉的老朋友一直在倾听你的话语。
3 - 获取书的目录和章节内容
ChatGPT可以更容易地获取阅读的资料,你可以使用ChatGPT来搜索书的目录,并获取目录中的每个章节内容,以便更深入地学习书中的主旨。
获取这本书的目录
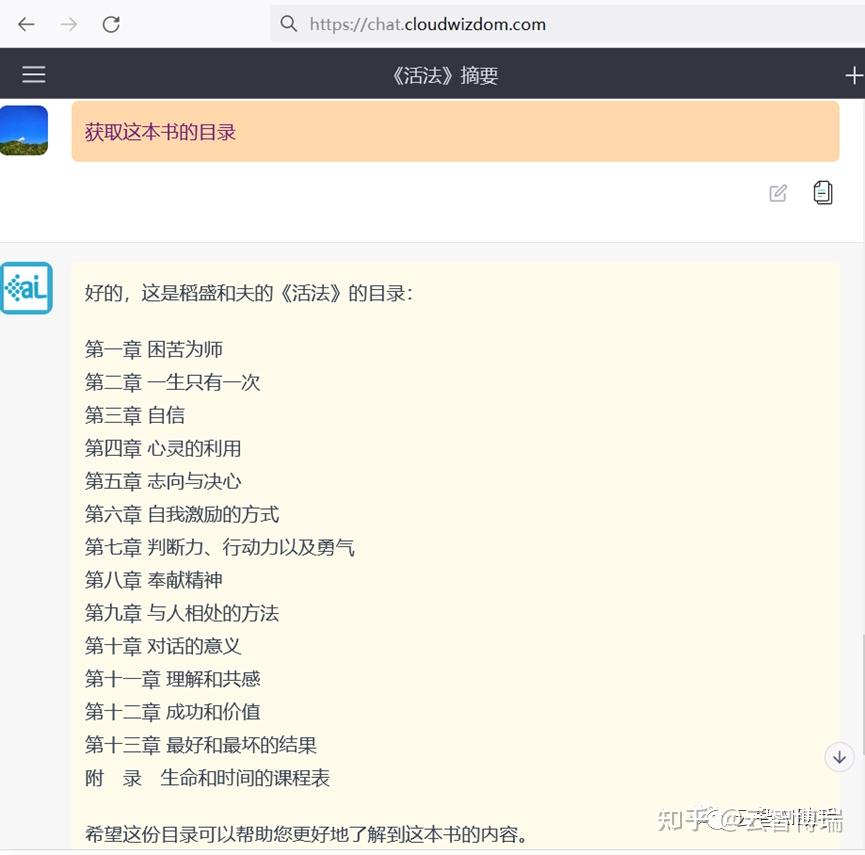
总结一下第六章中的内容

4 - 使用对话问答功能
ChatGPT是一种人工智能,可以像人一样进行对话,ChatGPT会回答您对书中内容提出的问题。您可以提出您对书中内容的疑问或观点,并与ChatGPT进行讨论。这是一种深入了解书中内容的方法。
如何利用这本书的观点进行企业管理

5 - 让作者担当你的人生教练
当你阅读完一本纸质书或电子书后,其实是很难将阅读到的内容应用到生活或工作中。
ChatGPT可以充当书中的人生教练,帮助你理解和应用书中内容,实现真正的自主式学习。
我希望你担任人生教练。请总结这本非小说类书籍,[作者:稻盛和夫] [书名:活法]。以孩子能够理解的方式简化核心原则。另外,你能给我一份关于如何将这些原则实施到我的日常生活中的可操作步骤列表吗?
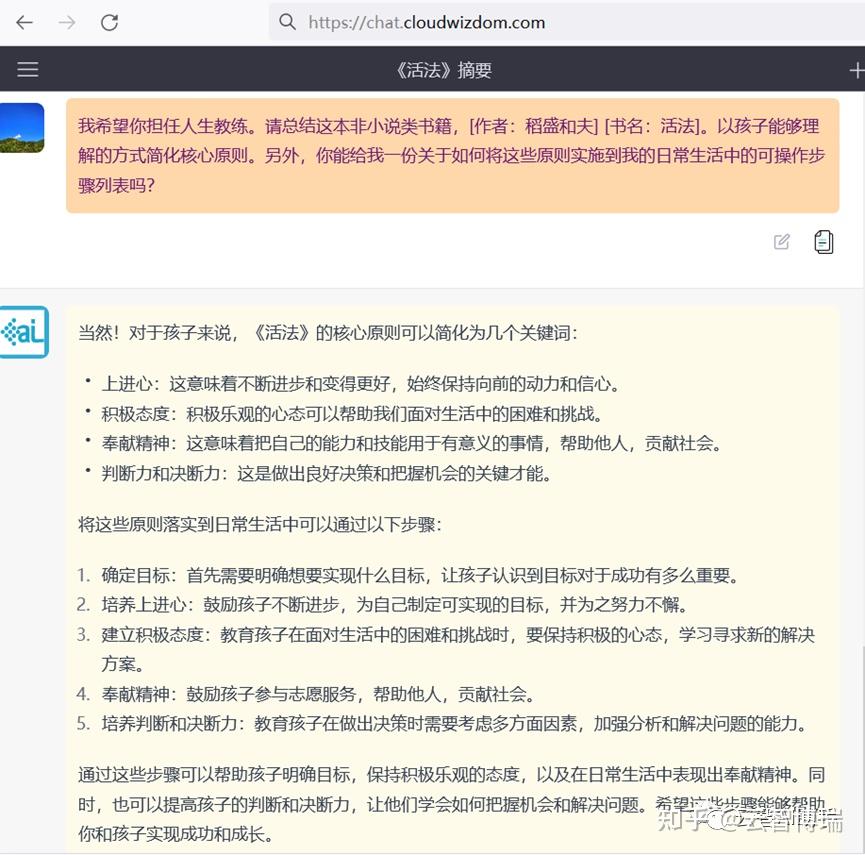
总之,使用ChatGPT可以帮助我们更高效地获取信息和知识,尤其是在快速阅读一本书时。希望这篇文章能够帮助您更好地使用ChatGPT,并提高您的阅读效率。

以上的截图均来源于我们的AI助手: 知否AI问答,如果大家有兴趣可以点击链接查看,微信扫码直接登录,无需其他复杂验证,新用户可免费试用3天。
点击原文直接体验或者长按下图二维码体验吧!

| 推荐阅读 |
11、如何快速完成一篇工作总结
发布于 2023-04-28 10:44・IP 属地北京 ,编辑于 2023-04-28 12:02・IP 属地北京
[
读书方法
](//www.zhihu.com/topic/19635758)
[
论文
](//www.zhihu.com/topic/19572442)
[
知识图谱:方法、实践与应用(书籍)
](//www.zhihu.com/topic/21483799)
赞同 22 条评论
分享
喜欢收藏申请转载
赞同 2
分享
写下你的评论...
2 条评论
默认
最新

无权限
07-21 · IP 属地北京
回复赞

会针对特定书籍,我试了好几本都无法提取。
05-28 · IP 属地北京
回复赞
推荐阅读
[

最高效地阅读方法究竟是什么?
鑫扬
](https://zhuanlan.zhihu.com/p/28794888)[

解读《超级快速阅读》
瞎说英语发表于夏砖家
](https://zhuanlan.zhihu.com/p/44956001)[

值得反复阅读的《超级快速阅读》
云卿
](https://zhuanlan.zhihu.com/p/57061866)[

【干货长文】我极力推崇的清单阅读法,到底是什么鬼?(附详细实践指南,还有福利)
清单控沙牛
](https://zhuanlan.zhihu.com/p/35307001)
想来知乎工作?请发送邮件到 [email protected]
▲
x▼
(1) Loss of permissions after Sonarr downloads : radarr
Save From : (1) Loss of permissions after Sonarr downloads : radarr
Content
You need to get your whole environment of users, groups and permissions setup correctly. Then it'll just chug along happily. That means run each daemon as its own user, like radarr for Radarr and nzbget for NZBGet. You can probably guess what I'd suggest running Sonarr as. Each of these users should be part of a shared group, like media. Now you setup each of your daemons to run as that user and group, with Docker it is likely a -e UID=123 type option, use id <username> to find the UID/GID.
Now that they're all running as the right user and group, you need to configure them to write files and folders with the right permissions. You want a umask of 002 which means folders get 775 and files get 774. In some Docker run arguments, you set -e UMASK=002, or maybe not. In NZBGet, you can set the user and group and umask. In Radarr/Sonarr, you do the same except instead of umask there is a box for folder and file permissions, which you set to 775 and 664 respectively. And of course, fill in the correct user there too.
Now you've got your daemons running as the right user and group and they're setup to make new files w/ the right permissions and user and group. So you have to clean up your existing permissions.
You want NZBGet's download directory to be owned by nzbget:media with permissions of 775 for folders and 664 for files. You do that w/ chown -R nzbget:media /path/to/nzbgets_stuff and find /path/to/nzbgets_stuff -type f -exec chmod 664 '{}' ';' and find /path/to/nzbgets_stuff -type d -exec chmod 775 '{}' ';'. Repeat this for Sonarr and Radarr, changing the user in the chown command. Your TV directory should be owned by Sonarr, Movies owned by Radarr.
Now that it is all done, they'll all just chug along doing the right thing.
Note
[OpenWrt Wiki] Wireless Access Point / Dumb Access Point / Dumb AP
This article may contain network configuration that is version dependent post 2021-06
More Information
Summary: This document describes how to create a Dumb Access Point (Dumb AP) that extends a network that already has a “main router”. It's called a “Dumb Access Point” because it does not provide routing or DHCP. Here are the basics of setting up any router (not just OpenWrt) to be a Dumb AP.
The result is a bridged LAN (no internal subnets) that will work fine for home and small networks. People can connect to the Dumb AP over Ethernet or Wi-Fi (using the configured SSID/password) and use to the existing network.
Note: The term “Dumb Access Point” appears to have originated in the Raspberry Pi world. From the perspective of a generic network engineer, the correct term would be “Wireless Access Point”. To quote linksys.com - “An access point connects to a wired router, switch, or hub via an Ethernet cable [or some other means], and projects a Wi-Fi signal to a designated area”. A router with a wireless interface would be called a “Wireless Router”.
Of course you can achieve this with using the web interface:
Once you have configured your wireless network with LUCI you can start configuring your dumb AP.
- Disconnect the (soon-to-be) Dumb AP from your network, and connect your computer to it with an Ethernet cable.
- Use the web interface to go to Network → Interfaces and select the LAN interface.
- Enter an IP address “next to” your main router on the field “IPv4 address”. (If your main router has IP 192.168.1.1, enter 192.168.1.2). Set DNS and gateway to point into your main router to enable internet access for the dumb AP itself
- Then switch to “DHCP Server” tab (or scroll down in older versions, 18.06 and earlier, of Luci) and select the checkbox “Ignore interface: Disable DHCP for this interface.”
- Click “IPv6 Settings” tab and set everything to “disabled”.
- Under “Physical Settings” tab, ensure “Bridge interfaces” is ticked, and ensure BOTH of your interfaces (eth0, wlan0) are selected, in order to allow traffic between wireless and wired connections.
- In the top menu go to System → Startup, and disable firewall, dnsmasq and odhcpd in the list of startup scripts. It should be noted that even though they are disabled, flashing a new image to the device will re-enable them. One option is to add some code to
/etc/rc.localto do this for you. See Disable Daemons Persistently. - Click the Save and Apply button. Hard-Restart your router if you're not able to connect anymore.
- Go to http://192.168.1.2 (or whatever address you specified) and check if the settings for the LAN interface are the same.
- Use an Ethernet to connect one of the LAN ports on your main router to one of the LAN/switch ports of your “new” dumb AP. (There's no need to connect the WAN port of the Dumb AP.) Since neither the WAN nor WAN6 interfaces will be used, edit each one and uncheck'bring up on boot' to disable them.
- You are done.
Configuration via OpenWrt command line tools
The changes below assume an OpenWrt default configuration, the relevant files are:
Edit /etc/config/network and change the [interface](https://openwrt.org/docs/guide-user/base-system/basic-networking#interfaces "docs:guide-user:base-system:basic-networking") section:
For switch-less devices, e.g. Alix Board, wr1043nd v2
On switchless devices, simply bridge all ethernet interfaces together, remove the existing WAN interface - if any.
config interface lan
        option type     'bridge'
        option ifname   'eth0 eth1'   # Bridges lan and wan
        option proto    'dhcp'        # Change as appropriate
For devices with switch and dedicated WAN, e.g. WNDR3700, WR1043ND v1, WR741ND v2.4
On devices with a separate WAN interface, bridge the LAN VLAN together with the WAN interface, remove the existing WAN interface - if any.
config interface lan
        option type     'bridge'
        option ifname   'eth0.1 eth1'  # Bridges vlan 1 and wan
        option proto    'dhcp'         # Change as appropriate
Switch configuration on WR1043ND (barrier breaker):
config switch\_vlan
        option device 'switch0'
        option vlan '1'
        option ports '0 1 2 3 4 5t'  # 1. add 0 in here

#config switch\_vlan               # 2. comment out or delete the whole vlan 2 section
#       option device 'switch0'
#       option vlan '2'
#       option ports '0 5t'
For devices with switch only, e.g. WRT54GL
On devices where WAN and LAN are separated by switch config, reconfigure the LAN VLAN to cover all ports, remove the existing WAN interface and its related VLAN - if any.
config switch\_vlan eth0\_1
        option vlan     '1'
        option ports    '0 1 2 3 4 5t' # Might vary depending on the device

config interface lan
        option type     'bridge'
        option ifname   'eth0.1'
        option proto    'dhcp'         # Change as appropriate
Edit /etc/config/wireless, and don't worry about most of it, things that might need changes are commented.
config 'wifi-device' 'radio0'
        option type    'mac80211'
        option channel '11'
        option macaddr '12:e4:4a:b3:83:1a'
        option htmode  'HT20'
        list ht\_capab  'SHORT-GI-20'
        list ht\_capab  'SHORT-GI-40'
        list ht\_capab  'TX-STBC'
        list ht\_capab  'RX-STBC1'
        list ht\_capab  'DSSS\_CCK-40'

config 'wifi-iface'
        option device  'radio0'
        option network 'lan'  # Set to the name of the bridged interface
        option mode    'ap'
        option ssid    'ap\_myaccesspoint'
        option encryption 'psk2'  # Change as appropriate
        option key     'ap\_password'
If you still need dnsmasq running for something else (e.g. TFTP server) you can do:
uci set dhcp.lan.ignore=1
uci commit dhcp
/etc/init.d/dnsmasq restart
If not disable dnsmasq service:
/etc/init.d/dnsmasq disable
/etc/init.d/dnsmasq stop
Disable odhcpd with uci:
uci set dhcp.lan.dhcpv6=disabled
uci set dhcp.lan.ra=disabled
uci commit
Or disable service:
/etc/init.d/odhcpd disable
/etc/init.d/odhcpd stop

/etc/init.d/firewall disable
/etc/init.d/firewall stop
Reloading the network config should be enough, it should automatically restart if necessary.
/etc/init.d/network reload
If you would like your AP to receive IPv6 as a host only and not for routing you have to tell the DHCPv6 client not to request prefix delegation. If you do not do this the AP will reject basic IPv6 addresses. If you want to still be able to use IPv6 on the router itself change the wan6 to lan6 and @wan to @lan.
config interface 'lan6'
	option proto 'dhcpv6'
	option ifname '@lan'
	option reqprefix 'no'
Note that although the start-up of daemons such as firewall, dnsmasq, and optionally odhcpd have been set to disabled, when a new image is flashed to the device, they will be re-enabled. To work-around this, simply add the following to /etc/rc.local on the device:
\# these services do not run on dumb APs
for i in firewall dnsmasq odhcpd; do
  if /etc/init.d/"$i" enabled; then
    /etc/init.d/"$i" disable
    /etc/init.d/"$i" stop
  fi
done
DLNA and UPnP clients and printer or SMB discovery protocols on LANs tend to work by using multicast packets. For example PS3, xbox, TVs and stereos use DLNA to detect, communicate with and stream audio/video over the network. By default on bridged interfaces on OpenWrt (at least tested in 18.x series) multicast snooping is turned off. This means all network interfaces connected to a bridge (such as a WiFi SSID and ethernet VLAN) will receive multicast packets as if they were broadcast packets.
On WiFi the slowest modulation available is used for multicast packets (so that everyone can hear them). If you have “enabled legacy 802.11b rates” on your WiFi (Advanced settings checkbox in LuCI under the WiFi settings, or option legacy_rates '1' in /etc/config/wireless file) then 1Mbps is the rate that will be used. This can completely use up the WiFi airtime with even fairly light multicast streaming.
There are two possible fixes for this, one is to enable multicast snooping: option igmp_snooping '1' under the appropriate /etc/config/network settings for the bridge. This will cause the bridge to forward only on bridge ports that have requested to receive the particular multicast group. On the other hand, if someone on WiFi requests the group, it will still flood the multicast there, and some people have reported problems with certain devices such as android phones and with ipv6 when igmp_snooping is enabled (requires further debugging to identify if there is really a problem or not). By disabling legacy 802.11b rates (option legacy_rates '0') you can at least force the use of 6Mbps or more on the WiFi multicast packets, and this opens up more airtime for other uses.
https://openwrt.org/docs/guide-user/network/wifi/dumbap
Notes:
The Dumb AP wireless can be configured to control access as Open/WPA/WPA2/etc. MAC-based access control is controlled by the main router.
'Static DHCP' is not covered here: this procedure creates an AP that provides wired/wireless access and won't interfere with Static DHCP.
This recipe is similar to the “Bridged AP” recipe at Bridged AP. These pages should probably be merged.
Firewall bridge mode support in OpenWrt is provided by the kmod-br-netfilter module.
Recommend Projects
-
 React
React
A declarative, efficient, and flexible JavaScript library for building user interfaces.
-
Vue.js
🖖 Vue.js is a progressive, incrementally-adoptable JavaScript framework for building UI on the web.
-
 Typescript
TypeScript is a superset of JavaScript that compiles to clean JavaScript output.
-
TensorFlow
An Open Source Machine Learning Framework for Everyone
-
Django
The Web framework for perfectionists with deadlines.
-
 Laravel
A PHP framework for web artisans
-
D3
Bring data to life with SVG, Canvas and HTML. 📊📈🎉
-
Recommend Topics
-
javascript
JavaScript (JS) is a lightweight interpreted programming language with first-class functions.
-
web
Some thing interesting about web. New door for the world.
-
server
A server is a program made to process requests and deliver data to clients.
-
Machine learning
Machine learning is a way of modeling and interpreting data that allows a piece of software to respond intelligently.
-
Visualization
Some thing interesting about visualization, use data art
-
Game
Some thing interesting about game, make everyone happy.
Recommend Org
-
Facebook
We are working to build community through open source technology. NB: members must have two-factor auth.
-
Microsoft
Open source projects and samples from Microsoft.
-
Google
Google ❤️ Open Source for everyone.
-
Alibaba
Alibaba Open Source for everyone
-
D3
Data-Driven Documents codes.
-
Tencent
China tencent open source team.