Giter Site home page Giter Site logo

esa-prl / exomy Goto Github PK

View Code? Open in Web Editor NEW
273.0 35.0 42.0 286.01 MB

ExoMy [ARCHIVED]: Check https://github.com/0xD0M1M0/ExoMy for latest updates.

Home Page: https://esa-prl.github.io/ExoMy/

License: GNU General Public License v3.0

exomy 3d-printing hardware diy

exomy's Introduction

ExoMy - Documentation Repository

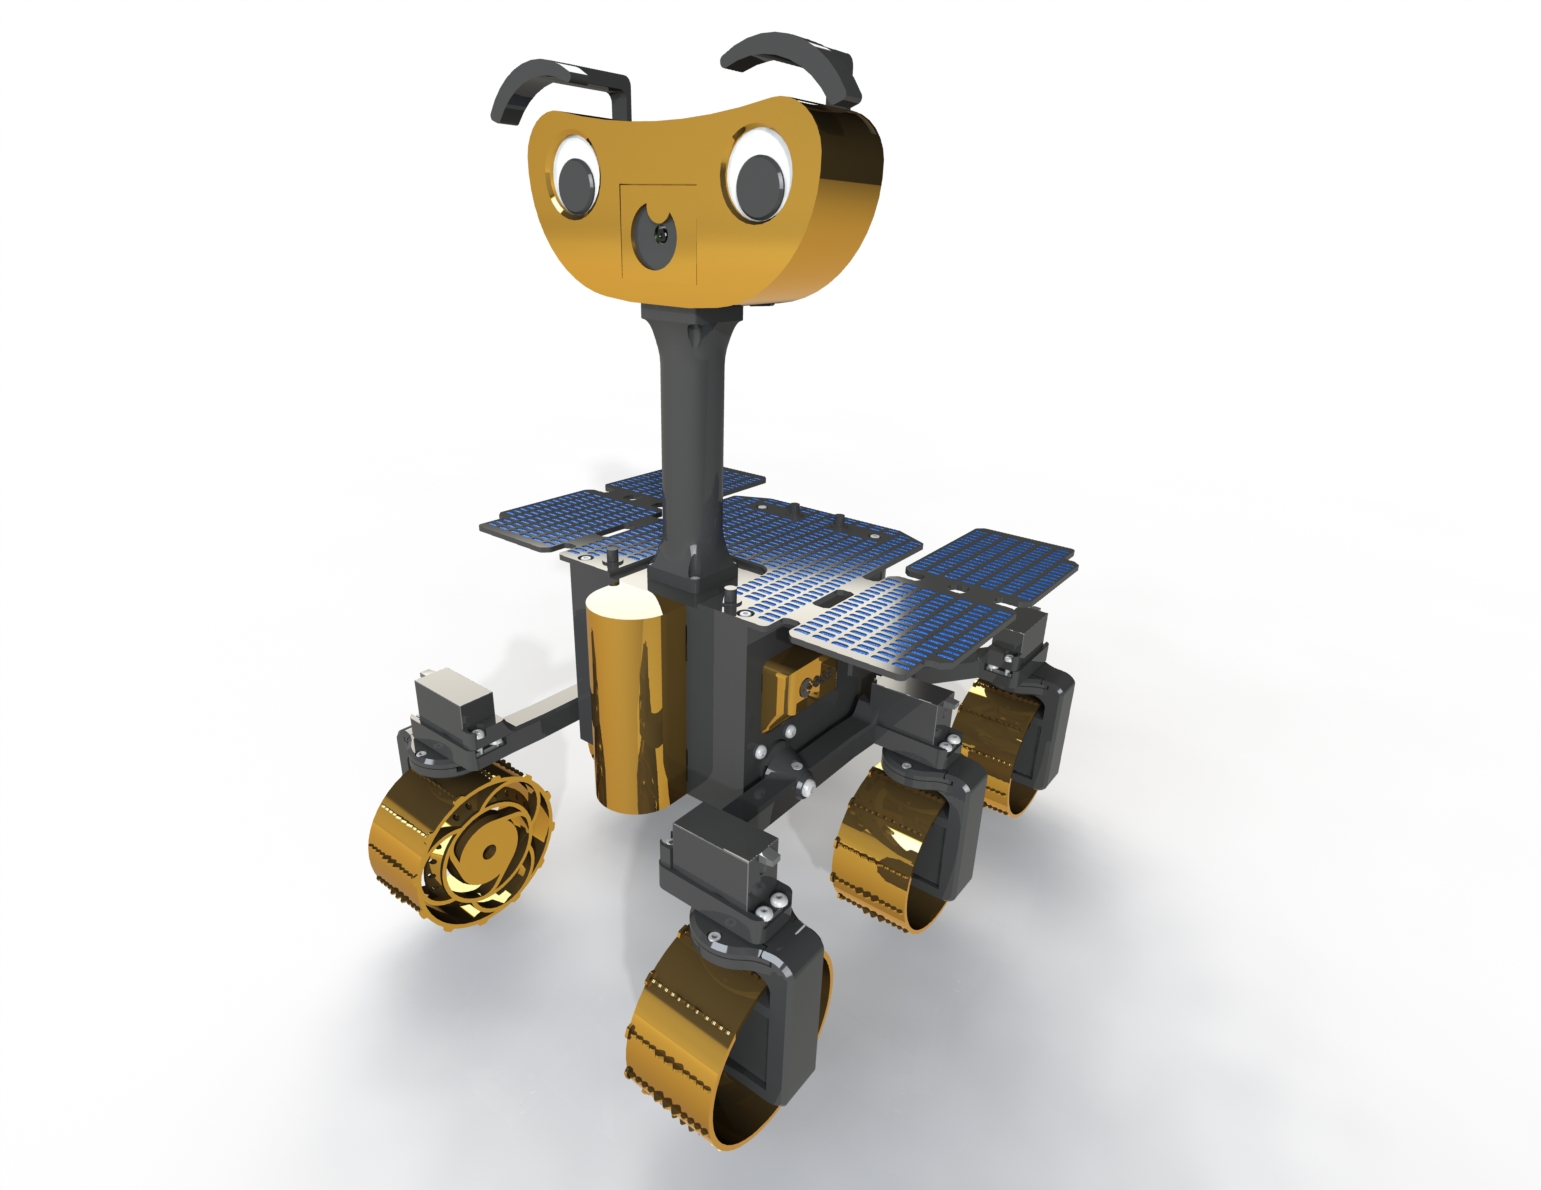
This repository contains all the files of the documentation of ExoMy. Click on Releases and download the files of the latest release. The release file contains the 3D files (STL, SLDPRT & STEP), circuit diagrams, part lists, etc. to build your own ExoMy. The building process and the files are explained further in the wiki.

ExoMy Project Structure

Overview of other parts of the ExoMy project.

The wiki contains step by step instructions on how the 3D-printed rover ExoMy can be built, controlled and customized.

There is a website about ExoMy. It does not help you build it, but is still nice to look at.

This repository contains the software to run Exomy. The wiki explains you how to use it.

Social Media

Join the Community!

@ExoMy_Rover

@ExoMy_Rover

ExoMy image

Publications

If you use this work in an academic context, please cite the following publication:

  • M. Voellmy and M. Ehrhardt: ExoMy: A Low Cost 3D Printed Rover. International Symposium on Artificial Intelligence, Robotics and Automation in Space (i-SAIRAS), 2020. (PDF)

      @inproceedings{inproceedings,
      author = {Voellmy, Miro and Ehrhardt, Maximilian},
      year = {2020},
      month = {10},
      pages = {},
      title = {ExoMy: A Low Cost 3D Printed Rover}
      }
    

Acknowledgements

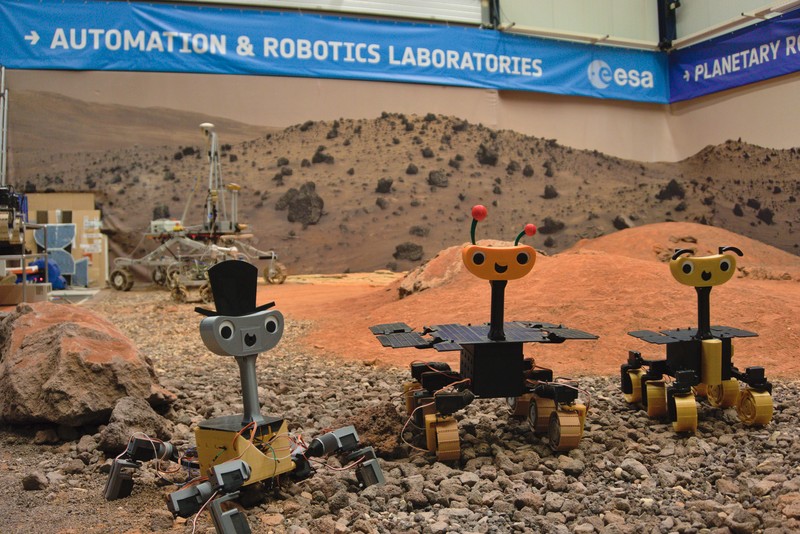
ExoMy was developed in the Planetary Robotics Laboratory of the European Space Agency.

The current team developing and maintaining ExoMy consists of Maximilian Ehrhardt, Miro Voellmy and Lorenzo Cervantes.

ExoMy Generations

We thank Shanker Ganesh Krishanmoorthy and Levin Gerdes for the development of the initial prototype, David Honess and Elsa María Sánchez for participating in the documented assembly, Tim Wiese and Mattia Haas for their inputs and contributions to the mechanical design, and finally Martin Azkarate, Martin Zwick and Gianfranco Visentin for enabling and continuously supporting the project.

exomy's People

Contributors

maxehrhardt avatar mvoellmy avatar

Stargazers

 avatar  avatar  avatar  avatar  avatar  avatar  avatar  avatar  avatar  avatar  avatar  avatar  avatar  avatar  avatar  avatar  avatar  avatar  avatar  avatar  avatar  avatar  avatar  avatar  avatar  avatar  avatar  avatar  avatar  avatar  avatar  avatar  avatar  avatar  avatar  avatar  avatar  avatar  avatar  avatar  avatar  avatar  avatar  avatar  avatar  avatar  avatar  avatar  avatar  avatar  avatar  avatar  avatar  avatar  avatar  avatar  avatar  avatar  avatar  avatar  avatar  avatar  avatar  avatar  avatar  avatar  avatar  avatar  avatar  avatar  avatar  avatar  avatar  avatar  avatar  avatar  avatar  avatar  avatar  avatar  avatar  avatar  avatar  avatar  avatar  avatar  avatar  avatar  avatar  avatar  avatar  avatar  avatar  avatar  avatar  avatar  avatar  avatar  avatar  avatar

Watchers

 avatar  avatar  avatar  avatar  avatar  avatar  avatar  avatar  avatar  avatar  avatar  avatar  avatar  avatar  avatar  avatar  avatar  avatar  avatar  avatar  avatar  avatar  avatar  avatar  avatar  avatar  avatar  avatar  avatar  avatar  avatar  avatar  avatar  avatar  avatar

exomy's Issues

BOM xlsx file contains hidden rows which might be overlooked by people

When I open https://github.com/esa-prl/ExoMy/wiki/v1.0.2/BoM/PI_ExoMy_Purchasing_BoM.xlsx in libreoffice, some of the rows are not displayed by default.

This can be confusing to people, as they might not be aware that the file also contains detailed information about the other parts as well.

They might then try to figure out the details from https://github.com/esa-prl/ExoMy/wiki/v1.0.2/Technical_Drawings/PDF/PI_ExoMy_All_Parts_BoM.pdf which will lead to frustration, since the information there is not detailed enough for actually purchasing the parts.

Funktion

My ExoMy is ready, everything calibrated. Now when I turn it on I can't access the WebGui, neither does the remote control via gamepad work. Nothing moves. The Raspi can be operated via HDMI, keyboard and mouse, the ServoHat also works???

Default Wheel STLs

The wheels shown in the picture preview of ExoMy are not the same as the STL files contained in either version of ZIP folder. In the picture, the little notches sticking out at the end of each tread grip are on the same side as the hub of the wheel - however, in the actual STL, they are on opposite sides of the wheel. I don't think it affects the functionality at all, but it does make the wheels a bit more difficult to print.

Hopefully either my description or the images I've attempted to attach properly convey what I'm specifically describing.

STLWheel
originalWheel

CAD drawings

Hello, could you please save the CAD drawings in Step-format so I (and probably many others) can read it in any CAD-program? (Tried to read it in Inventor 2018 that recognises sldprt and sldasm, but the 2018 was too old).

Error during installation of Docker

During installation of Docker I got this error:
E: Sub-process /usr/bin/dpkg returned an error code (1)

According raspberrypi.stackexchange.com this can happen after upgrading the Raspberry Pi. Some of the upgraded parts are not loaded until the next reboot, causing the Docker install to fail.

Please add in the Wiki a sudo reboot now after sudo apt-get update and sudo apt-get full-upgrade before installingen Docker.

Cable protection required

During driving the rover the cable tend to get caught in the wheels or rub against the "P03_Bogie_Bearing_Default". In my case I saw after a few hours of test driving serious cable wear.

I used following solutions combinations to protect or mitigate the risk of cable wear:

  • all cables are wrapped longitunal carefully in electrical tape on exposed areas until they are inside the housing. Exposed areas are: inside the "P28_Wheel_Bracket" (specifically on the top turn), after leaving the "P28_Wheel_Bracket" until passing the first zip tie inside the "P19_Bogie" and passing through the "P03_Bogie_Bearing"
  • used the unconventional rubber band solution to tie the cables into an upward direction between "P28_Wheel_Bracket" and "P19_Bogie". In the rear the rubber band goes to the outer zip tie position around the bogie, in the front upwards around the motor and in the center also around the motor
  • in the center, I exited the cable on the top of the "P28_Wheel_Bracket" by removing on each side of "P29_Wheel_Bracket_Fixing_Plate_Default" one end that slides under the "P28_Wheel_Bracket" allowing for enough space to exit the cables. Afterwards I was able to pull up the cable with the rubber band.

One open spot for the cables are the "exits" outside the "P28_Wheel_Bracket". Currently I use shrink tubes that are cut open and then clamped into the whole setup. But they tend to fall out.

Maybe these topics can be addressed in the wiki in the appropriate chapters. This would allow a longer lasting experience while driving the rover.

Number of required servos is unclear (16 or 12?)

Thanks for making this project open source/open hardware!

I have a small question regarding the required components.
The BOM states that we need the following:

6 | Parallax-Servo | Steering Modded
10 | Parallax-Servo | Continuous

But from the building instructions I could only find that 6 of each (= 12 servos total) are used in the bogie.
What is the intended use for the other servos?
Where these simply left on the BOM, e.g. because you originally planned to make the head orientable?

Error in P03_BogieBearing

The four holes in the corners of this part have a bore of 4mm, while they are supposed to hold a 4mm bolt. The diameter of these holes should be 3.3mm

Wrong Docker startup code in wiki

On the page "Final Integration" the docker startup for the motor config says:

sh ~/ExoMy_Software/docker/run_container.sh -c

Correct would be:
sh ~/ExoMy_Software/docker/run_exomy.sh -c

pi camera image and direction control not visible in web page

I have tried to locally see the web front end (keyboard, mouse, hdmi and ethernet connected to the raspi)
I enter 127.0.0.1:8000 in my browser (chromium) and see a web page.
It contains only the 3 buttons for drive type + motor enable/disable, no direction icon and no camera picture

I have tried to check on the cam and it took me a while to understand that it is usually occupied by the auto running exomy software.
That was why I received an error with raspistill -v -o mycam.jpg I assume?
Stopping the exomy service with -s option of the script and rerunning the raspistill shows me the cam's view.

What to do to get a fully working web page?

Regards
Juerg

American Providers BOM

We have sourced everything from Sparkfun and some of the parts change, am curious if we can upstream wiki/BOM changes once we have everything resolved.

3D print part in a more common format ?

Hi, I'd like to start building an ExoMy, but I don't have access to any solidworks copy.

Any change to see the 3D part shared with a more common format ? A format allowing open source CAD software ?

I think I could be a good idea also if you want your project to be more accessible to public 😃

Thx 🙏🏻

Incomplete sentence in the wiki

Hi :)

I just started reading the wiki, to learn a bit more about how to put this together. There is a sentence that seems to be cut, here:

Selection_143

Allows what?
Not a big deal, of course.

Recommend Projects

  • React photo React

    A declarative, efficient, and flexible JavaScript library for building user interfaces.

  • Vue.js photo Vue.js

    🖖 Vue.js is a progressive, incrementally-adoptable JavaScript framework for building UI on the web.

  • Typescript photo Typescript

    TypeScript is a superset of JavaScript that compiles to clean JavaScript output.

  • TensorFlow photo TensorFlow

    An Open Source Machine Learning Framework for Everyone

  • Django photo Django

    The Web framework for perfectionists with deadlines.

  • D3 photo D3

    Bring data to life with SVG, Canvas and HTML. 📊📈🎉

Recommend Topics

  • javascript

    JavaScript (JS) is a lightweight interpreted programming language with first-class functions.

  • web

    Some thing interesting about web. New door for the world.

  • server

    A server is a program made to process requests and deliver data to clients.

  • Machine learning

    Machine learning is a way of modeling and interpreting data that allows a piece of software to respond intelligently.

  • Game

    Some thing interesting about game, make everyone happy.

Recommend Org

  • Facebook photo Facebook

    We are working to build community through open source technology. NB: members must have two-factor auth.

  • Microsoft photo Microsoft

    Open source projects and samples from Microsoft.

  • Google photo Google

    Google ❤️ Open Source for everyone.

  • D3 photo D3

    Data-Driven Documents codes.