Giter Site home page Giter Site logo

googlecreativelab / open-nsynth-super Goto Github PK

View Code? Open in Web Editor NEW
2.4K 142.0 269.0 11.3 MB

Open NSynth Super is an experimental physical interface for the NSynth algorithm

License: Apache License 2.0

Makefile 6.90% C++ 72.92% Python 11.94% C 3.21% Shell 5.03%

open-nsynth-super's Introduction

Open NSynth Super

Open NSynth Super with tools and designs

Open NSynth Super is an experimental physical interface for NSynth, a machine learning algorithm developed by Google Brain’s Magenta team to generate new, unique sounds that exist between different sounds. Open NSynth Super allows you to create and explore new sounds that it generates through a simple to use hardware interface that integrates easily into any musician’s production rig. To find out more, visit the NSynth Super website.

This repository contains all the instructions and files required to build an Open NSynth Super instrument from scratch, and you can use them to make your own version. Anyone can fork the code and schematics to remix the instrument in any way they wish.

About this document

This document has three chapters – an overview of the instrument itself, a 'make your own' guide, and an overview of the audio creation process.

  • The 'how it works' overview summarises the technical and user interface features of the Open NSynth Super instrument.

  • The 'make your own' guide takes you through the steps required to build an Open NSynth Super unit and load it with an example Linux image containing pre-computed sample audio, helping you to get started with the instrument straight away.

  • The audio creation overview gives a high-level summary of the audio creation pipeline, which enables you to process audio files (on a separate computer) and load the instrument with your own input sounds.

This repository also includes individual chapters on every aspect of Open NSynth Super, so you can build a unit from scratch, or hack and customise any part of it:

How it works

Open NSynth Super with audio equipment

Open NSynth Super is super simple to integrate into any production music rig. Like many other synthesizer modules, it receives MIDI input via a 5-pin DIN connector, and outputs audio through a 3.5mm jack cable. This simple interface allows it to work with almost any MIDI source, like keyboards, DAWs, or hardware sequencers.

User interface

Open NSynth Super user interface

The physical interface of Open NSynth Super is constructed around a square touch interface. Using dials in the corners of the touch surface, musicians can select four source sounds and use the touch interface to explore the sounds that the NSynth algorithm has generated between them. In addition, the instrument also has controls for tuning the new sounds via the fine controls.

(A) Instrument selectors & patch storage - These rotary dials are used to select the instruments that are assigned to the corners of the interface. In version 1.2.0, these selectors can be pushed down to store or clicked to recall settings patches.

(B) OLED display - A high-contrast display shows you the state of the instrument and additional information about the controls that you are interacting with.

(C) Fine controls - These six dials are used to further customize the audio output by the device:

  • 'Position' sets the initial position of the wave, allowing you to cut out the attack of a waveform, or to start from the tail of a newly created sound.
  • 'Attack' controls the time taken for initial run-up of level from nil to peak.
  • 'Decay' controls the time taken for the subsequent run down from the attack level to the designated sustain level.
  • 'Sustain' sets the level during the main sequence of the sound's duration, until the key is released.
  • 'Release' controls the time taken for the level to decay from the sustain level to zero after the key is released.
  • 'Volume' adjusts the overall output volume of the device.

(D) Touch interface - This is a capacitive sensor, like the mouse pad on a laptop, which is used to explore the world of new sounds that NSynth has generated between your chosen source audio.

Technical overview

Open NSynth Super system diagram

There are several distinct components to each Open NSynth Super unit: a custom PCB with a dedicated microcontroller and firmware for handling user inputs; a Raspberry Pi 3 computer running Raspbian Linux and an openFrameworks-based audio synthesiser application; and a series of scripts for preparing audio on a GPU-equipped Linux server using the NSynth algorithm. In addition to the software, firmware, and hardware, there are files for creating a casing and dials for the unit.

Hardware & firmware

The electronics are built around a Raspberry Pi 3 running Raspbian Linux, and a custom PCB used to read the inputs and control the outputs. A microcontroller on the PCB manages the physical inputs: there are four rotary encoders on the four corners for instrument selection; six potentiometers below the interface to control the position, envelope, and volume settings; and a capacitive grid on the surface of the PCB (exposed through the top layer of the case) used to select the mixing point of the four instruments.

More information on the electronics, hardware, and firmware can be found here, and here. A complete bill of materials for the case and electronics is available in this Excel spreadsheet.

Software

Open NSynth Super runs a multisampler audio application built on openFrameworks to process incoming MIDI note data and generate sound output. More information about this application can be found in the software readme file.

Case

We designed a case for the electronics that can be easily manufactured with a laser cutter, and held together with standard screws and fittings. This design is easily customisable using different materials, colors, dials, and shapes. Read more about this in the case readme file.

Audio

Audio for the Open NSynth Super instrument is produced by the NSynth algorithm. Because generating audio requires a great deal of processing power, this repository includes a set of scripts that you can run on a server which will take any audio recordings of your choice and convert them into a format compatible with the instrument. For more information, see the audio readme file or the audio creation overview in this document.

Guide: How to make Open NSynth Super

Open NSynth Super parts

This guide gives you an overview of how to create casing and electronics for Open NSynth Super, and load the device with a premade Linux image which is already set up with application software, hardware support, and example sounds.

The example image file includes the following software features:

  • Raspbian Linux Lite
  • Full configuration to support the Open NSynth Super mainboard
  • Open NSynth Super software application pre-loaded and configured
  • Sample audio data
  • A read-only filesystem for robustness

You will need the following off-the-shelf items to complete this guide:

  • Micro SD card (16GB or 64GB)
  • Raspberry Pi 3B+
  • 5V 2A micro-USB power supply

You will also need the following Open NSynth Super-specific items, which are detailed in the steps below:

  • Open NSynth Super mainboard
  • Laser cut Open NSynth Super case
  • 3D printed dials (optional)

1. Laser cut the shell

This repository contains a reference design for a laser-cut shell for Open NSynth Super. As well as the case design, there are two sizes of 3D-printed dials which can optionally be added to the build. Parts for the case can be cut manually, or obtained easily from a laser-cutting service by supplying these files. More detailed information and specifications for the case can be found in the case readme file.

You should make or order a case following the above guide before moving forward with the build. Don't assemble the case yet, as you will need access to the ports on the Raspberry Pi.

2. Manufacture and assemble the PCB

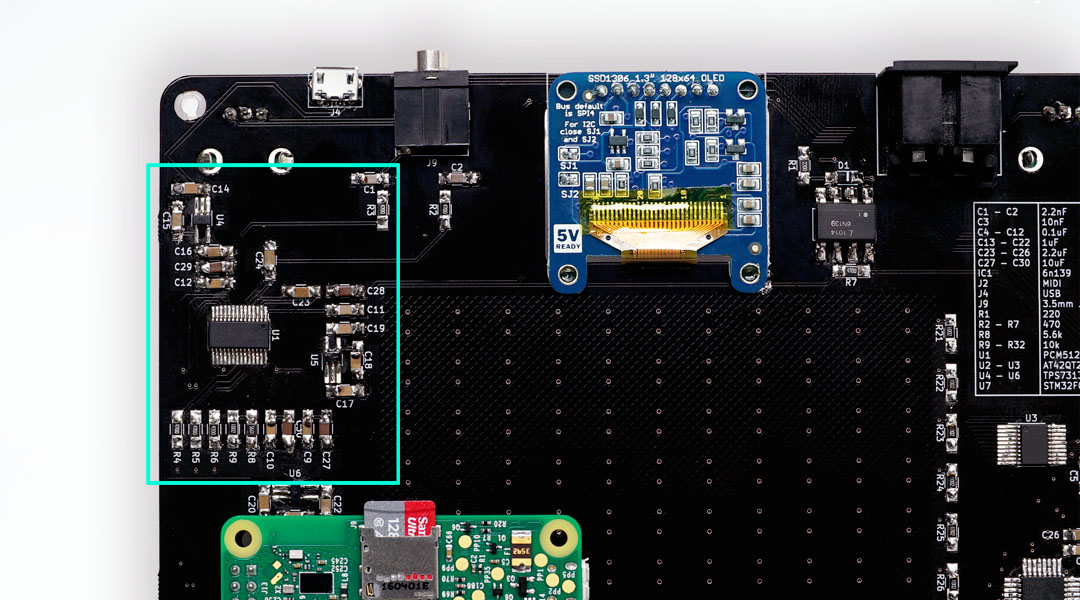
Open NSynth Super is built around a custom PCB with inputs for the hardware controls, audio and data I/O ports, and an OLED display for the UI. The PCB can be ordered fully assembled (this is most cost effective when ordering several boards), or be assembled by hand in a few hours. Further detail on the manufacture and assembly of the board can be found in the PCB readme file.

You will need to obtain or build your PCB before proceeding further with this guide.

In order to test the board, you will need to have a working Open NSynth Super software installation, which you will prepare at the next step. Before proceeding, connect the Raspberry Pi GPIO pins to the Open NSynth Super mainboard.

3. Prepare the SD card

There are two preconfigured OS images available, both loaded with sample audio and fully configured for use with NSynth Super. Depending on the size of your SD card, you can choose either the 64GB image or 16GB image.

The easiest way to create the SD card is to use GUI software like Etcher, Win32DiskImager, or the SD Card Association's formatter to burn the example image to a card.

The supplied images are compressed in bz2 format. These can be decompressed on the fly when writing to an SD card using the following command:

$ bzcat <IMAGE NAME> | sudo dd of=<DISK NAME>

Connect a keyboard and screen to the Raspberry Pi, insert the SD card, and plug a USB power cable into the socket on the Open NSynth Super mainboard. You should see the Pi booting up on the connected display; when you receive a prompt, you can login with the default username and password: pi / raspberry. Note that the device might run a file system check when you first boot up from the new card – this will take about 5 minutes depending on the size of the disk.

4. Install the firmware

The firmware will need to be loaded to the microcontroller on your Open NSynth Super mainboard. This allows the software application running on the Raspberry Pi to interact with the controls.

Because the file system is locked for robustness, you will need to remount the disk as read/write by running the following command on your Raspberry Pi:

$ sudo mount -o remount,rw /

Next, navigate to the firmware directory and run the install command:

$ cd /home/pi/open-nsynth-super-master/firmware/src
$ make install

This command will build and install the firmware to the microcontroller. You will receive a message on screen confirming the operation has been successful:

** Programming Started **
auto erase enabled
Info : device id = 0x10006444
Info : flash size = 32kbytes
wrote 12288 bytes from file ../bin/main.elf in 0.607889s (19.740 KiB/s)
** Programming Finished **
** Verify Started **
verified 11788 bytes in 0.050784s (226.680 KiB/s)
** Verified OK **
** Resetting Target **
adapter speed: 1001 kHz
shutdown command invoked

More detailed information about the firmware can be found in the firmware readme file. When the firmware installation is complete, you can power down the system using the following command, and move to the next step:

$ sudo poweroff

5. Verify the installation

Before assembling the shell and 'finishing' the instrument, it's important to check that everything is functioning correctly. To do this, plug in a MIDI device (like a keyboard), a pair of headphones or speakers, and power on the instrument.

After a few seconds, you should see the grid interface appear on the OLED screen. Move your finger around the touch interface to test its responsiveness. Next, adjust the six controls at the base of the unit; the UI should update according to the control that you are adjusting. Finally, test the four instrument selection encoders, which will scroll through an instrument list on the screen.

To test the audio, ensure your MIDI device is broadcasting on channel 1 (the default channel), and send some notes to the device. You should hear audio coming from the speakers or headphones (if you don't hear anything, make sure the device audio is turned up, and that the envelope and position controls aren't cutting the audible part of the waveform).

Because the standard image is preconfigured, you can use it to test that your Open NSynth Super mainboard is functioning correctly. If all features are up and running, you can move on to final assembly.

6. Assemble the shell

Now that you have a fully functioning instrument, you can finally build it into its shell. Power the unit down, remove all connections (e.g. screen, keyboard, MIDI, power), and follow the instructions found here.

Open NSynth Super case

7. Play with Open NSynth Super

With the case assembled, firmware installed, and the device tested, you're ready to go and make music with your Open NSynth Super. There are detailed readmes in this repository for the software application, case, PCB and audio creation pipeline if you want to go into more detail, or start hacking the device.

Audio creation overview

Sounds for Open NSynth Super are created using the neural synthesis technique implemented by Google Brain’s Magenta team as part of their NSynth project. You can read more about Magenta and NSynth on their project page.

Because generating audio requires a great deal of processing power, this repository includes a set of scripts that you can run on a server which will take any audio recordings of your choice and convert them into a format compatible with the instrument. This audio pipeline is built on top of the NSynth implementation available through Magenta's GitHub page.

The pipeline has the following stages:

  1. Assemble input audio files and assign sounds to corners of the interface
  2. Calculate the embeddings of the input sounds with the NSynth model
  3. Interpolate between these to create a set of embeddings for newly generated sounds
  4. Generate the audio
  5. Remove crackles and other artifacts from the generated audio
  6. Package and deploy the audio to the device

More detailed instructions on how to run the pipeline, including how to set up and provision a GPU-equipped Linux server for processing audio, are available here.


Changelog

Version 1.2.0

The latest version of Open NSynth Super is 1.2.0. This version adds support for storage and recall of patches and settings, swaps the instrument selector encoders for push-button variants, and introduces note looping to enable sustaining notes beyond their original sample length. Version 1.2.0 software is backwards compatible with version 1.0.0 hardware, although the push-button patch storage feature is not available.

Version 1.0.0

Version 1.0.0 is tagged in this repository. The example disk images for software version 1.0.0 are available for download as a 64GB image or 16GB image.


Notes

This is a collaborative effort between Google Creative Lab and Magenta, Kyle McDonald, and our partners at RRD Labs. This is not an official Google product.

We encourage open sourcing projects as a way of learning from each other. Please respect our and other creators’ rights, including copyright and trademark rights when present when sharing these works and creating derivative work. If you want more info on Google's policy, you can find it here. To contribute to the project, please refer to the contributing document in this repository.

open-nsynth-super's People

Contributors

damian0815 avatar kichiki avatar kylewerle avatar nsynthsuper avatar

Stargazers

 avatar  avatar  avatar  avatar  avatar  avatar  avatar  avatar  avatar  avatar  avatar  avatar  avatar  avatar  avatar  avatar  avatar  avatar  avatar  avatar  avatar  avatar  avatar  avatar  avatar  avatar  avatar  avatar  avatar  avatar  avatar  avatar  avatar  avatar  avatar  avatar  avatar  avatar  avatar  avatar  avatar  avatar  avatar  avatar  avatar  avatar  avatar  avatar  avatar  avatar  avatar  avatar  avatar  avatar  avatar  avatar  avatar  avatar  avatar  avatar  avatar  avatar  avatar  avatar  avatar  avatar  avatar  avatar  avatar  avatar  avatar  avatar  avatar  avatar  avatar  avatar  avatar  avatar  avatar  avatar  avatar  avatar  avatar  avatar  avatar  avatar  avatar  avatar  avatar  avatar  avatar  avatar  avatar  avatar  avatar  avatar  avatar  avatar  avatar  avatar

Watchers

 avatar  avatar  avatar  avatar  avatar  avatar  avatar  avatar  avatar  avatar  avatar  avatar  avatar  avatar  avatar  avatar  avatar  avatar  avatar  avatar  avatar  avatar  avatar  avatar  avatar  avatar  avatar  avatar  avatar  avatar  avatar  avatar  avatar  avatar  avatar  avatar  avatar  avatar  avatar  avatar  avatar  avatar  avatar  avatar  avatar  avatar  avatar  avatar  avatar  avatar  avatar  avatar  avatar  avatar  avatar  avatar  avatar  avatar  avatar  avatar  avatar  avatar  avatar  avatar  avatar  avatar  avatar  avatar  avatar  avatar  avatar  avatar  avatar  avatar  avatar  avatar  avatar  avatar  avatar  avatar  avatar  avatar  avatar  avatar  avatar  avatar  avatar  avatar  avatar  avatar  avatar  avatar  avatar  avatar  avatar  avatar  avatar  avatar  avatar  avatar

open-nsynth-super's Issues

05_clean_files.py fails with audioread.NoBackendError

Run on a 2x GPU system with 4x instruments per corner. Completes fine with one batch and not the other. Guess the error is misleading...

@jesseengel, wondering if you've seen this? (and doesn't seem like anyone else is watching this repo!)

//

(magenta) andrew@blast:/data/Liles/nsynth/open-nsynth-super/audio/workdir$
(magenta) andrew@blast:/data/Liles/nsynth/open-nsynth-super/audio/workdir$ python 05_clean_files.py 1
Normalising input WAVs
2%|█▊ | 992/57784 [03:26<3:16:57, 4.81it/s]100%|█████████████████████████████████████████████████████████████████████████████████████████████████████████| 57784/57784 [3:24:43<00:00, 4.70it/s]
Converting to WAV
100%|█████████████████████████████████████████████████████████████████████████████████████████████████████████| 104431/104431 [41:26<00:00, 42.00it/s]
(magenta) andrew@blast:/data/Liles/nsynth/open-nsynth-super/audio/workdir$
(magenta) andrew@blast:/data/Liles/nsynth/open-nsynth-super/audio/workdir$ python 05_clean_files.py 0
Normalising input WAVs
27%|█████████████████████████████▊ | 15537/57784 [58:29<2:39:03, 4.43it/s]sox WARN gain: gain clipped 63999 samples; decrease volume?
sox WARN dither: dither clipped 56045 samples; decrease volume?
28%|███████████████████████████████ | 16454/57784 [1:01:56<2:35:35, 4.43it/s]sox WARN gain: gain clipped 63902 samples; decrease volume?
sox WARN dither: dither clipped 56048 samples; decrease volume?
70%|███████████████████████████████████████████████████████████████████████████▉ | 40228/57784 [2:31:36<1:06:09, 4.42it/s]sox WARN gain: gain clipped 64000 samples; decrease volume?
sox WARN dither: dither clipped 55997 samples; decrease volume?
81%|█████████████████████████████████████████████████████████████████████████████████████████▌ | 46647/57784 [2:55:49<41:58, 4.42it/s]Traceback (most recent call last):
File "05_clean_files.py", line 46, in
audio, sr = librosa.core.load(os.path.join(original_path, fpath), sr=16000)
File "/data/Liles/nsynth/miniconda2/envs/magenta/lib/python2.7/site-packages/librosa/core/audio.py", line 112, in load
with audioread.audio_open(os.path.realpath(path)) as input_file:
File "/data/Liles/nsynth/miniconda2/envs/magenta/lib/python2.7/site-packages/audioread/init.py", line 116, in audio_open
raise NoBackendError()
audioread.NoBackendError

Encoder pins don't match

Since I can't find PEC11R-4315F-N0012-ND, I use PEC11R-4315F-S0012-ND as encoders(also works according to the instruction). However, the encoders have 5 pins with 3 on one side and 2 on the other, while there are only 3 cutouts on the board. I looked at the PCB image and found that the demo board has 3 pins as well. How do I deal with this? Can I just cut off the extra 2 pins of the encoders?

Can't access SD card in linux

I am trying to build the OS in a 64GB SD card under Ubuntu 17.10 but get errors when I try to access the card:

fdisk: cannot open /dev/nvme0n1: Permission denied
fdisk: cannot open /dev/sda: Permission denied

I looked for solutions but doesn't get much help. One solution suggests I add myself into the group that denies my permission, but the group "nvme0n1" doesn't even exist. Does anyone know how to solve the issue? Moreover, is there an easy way to build the OS in the SD card for Windows user? I have a Surface Book 2 and the Ubuntu installed in my laptop is very unstable.

OLED screen won't turn on.

I have tried resoldering the jumpers and the pins but nothing is powering it. Nsynth makes noise when plugged into my MPC. So I know that at least works. Any ideas? Is there a firmware for the OLED that I am maybe missing?

Close GUI elements to use CLI

How can I close the GUI OLED elements to use the CLI on boot? ps, and top don't allow me to see all processes as the GUI is overlayed on top of the CLI with a large surrounding black box.

Touchscreen

Hi there, I can see a massive difference between this model and the one posted by Google which is the touchscreen is missing from this design. Is there a way to include the touchscreen from adafruit instead of the capacitative pad?

Gracefully shutdown the nsynth raspberry

Once the device is up&running as a standalone synth, is there any way or guideline to gracefully invoke the raspberry shutdown from the hardware user interface?

Chinese OLED display instead of adafruit?

I noticed in the hardware folder that display communicates via i2c, does that mean we could actually use a generic i2c OLED instead of the 20$ adafruit one? As long as we solder the 4 pins in the right place it should work, right?

PCB table lists all components except D1

The table of reference codes for the surface mount components printed on the back of the pcb contains every component except the diode, which is listed as D1. There's an unlisted connection labeled D1 to the right of the display. The below image shows the D1 connection at the top right and the list on the far right.

PCB closeup

Can't setup network

When trying to use sudo wpa_cli it hangs 'Could not connect to wpa_suplicant:wlan0 - re-trying`. When I trace the wpa_cli I see it repeating that it's a read-only file system.

Do we need to set up an new wpa_supplicant.conf someplace outside the locked image?


Was able to connect by remounting and editing the wpa config. Maybe instruction change?

Midi real-time bytes cause the app's midi thread to shut down

The Midi thread currently misinterprets "system real-time" messages (which may be inserted into the midi byte stream at any point) as malformed data and exits. This makes nsynth unusable in a production environment where midi clock messages are used to keep devices in sync.

ref: http://www.lim.di.unimi.it/IEEE/MIDI/SOT3.HTM "Real Time messages can be sent at any time and may be inserted anywhere in a MIDI data stream, including between Status and Data bytes of any other MIDI messages."

Odd grid behavior

After building, installing, and successively testing the board with the Raspberry Pi 3 model B connected to a monitor, I shut down the system and tested the board in standalone mode. For some reason, the y-coordinate becomes “stuck” on the third row from the bottom, and by stuck, I mean that it’s quite difficult (but not impossible) to coax the grid indicator on the panel to move up or down to another y-coordinate by pressing on another row for a few seconds (the x-coordinate works fine).

On a whim, I plugged in the HDMI cable again, and the grid started working normally (and back to ‘sticky’ grid behavior when the cable is unplugged). I tried the 64GB image, but it had the same issue. It’s almost as if there’s an imaginary line on the 3rd-last row that make it difficult to cross when nothing is plugged into the HDMI port (unplugging or plugging in the mouse and keyboard had no effect).

Had anyone had the same odd grid behaviour? Could it have something to do with the model B and/or video driver? I double-checked the grid behaviour right to the IC pins with a scope and can’t see anything unusual between working and not working modes, which makes me think it’s software-related.

Colour touch LCD version

Are you likely to publish schematics for the model in the demo video with the colour touch LCD display? Although I appreciate the model here is designed to be simpler to build, having such a large display makes the thing look even more awesome, so if it weren't too expensive to do I'd love to give that model a try.

Cheers,
Rob

nsynth_generate fails with Abseil error (audio generation docs need updating)

Followed audio generation instructions and everything went fine until I got to executing nsynth_generate which, with or without arguments, fails with:

andrew@blast:/data/Liles/nsynth/open-nsynth-super/audio/workdir$ nsynth_generate
WARNING:tensorflow:From /usr/local/lib/python2.7/dist-packages/magenta/models/nsynth/wavenet/masked.py:116: init (from tensorflow.python.ops.init_ops) is deprecated and will be removed in a future version.
Instructions for updating:
Use tf.initializers.variance_scaling instead with distribution=uniform to get equivalent behavior.
Traceback (most recent call last):
File "/usr/local/bin/nsynth_generate", line 7, in
from magenta.models.nsynth.wavenet.nsynth_generate import console_entry_point
File "/usr/local/lib/python2.7/dist-packages/magenta/models/nsynth/wavenet/nsynth_generate.py", line 28, in
tf.app.flags.DEFINE_string("npy_only", False, "If True, use only .npy files.")
File "/usr/local/lib/python2.7/dist-packages/tensorflow/python/platform/flags.py", line 58, in wrapper
return original_function(*args, **kwargs)
File "/usr/local/lib/python2.7/dist-packages/absl/flags/_defines.py", line 241, in DEFINE_string
DEFINE(parser, name, default, help, flag_values, serializer, **args)
File "/usr/local/lib/python2.7/dist-packages/absl/flags/_defines.py", line 81, in DEFINE
DEFINE_flag(_flag.Flag(parser, serializer, name, default, help, **args),
File "/usr/local/lib/python2.7/dist-packages/absl/flags/_flag.py", line 107, in init
self._set_default(default)
File "/usr/local/lib/python2.7/dist-packages/absl/flags/_flag.py", line 196, in _set_default
self.default = self._parse(value)
File "/usr/local/lib/python2.7/dist-packages/absl/flags/_flag.py", line 169, in _parse
'flag --%s=%s: %s' % (self.name, argument, e))
absl.flags._exceptions.IllegalFlagValueError: flag --npy_only=False: flag value must be a string, found "<type 'bool'>"

Any suggestions as to a remedy would be much appreciated!

python 01_compute_input_embeddings.py fails.

Failing at the first hurdle in creating audio with:

2018-05-30 10:23:08.563832: I tensorflow/core/common_runtime/gpu/gpu_device.cc:1053] Created TensorFlow device (/job:localhost/replica:0/task:0/device:GPU:0 with 10413 MB memory) -> physical GPU (device: 0, name: GeForce GTX 1080 Ti, pci bus id: 0000:06:00.0, compute capability: 6.1)
INFO:tensorflow:Unexpected error happened: Negative dimension size caused by subtracting 1 from 0 for 'Conv2D_2' (op: 'Conv2D') with input shapes: [1,1,0,128], [1,1,128,128]..

I have 2 instruments assigned per corner and all the WAV files look good according to soxi output.

What does position do?

More a question than an issue. I'm looking through the code trying to understand how the Multisampler works.

What does the parameter position (in some parts referred to as offset when multiplied with ncols) do? I can deduce it can be changed by the first potentiometer, but still can't wrap my head around how it changes the synth.

Potentiometers instead of rotary encoders ?

Hi !

I'm wondering if it could be possible to put some potentiometers instead of the 4 rotary encoders in the corners (the good reference is impossible to find on the internet and I had the one with 2 more arms -or could I cut them ?- )

Thanks !

Midi input troubleshooting

I'm desperate for some help. I completed build a few days ago and have been unable to resolve the issue on my own. I cannot get any sounds to be made with my synth. I ran a sound test through a command and was able to hear noise out of the headphone jack. That leads me to believe that no Midi signal is reaching the device. I tried using the 64 and 16 GB preconfigured images. With both, everything else appears to function just by plugging the imaged card into my system. The screen functions and shows an expected response when each dial is turned. On the Midi connection, I have tried plugging in a keyboard with 5 pin end on each side (no USB involved) and also tried playing some notes out of a couple of DAWs installed on my PC and connecting with a USB to Midi cable. Are there any diagnostics that I can run to see if a signal is even being received? Is there something additional I needed to do in first setup of the software? Perhaps something else basic that I missed? I don't have much knowledge in this area, so I won't be offended by any suggestions. Thanks in advance!

Lots of missed MIDI notes

My Open NSynth Super plays only a fraction of the notes that I play on my MIDI keyboard. Most of them are missed and do not result in any sound. Does anybody else have the same issue? Any ideas what the problem could be?
Also, selecting some of the sounds like, for example, "El. Tom", "Snare", or "Vox. Hit" does not result in any audible sound whatsoever. Any clues?

Playback open error

I am so close to getting this working. Even though my display wont power on, I can use the HDMI port on the pi to check everything out. Nsynth is running, and all the knobs + touchpad work. When I run the speaker-test, however, I get an error:

Playback open error: -16, Device or resource busy

Any ideas on what could be causing this?

Thanks

compute input embeddings error: "no such file or directory"

running $ python 01_compute_input_embeddings.py from ~/open-nsynth-super/audio/workdir to test the pipeline gives me an OSError: [Errno 2] No such file or directory

I split up the subprocess.call to get a more specific line, though I don't think that worked (it breaks on the last line regardless).

Traceback:

Traceback (most recent call last):
  File "01_compute_input_embeddings.py", line 31, in <module>
    subprocess.call(["nsynth_save_embeddings", "--checkpoint_path=%s/magenta/models/nsynth/wavenet-ckpt/model.ckpt-200000" % settings['magenta_dir'], "--source_path=%s/audio_input" % source_dir, "--batch_size=64", "--save_path=%s/embeddings_input" % source_dir])
  File "/usr/lib/python2.7/subprocess.py", line 523, in call
    return Popen(*popenargs, **kwargs).wait()
  File "/usr/lib/python2.7/subprocess.py", line 711, in __init__
    errread, errwrite)
  File "/usr/lib/python2.7/subprocess.py", line 1343, in _execute_child
    raise child_exception
OSError: [Errno 2] No such file or directory

all folders exist and are readable, writeable and executable by current user

I think it might have to do something with the wavenet-ckpt folder which contains checkpoint, model.ckpt-200000.data-00000-of-00001, model.ckpt-200000.index and model.ckpt-200000.meta but no model.ckpt-200000

MIDI over USB

I would like to send MIDI over USB from a Traktor Pro Remix Deck (in step sequence or one-shot mode) to be able to use the NSynth Super in a live environment while DJ'ing.

Is it possible to send MIDI over USB? Or do I have to use the 5-pin DIN port? If this is currently not possible, could it be added using an openFrameworks package?
I couldn't find anything about it in the docs, and would try myself, but I'm currently waiting for the PCB to arrive.

Cannot feed value of shape (36,125,16) for Tensor 'encoding:0'

I am trying to run the pipeline on a OSX system and running into this error on the 4th Generate audio
step:

File "/anaconda3/lib/python3.6/site-packages/tensorflow/python/client/session.py", line 1111, in _run
str(subfeed_t.get_shape())))
ValueError: Cannot feed value of shape (36, 125, 16) for Tensor 'encoding:0', which has shape '(36, 16)'

I've also tried this on a windows 10 system and running into the same error.

Any ideas?

Cheers!

Software version (that runs in browser)

Love this project, thanks for sharing!

As much as I admire having a physical device I was wondering, how hard it would be to make this work in software only. Would be nice to play with this without having to go through the process of actually building the hardware.

Would that be hard to achieve?
Has anyone looked into that possibility?

Multidimensional Polyphonic Expression (MPE) Support?

I'm on a waitlist to order a PCB to build an NSynth Super at the moment so it may be a bit before I'm able to test this, but I'm curious whether MPE is supported by this?

If not familiar, this is a new specification recently adopted by MIDI and allows multidimensional controllers such as the LinnStrument and Seaboard to add pitch bends, vibrato, etc to individual notes rather than the all of the notes played simultaneously.

If not currently an option, I'd love to see it in a future addition to the hardware/software 👍

Here is a link to MIDI's release on the standard for more info:
https://www.midi.org/articles/midi-polyphonic-expression-mpe

Oled screen turns off after a few seconds

I turn on my nsynth; no midi plugged in; audio plugged in; and power;

oled screen turns on; works a little while; and turns off.

I tried debugging by running the app manually, and poking around, but could use some help as to where to poke next

Error in bash nsynth-setup.sh

Hi there,
I'm building one of these and following along with the readme: https://github.com/googlecreativelab/open-nsynth-super/blob/master/linux/readme.md

I'm having an issue on Step 6. All other steps were completed without error. However, on the Raspberry Pi when executing
$ bash nsynth-setup.sh

I receive four errors:
line 11: $'\r': command not found
line 12: $'\r: command not found
line 13: syntax error near unexpected token '$' {\r''
line 13: 'setup_audio() {

and then it returns...

One thing that it different from the instructions is that i've copied over the directory structure open-nsynth-super/ and not open-nsynth-super-master/ as I've been unable to locate that...?

Any help would be most appreciated.

can't install the firmware "no such file or directory"

Hi !

I'm trying to install the firmware on the raspberry.
Nothing happens when I run "sudo mount -o remount,rw /"
And if I try to run "cd home/pi/open-nsynth-super-master/firmware/src" then it says "No such file or directory".

I tried already to set the image on the micro SD again, but nothing changed.

Does anyone know ?

directory discrepency in onss_1.1_full.img

Hi! Great project! The build was really fun, hope I didn't mess it up. 😜So I wrote 'onss_1.1_full.img' to a 64GB card and tried to follow the instructions in the firmware installation section of the make guide. It tells me:

Next, navigate to the firmware directory and run the install command:

$ cd /home/pi/open-nsynth-super-master/firmware/src
$ make install

Problem is I can't find the directory 'open-nsynth-super-master' anywhere on the card. I found 'open-nsynth-super' -- which leads down the same hierarchy of directories -- but when I 'make install' from there, I get an error: "could not intialize the debug port."

Any thoughts? Thanks in advance!!

Midi real-time bytes cause the app's midi thread to shut down

The Midi thread currently misinterprets "system real-time" messages (which may be inserted into the midi byte stream at any point) as malformed data and exits. This makes nsynth unusable in a production environment where midi clock messages are used to keep devices in sync.

ref: http://www.lim.di.unimi.it/IEEE/MIDI/SOT3.HTM "Real Time messages can be sent at any time and may be inserted anywhere in a MIDI data stream, including between Status and Data bytes of any other MIDI messages."

make it work with raspberry pi 3 b+ and latest openframework

Set up the rpi 3 b+

get nsyth from git

$ wget https://codeload.github.com/googlecreativelab/open-nsynth-super/zip/master
$ unzip master && rm master

Set up the firmeware

$ cd /home/pi/open-nsynth-super-master/firmware/
$ unzip en.stm32cubef0.zip 
  • get the depencies
    $ cd /home/pi/open-nsynth-super-master/firmware/utils && sudo ./install_dependencies.sh
    -> this takes a while

  • don't do this $ mv STM32Cube_FW_F0_V1.9.0 cube it gives then the error
    make: *** No rule to make target '../STM32Cube_FW_F0_*/Drivers/CMSIS/Device/ST/STM32F0xx/Source/Templates/gcc/startup_stm32f030xc.s', needed by '../bin/main.elf'. Stop.

  • flash chip
    $ make install

sudo /home/pi/open-nsynth-super/firmware/openocd/bin/openocd --file openocd.cfg --command "program ../bin/main.elf verify reset exit"
Open On-Chip Debugger 0.10.0 (2018-05-14-21:26)
Licensed under GNU GPL v2
For bug reports, read
	http://openocd.org/doc/doxygen/bugs.html
BCM2835 GPIO nums: swclk = 25, swdio = 24
BCM2835 GPIO config: srst = 23
srst_only separate srst_gates_jtag srst_push_pull connect_deassert_srst
adapter speed: 1000 kHz
adapter_nsrst_delay: 100
srst_only separate srst_nogate srst_push_pull connect_deassert_srst
cortex_m reset_config sysresetreq
srst_only separate srst_nogate srst_push_pull connect_deassert_srst
adapter_nsrst_delay: 100
adapter_nsrst_assert_width: 100
Info : BCM2835 GPIO JTAG/SWD bitbang driver
Info : SWD only mode enabled (specify tck, tms, tdi and tdo gpios to add JTAG mode)
Info : clock speed 1001 kHz
Info : SWD DPIDR 0x0bb11477
Info : stm32f0x.cpu: hardware has 4 breakpoints, 2 watchpoints
Error: stm32f0x.cpu -- clearing lockup after double fault
Polling target stm32f0x.cpu failed, trying to reexamine
Info : stm32f0x.cpu: hardware has 4 breakpoints, 2 watchpoints
    TargetName         Type       Endian TapName            State       
--  ------------------ ---------- ------ ------------------ ------------
 0* stm32f0x.cpu       cortex_m   little stm32f0x.cpu       halted
adapter speed: 1001 kHz
target halted due to debug-request, current mode: Thread 
xPSR: 0xc1000000 pc: 0xfffffffe msp: 0xfffffffc
adapter speed: 1001 kHz
target halted due to debug-request, current mode: Thread 
xPSR: 0xc1000000 pc: 0xfffffffe msp: 0xfffffffc
adapter speed: 4061 kHz
** Programming Started **
auto erase enabled
Info : device id = 0x10006444
Info : flash size = 32kbytes
wrote 12288 bytes from file ../bin/main.elf in 0.614188s (19.538 KiB/s)
** Programming Finished **
** Verify Started **
verified 11788 bytes in 0.050718s (226.975 KiB/s)
** Verified OK **
** Resetting Target **
adapter speed: 1001 kHz
shutdown command invoked

copy audio files

Set up latest openframework from git

  • get latest openframeworks from git
    $ cd ~ && mkdir opt/ && cd opt/ && git clone --depth=1 https://github.com/openframeworks/openFrameworks.git
  • rename the openframeworks folder to be compatible with manual
    $ mv openFrameworks of
  • get openframeworks dependencies
    $ cd of/scripts/linux/debian && sudo ./install_dependencies.sh
  • get libs for openframeworks
    $ cd ~/opt/of/scripts/linux && download_libs.sh
  • copy the files from https://github.com/googlecreativelab/open-nsynth-super/tree/master/app/open-nsynth to $ mkdir /home/pi/opt/of/apps/open-nsynth && cp -r /home/pi/open-nsynth-super-master/app/open-nsynth /home/pi/opt/of/apps/open-nsynth/
  • replace in the code Poco::FastMutex with std::mutex -> this is in various files
  • add ofxPoco to addons.make
  • build the app in ~/opt/of/apps/open-nsynth/open-nsynth with
    $ make -j4 -> this takes a while
  • get the settings.json in the right place https://github.com/googlecreativelab/open-nsynth-super/tree/master/linux#4-copy-audio-files
  • test if it's running with
    $ bin/open-nsynth

get nsynth dependencies

$ cd ~/open-nsynth-super-master/linux

  • edit ./nsynth-setup.sh and edit the section replace every gstreamer0.10 with gstreamer1.0
install_deps() {
    apt-get update
    apt-get install -y i2c-tools python-smbus gdb-arm-none-eabi gcc-arm-none-eabi \
        git autoconf libtool make pkg-config build-essential \
        libcairo-dev gstreamer1.0-dev gstreamer1.0-x \
        gstreamer1.0-plugins-base-apps gstreamer1.0-alsa \
        libudev-dev libsndfile-dev libopenal-dev libssl-dev \
        gstreamer1.0-plugins-good gstreamer1.0-plugins-bad \
        gstreamer-plugins-base0.10-dev freeglut3-dev libasound2-dev \
        libxmu-dev libxxf86vm-dev libgl1-mesa-dev libglu1-mesa-dev \
        libraw1394-dev libudev-dev libdrm-dev libglew-dev libopenal-dev \
        libsndfile-dev libfreeimage-dev libcairo2-dev libfreetype6-dev \
        libssl-dev libpulse-dev libusb-1.0-0-dev libopencv-dev \
        libegl1-mesa-dev libgles1-mesa-dev libgles2-mesa-dev libassimp-dev \
        librtaudio-dev libboost-filesystem-dev
}
  • remove the follow section:
setup_openframeworks() {
    if ! [ -e /home/pi/opt/of ]
    then
        echo "Fetching openFrameworks"
        mkdir -p /home/pi/opt
        (
            cd /home/pi/opt
            curl http://openframeworks.cc/versions/v0.9.8/of_v0.9.8_linuxarmv6l_release.tar.gz | tar -xzf -
            mv of_v0.9.8_linuxarmv6l_release of
            #sudo of/scripts/linux/debian/install_dependencies.sh
        )
    fi
}
  • run it $ sudo sh ./nsynth-setup.sh
  • reboot $ sudo reboot

Converting binary audio files into sound

Looking to port some of these ideas to other platforms (i.e. iOS). Downloaded the "lite" audio binary files and the respective settings.json.

Looked through some of the source code, but got a little confused in the process. Can someone walk me through the process of using the binary audio files to generate a sound wave given an X, Y pair on the touchscreen plane?

Thanks.

Pipeline on server without GPU

Can I run sound creating pipeline on a server without a GPU? I understand that the process will be long, but I do not have access to a server with a GPU.

Compatible with Raspberry Pi 2?

Hi guys, I already bought a Pi 2 because I found it cheap on craigslist, but I later realised this project calls for a RP 3. Is there anyway I can make it work or did I just throw money out the window? Cheers!

Maximum Resolution for Capacitive Grid

Currently the capacitive touch grid is mapped to 0-10 or a point per touch IC sensor on each axis.

Is it possible to map the cap touch grid to a higher resolution?
Looking at the datasheet for the ICs suggests it is possible for much higher resolution with triangular trace designs.

Help...

Hi experts,
OK built my unit,,,,

I have loaded the SD card with the image , booted and get presented with this image of lots of colours but it goes no further , any advice please

img_4968

Jack 3,5mm doesn't fit into the PCB

My PCB (ordered on Tindle) doesn't have the right holes (not like on the picture) to put the 3,5mm audio jack !

Does anyone had the same problem ?

Thanks !

Audio fades out

After having played the Open NSynth Super for minutes, the volume starts fading out gradually (over perhaps 30 seconds or so) until I don't hear anything anymore. Adjusting the volume pot has no effect as does adjusting the volume in the ALSA Mixer. When terminating the Open NSynth Super process and playing some audio file via the aplay command, it plays perfectly fine. When I restart Open NSynth Super afterwards it works fine again (for another couple of minutes). Does anybody have any idea what might be going on?

Try to generate audio...

I try to generate the audio files but it fails at the command :

nsynth_generate --checkpoint_path=/home/user/magenta/magenta/models/nsynth/wavenet-ckpt/model.ckpt-200000 --source_path=/home/user/nsynth-pipeline/workdir/embeddings_batched/batch0 --save_path=/home/user/nsynth-pipeline/workdir/audio_output/batch0 --batch_size=512 --alsologtostderr --gpu_number=0

With the output log (it stops running after) :

WARNING:tensorflow:From /usr/local/lib/python2.7/dist-packages/magenta/models/nsynth/wavenet/masked.py:116: init (from tensorflow.python.ops.init_ops) is deprecated and will be removed in a future version.
Instructions for updating:
Use tf.initializers.variance_scaling instead with distribution=uniform to get equivalent behavior.

Can't understand why...

NOTE : I have all the files in embeddings_batched and embeddings_input folders, but just empty directories (batch0, ..., batch15) in audio_output

Raspberry Pi mounting

I've been going through the documentation to see how the Raspberry Pi needs to be mounted, but I couldn't find any pictures. Everything else, like the OLED, the enclosure and all the mechanical parts is very well documented (hats off!), but it seems to be missing for the R Pi.

Recommend Projects

  • React photo React

    A declarative, efficient, and flexible JavaScript library for building user interfaces.

  • Vue.js photo Vue.js

    🖖 Vue.js is a progressive, incrementally-adoptable JavaScript framework for building UI on the web.

  • Typescript photo Typescript

    TypeScript is a superset of JavaScript that compiles to clean JavaScript output.

  • TensorFlow photo TensorFlow

    An Open Source Machine Learning Framework for Everyone

  • Django photo Django

    The Web framework for perfectionists with deadlines.

  • D3 photo D3

    Bring data to life with SVG, Canvas and HTML. 📊📈🎉

Recommend Topics

  • javascript

    JavaScript (JS) is a lightweight interpreted programming language with first-class functions.

  • web

    Some thing interesting about web. New door for the world.

  • server

    A server is a program made to process requests and deliver data to clients.

  • Machine learning

    Machine learning is a way of modeling and interpreting data that allows a piece of software to respond intelligently.

  • Game

    Some thing interesting about game, make everyone happy.

Recommend Org

  • Facebook photo Facebook

    We are working to build community through open source technology. NB: members must have two-factor auth.

  • Microsoft photo Microsoft

    Open source projects and samples from Microsoft.

  • Google photo Google

    Google ❤️ Open Source for everyone.

  • D3 photo D3

    Data-Driven Documents codes.