simple-app's People
Contributors

Watchers

simple-app's Issues
[筆記] 實作一個簡易 To Do App( 將資料存進 MongoDB)
將資料存進 MongoDB
// 第一部分
let express = require("express");
let mongodb = require("mongodb");
let app = express();
let db;

// 第二部分
let connectionString = ''
mongodb.connect(connectionString, {useNewUrlParser: true, useUnifiedTopology: true }, function(err, client) {
  db = client.db()
})

// 第三部分
app.post("/create-item", function(req, res) {

  db.collection("items").insertOne({text: req.body.item}, function() {

    res.send("Thanks for submitting the form.")
  })
});
第一部分:
先載入 mongodb 模組
$ npm install mongodb
- 引入模組
- 宣告一個變數 db
第二部分:
連接到 mongodb
db = client.db():把資料庫內容存進先前我們宣告過的變數 db- 將
app.listen(3000)寫進mongodb.connect(...)裡面。如此一來,確保變數 db 可以使用時,再進行 listen 的動作 let connectionString = ''雙引號內請看下方關於 connectionString 這個參數
第三部分:
- post 請求 create-item
- 當有 create-item 的請求時,綁定 MongoDB 的 items 這個先前創建的 collection,然後新增一筆資料 {text: req.body.item} 進去剛剛綁定的 items 。
- 此時資料進去資料庫後,才執行「Thanks for submitting the form.」這個回應
假如把 res.send("Thanks for submitting the form.") 拿出 insertOne() 外面,會因為存進資料庫的時間比較慢,而先出現「Thanks for submitting the form.」這個回應
connectionString
我們現在要來填寫 connectionString。至於為什麼要填寫?我的理解是,連接到 mongodb 資料庫的伺服器,需要我們的密碼及地址,現在我們就來找出這個 connectionString
- 登入 mongodb
- 找到 cluster
- 點擊 connect 這個按鈕
- 在 whitelist your connection IP address,選 Add a Different Ip Address
- Ip Address 填 0,0,0,0/0,告訴 Atlas 伺服器接受任何 Ip Address。但這並不危險,因為仍舊需要帳號與密碼
- create a mongodb user。這裡的 user 並非我們一開始登入的帳號。取一個帳號密碼,並且創建一個mongodb user
- 選一個 connection method,這邊選擇 connect your application
- 接下來選擇 driver version,記得選 node.js 就對了
- 然後複製
mongodb+srv://todoAppUser:<password>@cluster0-gatlu.mongodb.net/test?retryWrites=true&w=majority
這一大串東西,把它丟進先前宣告的 connectionString 變數裡面
let connectionString = '丟進這裡'- 將
<password>改成剛剛設定的密碼,test也改成要連結的 database 名稱
[筆記] 實作一個簡易 To Do App(CRUD 之 update 上 )
更新資料庫內容(前端)
現在要做的事,就是更新資料,我們需要點擊 Edit 按鈕,便能實現一個可以編輯資料的功能出來。一般來說,要做出編輯的欄位可以用 <form>,不過還有一個更快、更方便的方式,就是 window.prompt()。
我們先在 html template 的 </body> 上方引入一隻接下來會需要編輯的 js 檔 browser.js,如下
<script src="/browser.js">alert("Hello!")</script>然後我們在專案的根目錄建立一個 public 資料夾,並在裡面新增一個 browser.js 檔案。另外需記得加上以下的 code 到 server.js 這隻檔案上方
app.use(express.static("public"));意思是允許 Node 讀取 public 內的檔案
接下來開始寫一個按下 Edit 按鈕的監聽事件在 browser.js 檔案(這裡的 JavaScript 是執行在前端,也就是瀏覽器的 JavaScript)
我們先試著理解這段 code。其中 e 為事件監聽的參數,代表事件 event,這個參數隨便怎麼取都可以,但我們還是習慣 event 或是 e。
先知道一下以下 code 的意思為符合 class名稱為 「edit-me」的事件。
e.target.classList.contains("edit-me")用 console.log(e) 就會發現有個 target 屬性
接著就可以開始來寫 Edit 事件了!
document.addEventListener("click", function(e) {
  if (e.target.classList.contains("edit-me")) {
    let userInput = prompt("Enter your desired new text");
    //假如點擊事件觸發時,有 class 名為 edit-me 的 dom 元素,則將 prompt 輸入的內容存進 userInput 變數
    axios.post("/update-item", { text: userInput }).then(function() {
      // do something interesting here in the next video
      }).catch(function() {
        console.log("Please try again later.");
      });
  }
});
為了確定 prompt 可以正常輸入內容,可以加上一段 console.log(userInput) 檢查看看。切記此時 console 是 web browser 的 console。。
接下來我們要用到 axios 這個方法。需要另外安裝 axios 這個套件。但這邊為了方便起見,直接引入 axios 的 cdn
為什麼要用 axios?
- 簡潔、乾淨
- 這樣可以直接將前端 userInput 內的資料直接傳到後端
在 axios.post("/update-item", { text: userInput }) 這邊使用到了 promise,後續也會更常接觸到 promise,這邊大概知道就好。我們大概知道 promise 跟執行時間順序有關。當使用到 promise 則 axios 後面會有 .then(),而這確保了一件事:當 axios 內的內容執行完,才會去執行 .then() 裡面的內容
而緊接著 .then() 後面的函式 .catch() 則是當執行前面函式有問題時,會執行的函式
然後此時此刻會發現一件事,既然前端 post 到 "/update-item" 這裏,那後端也要對接才對,因此我們來確定一下後端接收到資料
app.post("/update-item", function(req, res) {
  console.log(req.body.text)
})
然後需要使用這個 express 的中間層軟體
app.use(express.json());可能會新增⋯⋯
- promise
- axios
[筆記] 實作一個簡易 To Do App( Express 開發 Server)
用 Express 開發 Server
建立一個資料夾,取名 todoapp,名稱要怎麼取都可以,好記就好。
創一個檔案 server.js。名稱也是隨便取即可,但在這邊因為我們要寫一個 server,所以這隻檔案這樣取會比較容易記得。
打開編輯器(我使用的編輯器是 VSCode),打開 VSCode 後直接將檔案拖曳過來
在 todoapp 資料夾進行初始化
$ npm init -y
如果不用 -y 會需要一直按 Enter,輸入一些設定
這時會看到 pacjage.json 的設定檔
安裝 express 套件
$ npm install express
此時會多出
- package-lock.json 檔案,不太需要動到它
- node_modules 資料夾(可以在裡面確定有沒有剛剛載入的 Express )
打開 server.js,寫上以下 code
// 第一部分
let express = require("express")
let app = express()
// 第二部分
app.get('/',function(req, res) {
  res.send(`這是一段文字`)
})
// 第三部分
app.listen(3000) // 將 port 設定到 3000
command line 執行
$ node server
第一部分:先是引入剛才使用 terminal 載入的 Express 模組
第二部分:使用 get 方法。當有 / 的 request 時,server 會 response 「這是一段文字」在瀏覽器
第三部分:網址輸入 http://localhost:3000 看到剛剛執行的結果
[筆記] 實作一個簡易 To Do App(CRUD 之 read )
讀取資料庫資料
先前記得我們寫過一段 code,當收到 req 請求在 / 時,會顯示 home page 的頁面
app.get("/",function(req, res) {
  res.send(`this is html template`)
})
但現在我們不要這麼做,我們要在取得 data 後,才去回應這個請求
因此這段我們會寫成
app.get("/",function(req, res) {
  db.collection("items").find().toArray(function(err, items) {
    console.log(items)
    res.send(`this is html template`)
  })
})db.collection("items"):熟悉的一段 code,使用 mongodb 的一個 collection 方法綁定 items 這個 collectionfind():抓出 items 的資料。這邊裡面沒有參數,表示抓出整坨資料。之後會學到如何抓取「特定」資料toArray():這個方法是方便我們看資料,將 database 的資料轉換成 javascript 的陣列,當然第二個參數 items 就是我們要轉換的資料- 我們用
console.log()看一下 items 內容
注意這裡的 console 是 node 的,不是 browser 的 console
接下來 terminal 看一下這個 items 長怎麼樣
大概是這樣⋯⋯
[ { _id: 5dab39b6e20b3c3d2cd74a44, text: '成為一位合格工程師' },
  { _id: 5dab39c2e20b3c3d2cd74a45, text: '去倒垃圾' }]
將 html template 裡面的其中一個 <li>...</li> 複製下來備用,然後刪除所有 <li> 標籤
接下來看到 template 裡 <ul> 標籤的部分,試看看 map() 這個方法怎麼用。
<ul class="list-group pb-5">
  ${items.map(function() {
    return "Hello"
  })}
</ul>
假如你有 N 個待辦事項在 collection 裡,我們就會看到出現 N 個 Hello,Hello。但是 Hello 之間的 , 看起來很拙,我們不想要每個 Hello 之間都有一個 ,,此時有個方法 join()
 ${items.map(function() {
    return "Hello"
  }).join()}
我們在 map() 後面加上 .join() 這個方法。目的是要去掉這個預設的 ,。當 .join()裡面沒有放參數時,依然會顯示預設的 ,,假如我們希望 Hello 之間不要有 ,,我們可以改成 join("") 空字串表示不要有任何東西。當然如果希望呈現 Hello/Hello/Hello,則可以改成 join("/")
接下來我們將先前複製的 <li>...</li> 內容貼在 return`` 的 `` 內
items.map(function(item) {
    return "Hello"
  })
並且在 function() 參數加上自定義的參數 item,表示 map 過後的的單筆資料,這樣才可以用在
<li>...</li> 內的標題。我們把標題改成 ${item.text}
如果忘記 items 跟 text 是什麼,可以回顧上一篇
目前資料都可以正確顯示在 html 上了,不過還有個問題,當我們送出資料後,畫面會停留在 「Thanks for submitting the form.」,假如要看到我們剛剛新增的內容,又得手動更改網址到 "/",非常麻煩,所以接下來要來處理 redirect 重新導向的部分
程式碼寫成 res.redirect("/")
app.post("/create-item", function(req, res) {
  db.collection("items").insertOne({ text: req.body.item }, function() {
    res.redirect("/");
  });
});
這樣,新增完資料,畫面便會重新導向回 home page
之後可能會補上⋯⋯
- map() 方法
[筆記] 實作一個簡易 To Do App(create 之不需要重跑頁面)
新增項目之不需要重跑頁面
到 server.js 檔案找到 html template,有三個 tags 需要加上 id
<form id="create-form"></form>- form 裡面的
<input id="create-field" ...> <ul id="item-list" ...></ul>
// 第三部分
function itemTemplate() {
  return `
  <li class="list-group-item list-group-item-action d-flex align-items-center justify-content-between">
    <span class="item-text">${item.text}</span>
    <div>
      <button data-id="${item._id}" class="edit-me btn btn-secondary btn-sm mr-1">Edit</button>
      <button data-id="${item._id}" class="delete-me btn btn-danger btn-sm">Delete</button>
    </div>
  </li>`
}

// Create Feature
// 第一部份
let createField = document.getElementById("create-field")
// 第二部份
document.getElementById("create-form").addEventListener("submit", function (e) {
  e.preventDefault()
  axios.post("/create-item", { text: createField.value }).then(function () {
    // Create the html for a new item.
    document.getElementById("item-list").insertAdjacentHTML("beforeend", itemTemplate())
  }).catch(function () {
    console.log("Please try again later.");
  });
})
第一部份:綁定 input 上的 id 存進變數 createField
第二部份:
- 用修飾符
e.preventDefault()取消默認行為 { text: createField.value},將 text 的內容改為先前存進的變數之值(也就是 input 的 值)- 綁定 item-list (
- 的 id ),新增一段新的 html template,這裡用到 insertAdjacentHTML 這個方法,看裡面帶入的兩個參數就知道怎麼用了。
- 新增 template 這段是因為原先 browser 端僅負責告知 server 要儲存資料進資料庫,並重新導向頁面。但現在我們要直接就在畫面上新增資料上去
- 第一個參數是位置,而位置有四種,可參考這篇文章。
- 第二個參數就是要新增的內容,這裡用一個可包裝 html template 的 函式
第三部分:將想要新增的 html template 放進一個自訂的函式名為itemTemplate()
目前為止,要解決的問題是
itemTemplate()內的${item._id}。在 browser 端這邊新增了項目,但怎樣才能馬上能夠編輯及刪除項目?所以我們需要拿到正確的 id,以便於操作資料庫。截至目前為止,在
itemTemplate()內的 id 應該是取不到的,所以我們要去 server.js 中修改一下。app.post("/create-item", function (req, res) { db.collection("items").insertOne({ text: req.body.text }, function (err, info) { res.json(info.ops[0]) // 當寫進資料庫後,傳送一筆新增的資料。問題是傳到哪裡? }); });
res.json(info.ops[0])這邊會傳送資料到 browser 端,否則在 browser 那邊剛新增出來的項目並沒有辦法做編輯及刪除的動作。所以在 browser 端,也要個能夠接收 server 傳過去的新增項目。因此我們在insertAdjacentHTML()裡面的第二參數,也就是我們自訂的函式itemTemplate內再帶入一個參數 response.data,如下:axios.post("/create-item", { text: createField.value }).then(function (response) { // Create the html for a new item. console.log(response.data) document.getElementById("item-list").insertAdjacentHTML("beforeend", itemTemplate(response.data)) }).catch(function () { console.log("Please try again later."); });
並在我們自訂的 function 帶進
item參數,使得<li>樣板內的 item 變數可以使用function itemTemplate(item) { return ` <li class="list-group-item list-group-item-action d-flex align-items-center justify-content-between"> <span class="item-text">${item.text}</span> <div> <button data-id="${item._id}" class="edit-me btn btn-secondary btn-sm mr-1">Edit</button> <button data-id="${item._id}" class="delete-me btn btn-danger btn-sm">Delete</button> </div> </li>` }
現在資料可以新增、可以編輯及刪除,但當我們新增完資料,畫面上的 input 欄位內的資料並沒有清空。所以我們在來修改一下 browser 端。在 then function 裡面加上以下兩段 code
createField.value = "" // 清空 input 內資料
createField.focus() // 新增完資料後,input 框會呈現 focus 的狀態
[筆記] 實作一個簡易 To Do App(CRUD 之 delete)
刪除資料庫資料
在 browser.js 裡面的監聽事件,我們同樣新增一段 if statement,將原先 Update 的那段整個複製過來,如果忘記了參考這篇
 // Delete Feature
  if (e.target.classList.contains("delete-me")) {
    if (confirm("Do you really want to delete this item permanently?")) {
      axios.post("/delete-item", { id: e.target.getAttribute("data-id") }).then(function () {
        e.target.parentElement.parentElement.querySelector(".item-text").innerHTML = userInput
      }).catch(function () {
        console.log("Please try again later.");
      });
    }
  }
將所有 edit-item 的部分改成 delete-item
回到 server.js 我們要更改 html 部分的 delete button,同樣的加上 data-id 這個屬性
接著在 browser axios.post() 的部分,修改 .then() 裡面的 function,也就是當資料從前端送到後端後,要做的事(刪除資料)
改成
.then(function () {
  e.target.parentElement.parentElement.remove()})
以上是 browser 的部分,在後端也需要處理資料庫的部分
app.post('/delete-item', function (req, res) {
  db.collection('items').deleteOne({ _id: new mongodb.ObjectId(req.body.id) }, function () {
    res.send("Success")
  })
})
[筆記] 實作一個簡易 To Do App(CRUD 之 update 下 )
更新資料庫內容(後端)
現在開始寫後端的更新資料,code 如下
app.post("/update-item", function(req, res) {
  db.collection("items").findOneAndUpdate(a, { $set: { text: req.body.text } }, function() {
    res.send("Success");
  });
  res.send("Success");
});
關於這個 $set,它是 MongoDB 上一個更新資料的用法。當使用 $set 時,後面接著的物件就是我們要替換的內容。假如一筆資料有許多物件,我們也可以挑選其中幾個我們需要替換的物件。多個物件ㄧ樣用 , 作分隔,詳細參考 MongoDB 官網
截至目前為止,稍微整理一下。遇到
a.b().c(d, function() {
  //當 a.b() 執行,c() 裡面的匿名函式才會開始執行
})
通常遇到的就是,處理完資料庫的部分,才執行 res.send()
回到正題,現在我們要更新資料,需要有 id 來做對應,我們跳到 html template 找到 <ul> 標籤內的 edit button,加上 data-id,這個 id 可以隨意取名,你也可以叫 data-pizza
改完後變成
<button data-id="${item._id}" class="edit-me btn btn-secondary btn-sm mr-1">Edit</button>現在我們改寫一下前端 browser.js 的 axios,也要傳送 id 到後端,以便於後端去做該項資料的修改
截至目前為止,為什麼這邊需要用到 id?先說為什麼新增不需要用到 id。因為新增時,我們可以隨意增加「新」的資料這筆新的資料可以重複也可以不重複,都是獨一無二的資料,因此不需要特別去給予 id。那麼通常需要用到 id,就是表示該筆資料會「再」次被碰到時。當我們要做 edit,我們是要重複去提取舊有的 item 去作更新,那麼究竟是哪個 item,這時就需要 id。你說,那麼為什麼不直接去找到該 item 的標題就好了?很簡單,因為該 item 可能會出現重複的項目,這時你不知道要新增哪一個
因此在 browser.js 這隻檔案的 axios.post() 的部分變成
axios.post("/update-item", { text: userInput, id: e.target.getAttribute("data-id")})id: 這段字面上意思: e.target 取得 data-id 的屬性
回到先前 browser.js 有一段內容
document.addEventListener("click", function (e) {
  if (e.target.classList.contains("edit-me")) {
    let userInput = prompt("Enter your desired new text");
    axios.post("/update-item", { text: userInput, id: e.target.getAttribute("data-id") }).then(function () {
      e.target.parentElement.parentElement.querySelector(".item-text").innerHTML = userInput
    }).catch(function () {
      console.log("Please try again later.");
    });
  }
});
增加以下這段:
e.target.parentElement.parentElement.querySelector(".item-text").innerHTML = userInput
接下來我們優化 prompt 的部分,我們要做出的是,當我們點擊 edit 後,原先資料會直接顯示在輸入框內,這樣一來,我們只要更改部分內容即可,不需要重新打字進去
在 prompt() 裡,可以加入第二個參數,而第二個參數要放的就是我們要直接顯示在輸入框的原內容
prompt("Enter your desired new text", e.target.parentElement.parentElement.querySelector(".item-text").innerHTML)接下來的問題就是,當我們不想更改內容,按取消時,原內容變成空白的!
因此我們在 axios 的部分加上條件判斷
[筆記] 實作一個簡易 To Do App(將 App 放到網路上 )
將 App 放到網路上
檢查電腦是否有 git,可以在終端機輸入
$ git --version
假如有安裝,接著在命令列輸入
$ git config --global user.name "henry"
然後再次輸入
$ git config --global user.email "[email protected]"
現在我們要使用 heroku (一個免費的 hoisting 公司推出的服務)。先到官網註冊後,登入進去。
點選 create new app 後,創建一個名稱(不能跟其他人的重複,否則無效)
進去後,往下滑找到 Deploy using heroku git 這個選項,然後下載一個東西(讓我們方便在 terminal 就可以操作 heroku 的套件)。找到 Heroku CLI 這個連結,開啟新分頁。我們要下載的是 heroku 的 cli ( command line interface )
繼續往下滑,找到一個 download and install,依照自己電腦的作業系統下載
完成後回到 terminal
$ heroku login
然後就會跳出一段訊息就你點選任何一個鍵
heroku: Press any key to open up the browser to login or q to exit:
然後就會跳出一個登入頁面
此時我們準備將檔案上傳到 heroku,但在這之前,我們要創建一隻檔案,檔名叫 Procfile 在根目錄,然後打上以下 code
web: node server.js
然後在 server.js 的 let db 下方加入環境變數及一段判斷句。
let port = process.env.PORT
if (port == null || port == "") {
  port = 3000
}
告訴 server 要監聽的 port ,然後 app.listen 內的 3000 改為 port
mongodb.connect(
  connectionString,
  { useNewUrlParser: true, useUnifiedTopology: true },
  function (err, client) {
    db = client.db();
    app.listen(port);
  }
);
存檔,到command line 輸入
$ git init
因為我們並不需要將所有檔案上傳到 heroku,像是 node_module,因此我們在根目錄再新增一隻檔案 .gitignore,在檔案裡加上 node_module
然後接下來執行 git(記得是在 server.js 這隻檔案)
$ git add -A
$ git commit -m 'our first commt'
$ heroku git:remote -a todoappforhenrytest
然後等待他跑完,就可以到 heroku 官網(登入進去後),找到右上角的 open app
跑出來的頁面的網址,就是其他人可以看到我們做好的 App 的網址
[筆記] 實作一個簡易 To Do App(about Security )
關於資安
這篇是要實作如何避免駭客的一些基本攻擊,首現我們先在 server.js 檔案自訂一段函式
function passwordProtected(req, res, next) {
  console.log("Our custom function just ran!")
  next()
}
這邊多出一個參數 next,稍後會介紹到
然後在 app.get 這邊也新增剛剛自定義的函式作為第二個參數
app.get("/", passwordProtected, function (req, res) {
  db.collection("items").find().toArray(function (err, items) {
      res.send(`<!DOCTYPE html> . . .
這邊的意思是,當有 get 請求,會先執行 passwordProtected 這個函式,然後才執行下一個匿名函式
然後當執行到 passwordProtected 這裡時,剛剛介紹到的 next() 就派上用場了,它會告知此函式可以繼續執行下一個函式了
接下來,我們開始來寫 passwordProtected 內的內容
function passwordProtected(req, res, next) {
  res.set('WWW-Authenticate', 'Basic realm="Simple Todo App"')
  console.log(req.headers.authorization)
  if (req.headers.authorization == "Placeholder") {
    next()
  } else {
    res.status(401).send("Authentication required")
  }
}
當我們重整頁面,會出現一個要你輸入帳號密碼的驗證框,我們試著隨意輸入東西進去。然後會在 command line 看到一串東西,如:
Basic MTIzMTIzOjEyMzEyMw==那其實我們可以在帳號密碼欄位輸入我們自己要設定的帳號密碼,一樣按下登入,重 command line 找到這串內容,並將它複製後替換到 req.headers.authorization == "Placeholder" 的 Placeholder 這個地方
此時會想到其他的 route 也需要設置帳密,但假如一個一個在參數加上 passwordProtected 會顯得很麻煩。因此現在來做一個可以讓所有 url 都適用的一勞永逸方法。
首先先將 app.get("/",function...) 這邊的 passwordProtected 拿掉,新增以下這段
app.use(passwordProtected)然後這個方法便會適用於所有 url
但,駭客此時還有其它種攻擊方式。比如說在 input 欄位注入一段 a 連結
<a href="# onclick="() => {alert('這是一段攻擊'})">click me</a>然後就會產一個新項目 click me,並且點擊後確實會產生 alert 訊息
因此我們要避免這樣的情況,我們要有一個功能可以在 input 內容過濾掉一些不必要的元素。我們不需要自己寫出這樣的功能,有個套件可以下載。到 command line 執行
$ npm install sanitize-html然後一樣在 server.js 最上方引入這個套件
let sanitizeHTML = require("sanitize-html")接著我們修改一下 app.post 的 create-item 的地方
app.post("/create-item", function (req, res) {
  let safeText = sanitizeHTML(req.body.text, {allowedTags: [], allowedAttributes: {}})
  db.collection("items").insertOne({ text: safeText }, function (err, info) {
    res.json(info.ops[0])
  });
});
在 db.collection . . . 上方新增一個變數 safeText,這是用來過濾輸入內容用的。我們要過濾的項目寫在 sanitizeHTML 內的第二個參數。第一個參數是要處理的內容,第二個則是我們允許的內容。通通設為不允許(方法就是 allowedTags 跟 allowedAttributes 的後面分別是空的 [] 及 {} )
然後同樣修改編輯的部分。
此時我們用通樣的方式駭看看,在 input 欄位輸入剛才那段 a 連結。然後再到資料庫去看,只剩下 id 跟 text 為 click me
[筆記] 實作一個簡易 To Do App(CSR )
瀏覽器端渲染
這篇介紹如何由 SSR(Server Side Render) 轉成 CSR(Client Side Render)。
目前為止的 <ul> 標籤內的動態資料及 html template 是由 server 端傳輸到 browser 端的,但現在我們要讓server 端僅傳輸原始資料到 browser 端。也就是我們要將產生 html template 的職責轉交給 browser
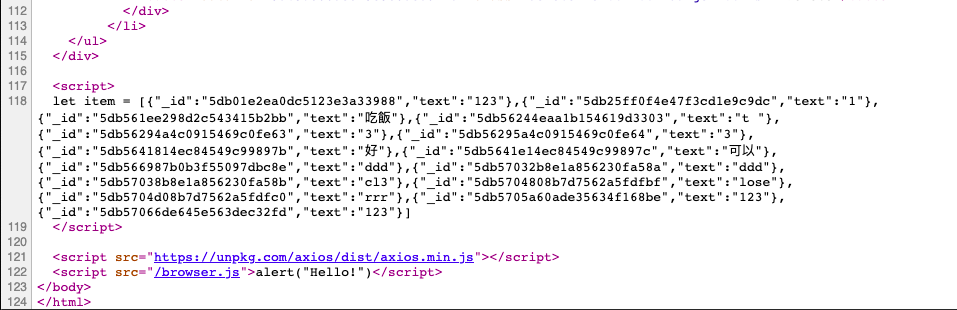
現在我們來讓原始資料可以傳到 browser ,在 server.js 內的 html template 找到兩行 <script> 標籤,然後在上面新增一段 <script>
<script>
  let item = ${JSON.stringify(items)}
</script>

<script src="https://unpkg.com/axios/dist/axios.min.js"></script>
<script src="/browser.js">alert("Hello!")</script>
此時,為了確定是否有將資料傳到 browser,我們打開頁面的「檢視原始碼」,會看到
所以現在我們來將 server.js 內的 <ul> 標籤內的內容通通刪除,並到 browser.js ,在
// Create Feature 上方增加一段 // Initial Page Load Render
// Initial Page Load Render
let ourHTML = "HELLO"
document.getElementById("item-list").insertAdjacentHTML("beforeend", ourHTML)
重整畫面,會看到沒有任何項目只有 HELLO。
所以現在就是想辦法讓項目可以呈現在畫面上
將 let ourHTML = "HELLO" 改成
let ourHTML = items.map(function (item) {
  return itemTemplate(item)
}).join('')
創建一個變數將原始資料 items 經過處理,成為新陣列,返回 html template(itemTemplate(item)),並且透過 join 方法將 ourHTML 變為字串。記得先前說明過 join 方法如果沒有加上' ' 參數,則預設會在每個字串中間加上 , 分隔號
到此我們回顧一下 items 原始資料的傳遞順序:
- 最一開始使在 server.js 內的 html template 內出現。我們透過 get 方法,在取得資料庫資料後,將 items 轉為陣列,並且帶入 res.end 出來的 html template 內,供其使用。
- 因此原先在 server.js 內的 html template 內的
<ul>標籤就可以使用 items 這個資料 - 後來因為將
<ul>標籤 移至 browser 內,這段 items 原始資料就改為在 server.js 內 response 的 html template 中引入一段<script>的方式,透過將其字串化供 browser rending 使用
<script>
  let items = ${JSON.stringify(items)}
</script>- 在 browser.js 中,透過 map 方法,將它帶進
itemTemplate(item)函式內,透過前端的新增動作,直接帶進原始 items
[筆記] 實作一個簡易 To Do App(CRUD 之 create )
新增項目到待辦事項
接著開始寫新增待辦事項的功能
什麼是 CRUD
- C:create 創造
- R:read 讀取
- U:update 更新
- D:delete 刪除
後面筆記會陸續碰到這四個步驟
複習一下上一篇,server 如何處理請求(request)跟回應(response)
let express = require("express")
let app = express()

app.get('/',function(req, res) {
  res.send(`這是一段文字`)
})

app.listen(3000)
現在開始做出新增的功能
回顧先前,當網址出現 / 時,代表訪問首頁的請求。那麼假如有個新增的請求,我們可以取名為/create-item,此時code 如下
// 第一部分
let express = require("express")
let app = express()
// 第二部分
app.use(express.urlencoded({ extended: false }));
// 第三部分:
app.get('/', function(req, res) {
  res.send(`
  <!DOCTYPE html>
<html>
<head>
  <meta charset="UTF-8">
  <meta name="viewport" content="width=device-width, initial-scale=1.0">
  <title>Simple To-Do App</title>
  <link rel="stylesheet" href="https://stackpath.bootstrapcdn.com/bootstrap/4.2.1/css/bootstrap.min.css" integrity="sha384-GJzZqFGwb1QTTN6wy59ffF1BuGJpLSa9DkKMp0DgiMDm4iYMj70gZWKYbI706tWS" crossorigin="anonymous">
</head>
<body>
  <div class="container">
    <h1 class="display-4 text-center py-1">To-Do App</h1>

    <div class="jumbotron p-3 shadow-sm">
      <form>
        <div class="d-flex align-items-center">
          <input autofocus autocomplete="off" class="form-control mr-3" type="text" style="flex: 1;">
          <button class="btn btn-primary">Add New Item</button>
        </div>
      </form>
    </div>

    <ul class="list-group pb-5">
      <li class="list-group-item list-group-item-action d-flex align-items-center justify-content-between">
        <span class="item-text">Fake example item #1</span>
        <div>
          <button class="edit-me btn btn-secondary btn-sm mr-1">Edit</button>
          <button class="delete-me btn btn-danger btn-sm">Delete</button>
        </div>
      </li>
      <li class="list-group-item list-group-item-action d-flex align-items-center justify-content-between">
        <span class="item-text">Fake example item #2</span>
        <div>
          <button class="edit-me btn btn-secondary btn-sm mr-1">Edit</button>
          <button class="delete-me btn btn-danger btn-sm">Delete</button>
        </div>
      </li>
      <li class="list-group-item list-group-item-action d-flex align-items-center justify-content-between">
        <span class="item-text">Fake example item #3</span>
        <div>
          <button class="edit-me btn btn-secondary btn-sm mr-1">Edit</button>
          <button class="delete-me btn btn-danger btn-sm">Delete</button>
        </div>
      </li>
    </ul>

  </div>

</body>
</html>
  `)
})
// 第四部分:
app.post("/create-item", function(req, res) {
  console.log(req.body.item);
  res.send("Thanks for submitting the form.");
});
// 第五部分:
app.listen(3000);
第一部分:不變
第二部分:這段與 req.body.item 有關!就是個 boilerplate code(不太需要更動的樣板程式碼)
第三部分:增加了 html 內容。要從講師的 GitHub 複製 html template 過來。連結
在
<form action="/create-item" method="POST" >
  <div class="d-flex align-items-center">
    <input autofocus autocomplete="off" class="form-control mr-3" type="text" style="flex: 1;">
    <button class="btn btn-primary">Add New Item</button>
  </div>
</form>
第四部分:這邊多了一種請求方式 post,並透過 console.log() 看看 req.body.item 是什麼?然後最後回應 「Thanks for submitting the form.」
第五部分:不變
Recommend Projects
-
 React
React
A declarative, efficient, and flexible JavaScript library for building user interfaces.
-
Vue.js
🖖 Vue.js is a progressive, incrementally-adoptable JavaScript framework for building UI on the web.
-
 Typescript
TypeScript is a superset of JavaScript that compiles to clean JavaScript output.
-
TensorFlow
An Open Source Machine Learning Framework for Everyone
-
Django
The Web framework for perfectionists with deadlines.
-
 Laravel
A PHP framework for web artisans
-
D3
Bring data to life with SVG, Canvas and HTML. 📊📈🎉
-
Recommend Topics
-
javascript
JavaScript (JS) is a lightweight interpreted programming language with first-class functions.
-
web
Some thing interesting about web. New door for the world.
-
server
A server is a program made to process requests and deliver data to clients.
-
Machine learning
Machine learning is a way of modeling and interpreting data that allows a piece of software to respond intelligently.
-
Visualization
Some thing interesting about visualization, use data art
-
Game
Some thing interesting about game, make everyone happy.
Recommend Org
-
Facebook
We are working to build community through open source technology. NB: members must have two-factor auth.
-
Microsoft
Open source projects and samples from Microsoft.
-
Google
Google ❤️ Open Source for everyone.
-
Alibaba
Alibaba Open Source for everyone
-
D3
Data-Driven Documents codes.
-
Tencent
China tencent open source team.