Guides
Accessing Slate
This guide will take you through:
You can create your Slate account by choosing Need Account as shown in the video below.
AccVid1.MOV
This redirects you to the registration form as shown in the image below.
![[Screenshot 2022-03-24 at 1 44 24 PM]](https://user-images.githubusercontent.com/101874906/159877231-d3962503-6914-4cf5-a4ea-91f7881224f8.png)
-
To register your Slate account you must provide the following information:
- The Username field requires you to create an authentic username specific to you. Make sure to not add spaces and the username cannot have characters other than '_'.
- The Business name field is for the name of the business which it has been registered under and this is the name which is seen by the customers.
- The Description field is there for you to add a summary of what your Slate store offers, such as the type of product or service that you provide or cater to.
- The field for Given name and Last name are for you to add your first and last name as per your identification documents.
- The Email address field is for the email address you want linked to your Slate store, this is the account your Slate store will be registered under.
- The Phone number field is for the number that you want to be contacted on by both the customers and the Slate team.
- For the Password field, this is for you to create an authentic password for you Slate account. we recommend you use characters and numbers in your password to increase it's strength.
-
To confirm your password you have to re-enter the password you have created for your slate store.
![[AccImg1]](https://user-images.githubusercontent.com/101874906/159887479-55117cd9-1b99-464b-8ed3-61b576cb94ef.png)
After creating your Slate store account. Once on the login dash fill in the email address that you have registered your Slate account with and the password.
In the instance you forget the password for your Slate store choose Forgot Password. Taking you to the forgot password field as shown in the image below.
![[Forgotten Password (1)]](https://user-images.githubusercontent.com/101874906/159889449-4dca2e47-96a7-46c5-80d1-8813c07de61e.png)
For you to recover your password, you must enter the email address in the field provided that you have registered your Slate account e.g '[email protected]', once filled choose Reset Code located under the email field.
leading you to the final stage of your password recovery process as seen in the image below. the first field requires you to enter the email address you have registered your slate account with, confirm the email address in the next field provided. The next field requires you to fill the confirmation code you have recieved via email, this shall be a 6 digit code.
![[Forgotten Password (2)]](https://user-images.githubusercontent.com/101874906/159908742-c80923d4-e688-44bb-9bc5-9fad298d6dfc.png)
Lastly, taking you to the field where you add the new password you have created. Our recommendation would again be to make your password as strong as possible by adding symbols, characters and numbers. confirm the password you have created by re-entering it in the last field on the page, labelled Confirm password.
You can now access your Slate account with the new password you have created.
Dashboard
this guide takes you through the following:
the Slate dashboard is the administration panel behind your storefront. It is for the management and overview of your products/services and insights to your customers as seen in the image below.
![[Screenshot 2022-03-30 at 10 44 18 AM]](https://user-images.githubusercontent.com/101874906/160766128-bb5a5208-70ad-4426-a0c9-165fb12b5200.png)
The dashboard is divided into sections where you can efficiently complete various tasks. The whole experience is designed by our experts to be intuitive and simple. We believe that you shall find the Slate store experience easy to manage, but these instructions are for those moments where you may require our assistance and to further enhance your experience with the Slate Platform. A short while spent reading this guide will make a significant difference in the efficiency and effectiveness of your Slate experience.
- Sales and Orders daily summary:
![[Screenshot 2022-03-31 at 3 32 19 PM]](https://user-images.githubusercontent.com/101874906/161036808-d4fcddeb-dcc6-401e-8848-3977aaecdca4.png)
On the top of your screen you are presented with your Daily Total Orders and Daily Revenue tiles of the business
- Location of operation
![[Screenshot 2022-03-31 at 3 46 05 PM]](https://user-images.githubusercontent.com/101874906/161038117-1fcfed13-9aa9-4da1-84fe-54adfb0ccb18.png)
Adjacent to that is the location tile, each business varies in size, for example a larger business has more than one location of operations. On your Slate store you can add more than one location, letting you manage each store individually. To get more information on how to add a location click here.
- Recent Activities:
![[Screenshot 2022-03-31 at 3 32 28 PM]](https://user-images.githubusercontent.com/101874906/161038361-98b3ee23-cb31-43dc-9081-944de1a6000c.png)
Underneath that is the activities column, showing the recent actions performed on your Slate store; orders that are placed for items on your Slate store, for more information on how to add items to your slate store click here. Fulfilled orders, orders that have been cancelled and details of payment processing all are displayed here, to get more information on order management click here.
- Actions:
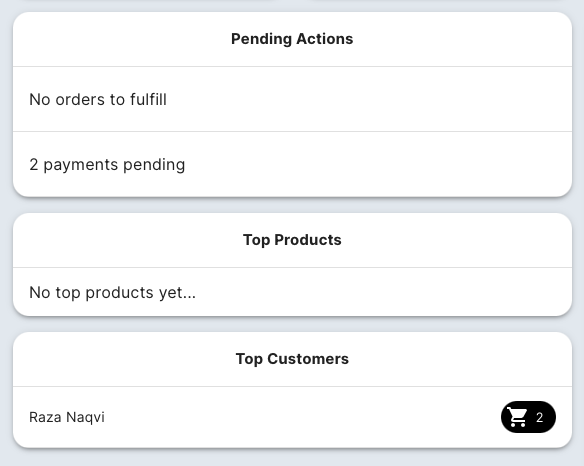
Adjacent to the activities column, you have the pending actions bar which has:
-
Order Fulfillment: This process covers the logistics of converting an item in inventory to be packed, processed and delivered to the assigned customer.
-
Pending Transactions: This is for the payments that are to be made by the customers for their ordered items.
-
Top Products: Underneath that you can see the top performing products of their slate store. This is determined by the number of units sold from the products available on your slate store. To get more information on how to add an item click here.
-
Top Customers: Lastly, on your Slate dash you have a list of your ‘Top Customers’ this is a list of customers that have most frequently bought products from your slate store. Ranking them on the basis of most active to least, to get more information on how to customers click here
Categories
This guide takes you through the following:
- What is a category
- How to access your categories
- How to add a category
- How to edit or delete a category
- How to delete a category
A category is the broadest way to classify all the inventory that you have uploaded to your Slate store. To learn more on how to upload inventory read this guide. The simplest way to understand how a category can help you filter your inventory is by using the following examples:
| Example | Inventory Upload | Categories | What can be in this category |
|---|---|---|---|
| Resteraunt | Chicken corn soup | Starters | Chicken corn soup |
| Chicken tikka pizza | Mains | Chicken tikka pizza | |
| Ice cream | Desserts | Ice cream | |
| Fresh apple juice | Drinks | Coca-cola; Fresh apple juice | |
| Coca-cola | |||
| Fashion | Pakistan cricket cap | Caps | Pakistan cricket cap |
| Karachi Kings shirt | Shirts | Karachi Kings shirt; Lahore Qalandars shirt; Peshawar Zalmi shirt | |
| Lahore Qalanders shirt | Others | Liverpool football club socks | |
| Peshawar Zalmi shirt | |||
| Liverpool football club socks |
if you are a resteraunt owner(or a home-based food business), it is very likely that you can split whatever you are selling into categories that your customers are normally used to seeing. For example, any customer ordering food from a business will be used to the categories of a starter, main, dessert and drinks. Similarly if you are selling clothes, your customer will be familiar with concepts like evening wear, formal wear, casual wear. You will be in the best position to determine what are appropriate categories for your store. A merchant selling local Pakistani clothing will have different categories (such as readymade shalwar, readymade kurta or cloth for shalwar or cloth for kurta) compared to a merchant selling Western clothing (such as denim jeans or cotton trousers or collared full-sleeve shirt or collared half-sleeve shirt).
- You can access your categories by choosing Categories from your Slate dashboard as shown in the image below. When you first access your categories this will be empty.
Untitled.1800.x.1080.px.1750.x.1080.px.1725.x.1080.px.mp4
- When you first access your categories this will be empty. Eventually you would expect this categories section to look like the below depending on your business and what you are selling.
![[Screenshot 2022-03-14 at 1 08 47 PM]](https://user-images.githubusercontent.com/101874906/160775844-288fac81-b82d-4183-b09d-52d65be48070.png)
- To add a category choose Add Category. This will open a side bar as shown in the image below. This is the start of how you add a category to your Slate store.
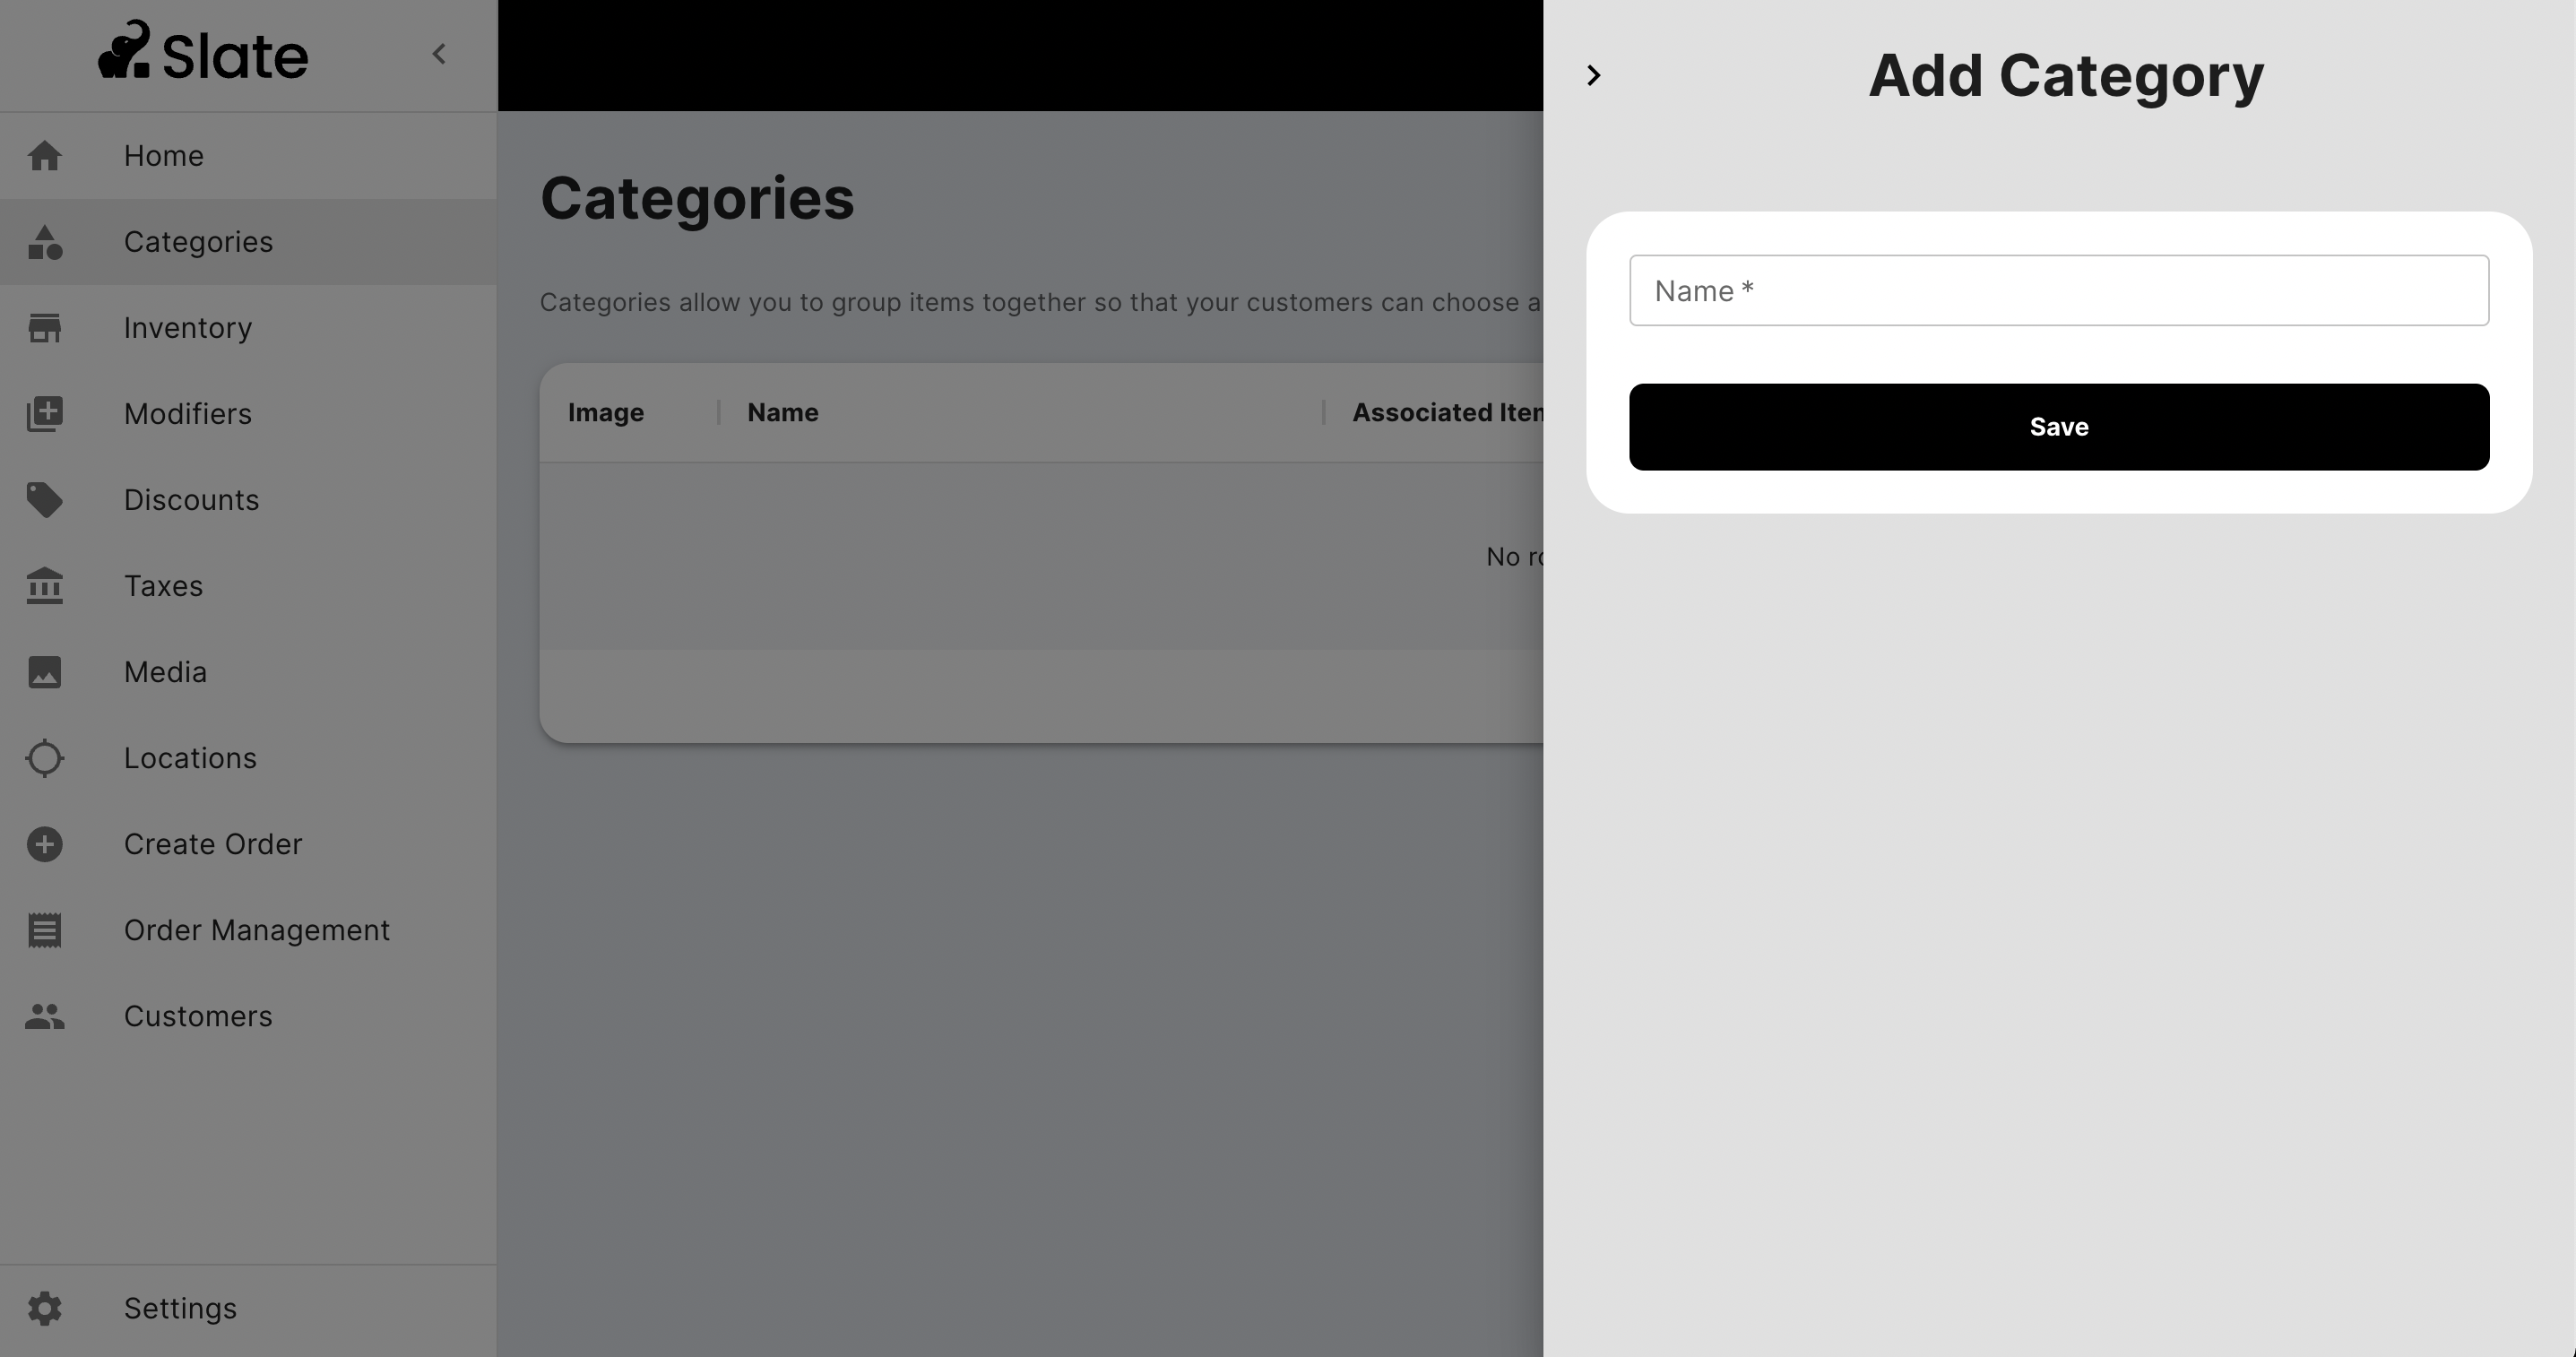
-
Name your category to continue. For our example we are going be creating a category for Mains for a restaurant.
-
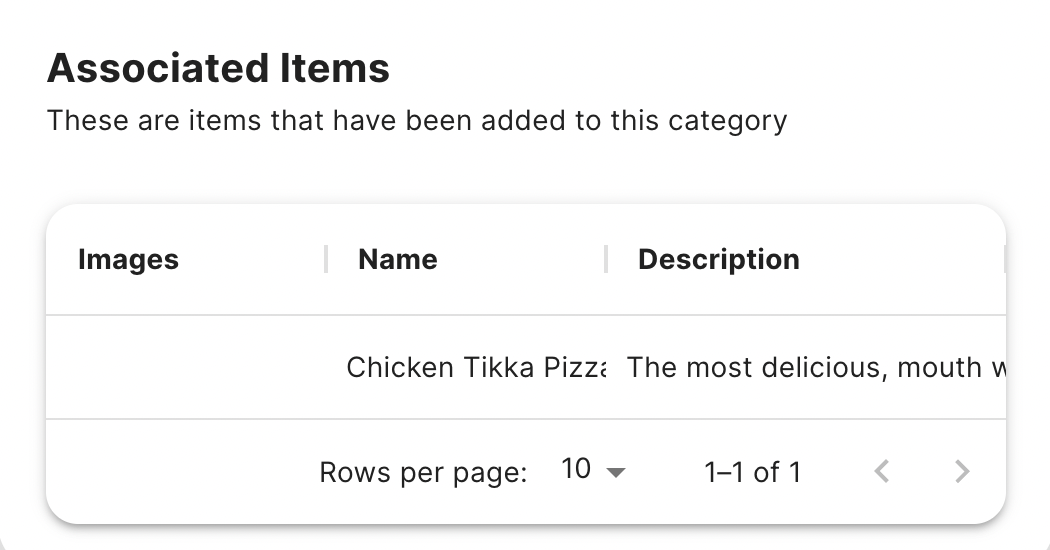
You will now need to edit your category which includes the following:

-
Associate an item with the category from your Inventory Items. To do this go to your Inventory Items and associate an item with this category. To learn more on how to upload inventory read this guide.
-
If you have already associated a category with an Inventory Item you will see this available when adding your category here as below
To edit a category choose Select. This opens an actions list as shown in the image below. This is the start of how to edit a category on your Slate store.
![[Category Edit Img]](https://user-images.githubusercontent.com/101874906/159466051-a77d5145-5371-4f39-a8a9-e6b19e8e617a.png)
- Choose View/Edit to open the side bar containing the information of the category to edit as shown in the image below.
![[CatImgEdit2]](https://user-images.githubusercontent.com/101874906/159475706-d67306ee-92e4-4ed6-8772-05e80fad311f.png)
- To edit the image choose Choose Image, taking you to a gallary with media that you have uploaded to your Slate store as shown in the image below. To learn more on how to add media to your Slate store click here
![[CatImgEdit3]](https://user-images.githubusercontent.com/101874906/159467245-fbd1e599-c21b-467a-988f-401d384d5400.png)
- First unselect the existing image that is currently on display, then choose the image you want to be displayed.
To duplicate a category choose Select for the category you want to duplicate. This opens an actions list as previously shown. Choose Duplicate
- To delete a category choose Select next to the category you are deleting from your Slate store. This opens an action list as previously shown. Choose Delete.
- To ensure you are deleting the right category you are asked if you choose to continue as shown in the image below.
![[CatImgEdit4]](https://user-images.githubusercontent.com/101874906/159473667-21a5254b-aa80-4263-aac0-cd8024740178.png)
- To delete the category choose Yes,continue.
Create an order
This guide takes you through the following:
- You can access create order by choosing Create Order on your Slate dashboard as shown below.
Screen.Recording.2022-03-30.at.10.54.35.AM.mov
Steps to create an order are:
- Choose the location you are generating the order from. For example if your store has 2 locations (such as Islamabad and Karachi) you will choose the location from which you will be fulfilling the order placed by your customer. If your customer is based in Karachi you would normally chose your store location as Karachi but there can be exceptions for example if the item you want to sell is available in your Islamabad store. If you only have one store (you are a home based business you will have one location).
![[Screenshot 2022-03-30 at 6 27 32 PM]](https://user-images.githubusercontent.com/101874906/160845900-63af556c-6003-458b-a5cc-0928c9d37864.png)
-
Choose the customer recieving the order, customers who have already ordered from your Slate store will be shown in the table, choose customer. For new customers view Create customer on how to add a new customer to your Slate store.
-
We have chosen an existing customer and location for us it is Slate HQ for you it will be the name of your stores location, for more information on adding a location click here. Our dashboard looks like the image below.
![[Screenshot 2022-03-25 at 5 16 14 PM]](https://user-images.githubusercontent.com/101874906/160119249-e63a52c6-e642-4a8a-8386-32ded5cc3633.png)
-
Choose Create Order
-
Choose:
- the product with the variation of the product you want for example if you are looking to buy a polo shirt for yourself and you are a size medium, you will choose medium that you have created in inventory, for more information on creating an inventory item click here,
- the taxes that you have added to your Slate store, for more information on how to add taxes click here,
- the discount you have added to your Slate store, for more information on how to add discounts click here.
![[Screenshot 2022-03-25 at 5 20 40 PM]](https://user-images.githubusercontent.com/101874906/160121814-084018e4-23d2-4464-a818-40969fa88ee7.png)
![[Screenshot 2022-03-25 at 5 20 50 PM]](https://user-images.githubusercontent.com/101874906/160122002-839b52df-e25b-4753-a61b-fd988fb90472.png)
- We have chosen the examples we added for product, taxes and discounts so our dashboard looks like the image below.
![[Screenshot 2022-03-25 at 5 43 01 PM]](https://user-images.githubusercontent.com/101874906/160123316-f5f38635-db06-416f-b5ee-f3c0fcfcd3ed.png)
-
Choose Continue
-
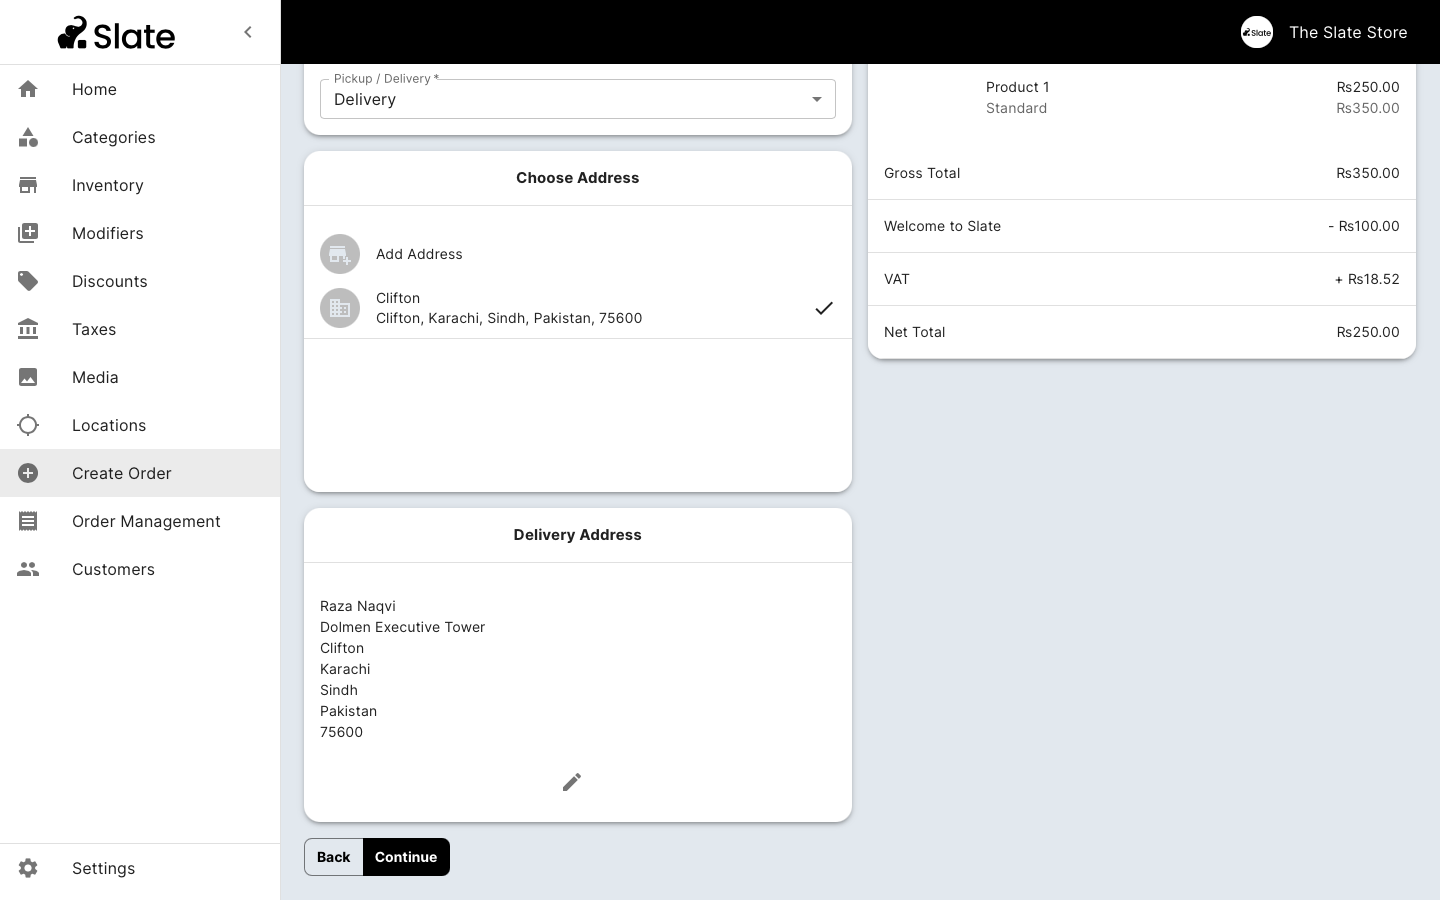
Then choose the way the customer recieves the order. There are 2 options to choose from:
- Pickup, the customer picks up the order from the branch chosen above.
![[Screenshot 2022-03-25 at 5 43 14 PM]](https://user-images.githubusercontent.com/101874906/160123801-d53953b6-eea1-4736-af39-7e1eb17f732d.png)
- Delivery, the merchant has to dispatch the order to the customers given address. Choose the delivery address for your customer. If your registered customer has to have the order delivered to a new address choose Add Address, for more information on how to add a new address click here. We chose an existing customer so their details pop up underneath the table when we chose the address for delivery, as shown in the image below.
-
Choose Continue
-
finally, review the information and confirm the order.
![[Screenshot 2022-03-25 at 5 43 45 PM]](https://user-images.githubusercontent.com/101874906/160124897-48f47b98-4626-48f2-b4f4-c989912104ae.png)
-
Once reviewed, choose Continue
-
Your dashboard will have a confirmation as shown in the image below
![[Screenshot 2022-03-25 at 5 43 53 PM]](https://user-images.githubusercontent.com/101874906/160125286-7db98483-acde-4ce0-bcb7-1f65f92587bd.png)
Inventory
This guide takes you through the following:
- What is inventory
- How to access inventory
- How to add an item
- How to add a variation
- How to edit an item
- How to delete an item
Each product or service (depending on the type of business) you list on your Slate store is part of your inventory. Your inventory keeps track of the number of units you have in stock. Each business has different products or services listed on their Slate stores. The simplest way to understand the different types of products or services different businesses can have is by using the following example:
| Type of store | Inventory product/service |
|---|---|
| Resteraunt | Pepperoni Pizza |
| Margherita Pizza | |
| Pharmacy | Paracetamol |
| Deep heat spray | |
| Bandages | |
| Gauze | |
| Car wash | Standard wash |
| Wash + Buff |
if you're a resteraunt owner (or a home-based business) you will list the items on your menu on your Slate store such as a pizzeria will list different types of pizzas they have available on their menu. For a car wash owner (or a door to door car washing service) you will list the different type of services you offer.
You can access your inventory by choosing Inventory from your Slate dashboard as shown below:
Steps to add an item:
- To add an item choose Add Item. This will open a side bar as shown in the image below. This is the start of how you add an item to your Slate store.
![[Screenshot 2022-03-30 at 3 59 27 PM]](https://user-images.githubusercontent.com/101874906/160824797-b3c6bc5b-b8c7-4c4c-9705-c1b2f02c06dc.png)
-
Name your item and add a description to continue. For our example we have added a pepperoni pizza for a pizzeria.
-
You will now need to edit your item which includes the following:
-
Choose a category the item falls under. This classifies the item you have uploaded. To learn more about how to create a category click here
-
Choosing an image to display for your item. This will be an image that you have uploaded to your Media section. To learn more about how to add media to your Slate store you can read this guide.
-
Create variation(s) for your item. The item is the shell and the content within it is variation. for example we are creating a pepperoni pizza for a pizza the variations for are; 8 inches, 12 inches and 16 inches, the sizes the resteraunt offers. Likewise, if you are a clothing store your variations for a crew neck T-shirt would be small, medium and large.
- To create a variation choose Add Variation.
- Name the variation, add a SKU number, the price of the item and click the track inventory slider if you wish to keep track of your inventory. If yes, then choose the location the item is available at.
- Each item has to have a number of units available, for example if you're a clothing business and the number of white crew neck t-shirts in size medium is 45 then you will add 45 in stock. This is done by choosing Select under the Actions column in the variations table, choose Update Stock, choose Increase to add to the number of units available for your listed variant and the number that you have in stock.
To edit an item choose Select in the actions column. This opens an actions list as shown in the image below. This is the start of how to edit a category on your Slate store.
-
Choose View/Edit to open the side bar containing the information of the item to edit as shown in the image below.
-
To edit the image choose Choose Image, taking you to a gallary with media that you have uploaded to your Slate store as shown in the image below. To learn more on how to add media to your Slate store click here
-
First unselect the existing image that is currently on display, then choose the image you want to be displayed.
To duplicate an item choose Select for the item you want to duplicate. This opens an actions list as previously shown. Choose Duplicate
-
To delete a item choose Select in the row of the item you are deleting from your Slate store. This opens an action list as previously shown. Choose Delete.
-
To ensure you are deleting the right item you are asked if you choose to continue as shown in the image below.
-
To delete the item choose Yes, Continue..
Locations
This guide takes you through the following:
A location is the base of operations for your business whether it is physical or mobile for example if you own a food truck your location is mobile and if you have rented out an office space, that is physical. If you are a business owner with more than one base of operation you can add them to your Slate store, to learn more on how to add locations click here.
You can access your inventory by choosing Locations from your Slate dashboard as shown below:
steps to add a location:
-
to add a location to your Slate store choose Add location opening a sidebar as shown in the image below.
-
name your location and add a description for it. In th example shown below we are creating a location for the Slate HQ.
-
upload images from your computer for the display and cover image. These images do not have to be of the location for example the image we have chosen is the Slate logo, so for home based busiesses they can upload images of their choice.
-
add your business #, the name of your business, the email for your business, your country of operation, the currency you transact in and the type of location it is.
-
it is optional but preferred to add your business':
- Facebook URL
- Instagram URL
- Twitter URL
-
add the business hours for your location by guiding the arms on the dial of the clock for each day as shown in the video below.
-
add the addreess of your location by choosing Add Address opening a pop up with a field to add the first line of your address as shown in the image below.
-
you will now need to edit your address by doing the following:
- add the first line of your address,
- the name of your organization
- the city your location is in
- the province the city is in
- the postcode for the area your location
- the address kind
- to save the address choose Save
- to save your location choose Save.
To edit your location choose Select in the row of the location you're editing in the Actions column opening the side bar with the pre-existing information you want to edit as shown in the image below.
Discounts
This guide takes you through the following;
You can access your discounts by choosing Discounts from your Slate dashboard as shown below:
Steps to add a discount:
-
To add a discount choose Add Discount. This opens a sidebar as shown in the image below.
-
Add a name for the discount you are creating, choose whether the discount modify tax basis or does not modify tax basis and whether the discount is a fixed amount or fixed percentage.
-
To save the discount choose Save.
To edit your discount choose Select in the row of the discount you're editing in the Actions column opening the side bar with the pre-existing information you want to edit as shown in the image below.
Media
This guide takes you through the following:
your media is a folder for all of the images
You can access your discounts by choosing Discounts from your Slate dashboard as shown below:
To add an image to media choose + Add Photo
Taxes
Customers
this guide will take you through the following:
Customers is a dashboard on your Slate store that gives you a list of customers that have already ordered from your Slate store. You can also place your customers in groups to access this feature select groups. For example in your list of existing customers, you can identify which customers are recurring and those that aren't. So, you can put the recurring customers in the recurring customer group.
for when you have to deliver an item to a customer who hasn't ordered from your slate store yet, you can add their information manually. to start the process of adding a customer choose Add Customer, opening a side bar for you to fill out the necessary information. Which is:
- First name
- Last name
- email address
- phone number
moving onto the address of the customer. to add the address of your customer choose Add Address, opening an address tile as shown in the image below. fill out the necessary information and press Save
to save the customer information you have added choose Save Customer
to edit a customer choose Select under the actions column in the row of the customer whose information you are editing. Choose View/Edit.
Extra
- Simple content model and structure. Easy to adjust to your needs. - Use the [synchronization feature](https://www.contentful.com/developers/docs/references/content-delivery-api/#/reference/synchronization) of our [Delivery API](https://www.contentful.com/developers/docs/references/content-delivery-api/). - Responsive/adaptive images via [gatsby-plugin-image](https://www.gatsbyjs.org/packages/gatsby-plugin-image/) and our [Images API](https://www.contentful.com/developers/docs/references/content-delivery-api/#/reference/synchronization/initial-synchronization-of-entries-of-a-specific-content-type).
See our official Contentful getting started guide.
$ git clone https://github.com/contentful/starter-gatsby-blog.git
$ npm install
Or use the Gatsby CLI.
$ gatsby new contentful-starter-blog https://github.com/contentful/starter-gatsby-blog/
This project comes with a Contentful setup command npm run setup.
This command will ask you for a space ID, and access tokens for the Contentful Management and Delivery API and then import the needed content model into the space you define and write a config file (./.contentful.json).
npm run setup automates that for you but if you want to do it yourself rename .contentful.json.sample to .contentful.json and add your configuration in this file.
Run the project locally with live reload in development mode.
Run a production build into ./public. The result is ready to be put on any static hosting you prefer.
Spin up a production-ready server with your blog. Don't forget to build your page beforehand.
See the official Contentful getting started guide.
Feel free to open pull requests to fix bugs. If you want to add features, please have a look at the original version. It is always open to contributions and pull requests.
You can learn more about how Contentful userland is organized by visiting our about repository.

![gatsby-cloud[bot] avatar](https://avatars.githubusercontent.com/in/24573?v=4 "gatsby-cloud[bot]")