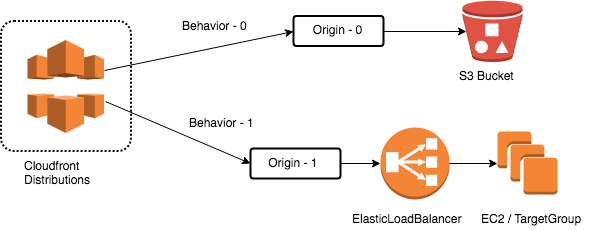
Today we are going to practice a very simple scenario, leverage Cloudfront for your S3 data source. This is a very common usage when your website serving static assets, you put those data into S3 bucket, left those dynamic generated content fall back to EC2.
For this workshop, we support 3 different region:
- Tokyo(ap-northeast-1)
- Sydney(ap-southeast-2)
- London(eu-west-2)
We pick these region becase later we will deploy cloudfront distribution, which can obviously see the difference after CDN enabled.
Switch Region on the AWS console, a drag down menu near right-up corner.
- Tokyo(ap-northeast-1)
- Sydney(ap-southeast-2)
- London(eu-west-2)
If possible, choose the region which geographically opposite to you on this planet.
- Check if you already have a EC2 Key pair in your selected region.
- If not, create one through AWS Console > EC2 > Key Pairs > Create Key Pair.
- Remember to download the private key(.pem) and well saved.
- In usual, we will move it into ~/.ssh/ sub-folder in your home directory.
- To make it secure, remeber to change the privilege with command
chmod 0400 XXXXX.pem
- Create cloudformation stack: AWS Console > Cloudformation > Create Stack > from S3 template > https://s3-ap-northeast-1.amazonaws.com/workshop-data-public/cloudformation-workshop-20180524-ec2-s3.json
- Wait till the stack creation ready, the status will change to
CREATE_COMPLETE - you can see the output sheet:
- Then you can use the command to sign into your EC2.
ssh [email protected] -i XXXXXX.pem
- install httpd service on EC2, and prepare the image file for serving.
sudo yum install httpd php
sudo service httpd start
cd /var/www/html/
sudo wget https://s3-ap-northeast-1.amazonaws.com/workshop-data-public/sydney.jpg
- Now you might want to test your httpd image serving status by using browser, open
http://XXX.XXX.XXX.XXX/sydney.jpg
-
check the AWS Console > Cloudformation >
YOUR_STACK> Output Sheet > s3 column. You can find the S3 domain-name looks likeYOUR_S3_BUCKET_NAME.s3.amazonaws.com. -
Then execute following command in your EC2 shell terminal, which will copy the image into your s3 bucket.
-
run this command in your EC2 shell, and you will find a simple response like:

-
Now, check the image file sydney.jpg is uploaded or not from AWS console > S3 >
YOUR_S3_BUCKET
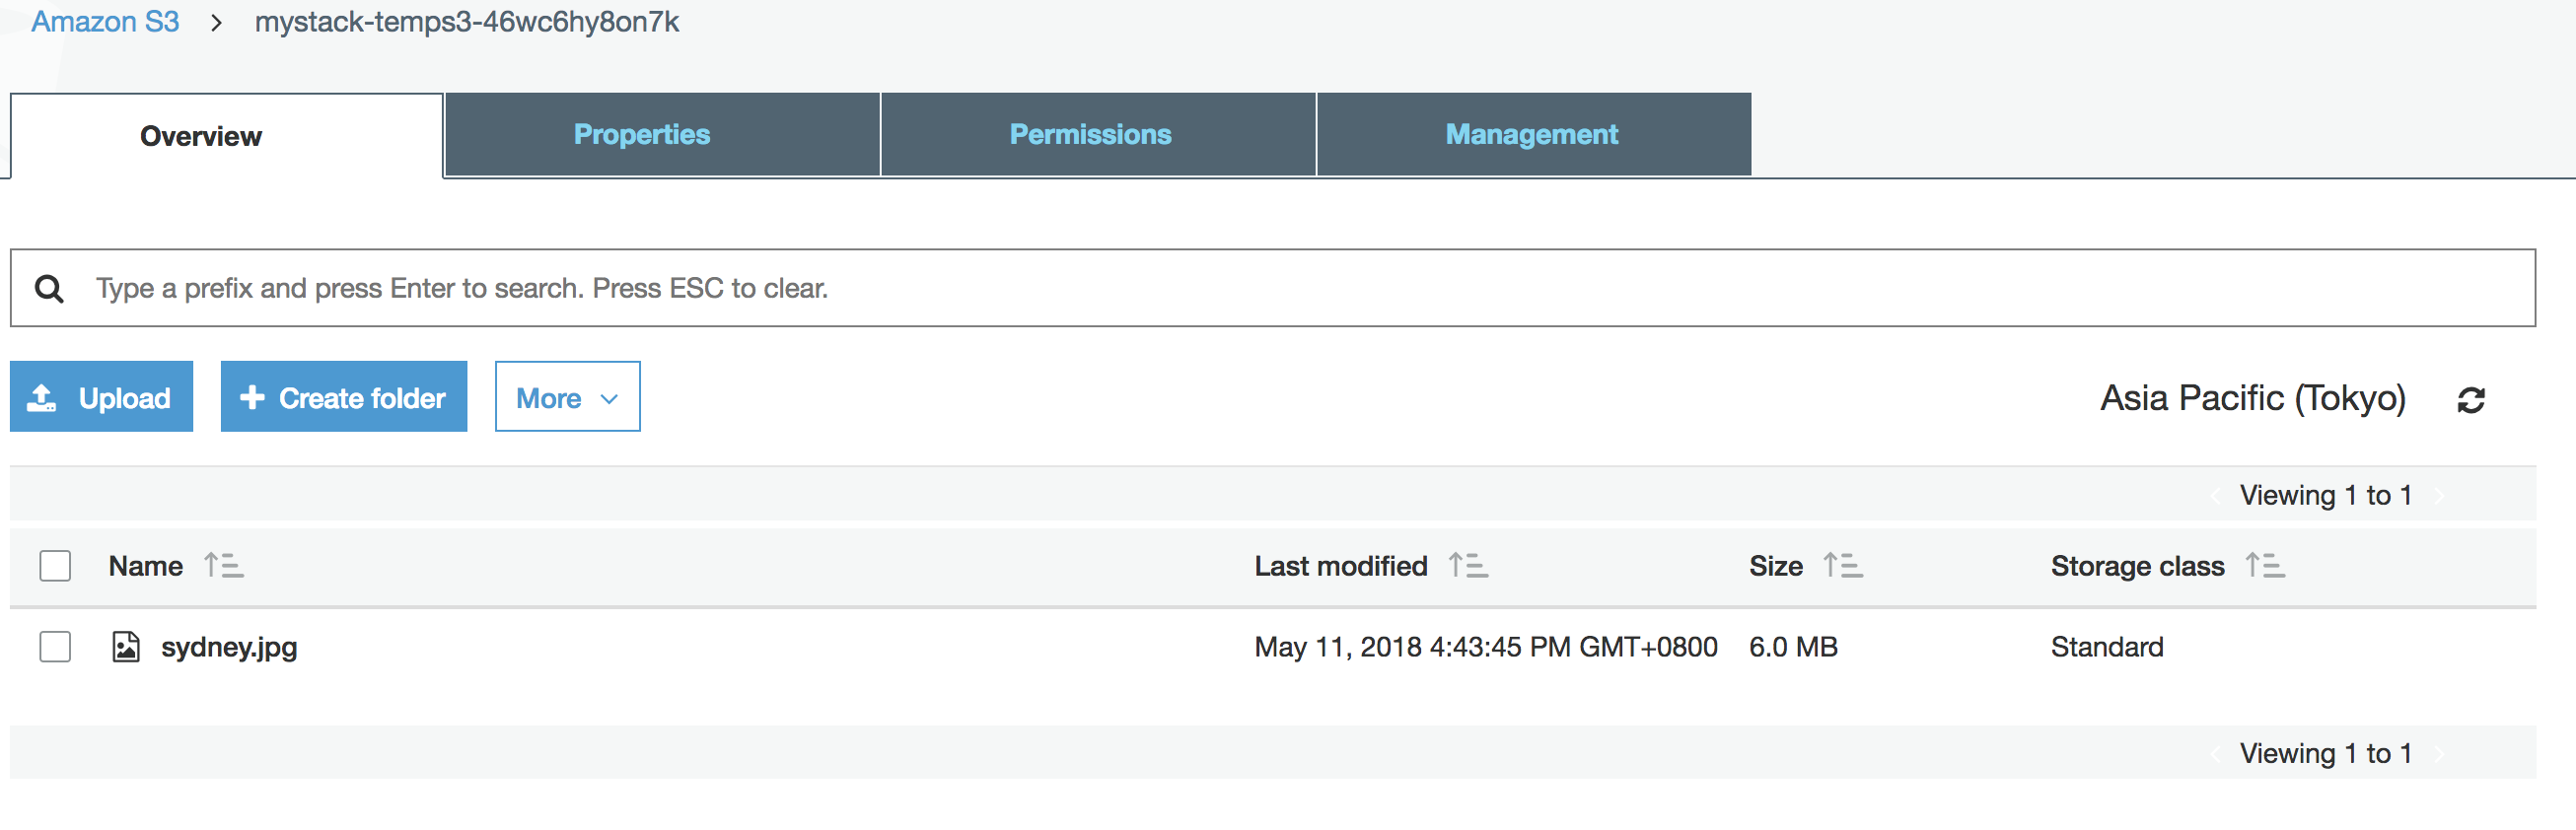
Click on the file and check the detail, you can find a link for this image.
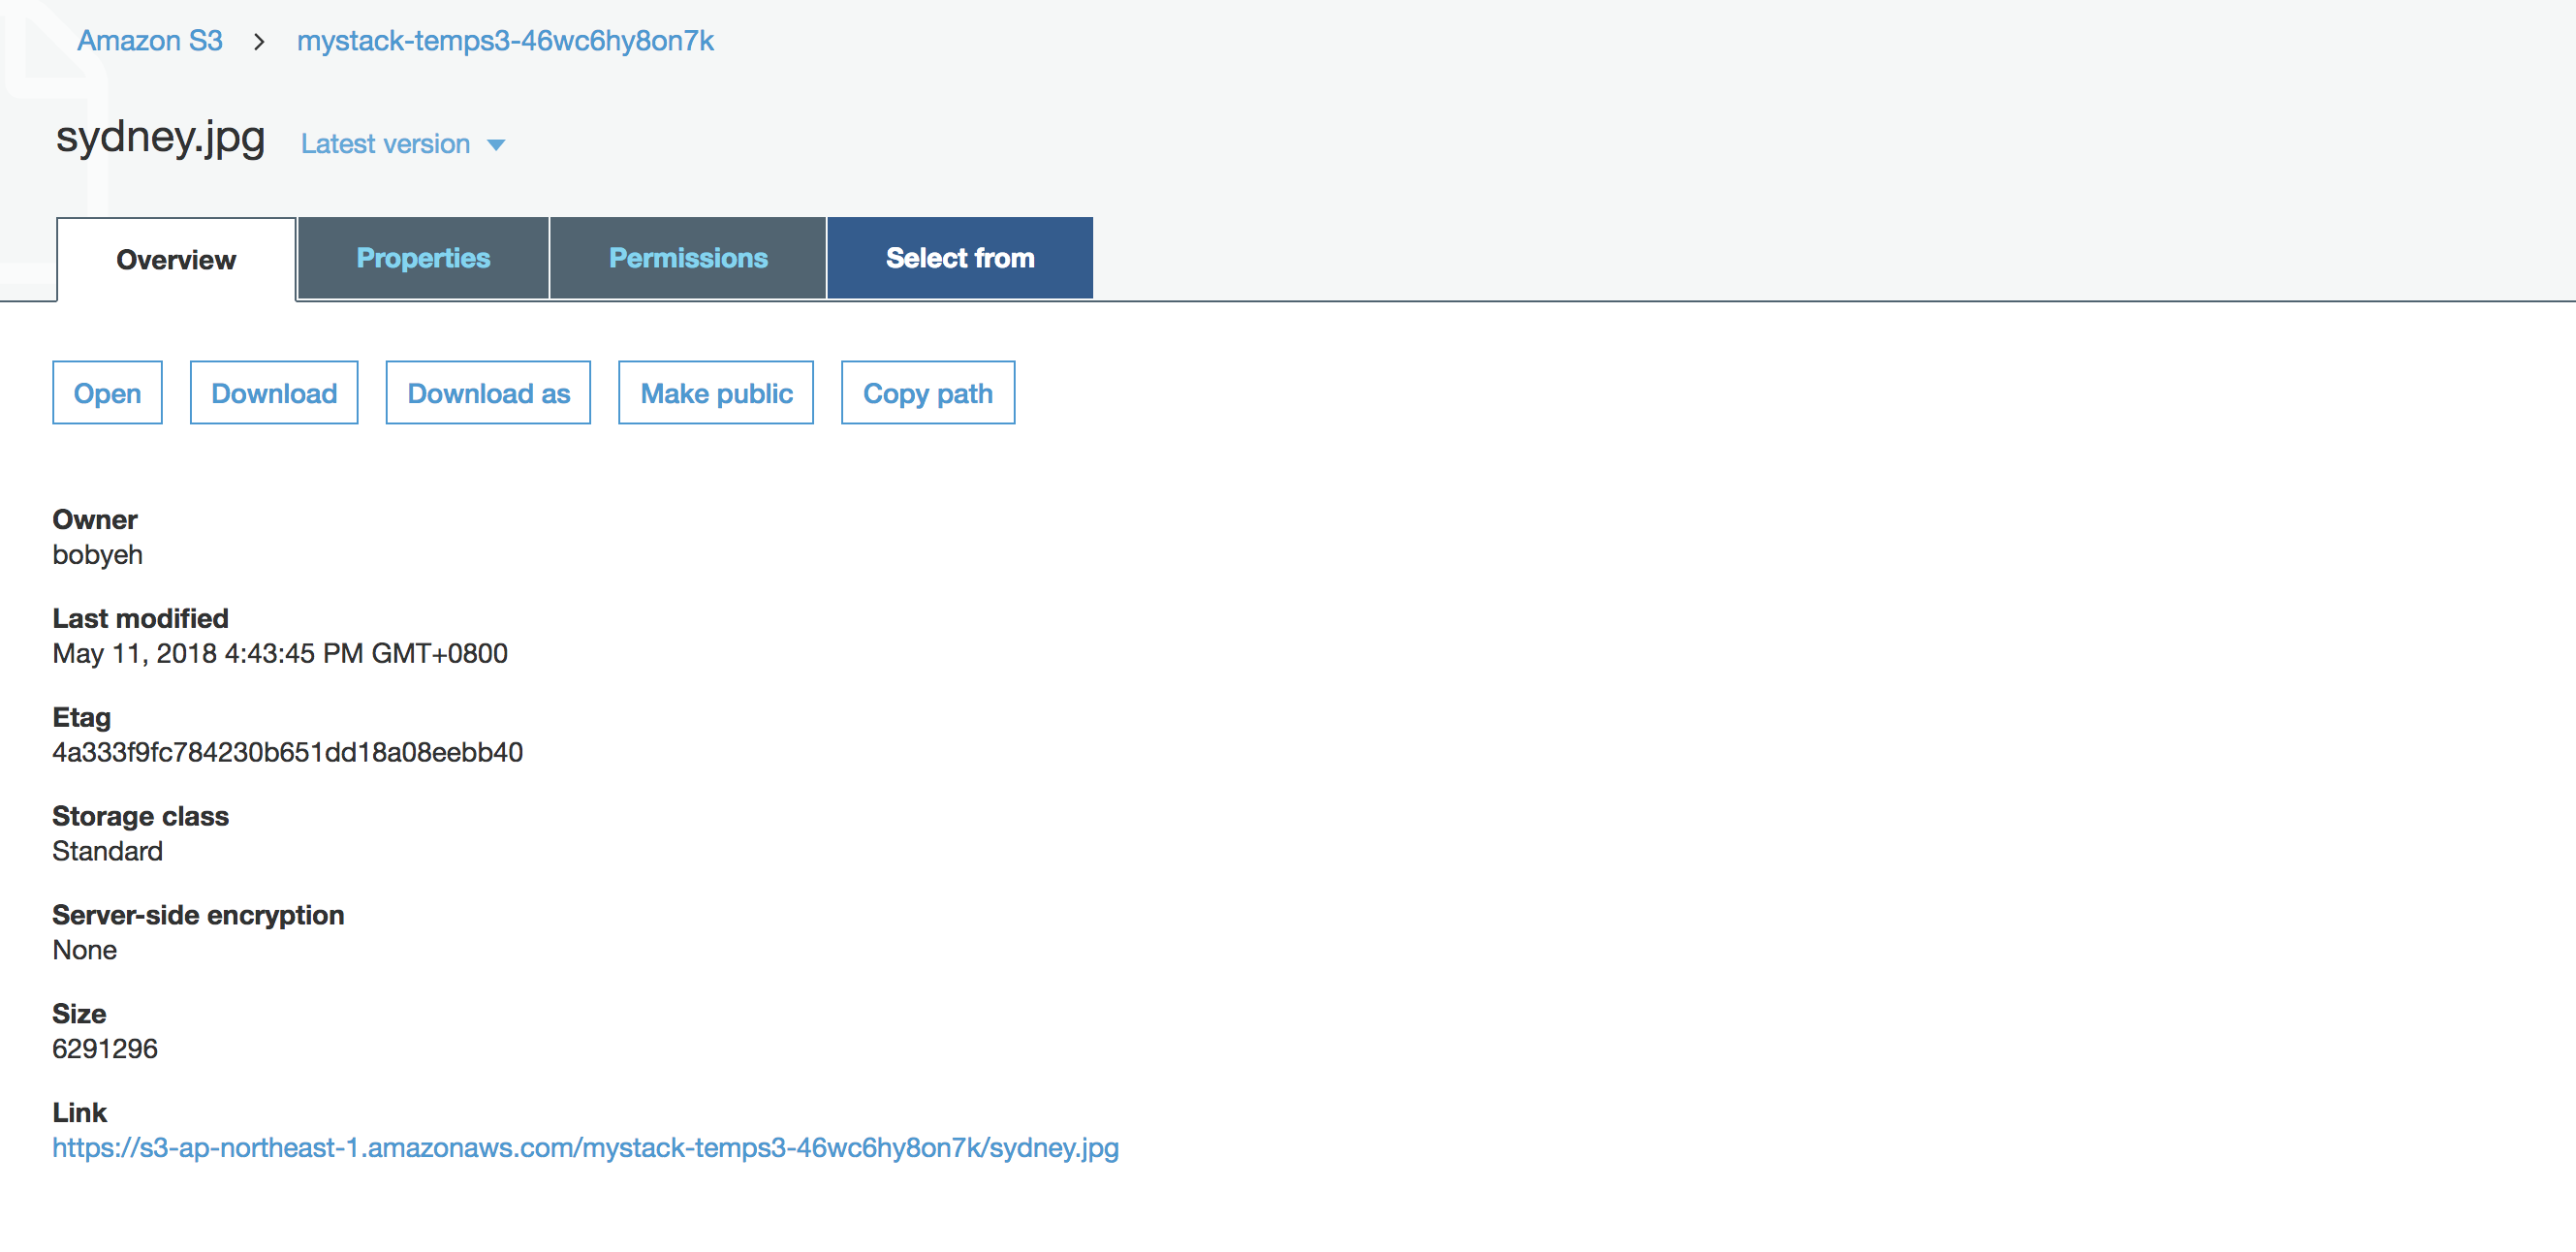
Click the image link, you will find the request was failed because AccessDenied.
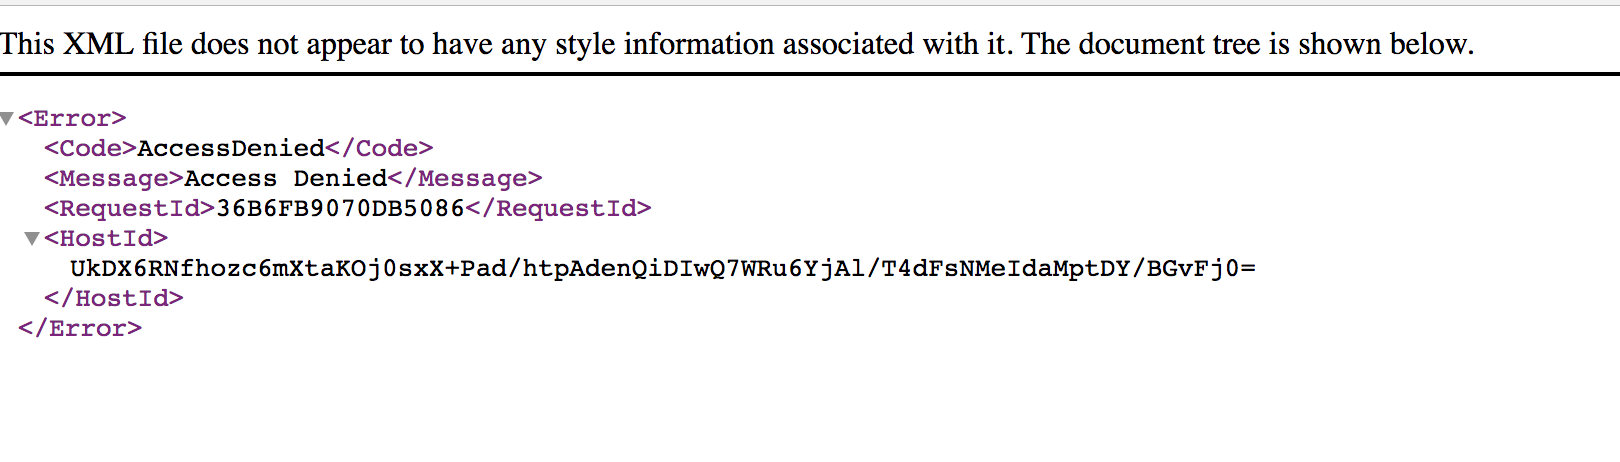
No worry, that's what exactly we want to see: To put static assets into S3 bucket, and serve the request through cloudfront. Now we are going into second phase, create cloudfront to distribute your static assets, and also help to speed it up globally.
####Manually create a Cloudfront Distribution
- AWS Console > Cloudfront > Create Distribution > Web
- Origin Domain Name > - Amazon S3 Bucket - >
THE_BUCKETNAME_IN_THIS_WORKSHOP.s3.amazonaws.com - Restrict Bucket Access > Yes
- Origin Access Identity > Use an Existing Identity
- Your Identities > access-identity-
- Grant Read Permissions on Bucket > Yes, Update Bucket Policy
- And leave all the other as default > Create Distribution.
It will take about 15-20 minutes to create this distribution, we can take a break and get a coffee now. And we will introduce each of these configurations during the distribution creation time.
- Find the domain name for your cloudfront distribution
- AWS Console > Cloudfront > Distributions >
YOUR_CF_DISTRIBUTION> Domain Name - Try to open the image through browser http://
YOUR_CF_DOAMIN/sydney.jpg , and please check the developer tool with the network request/response, expend the response header, you could find the information like this: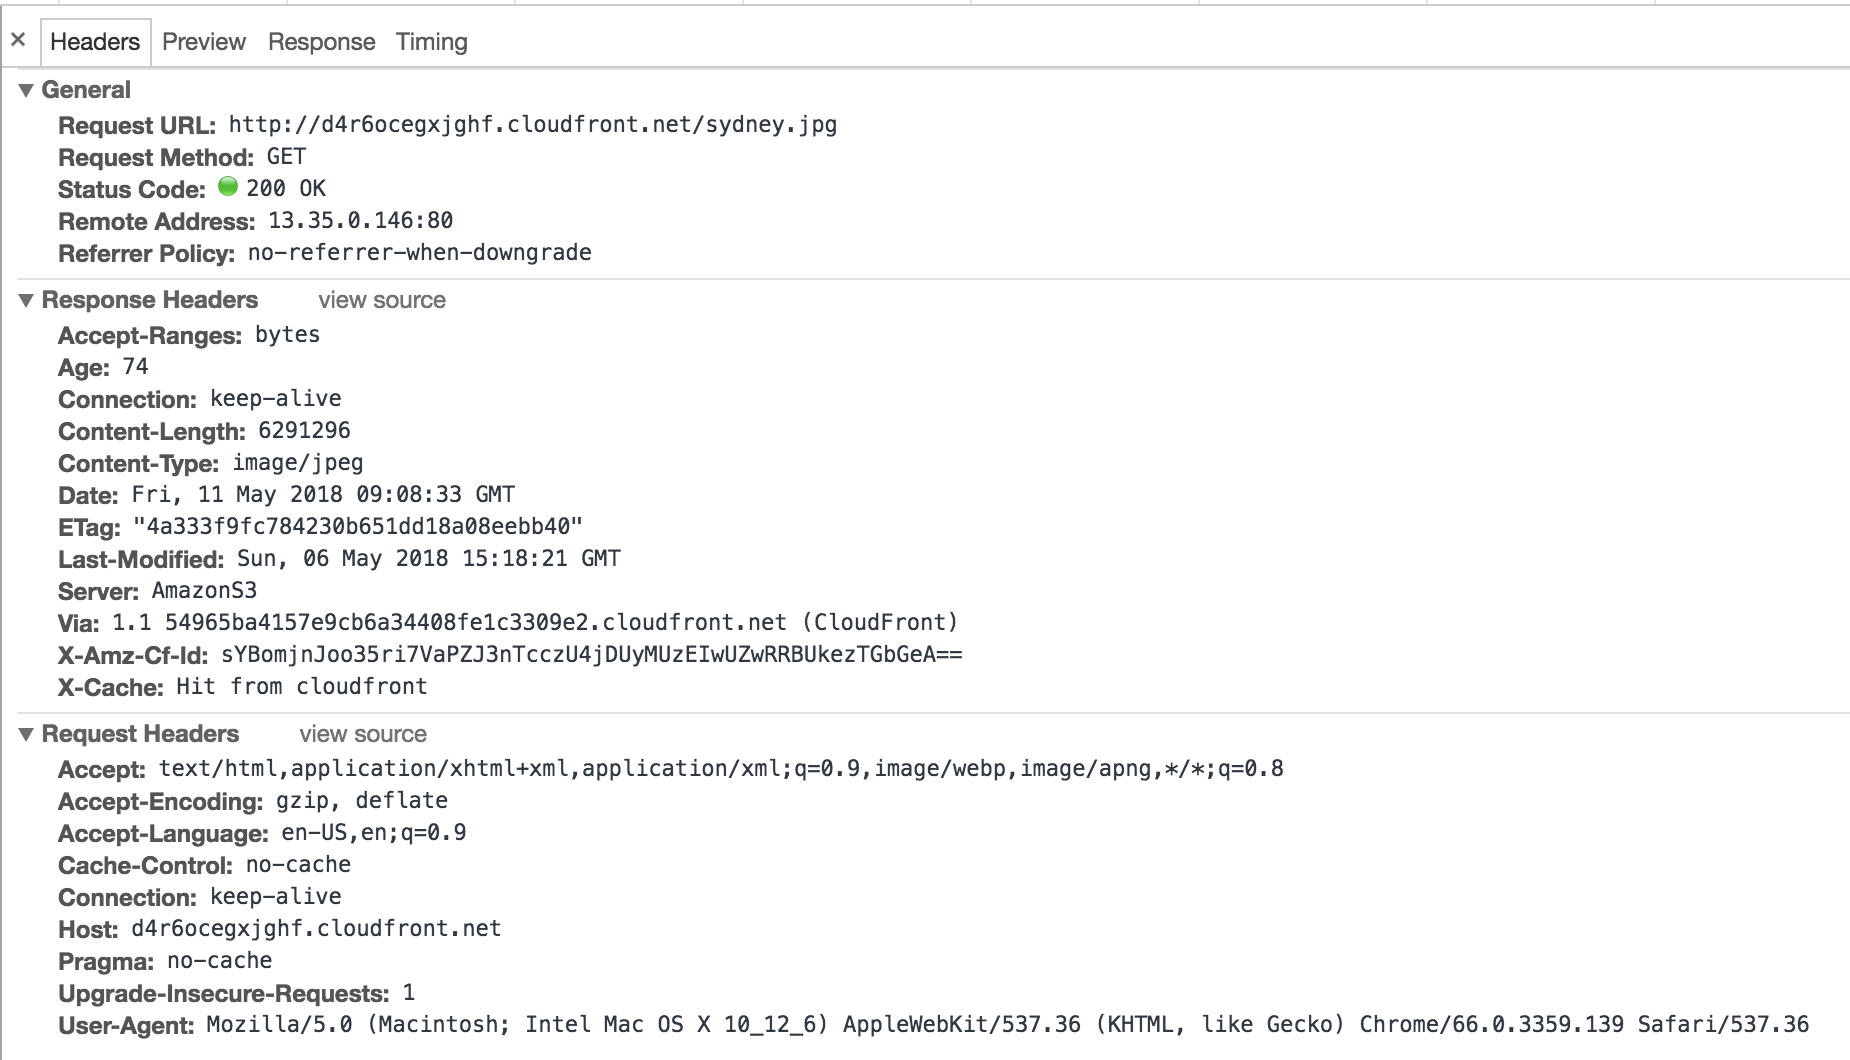 And there is an header saying:
 X-Cache: Hit from cloudfront, which telling you now the traffice started from S3, and through delivered through cloudfront distribution.
- You might already know that: S3 can also serve the web page and image, why should I circle this to use one more service? Now you can start to do an experiment: Try to access the image in S3 directly, and compare the access speed.
- AWS Cosole > S3 >
YOUR_S3_BUCKET> Click on the image > Make Public - And then get the link on the image detail, and try again on your browser.
- Through the developer tool, you can compare with the speed. (If you did choose the long distance region for your source.)
-
Now, you roughly know how it works to cache the image at cloudfront edge, but you wonder if we can simple cache everything from EC2?
-
AWS Console > EC2 > Instances >
YOUR_EC2_INSTANCE> Availability Zone (Remember this) -
AWS Console > EC2 > Load Balancer > Create Load Balancer > Application Load Balancer > Click Create > Input Load Balancer Name, and remember to click the
same Availability Zonewith the EC2. -
Click next till Step 3: Configure Security Groups > Create a new security group > Make Security Group Name=MyLabSecurityGroup, Type=HTTP, Port=80, Source=0.0.0.0/0
-
Click next to Step 4: Configure Routing > Make Target group = New Target Group, Target Group Name=MyLabTragetGroup then click Next.
-
Clieck next to Step 5: Register Targets > You will see there is available EC2 for you to register into Target Group. > Click the checkbox of the EC2 > Add to Register > Click Next
-
At the review page, click Create. Now you have a load balancer with EC2 attached.
-
Go back to CloudFront distribution > Origin > Create Origin > Click the Origin Domain, you can find a new entity point to your new created Load Balancer > Create.
-
Cloudfront distribution > Behavior > Create Behavior > Path Pattern=
*.php, Origin=ELB-XXXXXXXXXX> Create. -
Now, switch back to your EC2 console
cd /var/www/html/
wget https://s3-ap-northeast-1.amazonaws.com/workshop-data-public/index.php
And use VIM or Nano to edit the index.php
nano index.php
modify the $CF_DISTRIBUTE=XXXXXXXXX with your Cloudfront Distribution domain name YOUR_CF_DOMAIN.
Ctrl + O to Save
Ctrl + X to Exit
- Use browser to check http://
YOUR_CF_DOMAIN/index.php
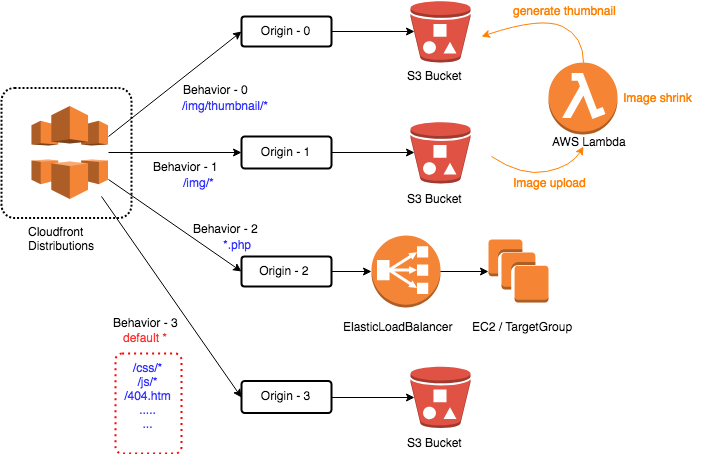
Is it possible to build multi-origin for my website?
Yes, to setup a clear path pattern for your origin, with correct priority.
Till here, you already know how to separate your static asset onto S3 and leverage Cloudfront for global distribution.
We setup two different option for workshop challenge:
a. A Wordpress website. (For teams you now using EC2 serving everything, you should try this first. No matter you use Wordpress, Python-Flask, Python-djongo, node-express or Apache+PHP, this challenge is help to practice again through step-4 to step-6, then you could apply the same concept back to your own workload.)
b. An On-Demand Video Streaming Page. (For teams who plan to handle online streaming, or who already notice that we have another cloudfront distribution type: RTMP, welcome to give a try on this.)
You might want to know how exactly we separate the static asset on a online website, like WordPress.
- Install the WordPress from sketch on EC2, which will require mysql-server, PHP, and also the Wordpress source code.
install mysql-server on your EC2
you might need:
yum install mysql mysql-server

install php related package, you might need:
yum install php php-mysql php-devel php-gd php-pspell php-xml
yum install php-common
yum install php-curl

And then, you might need to clone the wordpress onto your /var/www/html/:
git clone https://github.com/WordPress/WordPress

Create DB for Wordpress:
>mysql -u root -h localhost
mysql> create db wordpress;
mysql> create user wordpress@'localhost' identified by 'password';
mysql> grant all privileges onto wordpress.* to wordpress@'localhost';
mysql> flush privileges;
mysql> exit;
- And then make sure all the configurate was aligned with /var/www/html/WordPress/wp-config.php Now you can check with your wordpress page, see the wp-admin console.
- Next, install a wordpress plug-in
CDN Enabler, putYOUR_CF_DOMAINinto Plug-in Setting. You can find this plug-in will redirect wp-content,wp-include to cloudfront distribution, so don't forget to dump the static assets to S3 bucket. The command is pretty much like what we did in step 5:
> aws s3 cp wp-content s3://YOUR_S3_BUCKET/ --recursive
- Finally, you can find all the assets traffic been redirected as what we did in our workshop.
To build up a cloudfront distribution for online streaming, you might need:
- Create one more cloudfront distribution with RTMP option, you can either create a new bucket to serve the data or just put it into the same bucket we created for this workshop.
- Get a mp4 file from somewhere like
http://file-examples.com/index.php/sample-video-files/sample-mp4-files/or own by your self. Put it onto your S3 bucket. - Now, you can verify the rtmp streaming using existed streaming player. We take VLC player on mac for example:
VLC > File > Open Network >
rtmp://MY_S3_BUCKET_FOR_RTMP_CF/cfx/st/THE_MP4_FILENAME.mp4- Please remember we need to put /cfx/st/ between distribution site and file name. You can refer to https://docs.aws.amazon.com/AmazonCloudFront/latest/DeveloperGuide/Streaming_URLs.html
- If you want to build your own online player page, you can follow the instruction on https://docs.aws.amazon.com/AmazonCloudFront/latest/DeveloperGuide/TutorialStreamingJWPlayer.html , and then check your online player work or not. Recently we know that rtmp will require flash player, so it might get you some time to get a browser that still support flash-player.
In particular scenario, we might face some cross origin reference (CORS) permission issue, then we need to take a look on following page:
- https://docs.aws.amazon.com/AmazonS3/latest/dev/cors.html
- https://docs.aws.amazon.com/AmazonCloudFront/latest/DeveloperGuide/header-caching.html#header-caching-web-cors
- And it mentioned "Configure CloudFront to forward the following headers: Origin, Access-Control-Request-Headers, and Access-Control-Request-Method."
- Disable the Cloudfront distribution for this workshop.
- Delete the distribution for this workshop.
- Delete files in S3 bucket for this workshop.
- Delete ALB and Target Group for this workshop.
- Go to Cloudformation and delete stack.


