
Do the difficult things while they are easy and do the great things while they are small. A journey of a thousand miles must begin with a single step. -Lao Tzu
In this lesson we'll introduce you to table views.
- Present a data set to the user in an organized way using table views
- Describe when to use table views in their iOS apps
- List the various components of table views: The view, controller, cells, and data source
- Explain how a table view creates and uses cells to show data
- Explain reusable table view cells and how they are created and dequeued
Table views are one of the fundamental views that ship with Cocoa Touch and iOS. They are often used with apps that present a lot of data to the user. You're no doubt familiar with table views, even if you don't know them by name. Take a look at the Contacts app, for example: The main view, the list of contacts, is a table view. You most likely have far more contact cards than will fit on a single screen (despite getting larger and larger, iPhone screens are still pretty small, after all); table views also make it easier to present a large volume of information in an easy-to-read (and easy-to-scroll) manner.
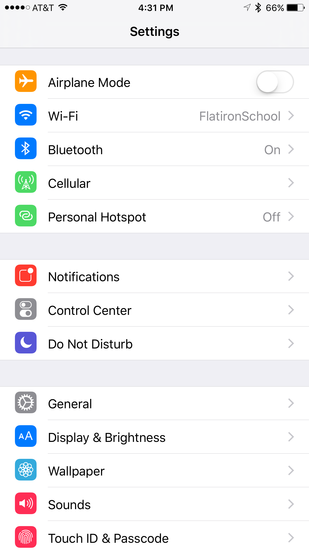
Some examples of apps on your iPhone that use table views are the Settings app:
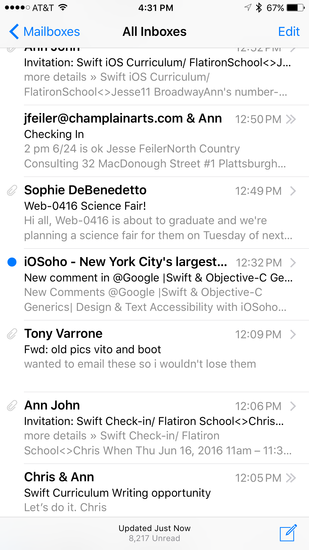
The Mail app:
And the Music app:
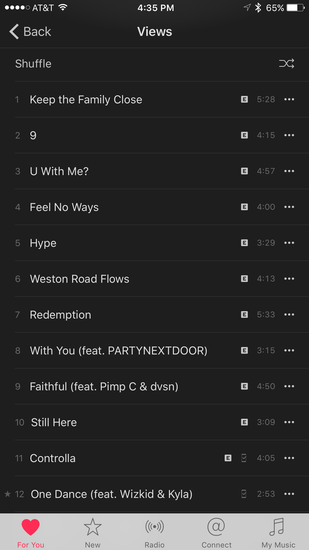
Table views are made up of cells. Each cell represents a single piece of data in a larger data set. You can define how to draw a single cell, and the table view will take care of the work of drawing many cells and scrolling them.
Table views are backed by a data source. The data source provides the pieces of data that will be drawn into each individual cell of the table.
As you've probably guessed by now, a table view is a type of view that is provided by Cocoa Touch. It is an instance of the class UITableView, which is a subclass of UIView. This means that it provides all the functionality of a basic view (UIView), along with some functionality of its own.
Namely, a table view knows how to lay out data in rows. It gets its data from a source and draws each piece of that data set into a cell. Table views also allow users to scroll through the entire data set, displaying a cell for each piece of data, and can even allow the user to select a cell to bring up more details for that piece of data. (Think again of the Contacts app on your iPhone: You can scroll through a list of contacts' names, then select one to view more details like their telephone number and email address.)
Table views get their data from a data source. A data source is typically another class that implements the UITableViewDataSource protocol, which means it provides a number of methods that the table view can call to retrieve individual pieces of data from the larger data set. Most of the methods described in the protocol are optional, but there are two that data sources are required to implement: tableView(_:cellForRowAt:) and tableView(_:numberOfRowsInSection:).
Basically, when you set up a table view, you can designate an instance of a given class as the view's data source. The view will then call methods on the data source, asking it questions like "How many rows of data are in your data set?" and "What piece of data is on the 20th row of the table?" The table view can then use these queries to figure out how to draw the table in a neat, scrollable table.
Table views comprise cells. Each cell is a single piece of data. A table view cell is also a view which is configured to display a given piece of data.
You often see cells made of a custom view (such as in the Mail example above), but Cocoa Touch also comes with basic cells preconfigured with labels and images that you can use to display data points, too. For now, you'll work with these preconfigured cells; later on, you can explore creating cells with custom views so you can display data any way you want.
An example of an app using a table view has been created for you. Open up the TableViewFunTime.xcodeproj file included in this repo. Select Main.storyboard from the file viewer to show the app's UI.
In Main.storyboard, you should see a single scene that includes a table view. It looks like this:

Interface Builder only shows a basic example of how the table view will look. Notice that the table view takes up the entire UI of the application. There is also a prototype cell drawn at the top of the table view. This gives you a basic idea of what the cell will look like, but it is not yet populated with any data. The table view itself has no data in Interface Builder, either, so it mostly looks blank.
Try building and running the app. In the simulator, you'll see this:
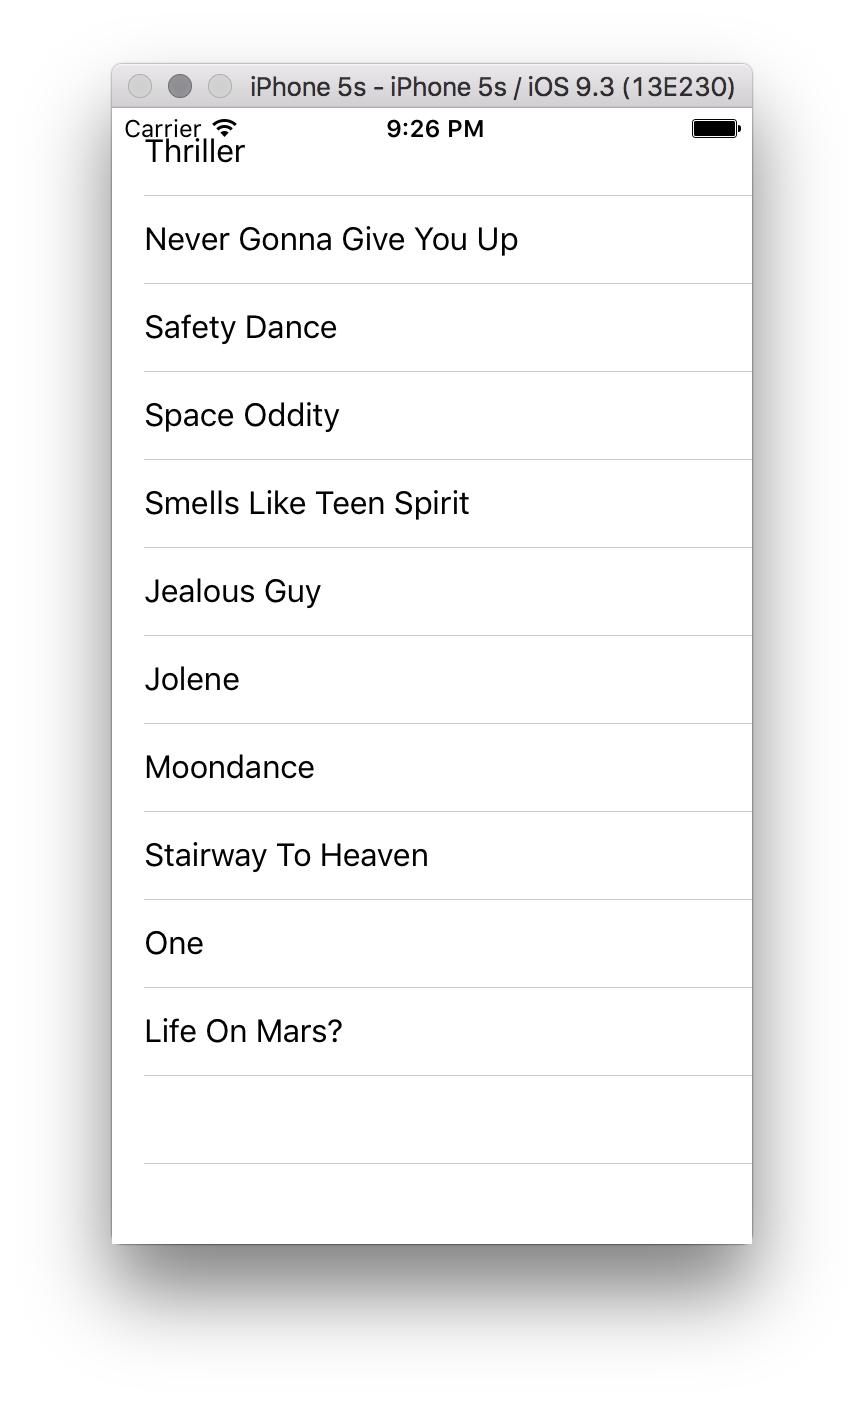
When the app is actually run, it is populated with data (in this case, some great classic examples of music). How does the app get populated with data? Is it magic?
You're about to find out!
The "magic" happens in the app's view controller. Open up TableViewController.swift to see the code that powers the view controller. In particular, take a look at the section marked Table view data source. You'll see that there are currently three methods defined:
    // MARK: - Table view data source

    override func numberOfSections(in tableView: UITableView) -> Int {

        return 1

    }

    override func tableView(_ tableView: UITableView, numberOfRowsInSection section: Int) -> Int {

        return favoriteSongs.count

    }


    override func tableView(_ tableView: UITableView, cellForRowAt indexPath: IndexPath) -> UITableViewCell {

        let cell = tableView.dequeueReusableCell(withIdentifier: "basicCell", for: indexPath)

        let favoriteSong = favoriteSongs[indexPath.row]

        cell.textLabel?.text = favoriteSong

        return cell

    }
Believe it or not, these are all the methods that are required to power a table view. The table view can use these methods to get its data set, and will do all the rest of the work itself—drawing the cells, allow the user to scroll through the table view, and so on.
Let's take a look at these methods in more detail.
The first method, numberOfSections(in:), returns the number of sections in the table view. Many table views only have one section, including the one in this example project, so in this case, the method is simply returning 1. Table views can be broken into sections, though. You can see this in the Settings app, which groups similar settings categories into sections. Each section is denoted with a large grey area. Sections can have titles, too, although the Settings app doesn't have titles for its sections.
In future lessons, you'll deal more with dividing a table view into sections; for the time being, you'll work with table views with just one section.
The next important method is tableView(_:numberOfRowsInSection:). This method gets passed an Int representing a particular section of the table view, and returns the number of rows present in that section. Since you're working with table views with only one section in this example, numberOfRowsInSection will always be 0 (since sections are 0-indexed, like arrays).
The relevant bit of this method is the single line that returns the number of rows in the section. In this example app, you are creating a list of favorite songs that has been stored in the instance variable favoriteSongs. The number of rows—i.e., the number of pieces of data in the data set—is the number of songs stored in the favoriteSongs array, so this method simply returns the count of that array. Easy, right?
The final method, tableView(_:cellForRowAt:), is a bit more complicated. There's a lot going on in this method, so let's break it down bit by bit.
tableView(_:cellForRowAt:) does something very important: It returns an actual cell for use in the table view. The "magic" is that, given a cell, the table view will know how to draw it in amongst all the other cells. Neat, huh?
First, tableView(_:cellForRowAt:) gets passed an indexPath parameter which lets the method know exactly which cell is being requested. This parameter is of type NSIndexPath, which is a structure that contains both the section and row of the cell being drawn. In this example application, all that matters is the row (since your table view only has one section), which can be obtained using the row property.
But first, let's talk about reusable cells.
The method's first line of code is this:
let cell = tableView.dequeueReusableCell(withIdentifier: "basicCell", for: indexPath)What on Earth is that call?
A table view has to allocate memory to store and draw every cell that the user sees on their screen at any given time. In fact, the table view creates a few cells that are above and below the currently visible screen, too, so that scrolling through the table view is fast and fluid. But the iPhone has a fairly limited amount of memory (even less in the early days of the iPhone), and it would be inefficient for the table view to allocate memory for every cell, so it only allocates memory for the visible cells and a few cells immediately adjacent to the visible cells.
Theoretically, when a table view needs to create a new cell, it allocates memory for the cell and then initializes it with a label or image or whatever view dicates the look of the cell. In practice, though, most cells are mostly the same except for some slightly different text, or maybe a slightly different image. Allocating and deallocating memory is a complex and time-consuming task on the iPhone, so table views try to minimize how often they have to allocate and deallocate table view cells, since there could potentially be hundreds or thousands of cells in a table view.
That's where the method call dequeueReusableCell(withIdentifier:for:) comes in.
Consider this: You have a table view with 100 cells. You're looking at that table view on an iPhone that can display five cells at a time. When your app starts up, the table view will create the first five cells, at indexes 0 through 4, and display them. It will then create five more cells, at indexes 5 through 9, and store them in memory, so you can quickly scroll through the view.
You start scrolling, and look at the next set of five records (cells 5 through 9). The table has already created those, so it displays them quickly. While you're looking at those cells, it has already created cells 10 through 14, so you can keep scrolling. It also keeps cells 0 through 4 in memory, in case you scroll backwards.
You scroll forward again. Now you're looking at cells 10 through 14. It keeps cells 5 through 9 in memory, too, just in case you scroll backwards, and it starts to create cells 15 through 19 in case you scroll forwards.
Here's the important part: Instead of allocating more memory for cells 15 through 19, the table view instead reuses, or dequeues, cells 0 through 4 (which it has determined it doesn't need anymore). That way, it doesn't have to create new cells from scratch, but instead can present the app with a nearly-initialized cell. All the app needs to do is change the cell's text label or update its image or update the view.
dequeueReusableCell(withIdentifier:for:) is way to efficiently create and manage cells in large table views. It returns a previously-allocated but currently unused cell if one exists; otherwise, it creates and returns a newly-allocated cell.
How can the table view differentiate between different types of cells, though? In other words, you may have cells that look different; how does the table view know which one to return?
Every different type of cell (that is, every different look or design) has a unique identifier. The first parameter you pass to dequeueReusableCell(withIdentifier:for:) specifies the identifier of the type of cell you want to retrieve or create. In this example, the cells in the table all have the identifier "basicCell". (Often times, the identifier of a cell is the same name as its class, but sometimes you want to have a more specific identifier.)
The rest of this method is fairly simple. Once you have a cell (either one previously allocated, or a new one), you then retrieve its corresponding song, which is just the entry in favoriteSongs that corresponds to the cell's row. You then set the text label of the cell to the name of the song (cell.textLabel?.text = favoriteSong) and return the cell.
Let's take a look at a more practical example of dequeueing cells in action.
How many times does tableView(_:cellForRowAt:). It will get called eleven times, once for each cell that needs to be drawn. You can see this in action by adding some print() statements to tableView(_:cellForRowAt:) and then running your app. In the print() statement, print out both the section and row of indexPath to see what is going on.
    override func tableView(_ tableView: UITableView, cellForRowAt indexPath: IndexPath) -> UITableViewCell {
        let cell = tableView.dequeueReusableCell(withIdentifier: "basicCell", for: indexPath)

        let favoriteSong = favoriteSongs[indexPath.row]

        cell.textLabel?.text = favoriteSong

        return cell

    }
After running our code, you should see this print to console:
Section: 0 -- Row: 0
Section: 0 -- Row: 1
Section: 0 -- Row: 2
Section: 0 -- Row: 3
Section: 0 -- Row: 4
Section: 0 -- Row: 5
Section: 0 -- Row: 6
Section: 0 -- Row: 7
Section: 0 -- Row: 8
Section: 0 -- Row: 9
Section: 0 -- Row: 10
Notice how the row property corresponds to an index into the favoriteSongs property!
The first time this function is called, row has a value of 0.
let favoriteSong = favoriteSongs[indexPath.row]
// the first time through, the row property is 0. This is the equivalent then of favoriteSongs[0]
// favoriteSong has a value of "Thriller"
The second time this function is called, row has a value of 1.
let favoriteSong = favoriteSongs[indexPath.row]
// the second time through, the row property is 1. This is the equivalent then of favoriteSongs[1]
// favoriteSong has a value of "Never Gonna Give You Up"
Once you get the title of a song (which in this example is just a String), you assign that song title to the cell's text label's text property.
After doing this you have completely configured the cell and returned it back to the caller of the method. The caller of this method is the table view, so you can think of this as a form of communication between the table view and the view controller. The table view calls this method, passing in itself and the indexPath as parameters. The view controller makes use of this information to configure a cell and returns it back to the table view, which is then able to display it to the user.
And that's how the table view's data source works. Let's take a look at how you wire up a table view to a data source.
Take a look at Main.storyboard again. In Interface Builder, click once on the Table View, either in the main editor window or the object listing on the left side of Interface Builder, to select it, then bring up the Connections Inspector in the right pane.

Notice the dataSource outlet? That outlet is hooked up to the Table View Controller, which represents the TableViewController you just examined earlier in this lesson. The table view is wired up to this controller, which means that it will ask the controller—by calling particular methods—for the data necessary to draw the table view. The table view itself takes care of the rest of the work—it just needs to be hooked up to the data source, and does the rest by itself.
In future lessons, you'll see how to build your own iOS app powered by a table view yourself. For now, though, you've hopefully gained insight on how table views in iOS work.


