A step by step Webpack tutorial that drives you throught a build process of a Webpack Bundled and basic Javscript project
This Repository was used during webpack presentation. The Repo might be helpfull to understand the way webpack works.
The project will help you learn the main features of Webpack, No fancy staffs, Nor complicated things, just a minimal JS logic with minimal css and html templates. The main Object is to understand How To Webpack.
webpack is a bundler for modules. The main purpose is to bundle JavaScript files for usage in a browser, yet it is also capable of transforming, bundling, or packaging just about any resource or asset. github.com/webpack/webpack
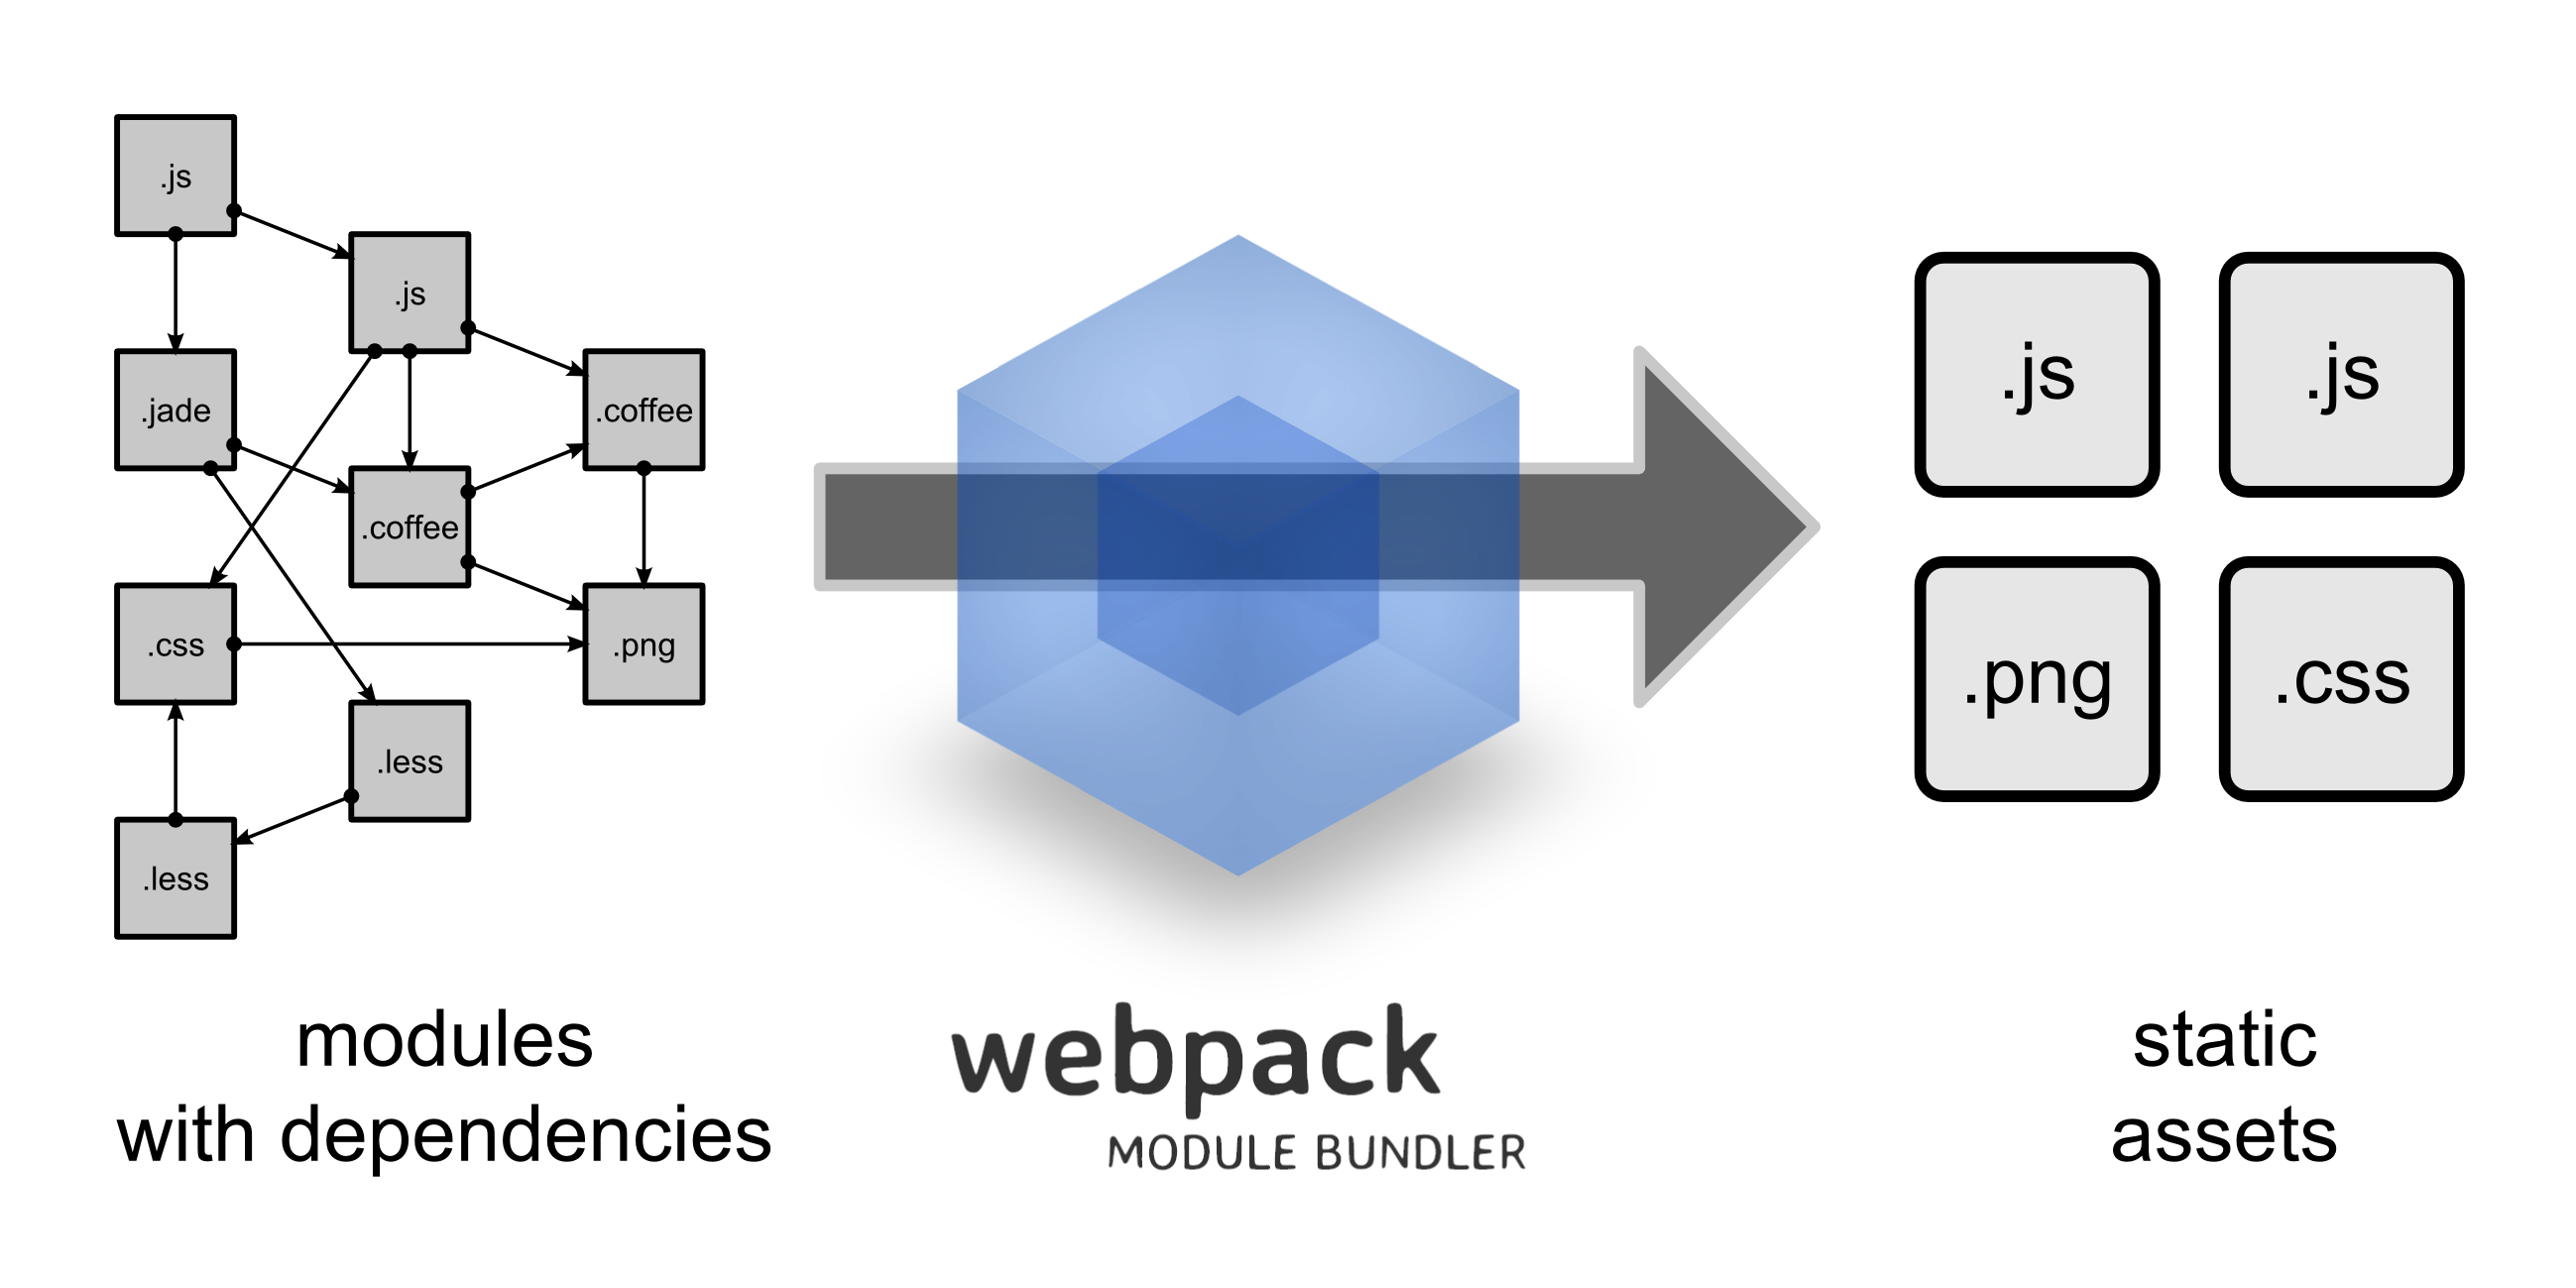
webpack is a module bundler.
webpack takes modules with dependencies and generates static assets representing those modules.
Existing module bundlers are not well suited for big projects (big single page applications). The most pressing reason for developing another module bundler was [[Code Splitting]] and that static assets should fit seamlessly together through modularization.
I tried to extend existing module bundlers, but it wasn't possible to achieve all goals.
- Split the dependency tree into chunks loaded on demand
- Keep initial loading time low
- Every static asset should be able to be a module
- Ability to integrate 3rd-party libraries as modules
- Ability to customize nearly every part of the module bundler
- Suited for big projects
More on: Webpack official website
--
- Unix based system
- Node lts version (> *4.1)
- Npm (> *2)
-
Download or clone the Repo:
$ git clone https://github.com/medhoover/gsw-webpack.git -
install dependencies:
$ npm install
--
The repository contains 5 branches, including the master branch which holds the final result (currently merged from step-4).
Each Branch is a step on the build process, and the application works starting from the first one.
At each step you will discover new Webpack features.
- Start by installing the [required dependencies] (#instllation)
- Checkout to first step using CLI
git checkout step-1 - Start the app using
npm start - Check the source code to see how things works
- jump to the next step using the command
git checkout step-2 - Repeat the steps ...
- Note: Each branch has it own run script commands, bellow is the list:
- stpe-1, step-2 & step-3:
npm start - step-3:
npm start&npm run devStart: for webpack dev server (supports live server reload on files update)
Check [pakcage.json] (https://github.com/medhoover/gsw-webpack/blob/master/package.json#L7-L8) for more details
--
I tried to add comments for each remarkable instruction, For more detailed explanation chckout the links in the next [section] (#links)
--
I recommand going throught the [official documentation] (https://webpack.github.io), and you can also take a look at the [List of tutorials] (https://webpack.github.io/docs/list-of-tutorials.html) updated regularly by webpack team. As well as this useful [meduim article] (https://medium.com/@dabit3/beginner-s-guide-to-webpack-b1f1a3638460#.kpq14xoc8).

