LambStatus


LambStatus is a status page system inspired by StatusPage.io, built on AWS Lambda.
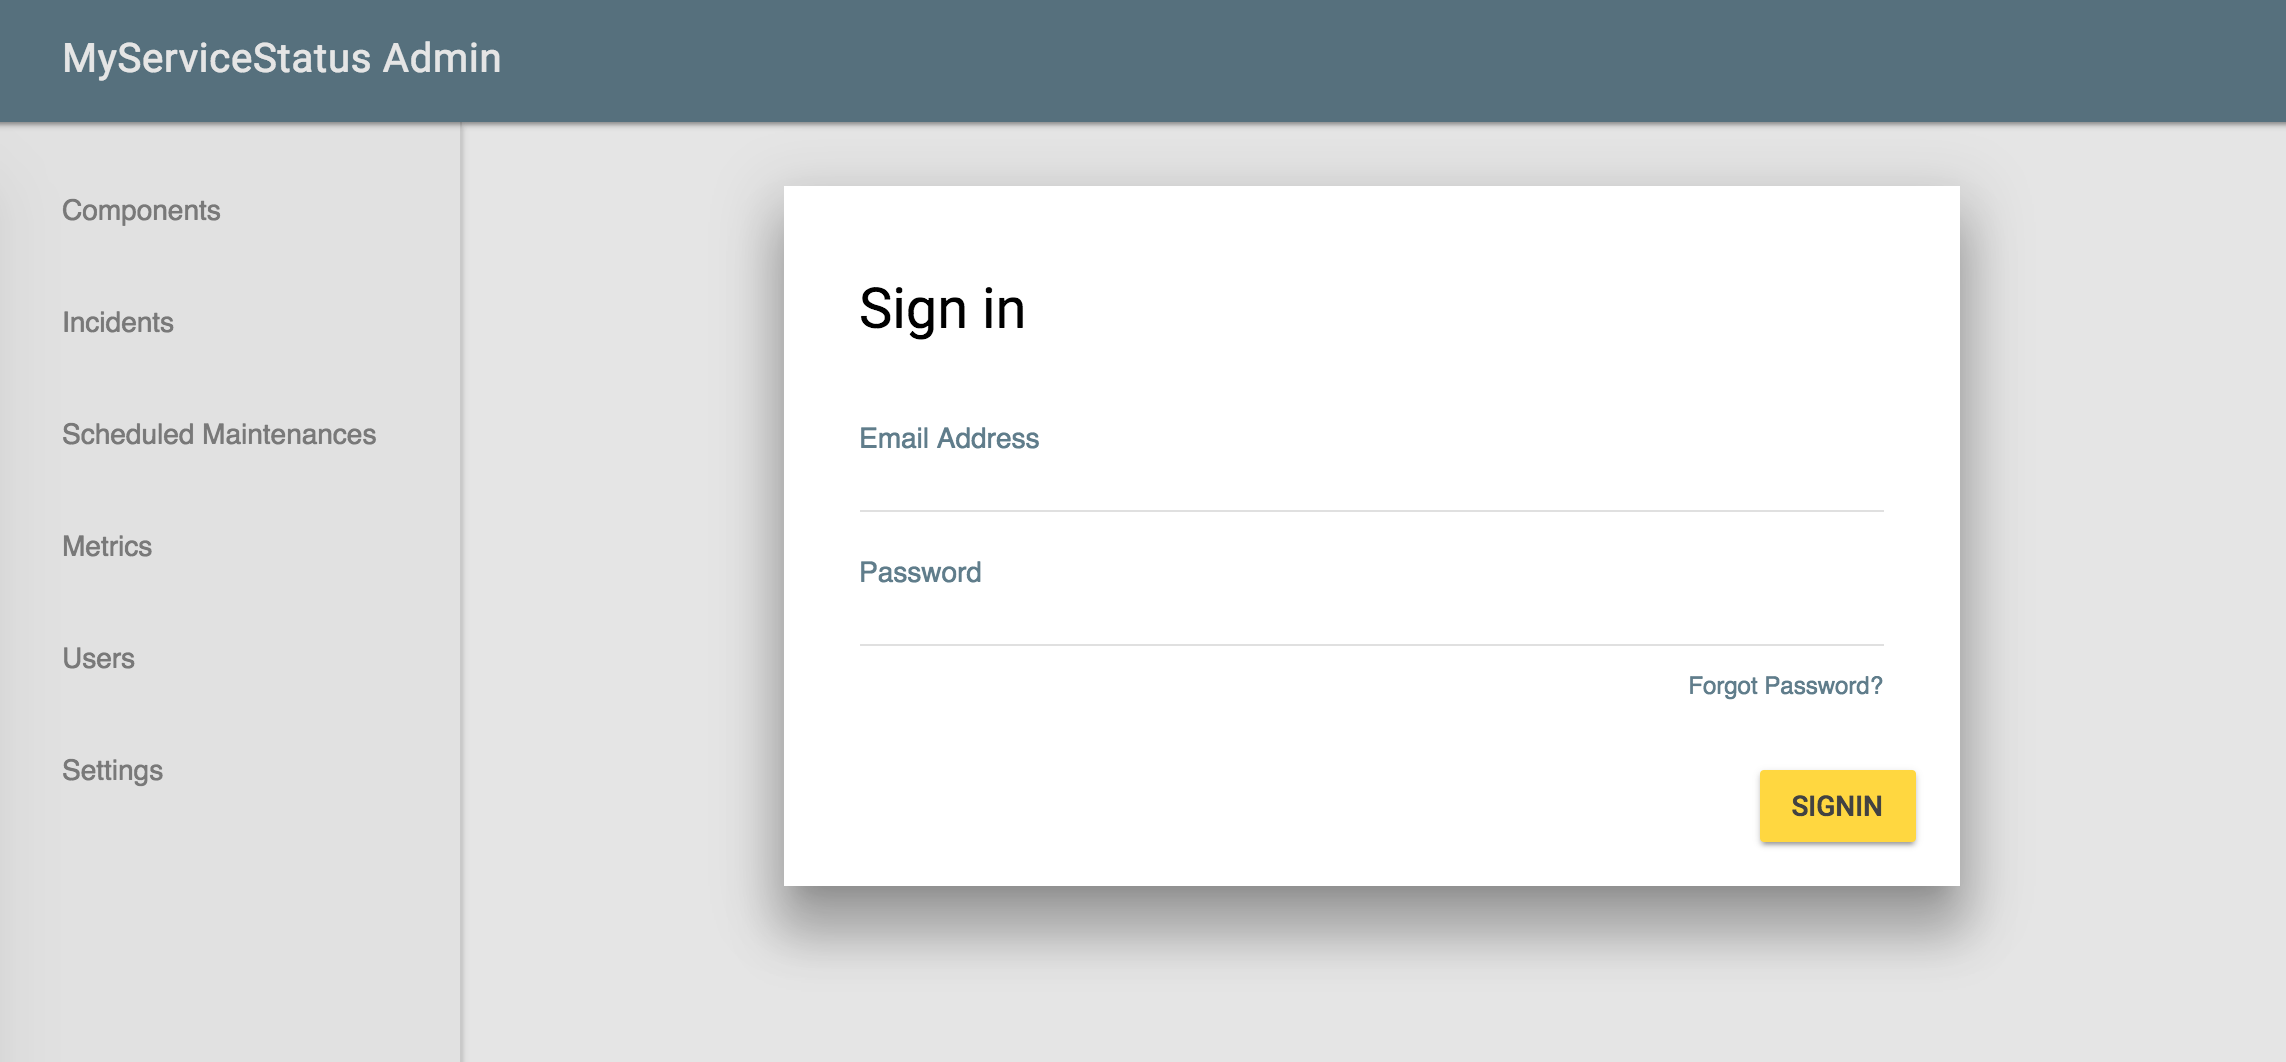
With a few clicks, You can build a status page like this:

The demo pages are available:
- Status page (the page to tell your service's status to your users)
- Admin page (the page to change your service's status)
Goals of this project
- Offers an open source and serverless status page system.
- Enables you to deploy and maintain the status page system at minimum effort.
Why Serverless?
Status page system is great with the Serverless architecture, because:
- It dramatically eases your pain caused by the scaling / availability issues. It is terrible if your service is down AND heavy traffic from stuck users stops your status page.
- It reduces your infrastructure cost. A status page usually gets very low traffic and occasionally huge traffic. You only pay for the traffic that you handle.
Apart from the Serverless architecture, LambStatus enables you to:
- Easily build and update the system (by the power of the CloudFormation)
- Choose the AWS region different from your service's region. If both your service and its status page rely on the same region, the region outage may stop both.
Installation
Launch your cloudformation stack by clicking the button below:
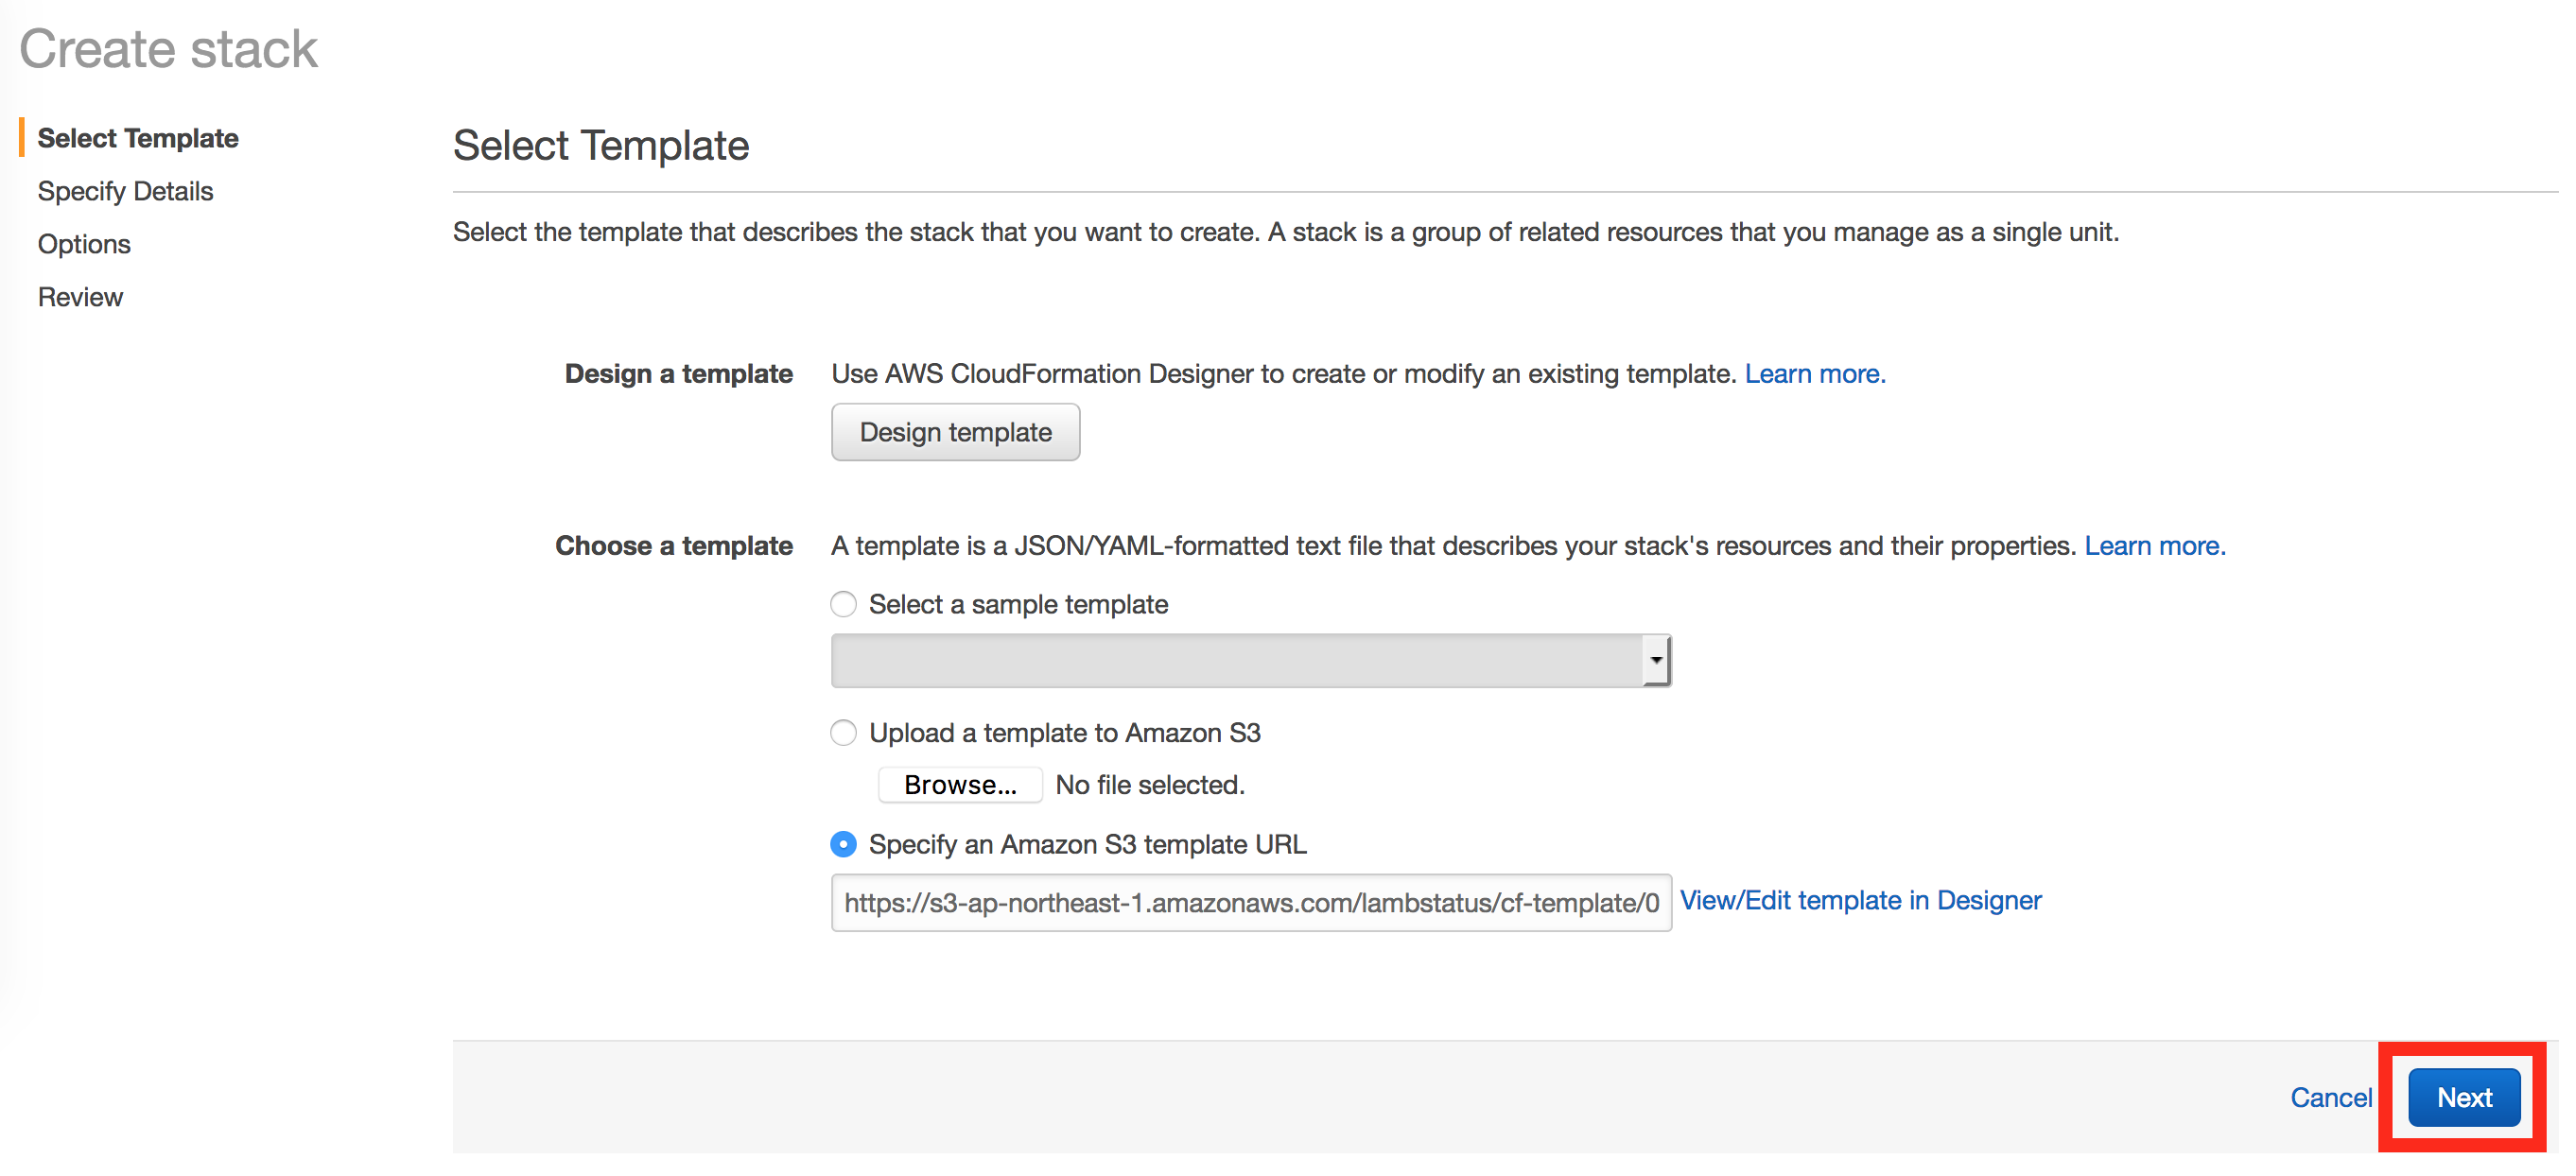
When a window to create a new CloudFormation stack is opened (like below), click Next.
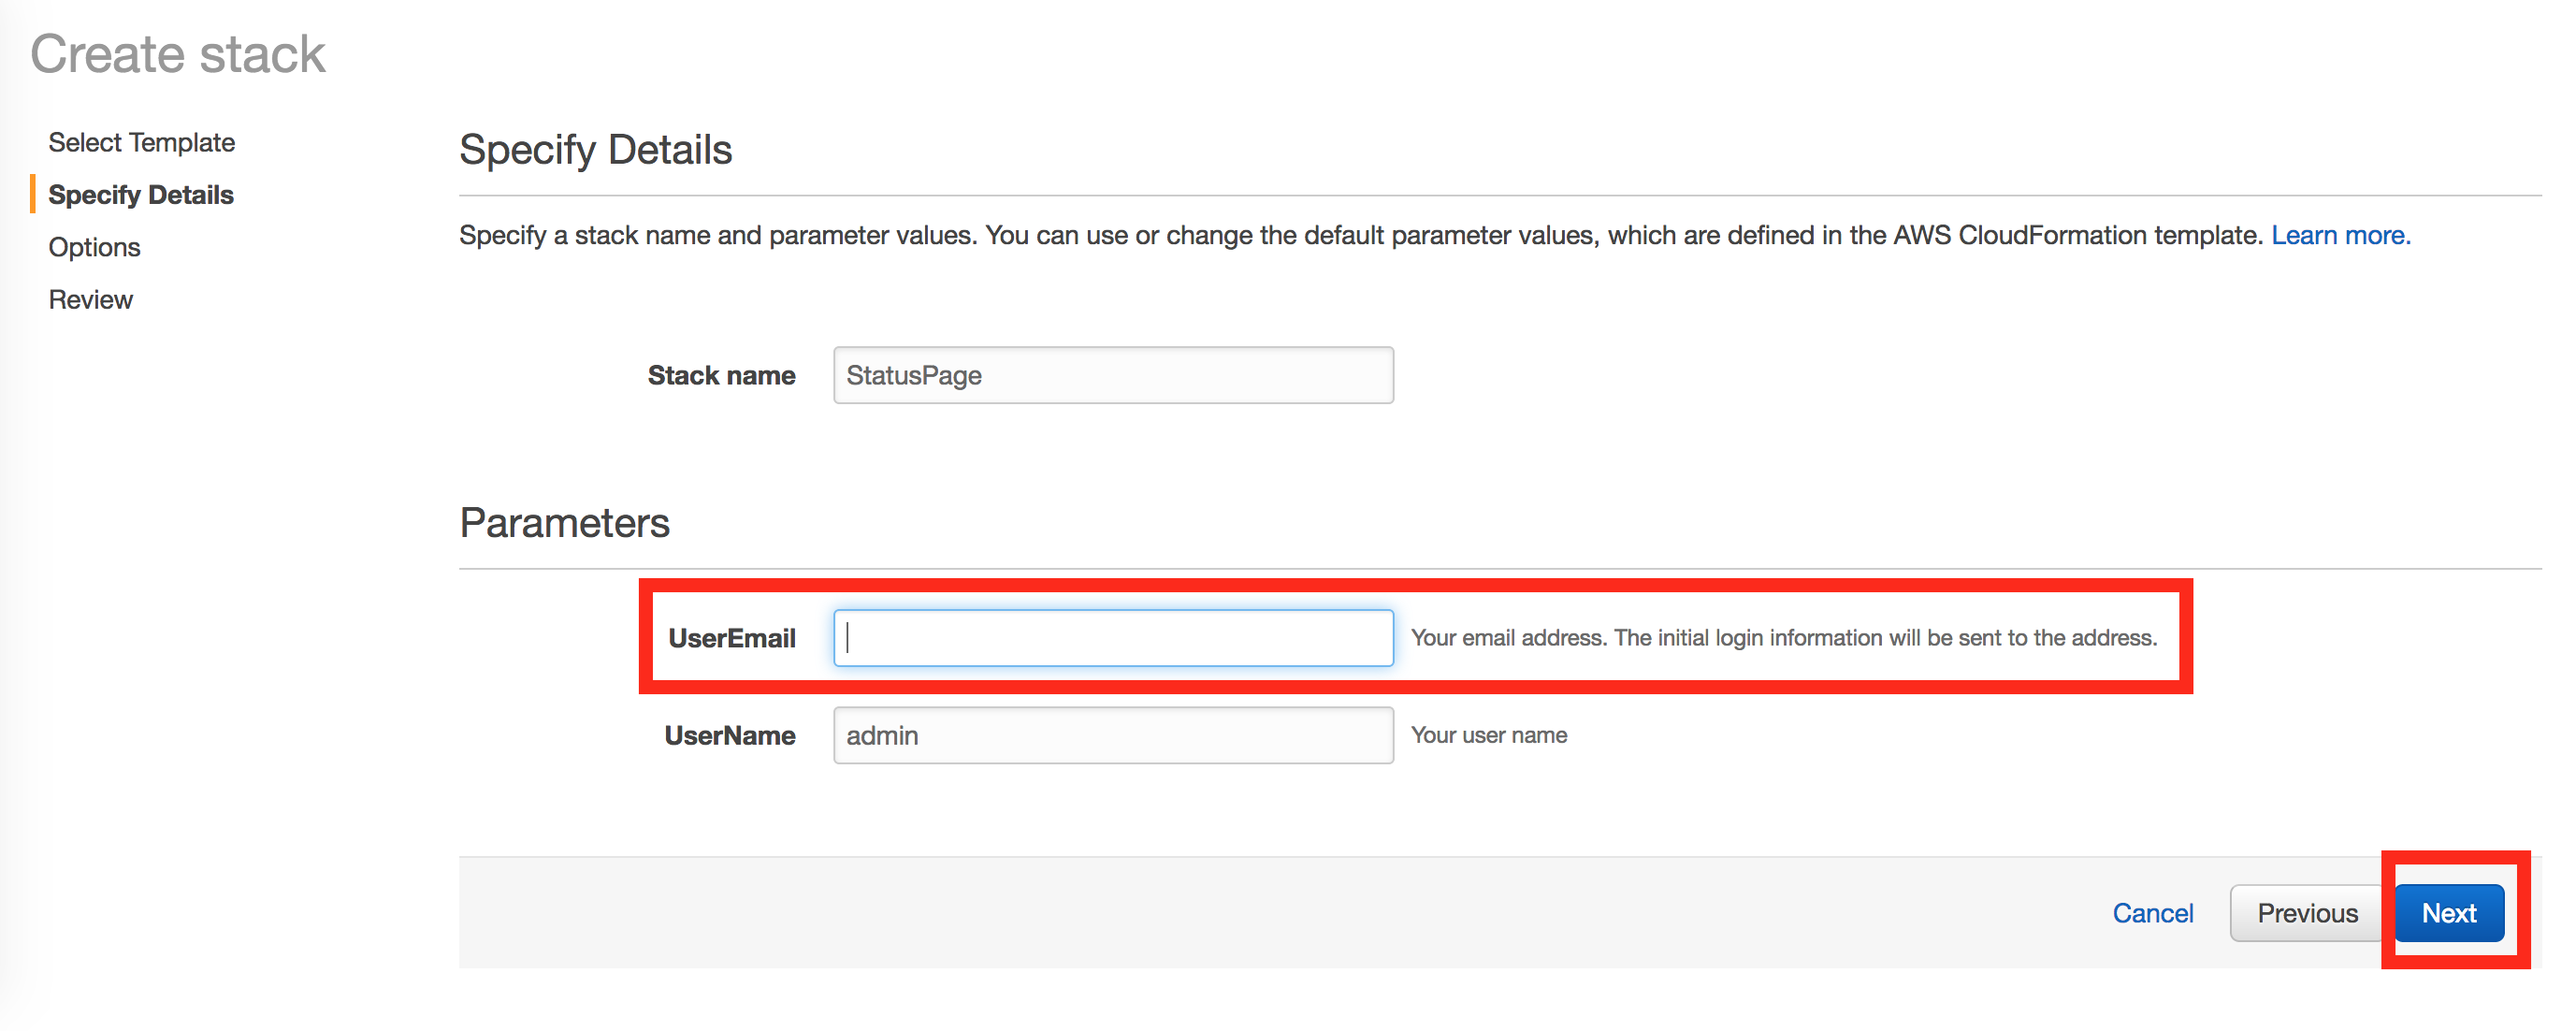
Then, enter your email address and click Next.
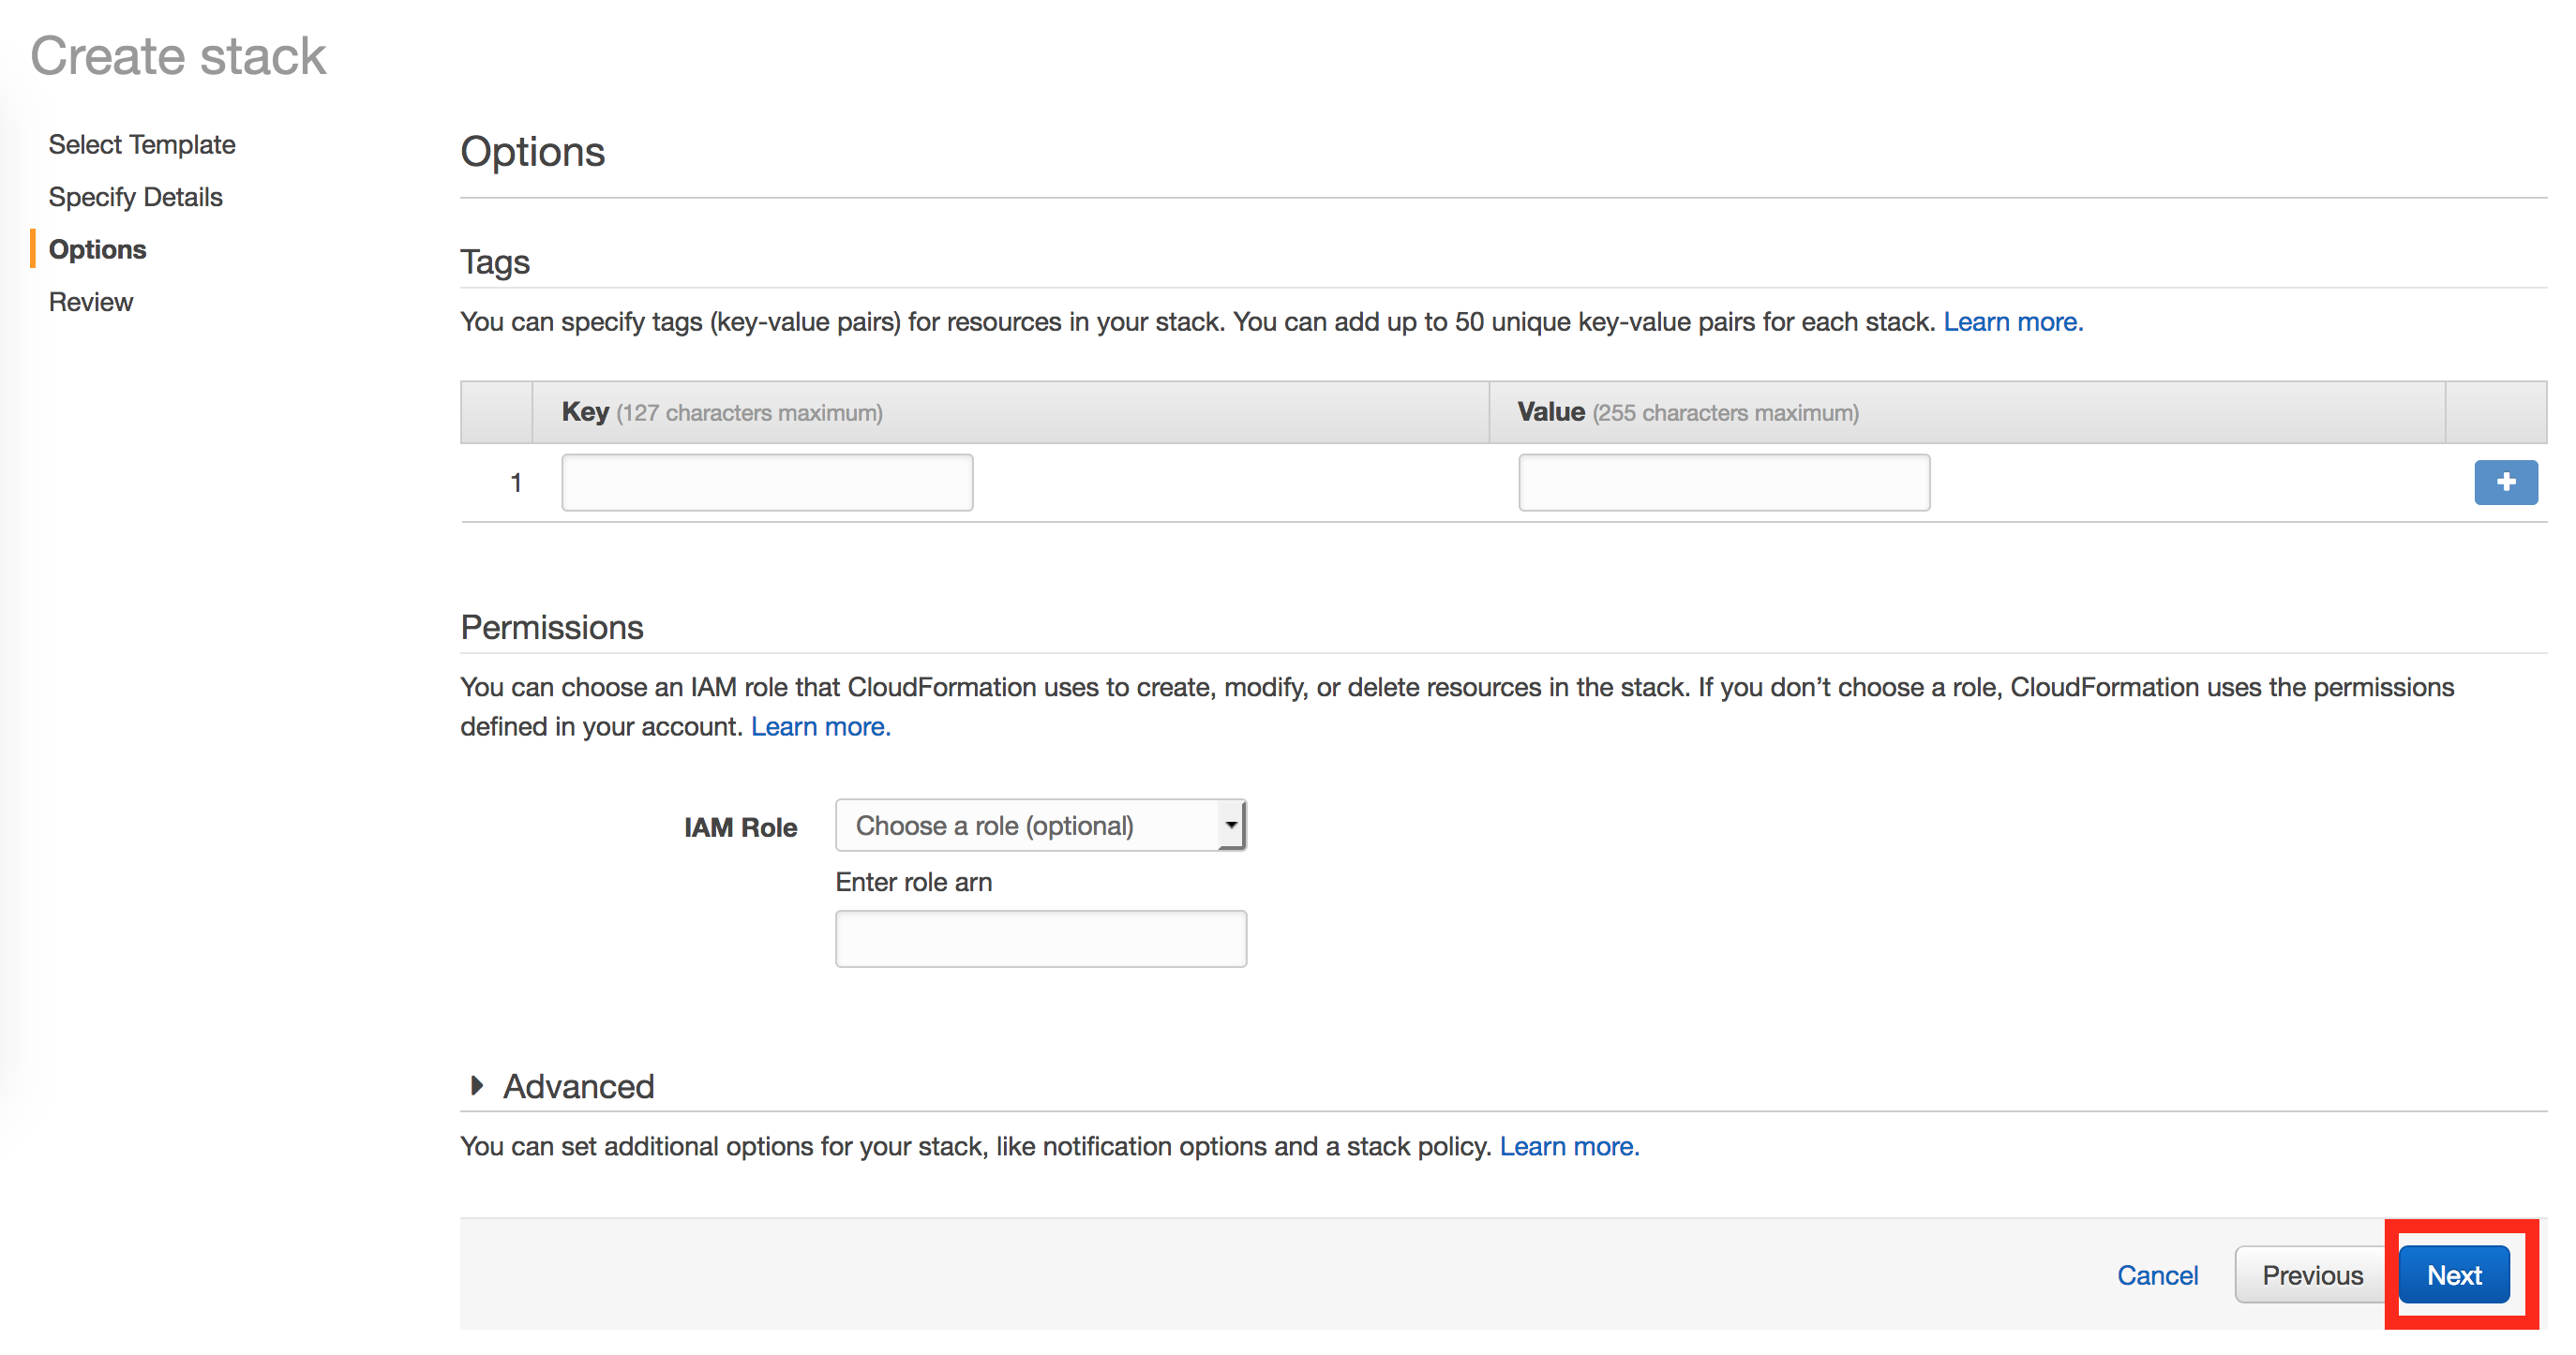
Click Next again.
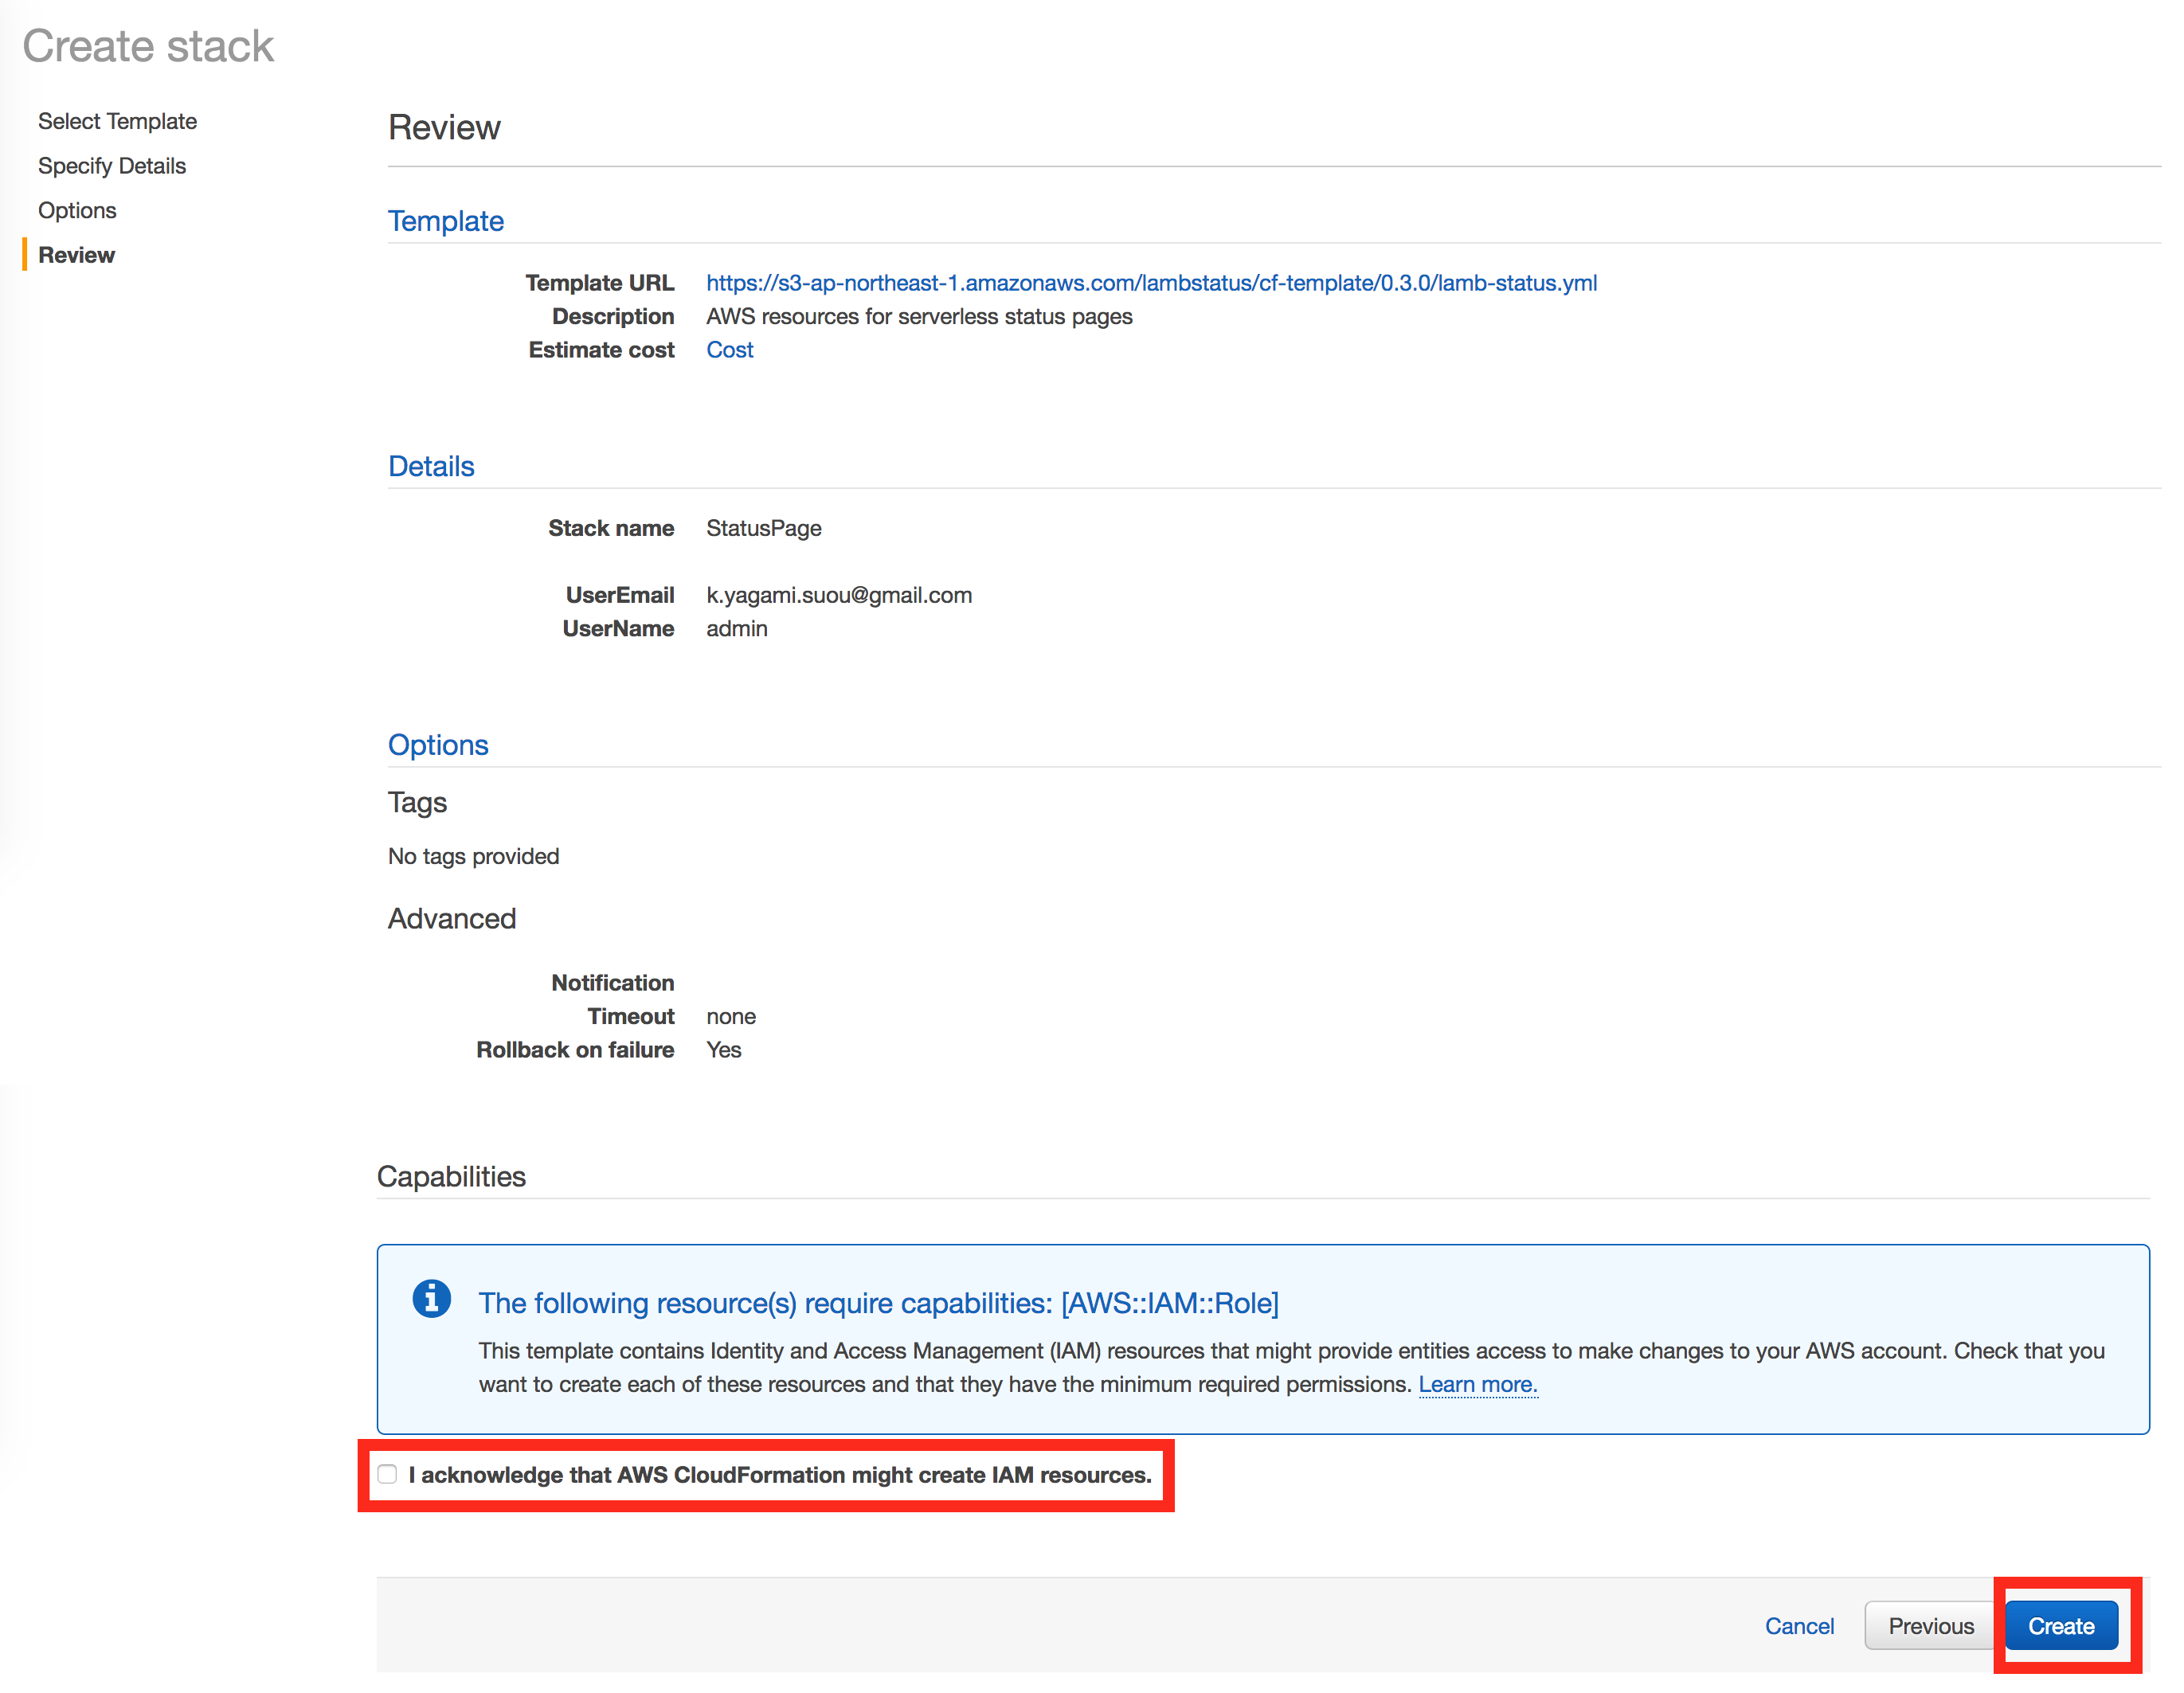
Check the acknowledgment checkbox at the bottom and click Create.
When the stack is created, the email will be sent to the email address of the initial user. It may take 20-25 minutes, mainly due to the settings of CloudFront Distribution.

Click the link in the email, and sign in to admin console.
See the demo page for the usage example of admin console.
Update
If the newer version of LambStatus is available, you can easily update the existing CloudFormation stack by applying this template. Visit the wiki page to see the step-by-step instructions.
TODO
LambStatus is still under development, and YOUR feature requests and bug reports are very welcome. Feel free to open a new issue or join our gitter room.
- Service status
- Show status by functional components
- Grouping functional components (#14)
- Incidents
- Show incidents
- Scheduled maintenance
- Metrics
- Show metrics
- Import metrics data from other monitoring SaaS
- CloudWatch
- New Relic (#16)
- ...
- User accounts
- Notifications
- Settings
- Custom domain
- Custom colors / styling (#14)
Development
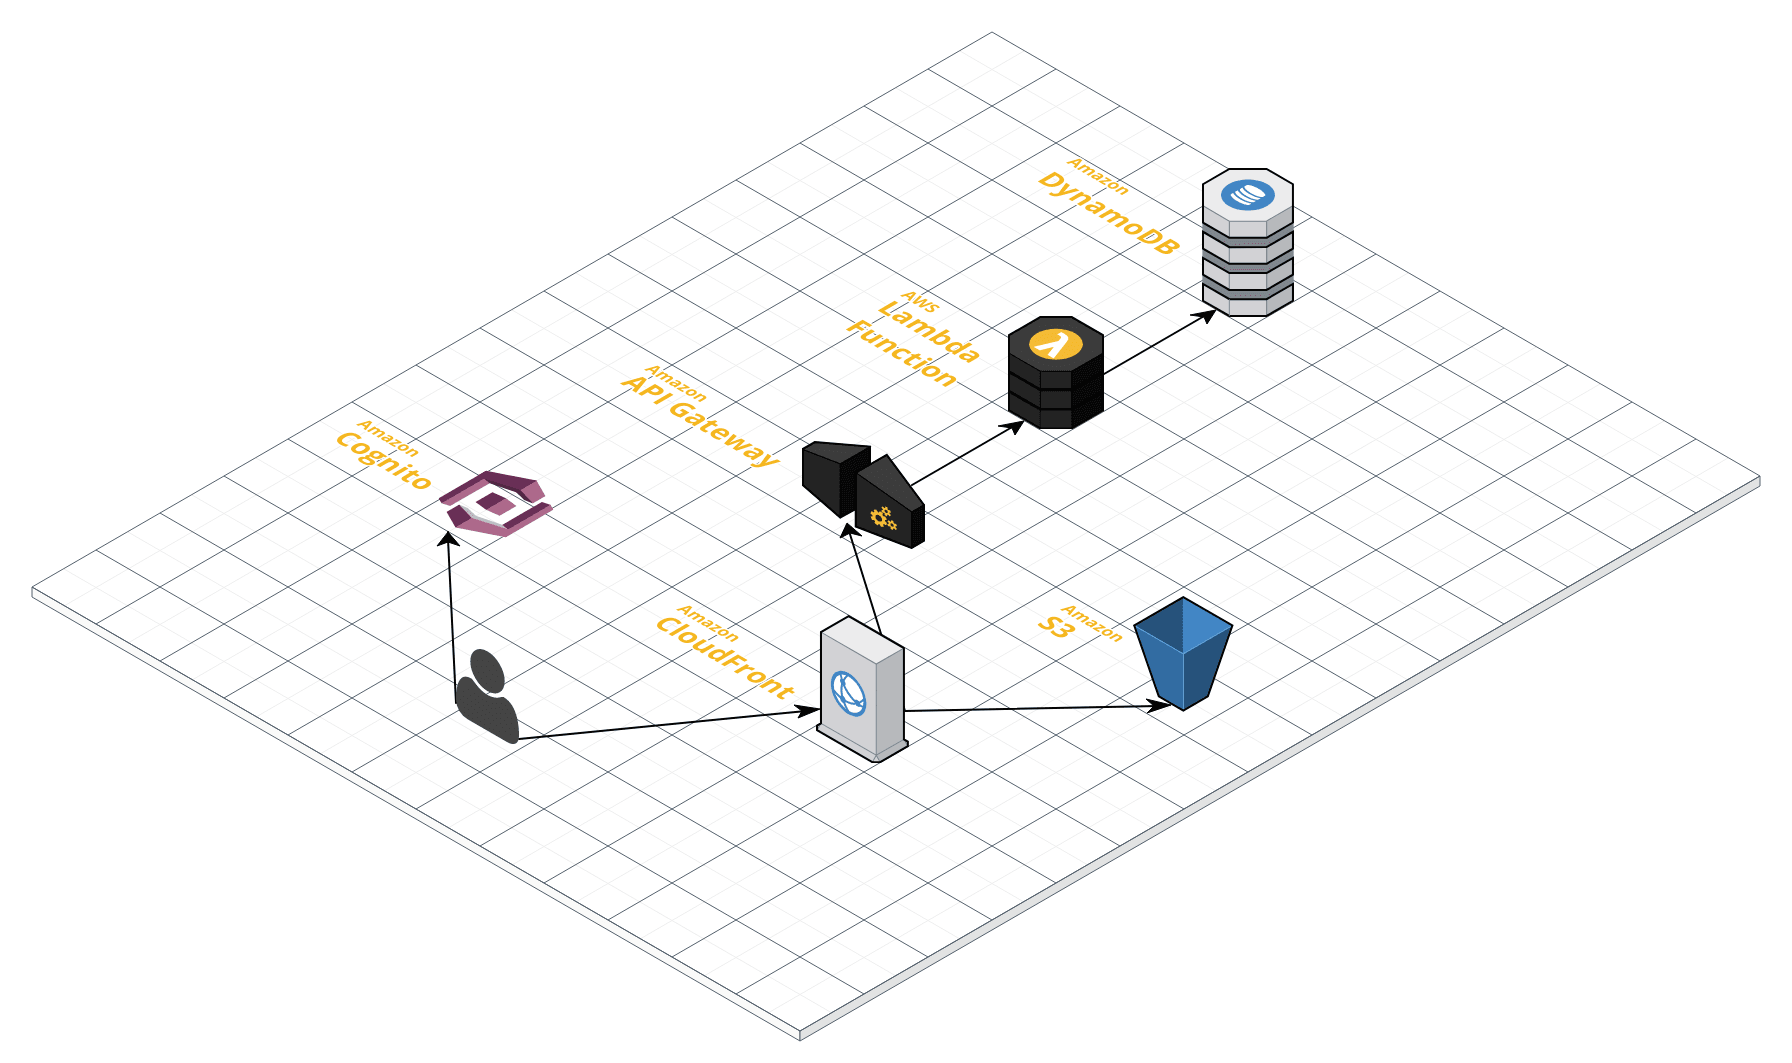
Here is the rough architecture:
Set up
-
Clone the repository and go to the cloned directory
git clone https://github.com/ks888/LambStatus && cd LambStatus -
Install all dependencies
npm run install -
Configure the
.envfile. At least, you need to write your email address to theUSER_EMAILline because the initial login information will be sent to the address. -
Launch CloudFormation stack
npm run cloudformation:createThe command will return immediately, but it may take 20-25 minutes to actually create the stack, mainly due to the settings of CloudFront Distribution.
If the command returns an error, make sure you properly configured the AWS credentials.
Server-side development
-
Go to the
lambdadirectorycd packages/lambda -
Build
npm run build -
Test
npm run test -
Deploy
npm run deploy
Client-side development
-
Go to the
frontenddirectorycd packages/frontend -
Build
npm run build -
Test
npm run test -
Run the local server
npm run start
Now, visit http://localhost:3000 and sign in to the admin console. Get the login information from the email you received.


