Our team proudly presents a brand new video conference functionality, which includes:
- centralized server-based conferencing (SFU)
- up to 30 members (depends on bandwidth)
- Endpoints
- managing each Endpoint's media elements
- MediaRenderers inside Endpoints
The functionality provides vast opportunities to make many-to-many video conferences with the versatile management of media elements, streams etc. This article will help you to understand all features and advantages of the functionality: step by step, you'll learn how to work with Endpoints and MediaRenderers, and how to create server-based video conferences.
You need Web SDK 4.3.0 or later to use this functionality.
First of all, let's grab a simple demo to demonstrate all further concepts and tricks. You can get the demo layout here, see the Step 1.
Note that in this demo we use HTML templates and normalize.css (in addition to the main style.css file).
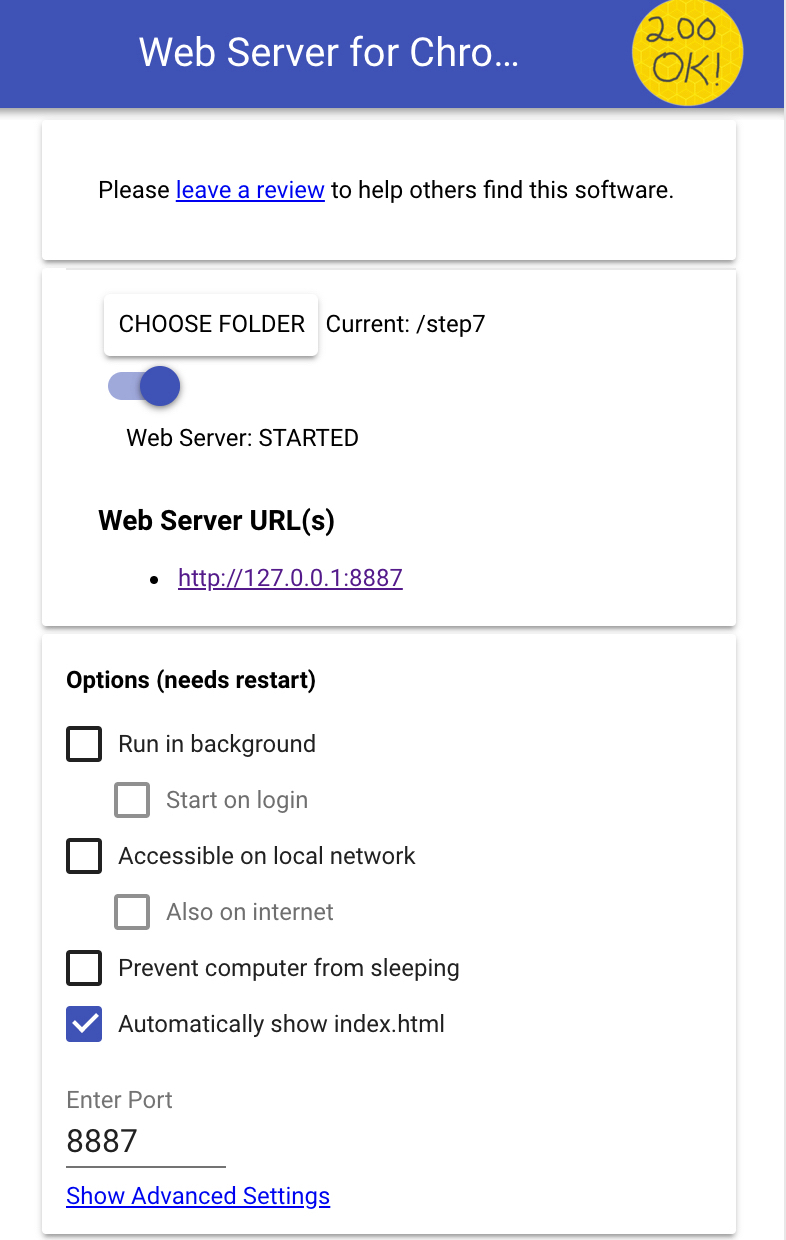
We recommend using Web Server for Chrome as it makes development and debugging easier. Install and open the app, click "Choose folder" and specify the folder with your project. After that you'll see the Web Server URL, that's it.
To use Web SDK, you have to:
- create the Voximplant class instance;
- then initialize it;
- and connect to the Voximplant cloud.
We are also going to use two JS files: index.js and helper.js. The index.js will contain necessary code related to described concepts; the code which is not related to the theme is placed in helper.js
So, create index.js in the project's root and add first lines there to create a logger and define variables to control form:
'use strict';

// logger in the right column
const logger = new cLogger(document.querySelector('.js__logarea'));

const loginForm = document.querySelector('.js__login-form');
const callForm = document.querySelector('.js__call-form');
const callDisconnect  = document.querySelector('.js__call-disconnect');

// disable calling form until login
callForm.style.display = 'none';

// hide disconnect form
callDisconnect.style.display = 'none';
Next, we have to get the Voximplant SDK instance:
const sdk = VoxImplant.getInstance();Add a handler for the submit action:
// set EventListener for the form submission;
// we can send form to server by pressing the Enter key or the "Connect&Login" button
loginForm.addEventListener('submit', async function (e) {
  e.preventDefault();
  const formData = new FormData(e.target);
});
Then we have to add a condition to that handler to make our web client connect to the Voximplant cloud:
// we must check current SDK state to prevent an exception in case of repeated init and connect
  if(sdk.getClientState()!=='CONNECTED') {
    // init SDK
    await sdk.init({remoteVideoContainerId:'js__workbench'});
    logger.write('[WebSDk] Initialization completed');
    // connecting to the Voximplant Cloud;
    // "false" argument disables checking of UDP connection (for fastest connect)
    await sdk.connect(false);
    logger.write('[WebSDk] Connected');
  }
Finally, we have to log in. In case of login error, it will be mentioned in the log. To do this, add the following code to the same handler:
try {
    // logging in
    await sdk.login(formData.get('login'), formData.get('password'));
    logger.write('[WebSDk] Authorization completed');
    // change form visibility
    loginForm.style.display = 'none';
    callForm.style.display = 'block';
  }catch (e) {
    logger.write('[WebSDk] Wrong login or password');
}To make things right, we have to create an application and a rule in it. Go to Applications, click New application, type the name of a new application (“confapp”, for example) and then click Create.

Remember that the Web SDK code can't perform call management by itself, without cloud JS scenarios. That is why we have to create a scenario.
Create the conf_local scenario with the following blocks of code. Firstly load the conference module and define variables for a conference and participants' counter:
require("conference");

let conf;
let partsCounter = 0;
Now add a handler for the very first call which creates a conference. Note that the conference creating executes once in a session.
VoxEngine.addEventListener(AppEvents.Started, function (event) {
  conf = VoxEngine.createConference({hd_audio: true});
  conf.addEventListener(ConferenceEvents.Stopped, function (event2) {
    Logger.write('Conference was stopped!');
    VoxEngine.terminate();
  });
  conf.addEventListener(ConferenceEvents.Started, function (event2) {
    Logger.write(`Conference is started ID: ${event2.conference.getId()}`);
  });
});
Create another handler for further incoming calls. The handler answers a call and connects it to the conference. It also increases participants' counter:
VoxEngine.addEventListener(AppEvents.CallAlerting, function (e) {
  e.call.answer();
  partsCounter = partsCounter + 1;
  const endpoint = conf.add({
    call: e.call,
    mode: "FORWARD",
    direction: "BOTH", scheme: e.scheme
  });
  Logger.write(`New endpoint was added ID: ${endpoint.id()}`);
});
Put these lines to the same handler to create a function which stops a conference if there are no participants:
function checkForTermination() {
  if (partsCounter === 0) {
    conf.stop();
    conf = null;
  }
}

e.call.addEventListener(CallEvents.Disconnected, function (event2) {
    partsCounter = partsCounter - 1;
    if (partsCounter === 0) {
      setTimeout(checkForTermination, 1000 * 10); // wait for 10 ceconds
    }
  });
Then add a new rule to your confapp application; you can name it Conference. Use the conf_local JS scenario in this rule. Don't forget to select the Video conference checkbox to allow video streams in conferences.

To use the application, you need to create at least one user. Go to the Users tab inside of the application, create a user named user1, set a password for it; the active checkbox should be selected. Click Save.

That's it! We have prepared the Voximplant cloud to serve video conferences.
There are methods and events in Web SDK to handle calls. The following code allows to handle calls and do appropriate actions in case of call is disconnected or failed. The callForm initiates a call after submission while callDisconnect hangs up. Each call status reflects in a console (see the column under the forms).
Add the following blocks of code to the index.js to implement described logic. Start with making a new call and hanging up a call:
// link to current active call
let currentCall;

// create new call
callForm.addEventListener('submit', function (e) {
  e.preventDefault();
  const formData = new FormData(e.target);
  currentCall = sdk.callConference({number: formData.get('number'), video: {sendVideo: true, receiveVideo: true}});
  bindCallCallbacks();
});

// action on disconnect form
callDisconnect.addEventListener('submit', function (e) {
  e.preventDefault();
  currentCall.hangup();
});
Great! There's only one thing to do in this step – add the handlers for call's states Connected, Disconnected and Failed:
// bind primary callbacks
function bindCallCallbacks(e){
  logger.write(`[WebSDk] Set up listeners for ID: ${currentCall.id()}`);
  currentCall.on(VoxImplant.CallEvents.Connected,onCallConnected);
  currentCall.on(VoxImplant.CallEvents.Disconnected,onCallDisconnected);
  currentCall.on(VoxImplant.CallEvents.Failed,onCallFailed);
  callForm.style.display = 'none';
  callDisconnect.style.display = 'block';
}

function onCallConnected(e) {
  logger.write(`[WebSDk] Call connected ID: ${e.call.id()}`);
}

function onCallDisconnected(e) {
  logger.write(`[WebSDk] Call ended ID: ${e.call.id()}`);
  currentCall = null;
}

function onCallFailed(e) {
  logger.write(`[WebSDk] Call failed ID: ${e.call.id()}`);
  currentCall = null;
}
Now web client is able to create first conference. It also handles connected/disconnected/failed call's states and provides logging.
Endpoint is one of the new concepts in the latest release. It represents any remote media unit in a call. Endpoint can be:
Each call from Web SDK includes only Endpoints, which send audio/video stream to a call. That means there wouldn't be ASR's and Recorder's Endpoints in a call from Web SDK. However, you can get these endpoints' events on the VoxEngine scenario side and then send them to the Web SDK.
Voxengine conference in the cloud contains Endpoints for all participants:
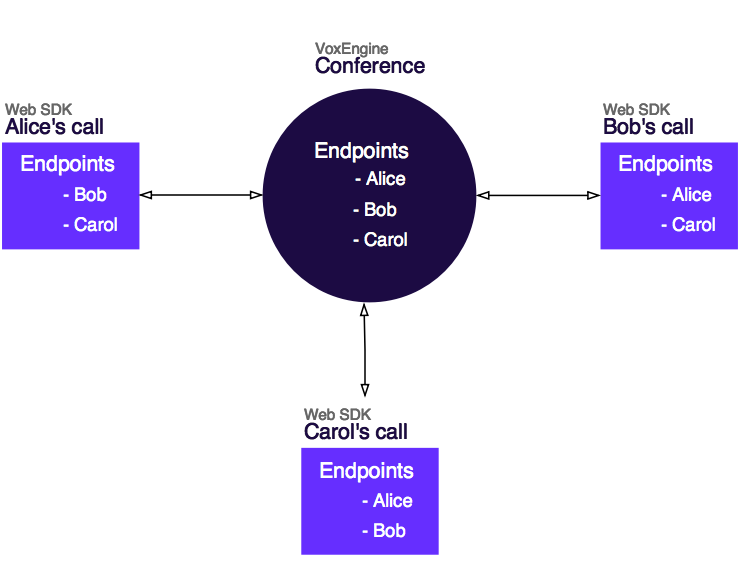
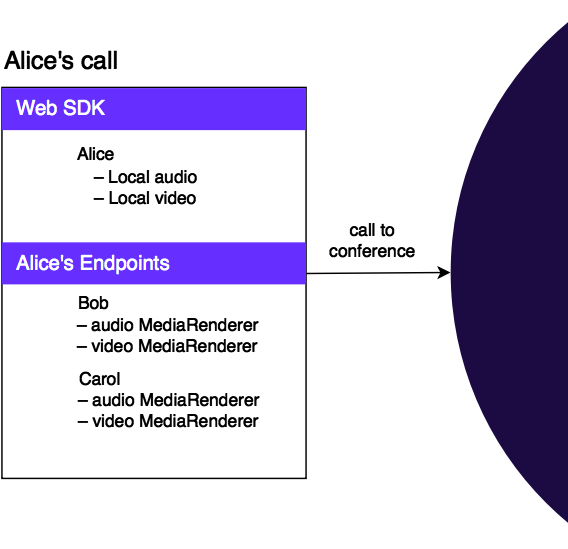
Call from Web SDK also includes local audio/video and Endpoints with MediaRenderers:
There are events for Endpoints, which allows tracking Endpoints' behavior. When another participant joins the conference, we have to create a container for video rendering. Accordingly, we have to delete this container when the participant leaves the conference.
Add a handler for the EndpointAdded event to the bindCallCallbacks function:
currentCall.on(VoxImplant.CallEvents.EndpointAdded, onEndpointAdded);Then create the onEndpointAdded function which sets up a rendering container for a new participant:
function onEndpointAdded(e) {
  logger.write(`[WebSDk] New endpoint ID: ${e.endpoint.id} (${e.endpoint.isDefault?'default':'regular'}) for Call ID: ${e.call.id()}`);
  // create the display element for this endpoint
  if(!e.endpoint.isDefault) {
    const node = renderTemplate(e.endpoint);
    const container = document.getElementById('js__workbench');
    container.appendChild(node);
  }
  // remove the display element with this endpoint
  e.endpoint.on(VoxImplant.EndpointEvents.Removed,onEndpointRemoved)
}
And the second function which deletes rendering container:
function onEndpointRemoved(e) {
  logger.write(`[WebSDk] Endpoint was removed ID: ${e.endpoint.id} (${e.endpoint.isDefault?'default':'regular'}) for Call ID: ${e.call.id()}`);
  const container = document.getElementById('js__workbench');
  const node = document.getElementById(e.endpoint.id);
  if(node) {
    container.removeChild(node);
  }
}It is possible to create container for video rendering when web client started to receive remote video stream. Accordingly, we can delete this container when remote video stream is stopped.
When remote video is started, we have access to the MediaRenderer instance. Let's use it for extended logging. Add the handlers for the RemoteMediaAdded and RemoteMediaRemoved events to the onEndpointAdded function:
e.endpoint.on(VoxImplant.EndpointEvents.RemoteMediaAdded, onRemoteMediaAdded);
e.endpoint.on(VoxImplant.EndpointEvents.RemoteMediaRemoved, onRemoteMediaRemoved);

function onRemoteMediaAdded(e) {
  logger.write(`[WebSDk] New MediaRenderer ID: ${e.mediaRenderer.id} in ${e.endpoint.id} for Call ID: ${e.call.id()}`);
}

function onRemoteMediaRemoved(e) {
  logger.write(`[WebSDk] MediaRenderer was removed ID: ${e.mediaRenderer.id} in ${e.endpoint.id} for Call ID: ${e.call.id()}`);}
When you subscribe to the RemoteMediaAdded event, Web SDK will no longer render remote audio/video stream automatically, so you have to call the MediaRenderer.render method with optional container parameter. To do so, add the following lines to the onRemoteMediaAdded function.
const endpointNode = document.getElementById(e.endpoint.id);
  if(endpointNode){
    const container = endpointNode.querySelector('.endpoint__media');
    e.mediaRenderer.element.width="200";
    e.mediaRenderer.element.height="150";
    e.mediaRenderer.render(container);
}- Clone this repo to your local machine.
- Open the Web Server for Chrome, click Choose folder and specify the Step 7 folder. Open the suggested Web Server URL in your browser.
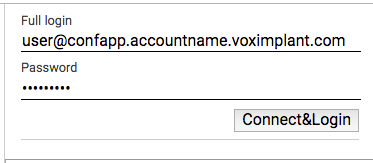
- Type in the Full login in the right column. The Full login consists of a user name (user1) + @ + application name (conference-app) + your Voximplant account name + voximplant.com. Then type in the password for the user1 and click Connect&Login.
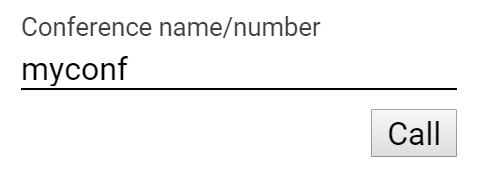
Allow access to your microphone and camera. - Then specify Conference name/number as myconf and click Call.
Nice, now you are the conference participant! Ask your friends to do the same steps on their machines and then enjoy your conference call.