AnyCubic Mega Zero Heated Bed Upgrade
See this video for better instructions. The video uses an ABS Laser cut adaptor for the bed. My only real contribution is a printable alternative to that.
- AnyCubic Mega Zero
- 4x M3 x 16mm Bolts
- 4x M3 Nuts
- 4x M3 Wing Nuts
- 12x M3 Metal Washers
- (optional) 4x M3 Rubber Washers
- 12v Heated Bed
- 12v Power Supply
- Heated Bed Mosfet
- 5v Boost Converter
- Roll of PLA
- Roll of ABS
- (recommended) Various Heat Shrink Tubing
- Print PLA Bed Spacers
- Disassembled Existing Bed
- Assemble Heated Bed
- Assemble New Power Supply
- Solder Mosfet & Boost converter to control board
- Make Firmware Changes
- Tune Heated Bed
- Print ABS Bed Spacers
- Re-assemble Heated Bed
Print the Bed Spacers from above. Quality is fairly unimportant given that they'll melt pretty quickly and need to be replaced soon. Optionally print this wing nut knob adaptor
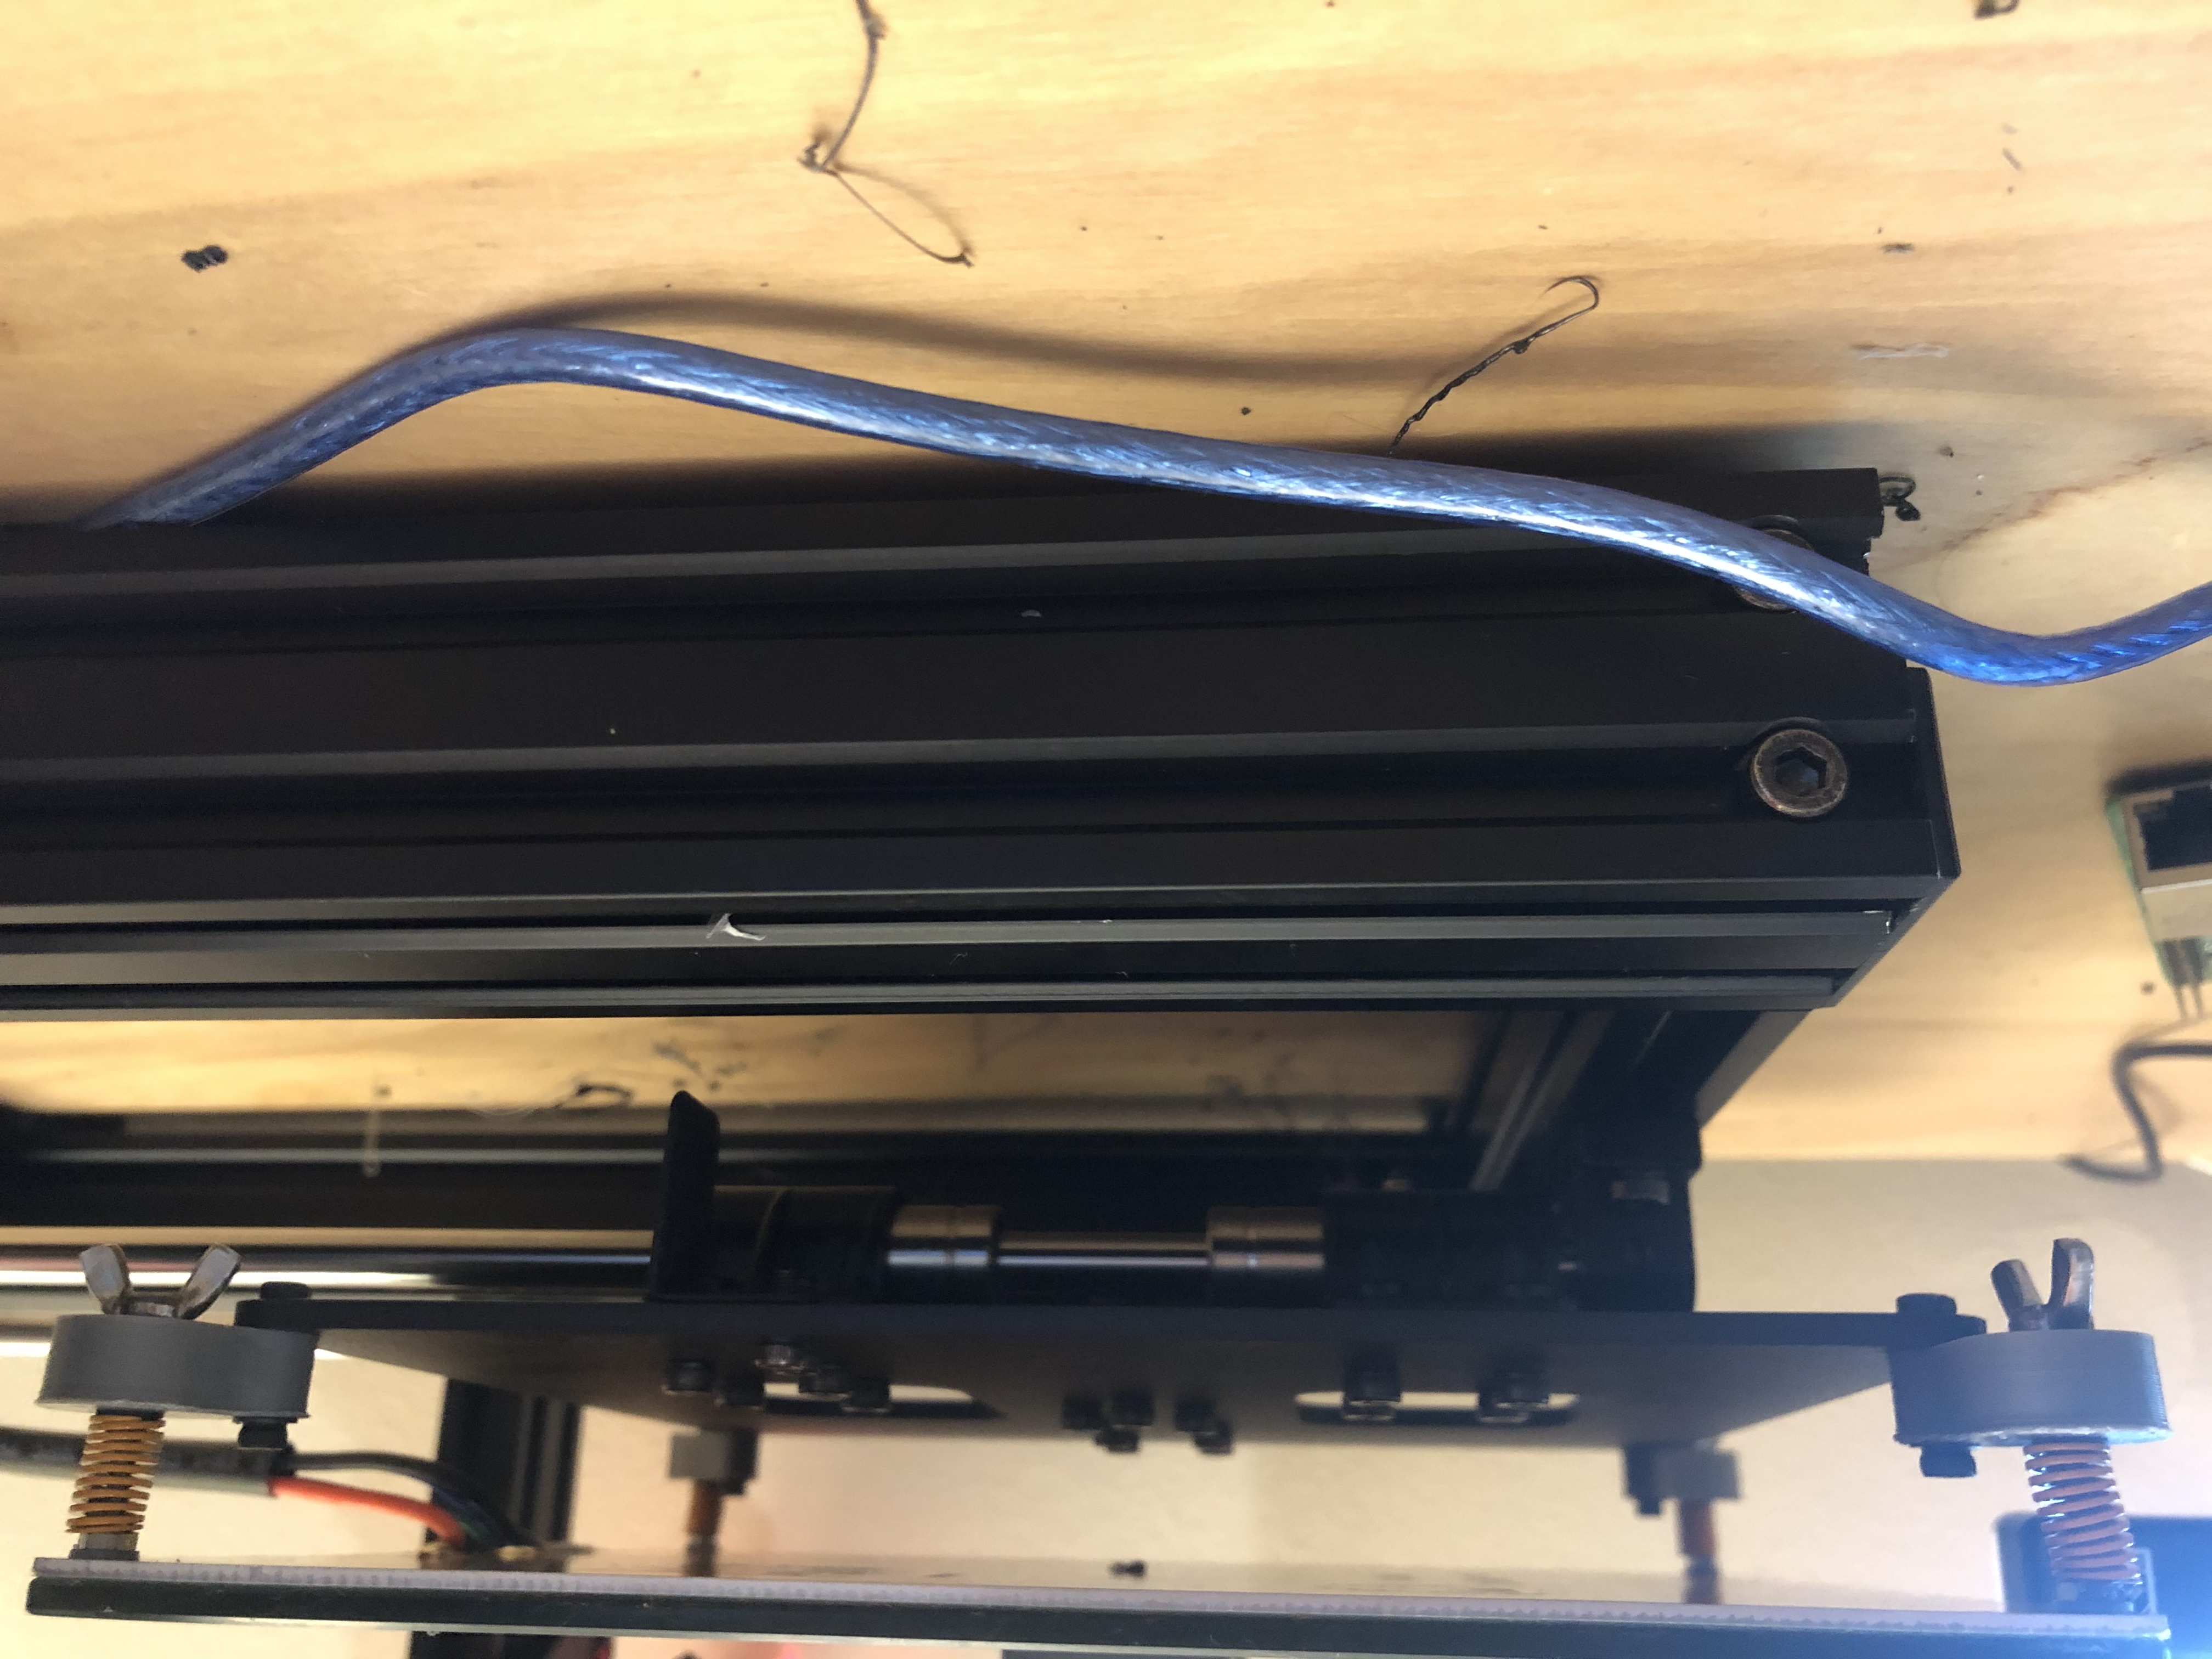
Unscrew the four bed leveling knobs Lift the bed upwards removing it from the Y carraige being careful not to lose the springs Optionally, now is a good time to replace those springs with a stiffer set. I found some on Amazon.
Loosely install the bed spacers by stacking the rubber (if you have, otherwise metal) washer on top of the small end of the bed spacer on top of the Y carraige. Press the M3x16 Bolts through the stack, and affix loosely with the regular M3 nuts at the bottom.
Dry fit the heated bed without the springs
With the bed dry fitted, tighten the bed spacer nuts
Remove the bed, then reinstall by stacking the bed on top of a metal M3 washer on top of the bed springs on top of another M3 washer on top of the bed spacer. It's tricky, but I took it one corner at a time, lifting each corner only high enough to pass the nuts and spring onto the post, meanwhile trying to keep the other 3 corners from lifting too much
While firmly pressing down on each corner, affix the wing nuts and optionally the wing nut knob adaptor
Adjust the Z endstop height now that the bed is significantly higher
Assemble AC side of the power supply. It's pretty self explanitory if you know about electronics and theres too much possible variation to cover that in this guide.
Cut the cable provided by Anycubic on the side closer to the printer.
Strip back the printer cable, then strip back the center wire keeping the outer and inner wires separate
Solder red and black wires as extensions. Red is positive, the center wire is positive. Use heatshrink tubing to keep the inner and outer leads separate.
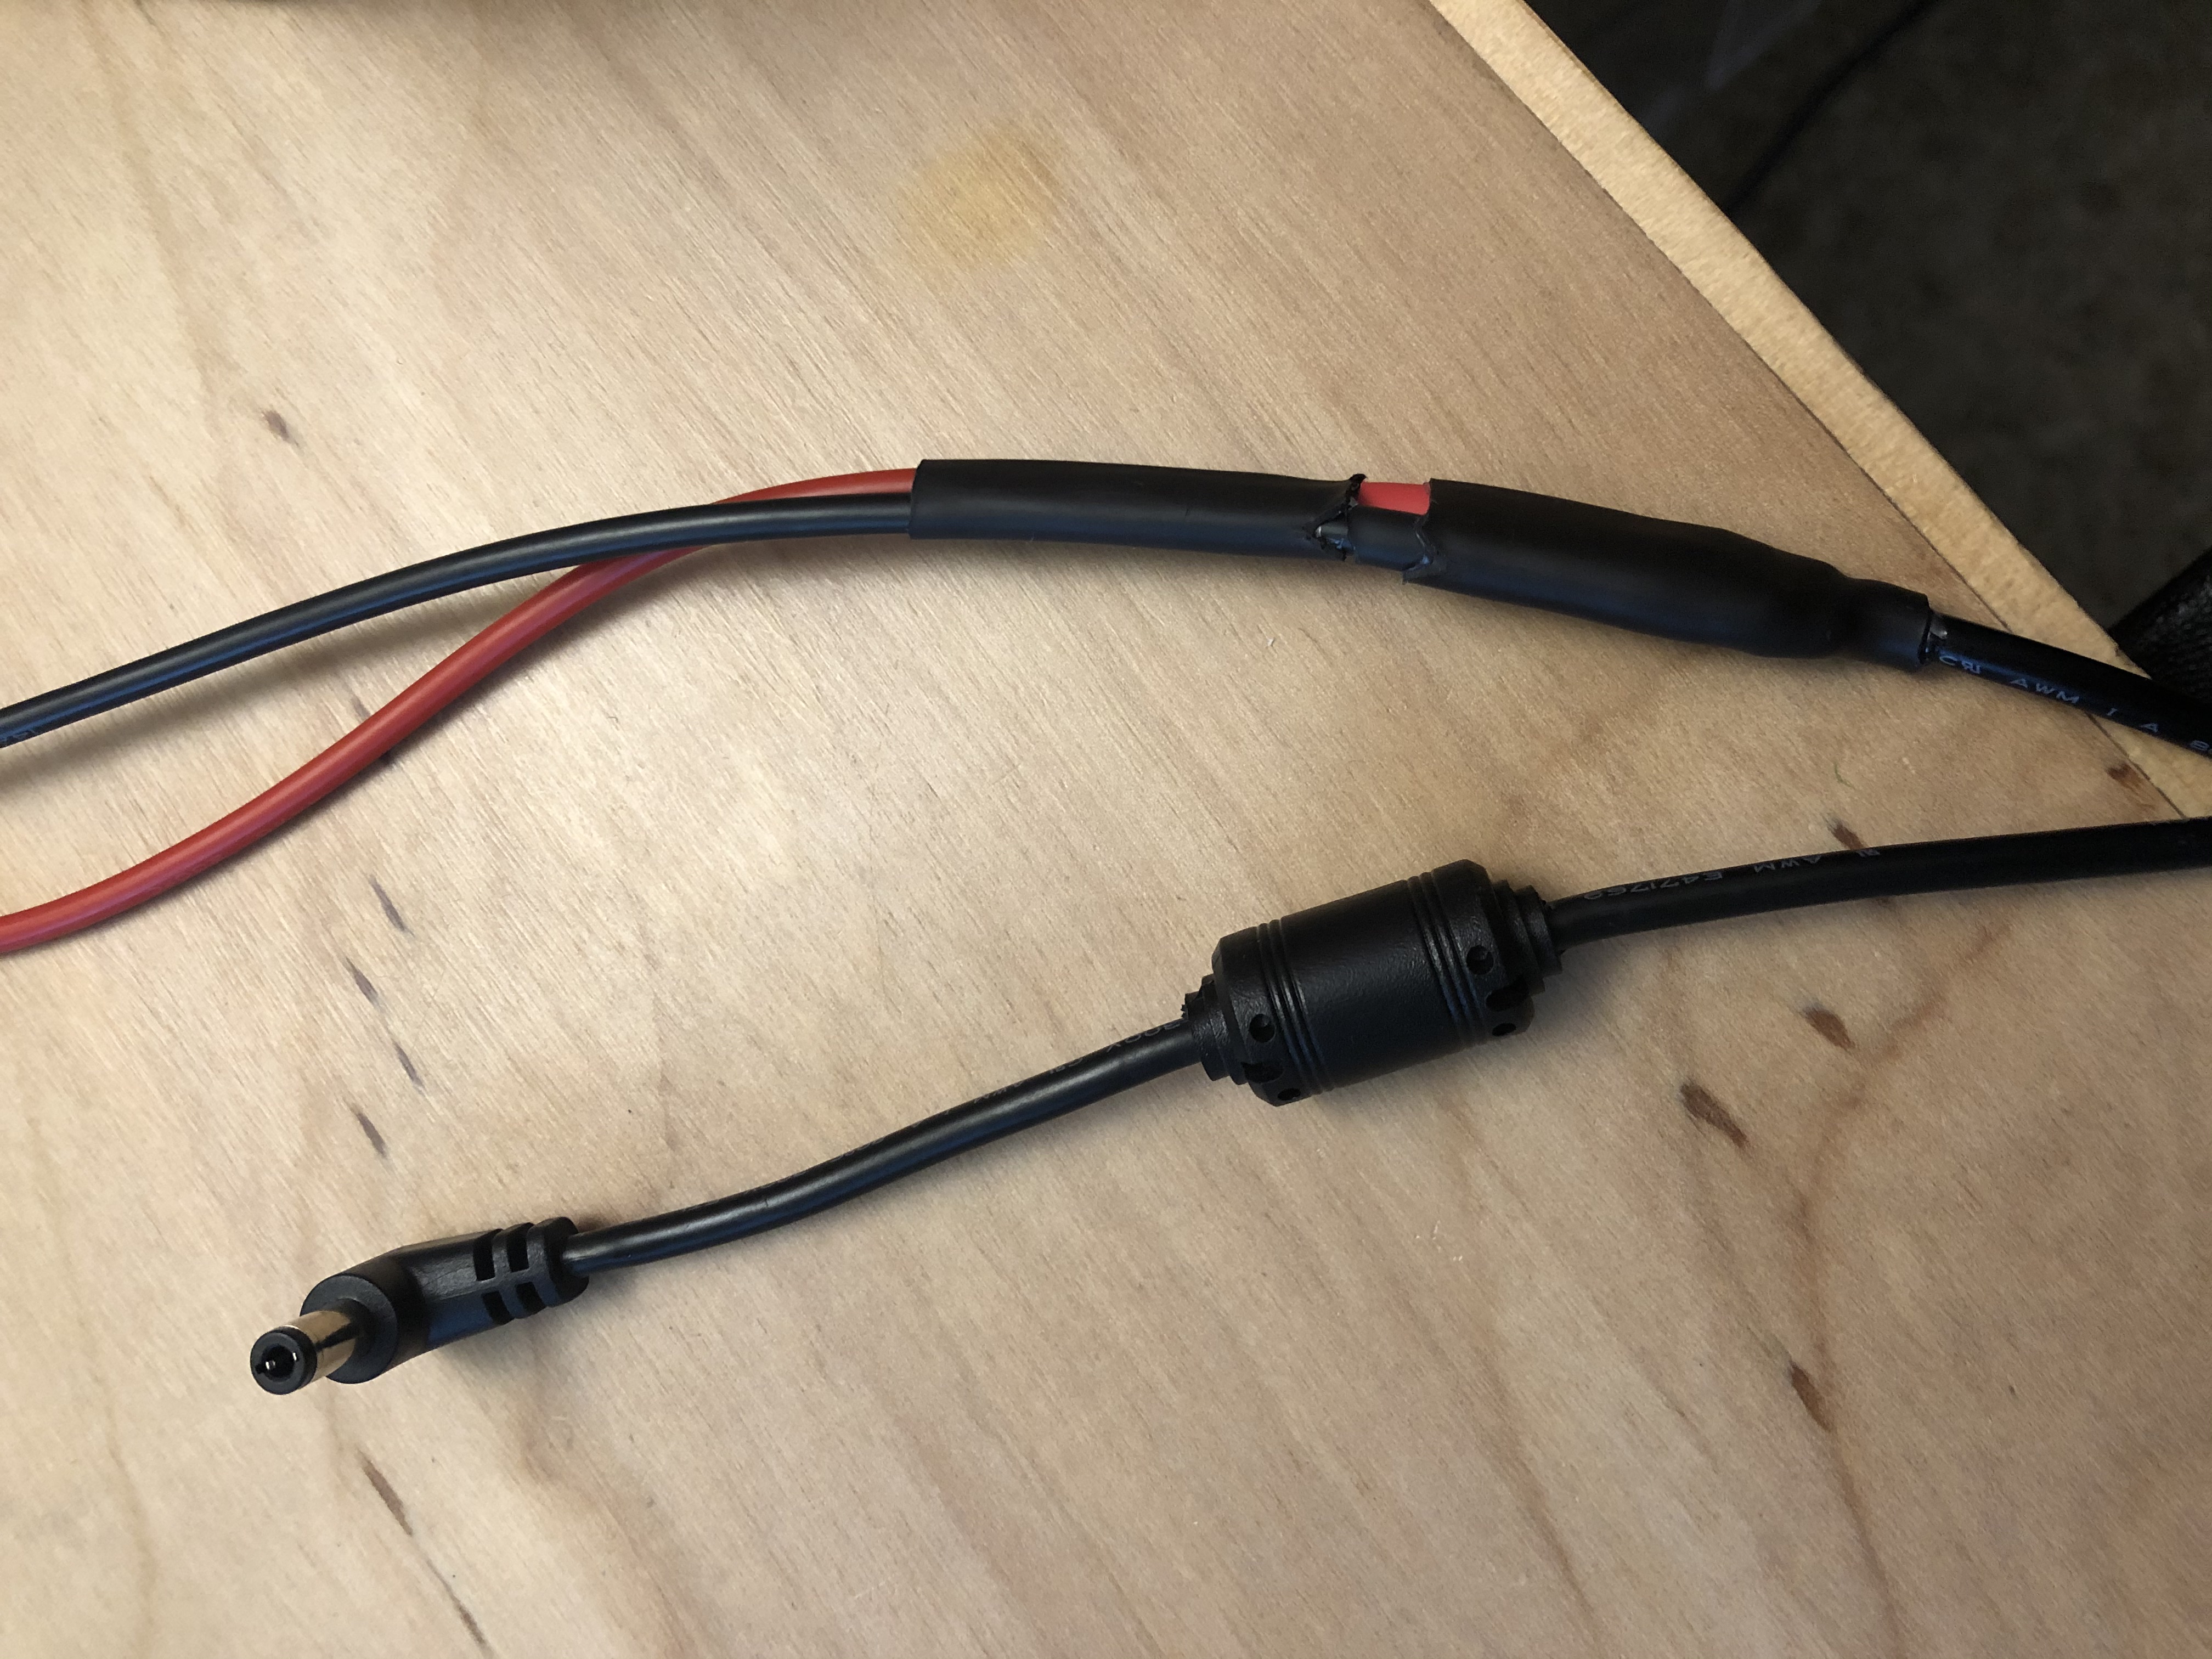 Attach the extensions to DC side of the PSU
Attach another set of red and black extensions to the DC side of the PSU, attach them to the mosfet on the other side
Attach the extensions to DC side of the PSU
Attach another set of red and black extensions to the DC side of the PSU, attach them to the mosfet on the other side
Solder the mosfet & boost converter to the control board. See video for instructions.
Again, see the video and the materials he provides for Marlin Changes. I cannot really help here because I opted to upgrade the control board at the same time and so do not have the changes reequired for the original control board.
PID tune the new heated bed. See here for info
Repring the bed spacers, as you should see the PLA ones already starting to warp. Don't worry about ABS warping, the part is so small that on the fake Ultrabase I installed @100ºC I had no warping issues at all.
Re-assemble the heated bed as before with the new ABS spacers

