Let's take an existing project that uses react-router (like your portfolio project or the dentist website) and add a page to it that accepts a location and displays the weather.
You will need:
- Fetch (built-in to JavaScript) or axios (3rd party, remember to
npm install axios) - Temperature conversion functions
- React-router (Remember to
npm install react-router-dom) - Create forms that store data with local state
Resources:
Time to show off! You're going to display the weather on your app.
You'll use the OpenWeather API to fetch weather information from a certain zip code and update your blog to display the current weather.
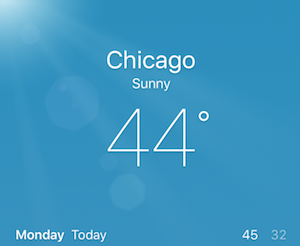
At the end of this exercise, your solution will look something like what's shown here.
Make a new component called Weather and make a route for rendering it with react-router. If you need reminders of how to do this, peek back at the react-router lessons or take a look at how you did it in the dentist website.
On your Weather page, ask the user to input a zip code.
-
You can learn more about forms here.
- When this event fires, take the
event.target.valueandfetch()from the OpenWeather API.
- When this event fires, take the
-
Use the response from the API to display the current temperature, the high and low temperatures, the current weather description, and the name of the city.
- Note: Our solution uses Fahrenheit. You're free to use Celsius or Kelvins if you'd like.
Important Notes:
-
Because the OpenWeather API is not an open API, every request must end with this API key:
&appid=052f26926ae9784c2d677ca7bc5dec98. -
As an example, this is a URL to which you might send a
fetch()request:http://api.openweathermap.org/data/2.5/weather?zip=60614,us&appid=052f26926ae9784c2d677ca7bc5dec98.
Here is a functional Weather component starter:
import React, { useEffect, useState } from 'react'

const Weather = (props) => {
  // Your useState definitions here
  let [zipcode, setZipcode] = useState('')

  const handleChange = (event) => {
    setZipcode(event.target.value)
    console.log('Your zip code is' + zipcode)
  }

  useEffect((event) => {
    // Your fetch call here
  }, [])

  return (
    <div>
      <form onSubmit={handleSubmit}>
      <p>
        { /* Display weather information here */ }
      </p>
      <label>
        Please enter your zip code for the weather:
        <input type="text" onChange={handleChange} value={zipcode} />
      </label>
      <input type="submit" value="Get my forecast!" />
    </form>
    </div>
  )
}


export default Weather
You are free to use class-based components too if you'd like. Here is the starter code for a Weather class component.
import React, { Component } from 'react';

class Weather extends Component {

  state = {
    // Your required states here
  }

  handleChange = (event) => {
    this.setState({zipcode: event.target.value});
    console.log('Your zip code is' + this.state.zipcode);
  }

  handleSubmit = (event) => {
    // Your fetch call here
    // Your state updates go under function(json)
  }

  render() {
    return (
      <div>
        <form onSubmit={this.handleSubmit}>
        <p>
          { /* Display weather information here */ }
        </p>
        <label>
          Please enter your zip code for the weather:
          <input type="text" onChange={this.handleChange} />
        </label>
        <input type="submit" value="Get my forecast!" />
      </form>
      </div>
    )
  }
}


export default Weather;
Need a Hint or Two?
Hint 1
You'll only need to create and implement the `Weather` component. Nothing else needs to change in whichever existing app you created other than hooking up the component to a route with your router!
Hint 2
To see how to handle the form, check out the skeleton code.
Here are some extra ideas to challenge yourself if you have time:
- Icons make every weather app come to life! There's a good way to do this - hunt around in the returned JSON for a recommended icon.
- Spend a little time styling the page. Try to get it close to the example image above!
- Make your current weather into a 5-day forecast
- Make a
Use current locationbutton so the user can click that instead of providing the location.