Giter Site home page Giter Site logo

nilm's Introduction

NILM

Non-Intrusive Load Monitoring Device

This is a simplified version of the NILM devices where it implement Raspberry PI 4B and PZEM-004t which is current and voltage sensor. where it works as electical monitor that have a website deployed from the Raspberry Pi, it use machine learning to understand the behaviour of the appliance and give predictions based on it.

Firstly, you have to setup the raspberry pi

Configuring and using the pins

Update and upgrade to the latest version of Raspbian using the following commands

sudo apt-get update
sudo apt-get upgrade

if you dont have the GPIO package installed, you simply install it by running the following command.

sudo apt-get install rpi.gpio

Configuring Raspberry Pi I2C

Setting up the I2C pins on the raspberry Pi is super easy and will only take a couple of minutes to do. Secondly, go to the Raspi-config tool by entering the following command.

alt text here

sudo raspi-config

in here go to Interface Options and then to I2c, enable I2c by selecting Yes

The Pi should now alert you that I2c will be enabled after reboot. It will then ask if you want it to be loaded by default. Select Yes if you plan on using I2c everytime the raspberry pi boots up.

now we want to make sure it has successfully enabled the necessary modules. To this, enter the following command.

lsmod | grep i2c_

Raspberry Pi Wiring and configuration

To connect the Raspberry Pi to the PZEM-004t correctly to collect the measurements of the appliances such as voltage, current, power, e4nergy, frequency, power factor.

the wiring goes like:

Raspberry PI GPIO PZEM-004t
5V ( GPIO 2) 5v
GND ( GPIO 6) GND
TX (GPIO 14) RX
RX (GPIO 15) TX

alt text here


Download Modbus Library

In order to have a functioning code, you will need to download Modbus-tk which is the serial communication encoding that is used between the PZEM-004t and Raspberry Pi. to download it, just type the following code in the terminal in your Raspberry Pi:

sudo pip3 install modbus-tk

then run the python code under the name: PZEM-004t Raspberry Pi.py which must run effortlessly.


Clone the Repository on your Raspberry Pi

you can download the files using the simple command:

git clone https://github.com/Osama29/NILM

Extra Features

Implementation of UART to TTL USB module

Incase you were using a TTL to UART Module which use the USB port of the Raspberry Pi, then all you have to do is connect the USB Module and then change the following code in the PZEM-004t Raspberry Pi.py:

if __name__ == '__main__':
  try:
      serial_port = serial.Serial(
                                  port '/dev/ttyS0',
                                  baudrate = 9600,
                                  bytesize= 8,
                                  parity='N',
                                  stopbits=1,
                                  xonxoff=0
                                  )

Change the code to the following code:

if __name__ == '__main__':
  try:
      serial_port = serial.Serial(
                                  port '/dev/ttyUSB0',
                                  baudrate = 9600,
                                  bytesize= 8,
                                  parity='N',
                                  stopbits=1,
                                  xonxoff=0
                                  )

by that you will gain the ability to use the USB module to connect to the PZEM-004t by connecting the TTL to UART Module., you hbave to make sure that the wiring and the hardware are connected correctly.


Troubleshooting

No Module named 'modbus_tk'

if you were trying to run PZEM-004t Raspberry Pi.py and it showed the following error:

Traceback (most recent call last):
  File "/home/raspberrypi/PZEM-004t Raspberry Pi.py", line 4, in <module>
     import modbus_tk.defines as cst
ModuleNotFouundError: No module named 'modbus_tk'

------------------
(program exited with code: 1)
Press return to continue

Then all you have to do is to run this comand in the terminal:

sudo pip3 install modbus-tk

No Module named "serial"

if you were trying to run PZEM-004t Raspberry Pi.py and it showed the following error:

Traceback (most recent call last):
  File "PZEM-004t Raspberry Pi.py", line 3, in <module>
    import serial
ImportError: No module named serial


------------------
(program exited with code: 1)
Press return to continue

you can solve this issue by applying these steps:

  1. Open your terminal on Raspberry Pi and type:
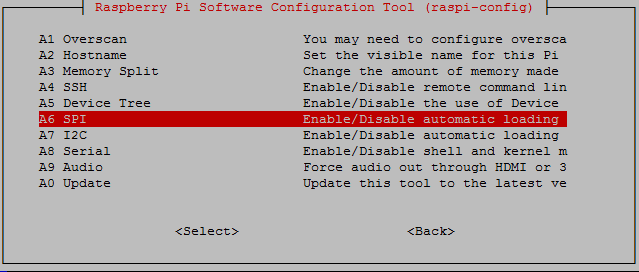
sudo raspi-config
  1. after access the menu which will look like this

alt text here

head to 3 Interface Options

  1. Press on I6 Serial Port and click No for the first option.

  2. Click Yes for the second option.

  3. Click Finish

  4. Type reboot to reboot the system after saving the changes

  5. Done

nilm's People

Contributors

osama29 avatar

Stargazers

 avatar  avatar

Watchers

 avatar  avatar

nilm's Issues

Raspberry Pi Issue - SerialException: Could not open port /dev/ttyS0 [Errno 13] Permission denied: '/dev/ttyS0

I keep getting this error when i run the code after setting up the raspberry pi

Traceback (most recent call last):
  File "/usr/lib/python3/dist-packages/serial/serialposix.py", line 322, in open
    self.fd = os.open(self.portstr, os.O_RDWR | os.O_NOCTTY | os.O_NONBLOCK)
PermissionError: [Errno 13] Permission denied: '/dev/ttyS0'

During handling of the above exception, another exception occurred:

Traceback (most recent call last):
  File "/home/raspberrypi/PZEM-004t_RaspberryPi.py", line 15, in <module>
    serial_port = serial.Serial(port='/dev/ttyS0', baudrate=9600, bytesize=8, parity='N', stopbits=1, xonxoff=0)
  File "/usr/lib/python3/dist-packages/serial/serialutil.py", line 244, in __init__
    self.open()
  File "/usr/lib/python3/dist-packages/serial/serialposix.py", line 325, in open
    raise SerialException(msg.errno, "could not open port {}: {}".format(self._port, msg))
serial.serialutil.SerialException: [Errno 13] could not open port /dev/ttyS0: [Errno 13] Permission denied: '/dev/ttyS0'

During handling of the above exception, another exception occurred:

Traceback (most recent call last):
  File "/home/raspberrypi/PZEM-004t_RaspberryPi.py", line 122, in <module>
    master.close()
NameError: name 'master' is not defined


------------------
(program exited with code: 1)
Press return to continue

how to fix this issue?

No module named "modbus_tk"

I keep getting this error all the time and i tried download modbus but it didn't work, how can i solve this issue

Traceback (most recent call last):
  File "/home/raspberrypi/PZEM-004t Raspberry Pi.py", line 4, in <module>
     import modbus_tk.defines as cst
ModuleNotFouundError: No module named 'modbus_tk'

------------------
(program exited with code: 1)
Press return to continue

I followed all the tutorial and it still didn't fix the issue

Recommend Projects

  • React photo React

    A declarative, efficient, and flexible JavaScript library for building user interfaces.

  • Vue.js photo Vue.js

    ๐Ÿ–– Vue.js is a progressive, incrementally-adoptable JavaScript framework for building UI on the web.

  • Typescript photo Typescript

    TypeScript is a superset of JavaScript that compiles to clean JavaScript output.

  • TensorFlow photo TensorFlow

    An Open Source Machine Learning Framework for Everyone

  • Django photo Django

    The Web framework for perfectionists with deadlines.

  • D3 photo D3

    Bring data to life with SVG, Canvas and HTML. ๐Ÿ“Š๐Ÿ“ˆ๐ŸŽ‰

Recommend Topics

  • javascript

    JavaScript (JS) is a lightweight interpreted programming language with first-class functions.

  • web

    Some thing interesting about web. New door for the world.

  • server

    A server is a program made to process requests and deliver data to clients.

  • Machine learning

    Machine learning is a way of modeling and interpreting data that allows a piece of software to respond intelligently.

  • Game

    Some thing interesting about game, make everyone happy.

Recommend Org

  • Facebook photo Facebook

    We are working to build community through open source technology. NB: members must have two-factor auth.

  • Microsoft photo Microsoft

    Open source projects and samples from Microsoft.

  • Google photo Google

    Google โค๏ธ Open Source for everyone.

  • D3 photo D3

    Data-Driven Documents codes.