paulkoanui / github-cms Goto Github PK
View Code? Open in Web Editor NEWReference implementation for GitHub CMS Action
Home Page: https://paulkoanui.github.io/github-cms-docs/
Reference implementation for GitHub CMS Action
Home Page: https://paulkoanui.github.io/github-cms-docs/


A GitHub repository has all of the ingredients for serving as a content management system.
This project presents a system for enabling content management and publication capabilities on any GitHub Repository. Content is stored as GitHub Issues, managed through GitHub Projects, published by a GitHub Action to a GitHub Repository and hosted by GitHub Pages.
Staged content are GitHub Issues organized in the "Staging" column of a GitHub Project. Items in this state are waiting to be published or archived.
From the Source Content Repository:
"Staging" is simply an organizational state that says, "This item belongs in this collection but is not ready to be published or archived in its current form."
Published content are GitHub Issues organized in the "Published" column of a GitHub Project. Items in this state are published to the Target Publication Repository.
From the Source Content Repository:
Archived content are GitHub Issues organized in the "Archived" column of a GitHub Project. Items in this state are archived to the Target Publication Repository.
The publication workflow,
github-cms.yml, specifies theTARGET_ARCHIVE_PATHenvironment variable. The default value is_archive. So, if a published item exists at_pages/my-content-page.md, the archived path is,_archive/_pages/my-content-page.md.
From the Source Content Repository:
In order to unpublish content, you must remove it from the GitHub Project that manages its publication state.
From the Source Content Repository:
Content placed in the Target Publication Repository reflects Issue content at the time of the publication action. Therefore, subsequent updates to the published or archived issue are NOT automatically reflected in the target system.
To update Published content after changes:
To update Archived content after changes:
git reflog and git reset to save your code.Source: Nikhil Thota
A few months ago I was offered (and have since accepted) a full time offer to work at Facebook in San Francisco and in that time I have been reflecting on my own usage of social media and the amount of value it has added to my life.
A common trend I’ve been seeing is the urgency to delete all your social media IMMEDIATELY or even go completely off-the-grid to avoid the unimaginable long-term implications of having your attention and personal data potentially manipulated and abused. I don’t think that we can thrive in today’s world without utilizing the platforms that allow us such a dense level of interconnectivity. I’m not saying that things couldn’t be engineered better; what I am saying however, is that we can take control of how these platforms influence us and in a sense, take control of our own evolution.
Anyways, here are five things I’ve done which have allowed me to be a participant in the digital world, but not have my attention micromanaged:
Inbox-zero isn’t a new idea but it’s infinitely more difficult to achieve this if you’re bombarded with emails from random retailers offering coupons and one-in-a-lifetime deals you’re never going to use.
A simple way to de-clutter your inbox is to look at each email you receive from a subscription and if it’s not immediately relevant (or will be in the foreseeable future), just scroll to the bottom and hit that unsubscribe button. Over time you’ll receive less and less irrelevant emails and this will naturally translate into less stress in the back of your mind.
And for those subscriptions and newsletters that you do want to keep, Unroll.me is a great tool I’ve used to manage the amount of content I see in my inbox. It allows you to wrap all relevant subscriptions into a daily newsletter that you see once and can tackle at your own leisure (it even allows you to unsubscribe directly from their platform!)
As you progress through school, jobs, projects, and whatever else you devote your time to, you tend to meet a lot of people who you may add on Facebook, follow on Instagram, but never develop a real relationship with. These acquaintances bloat your feeds and may cause you to miss out on important things that happen to those in your life who do matter.
What I have done is unfollow (or mute) the people that I don’t spend time with in person or plan to in the future. This includes brands, groups, events or influencers who I don’t feel are genuinely inspiring me. The beauty of this is that you are freeing up more time and mental space to interact with the content and people who you truly do want to invest in.
If you don’t want to be dramatic but still want more manageable social media feeds, the mute feature does thankfully exist. This allows you to mute someone’s posts, stories, and other notifications without explicitly unfollowing them and not tarnishing your (probably nonexistent) relationship with them.
It’s no secret that social media messes with the reward circuitry in your brain. One of the best ways to see just how it works is to take a social media purge where you commit to not using it for a certain amount of time. I’ve been surprised at how reflexively I reach for my phone and even more surprised at the free time and mental clarity I have after a couple days of adjusting.
In the past I’ve experimented with social media detoxes ranging from days to weeks and have found that the best strategy to avoid the temptation is to just delete the apps and not re-download until your purge is over. Most of the time you have an urge to check something, it’s simply a reflex and you won’t follow through since downloading the app again will take time and you will have caught yourself by then.
Another strategy, courtesy of Kenton Prescott is to enact a recurring purge, where you keep your phone in airplane mode (or even Do Not Disturb) for some amount of hours a day, limiting the time you spend catching up on notifications. The idea is that everyone can wait a few hours for your attention, even in the case of emergencies.
This one is pretty simple, just turn off notifications for things that are not essential. Every time your phone or wearable buzzes, you’re losing precious mental bandwidth which can take up to 23 minutes to get back!
In similar fashion to the previous steps, this takes some time and conscious effort daily where you take note of all notifications you get, evaluate if each one is worth the time, and turn off as necessary.
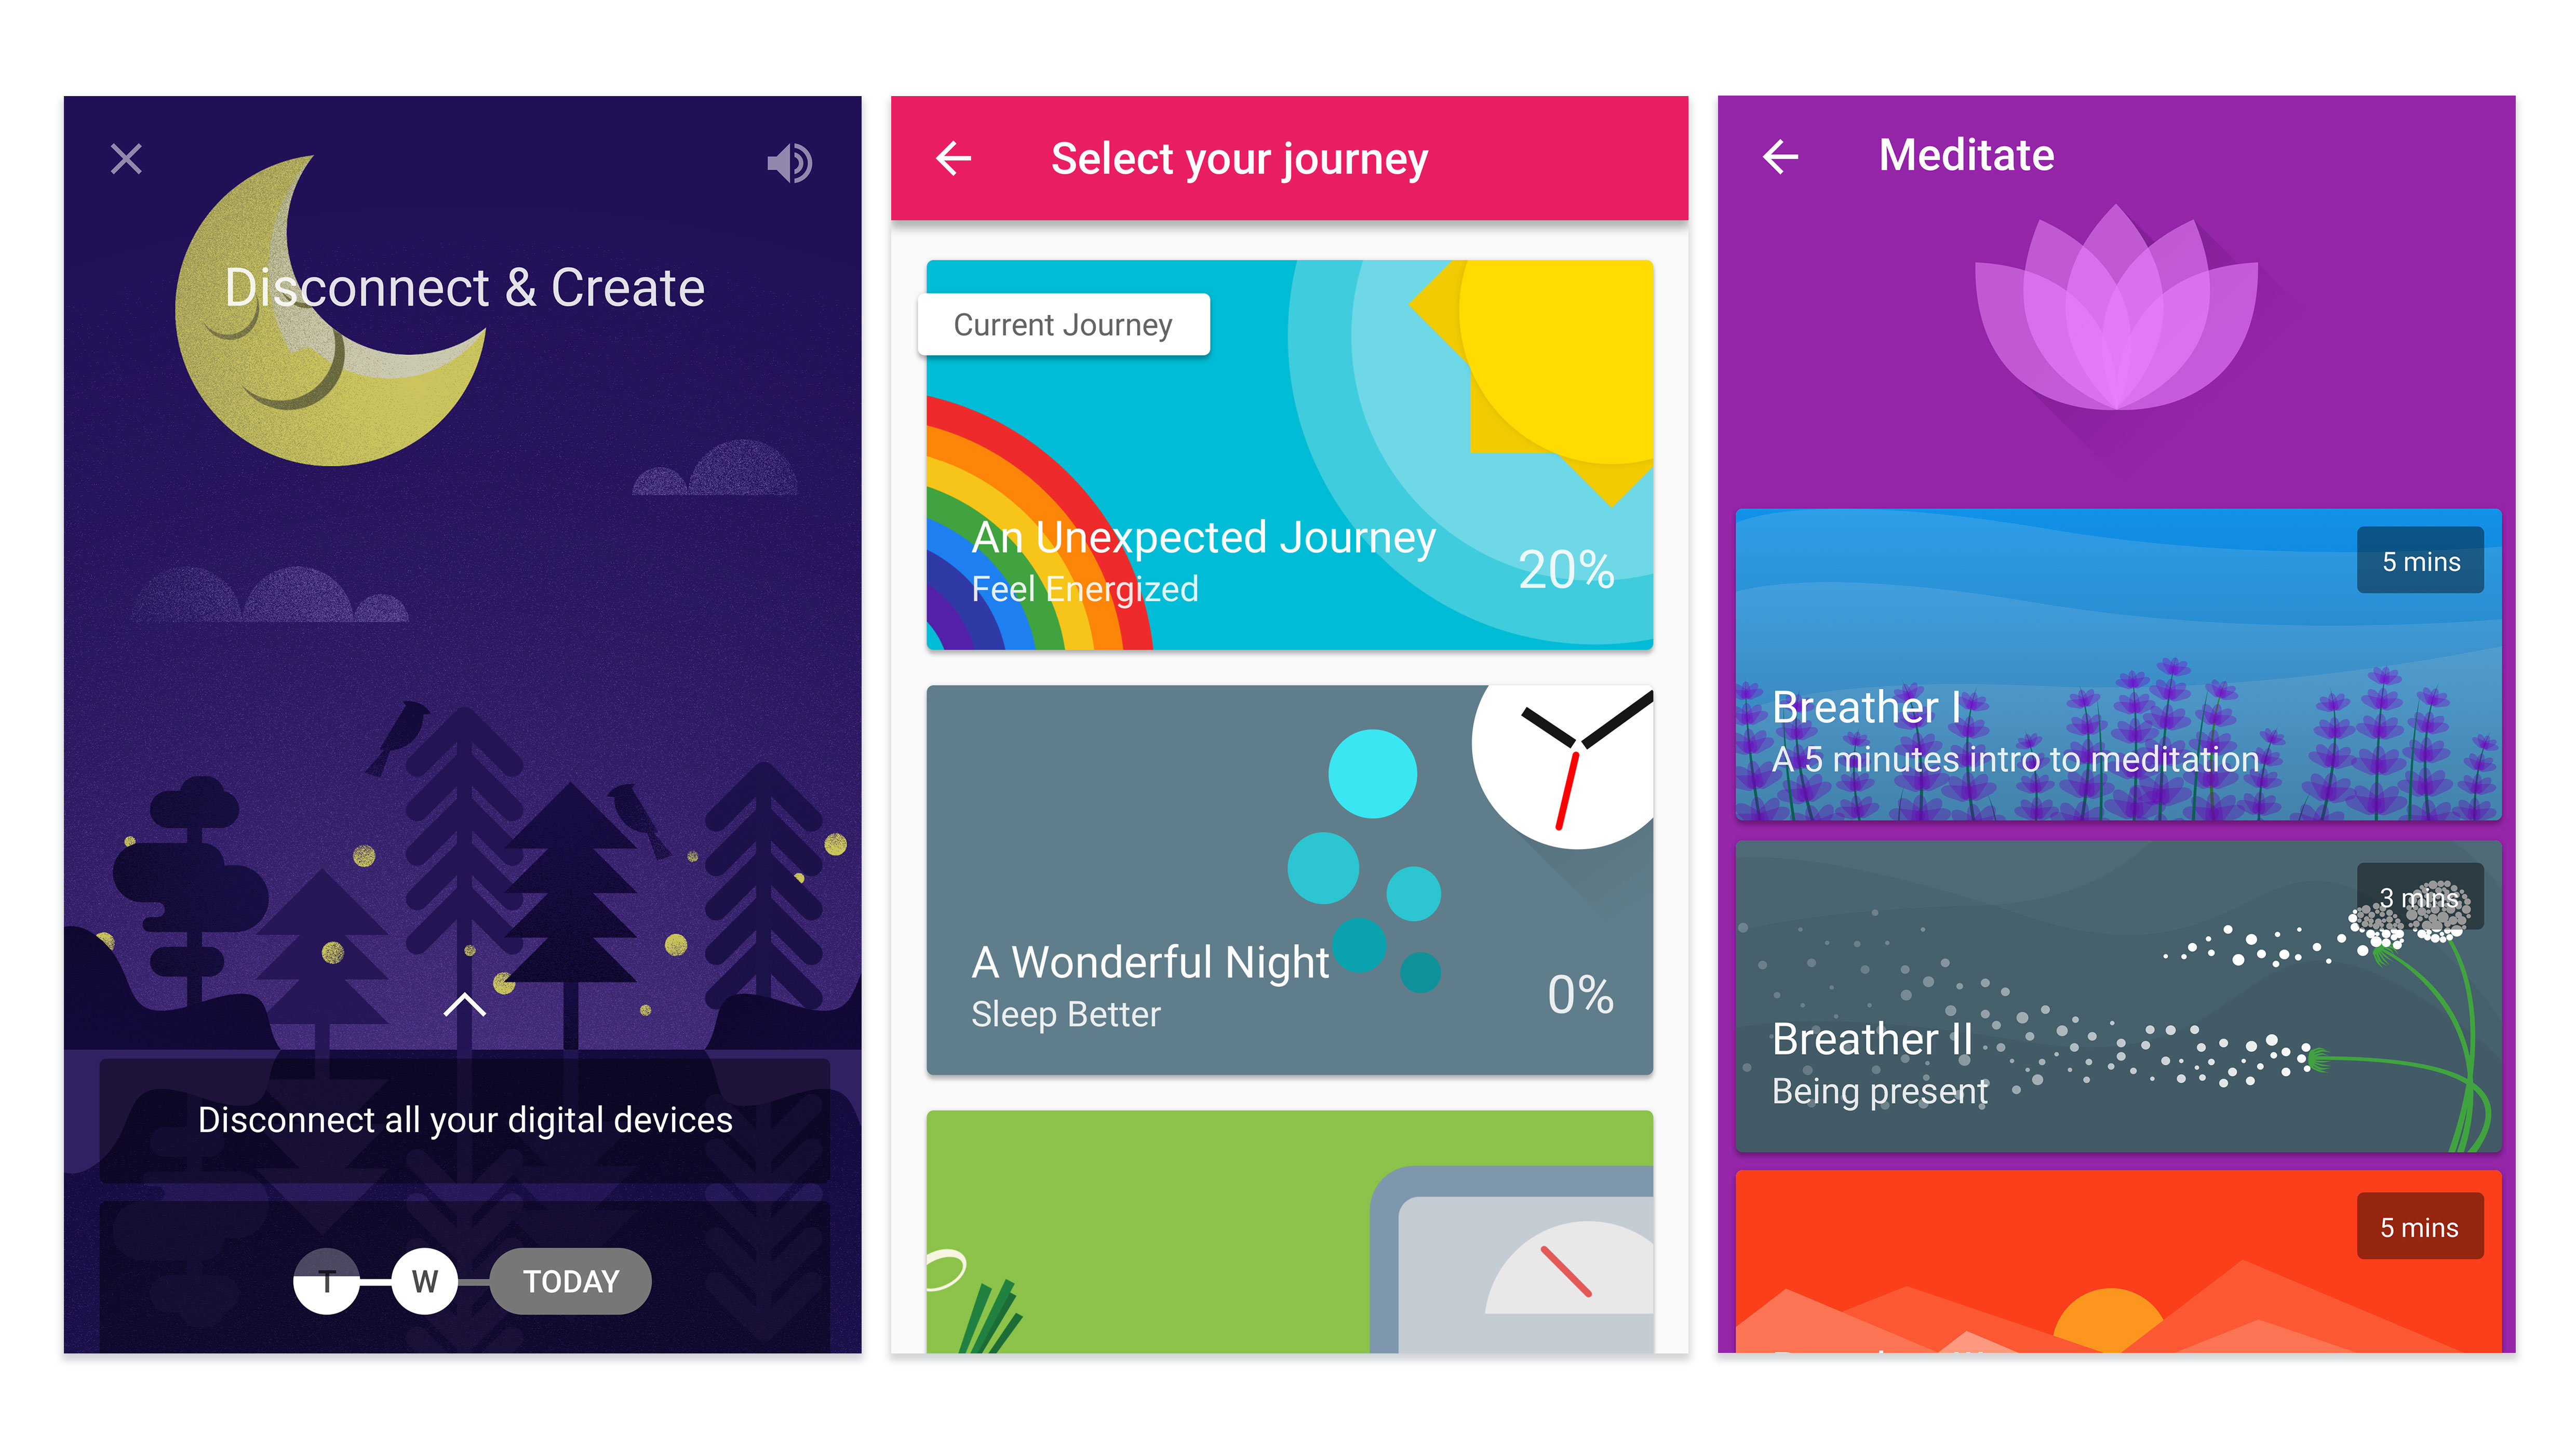
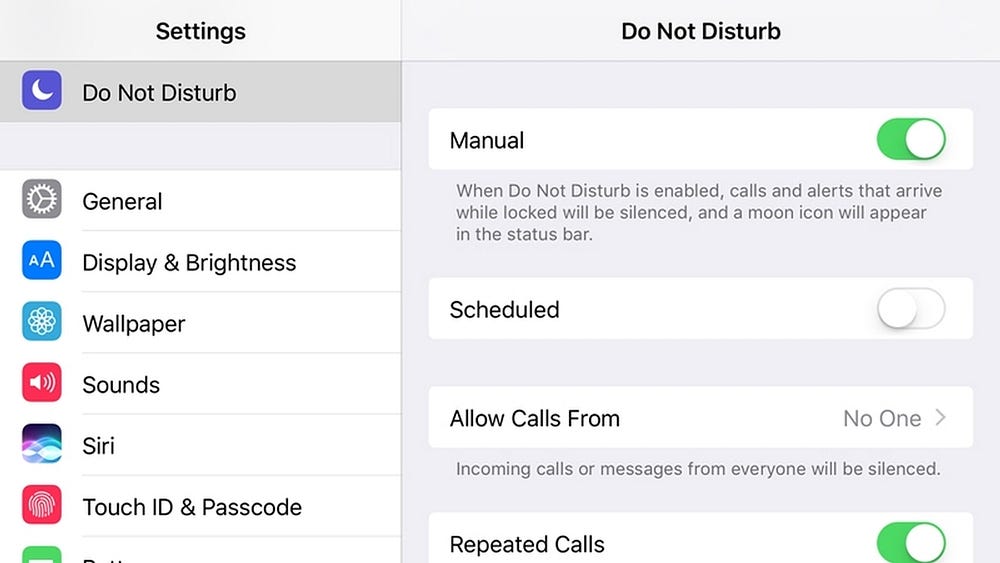
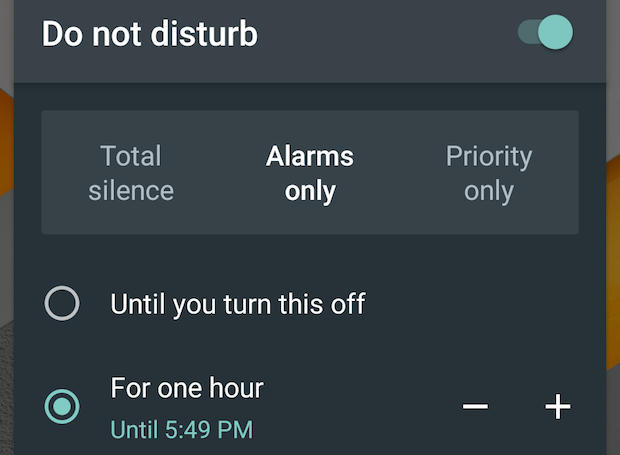
One of my favorite features on my phone is Do Not Disturb. It allows you to silence all non-critical notifications for an indefinite amount of time. This is what I use when I’m working on school work, personal projects, or even this article. On both iOS and Android, you’re given fairly granular control over what is considered critical so you can pick and choose what is worth the focus lost from a distraction.
{% include elements/figure.html image="https://cdn-images-1.medium.com/max/1000/0*MAeS-4fEc0Y7T4VB.jpg" caption="iOS" %}
{% include elements/figure.html image="https://cdn-images-1.medium.com/max/1000/0*nF_H2-8oTY7C0a54.png" caption="Android" %}
Apple and Google also fairly recently rolled out time management tools which allow the user to be restricted from certain applications after a given amount of use. This really helps to add an extra layer of discipline if you’re trying to build the habit of using your phone less.
Minimalism isn’t a philosophy that demands you to sell everything you own, wear the same outfit for the rest of your life, and live out of your van. Rather, it’s taking a hard look at everything in your life and determining whether something truly provides happiness for you. Digital Minimalism is a subset of this way of thinking and is a philosophy that has allowed me to work in tech and be an active participant of social media, but also maintain my own level of free thinking and choose what I focus on.
I hope this has helped at least one person out there better manage their digital engagement. When I was first starting my foray into this way of thinking, this documentary by Matt D'Avella really helped me understand what minimalism was all about and is something I’d recommend if you’d like to learn more!
A GitHub repository has all of the ingredients for serving as a content management system.
Source: freecodecamp
This tutorial will give you a basic understanding of React.js by building a very simple application. I’ll leave out everything which I don’t think is core.
When getting started with React, you should use the simplest setup possible: an HTML file which imports the React and the ReactDOM libraries using script tags, like this:
<html>
<head>
<script src="https://unpkg.com/react@15/dist/react.min.js"> </script><script src="https://unpkg.com/react-dom@15/dist/react-dom.min.js">
</script>
<script src="https://unpkg.com/[email protected]/babel.min.js"></script>
</head>
<body>
    <div id="root"></div>
    <script type="text/babel">

    /*
    ADD REACT CODE HERE
    */

    </script>
</body>
</html>
We’ve also imported Babel, as React uses something called JSX to write markup. We’ll need to transform this JSX into plain JavaScript, so that the browser can understand it.
There are more two things I want you to notice:
<div> with the id of #root. This is the entry point for our app. This is where our entire app will live.<script type="text/babel"> tag in the body. This is where we’ll write our React.js code.If you want to experiment with the code, check out this Scrimba playground.
Everything in React is a component, and these usually take the form of JavaScript classes. You create a component by extending upon the React-Component class. Let’s create a component called Hello.
class Hello extends React.Component {
render() {
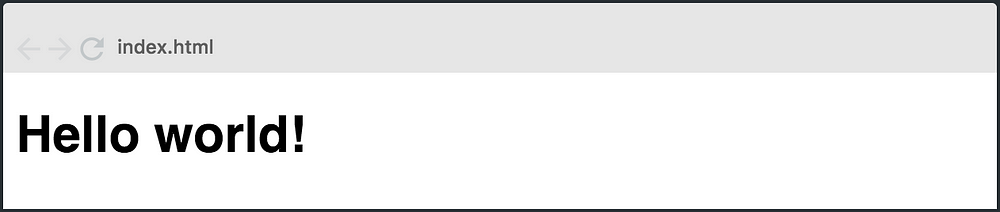
return <h1>Hello world!</h1>;
}
}You then define the methods for the component. In our example, we only have one method, and it’s called render().
Inside render() you’ll return a description of what you want React to draw on the page. In the case above, we simply want it to display an h1 tag with the text Hello world! inside it.
To get our tiny application to render on the screen we also have to use ReactDOM.render():
ReactDOM.render(
    <Hello />,
    document.getElementById("root")
);
So this is where we connect our Hello component with the entry point for the app (<div id="root"></div>). It results in the following:
The HTML’ish syntax we just looked at (<h1> and <Hello/>) is the JSX code I mentioned earlier. It’s not actually HTML, though what you write there does end up as HTML tags in the DOM.
The next step is to get our app to handle data.
There are two types of data in React: props and state. The difference between the two is a bit tricky to understand in the beginning, so don’t worry if you find it a bit confusing. It’ll become easier once you start working with them.
The key difference is that state is private and can be changed from within the component itself. Props are external, and not controlled by the component itself. It’s passed down from components higher up the hierarchy, who also control the data.
{% include elements/highlight.html text="A component can change its internal state directly. It can not change its props directly." %}
Let’s take a closer look at props first.
Our Hello component is very static, and it renders out the same message regardless. A big part of React is reusability, meaning the ability to write a component once, and then reuse it in different use cases — for example, to display different messages.
To achieve this type of reusability, we’ll add props. This is how you pass props to a component:
ReactDOM.render(
    <Hello message="my friend" />,
    document.getElementById("root")
);
This prop is called message and has the value “my friend”. We can access this prop inside the Hello component by referencing this.props.message, like this:
class Hello extends React.Component {
    render() {
        return <h1>Hello {this.props.message}!</h1>;
    }
}
As a result, this is rendered on the screen:
The reason we’re writing {this.props.message} with curly braces is because we need to tell the JSX that we want to add a JavaScript expression. This is called escaping.
So now we have a reusable component which can render whatever message we want on the page. Woohoo!
However, what if we want the component to be able to change its own data? Then we have to use state instead!
The other way of storing data in React is in the component’s state. And unlike props — which can’t be changed directly by the component — the state can.
So if you want the data in your app to change — for example based on user interactions — it must be stored in a component’s state somewhere in the app.
To initialize the state, simply set this.state in the constructor() method of the class. Our state is an object which in our case only has one key called message.
class Hello extends React.Component {

    constructor(){
        super();
        this.state = {
            message: "my friend (from state)!"
        };
    }

    render() {
        return <h1>Hello {this.state.message}!</h1>;
    }
}
Before we set the state, we have to call super() in the constructor. This is because this is uninitialized before super() has been called.
Changing the state
To modify the state, simply call this.setState(), passing in the new state object as the argument. We’ll do this inside a method which we’ll call updateMessage.
class Hello extends React.Component {

    constructor(){
        super();
        this.state = {
            message: "my friend (from state)!"
        };
        this.updateMessage = this.updateMessage.bind(this);
   }
    updateMessage() {
        this.setState({
            message: "my friend (from changed state)!"
        });
    }
    render() {
        return <h1>Hello {this.state.message}!</h1>;
    }
}
Note: To make this work, we also had to bind the
thiskeyword to theupdateMessagemethod. Otherwise we couldn’t have accessedthisin the method.
The next step is to create a button to click on, so that we can trigger the updateMessage() method.
So let’s add a button to the render() method:
render() {
  return (
     <div>
       <h1>Hello {this.state.message}!</h1>
       <button onClick={this.updateMessage}>Click me!</button>
     </div>
  )
}
Here, we’re hooking an event listener onto the button, listening for the onClick event. When this is triggered, we call the updateMessage method.
Here’s the entire component:
class Hello extends React.Component {

    constructor(){
        super();
        this.state = {
            message: "my friend (from state)!"
        };
        this.updateMessage = this.updateMessage.bind(this);
    }
    updateMessage() {
        this.setState({
            message: "my friend (from changed state)!"
        });
    }
    render() {
         return (
           <div>
             <h1>Hello {this.state.message}!</h1>
             <button onClick={this.updateMessage}>Click me!</button>
           </div>
        )
    }
}
The updateMessage method then calls this.setState() which changes the this.state.message value. And when we click the button, here’s how that will play out:
Congrats! You now have a very basic understanding of the most important concepts in React.
Source: Ashley Mayer
Silicon Valley is a magical place with some strange norms—perhaps because companies, careers, and fortunes rise and fall with such astounding speed. Here are a few of the quirky, brutal, and hopefully useful lessons I learned during my 11 years living and working in the technology industry’s epicenter.
There’s a rigid hierarchy of functions in Silicon Valley. At the top of the pyramid sit the entrepreneurs, the engineers, the venture capitalists. The closer you are to building or funding, the more respect you get—which probably makes sense. But when I began my career in tech, I wasn’t prepared for how little respect is left over for other functions: recruiting, HR, marketing, communications, etc. There’s an assumption that truly great products market themselves or that truly great companies are magnets for top talent. To work in these superfluous fields is either a sign that your company must compensate for its lack of greatness or that you’re but an intermediary for the inevitable.
Of course, not everyone thinks like this. And that’s where the upside to this warped view comes in. At the company level, it’s quite clear you’ll need to out-innovate your competitors by building a better product. But what about the less obvious vectors for competition? With the benefit of hindsight, it’s easy to see where investments in culture have paid off exceptionally well (and where the lack thereof has halted otherwise unstoppable companies). In nascent industries—especially highly regulated ones—educating customers and stakeholders about your product and market may be as core to survival as the product itself.
This opportunity for differentiation also exists at the individual level. It used to bother me that people made certain assumptions about me based on my profession. I craved validation from my peers and resented the stereotypes that came along with PR. But the longer I’ve been in this field, the more respect I have for how nuanced, impactful, and essential our work is, and consequently, I’m bothered less by other people’s projections. An unfortunate consequence of the hierarchy of functions is that it’s harder to attract top talent to the layers we undervalue, which hurts the industry as a whole. But, as an individual, it means that it’s probably more feasible to distinguish yourself as one of the top recruiters or marketers than it is to become a top engineer in a world where that is the ultimate prize.
One of our industry’s oft-repeated (and oft-abused) sayings is, “If you’re offered a seat on a rocket ship, you don’t ask what seat. You just get on.” It’s what Google’s then-CEO Eric Schmidt told Sheryl Sandberg to convince her to come onboard in 2001, and I’ve always appreciated the humility embedded in this perspective (for the seat-taker, that is). But we often fail to dwell on the inevitable follow-up question: If you took a seat on that rocket ship, and it was indeed a rocket ship, how do you know if you made any meaningful impact on its speed or trajectory?
Success is one of the most dangerous things that can happen to you early in your career. When you’re on a so-called rocket ship, you’re likely drinking from the fire hose daily, making things up as you go along. If you’re given responsibilities that exceed your experience, you’re probably plagued by self-doubt. Then, at some point, if you’re lucky, the company you’ve helped build is declared a success. And those many bumps along the way are ironed out into a perfect narrative. Perhaps you’re even tempted to believe it.
Some reputations are built on much less than you would assume.
In Silicon Valley, myths about people and companies tend to beat out carefully considered case studies. Maybe it’s because so much creation happens when companies are still private and therefore less observable. Maybe it’s because there are so many new and invisible forces at work (emerging technology trends, cultural and behavioral shifts) in a company’s meteoric rise that mythology is the only way we can make sense of it. Maybe it’s because we love a good story—and a good creation story most of all.
It’s a balancing act to allow yourself pride in what you’ve helped accomplish without getting caught up in your own personal mythology. Be grateful for the tough times: They will keep you anchored during headier cycles. If you battle insecurity and anxiety on the regular (raises hand), find solace in the fact that you’re probably working harder than you would if you were capable of believing that it was your seat that made all the difference.
This is going to seem random, but bear with me: In the 1999 rom-com Never Been Kissed, Drew Barrymore’s character, Josie, is a reporter who goes undercover as a high school student to write about the “cool” high school crowd. But there’s just one problem: She’s super uncool, so she can’t get anywhere near them. Then her naturally cool younger brother decides to relive his high school glory days and salvages her assignment by convincing the cool kids that Josie is, in fact, quite cool. “All you need is for one person to think you’re cool,” he tells her. “And you’re in.”
Silicon Valley can feel a little like high school—in many ways, but especially when it comes to people’s reputations. I’m regularly shocked by how much just one person declaring someone a “rockstar” can open doors and even change the trajectory of a career. And if the person doing the declaring is particularly influential, other people will repeat their pronouncement as a given. The speed and opacity of startup trajectories make it impossible to really know how impactful someone was (how to separate the seat from the rocket ship), so personal endorsements carry a tremendous amount of weight. Which means that some reputations are built on much less than you would assume.
This is troubling, especially because influential people tend to skew white and male, as do their networks, which only reinforces existing power structures. But it’s also an incredible opportunity to elevate deserving but underappreciated and underrepresented people—especially if you yourself are influential. I doubt many people know how much weight their words carry.
Of course, if you’re not accustomed to wielding this power—or asking for it to be wielded on your behalf—it can feel pretty uncomfortable. Women in particular have a harder time transitioning from the personal and emotional to the transactional in their relationships. My female friends and I have discussed this extensively and have even experimented with a “favor swap” event where the whole point is to get transactional. Maybe this is what Lean In Circles should have been all along—lead with the favors, not the feelings.
This one is simple, but important. We all know how critical it is to build strong relationships inside a company, but it wasn’t until I moved on from my first startup job that I realized how incredibly valuable co-worker relationships become after you leave. After years together in the trenches, former co-workers know your strengths and can call you on your bullshit. And once you’re no longer co-workers, all those pesky work-related complications and politics disappear.
Your non-co-worker friends will of course cheer you on, but if you’re in a rut professionally or trying to figure out if you’re the one being difficult in a dysfunctional work relationship, no one can help you troubleshoot like your former colleagues. Same if you need a substantive ego boost. And because your relationship started in a work context, it’s also much easier to be transactional, whether that means asking for intros, references, funding, or feedback.
Source: atlassian
Version control systems are a category of software tools that help a software team manage changes to source code over time. Version control software keeps track of every modification to the code in a special kind of database. If a mistake is made, developers can turn back the clock and compare earlier versions of the code to help fix the mistake while minimizing disruption to all team members.
For almost all software projects, the source code is like the crown jewels - a precious asset whose value must be protected. For most software teams, the source code is a repository of the invaluable knowledge and understanding about the problem domain that the developers have collected and refined through careful effort. Version control protects source code from both catastrophe and the casual degradation of human error and unintended consequences.
Software developers working in teams are continually writing new source code and changing existing source code. The code for a project, app or software component is typically organized in a folder structure or "file tree". One developer on the team may be working on a new feature while another developer fixes an unrelated bug by changing code, each developer may make their changes in several parts of the file tree.
Version control helps teams solve these kinds of problems, tracking every individual change by each contributor and helping prevent concurrent work from conflicting. Changes made in one part of the software can be incompatible with those made by another developer working at the same time. This problem should be discovered and solved in an orderly manner without blocking the work of the rest of the team. Further, in all software development, any change can introduce new bugs on its own and new software can't be trusted until it's tested. So testing and development proceed together until a new version is ready.
Good version control software supports a developer's preferred workflow without imposing one particular way of working. Ideally it also works on any platform, rather than dictate what operating system or tool chain developers must use. Great version control systems facilitate a smooth and continuous flow of changes to the code rather than the frustrating and clumsy mechanism of file locking - giving the green light to one developer at the expense of blocking the progress of others.
Software teams that do not use any form of version control often run into problems like not knowing which changes that have been made are available to users or the creation of incompatible changes between two unrelated pieces of work that must then be painstakingly untangled and reworked. If you're a developer who has never used version control you may have added versions to your files, perhaps with suffixes like "final" or "latest" and then had to later deal with a new final version. Perhaps you've commented out code blocks because you want to disable certain functionality without deleting the code, fearing that there may be a use for it later. Version control is a way out of these problems.
Version control software is an essential part of the every-day of the modern software team's professional practices. Individual software developers who are accustomed to working with a capable version control system in their teams typically recognize the incredible value version control also gives them even on small solo projects. Once accustomed to the powerful benefits of version control systems, many developers wouldn't consider working without it even for non-software projects.
Developing software without using version control is risky, like not having backups. Version control can also enable developers to move faster and it allows software teams to preserve efficiency and agility as the team scales to include more developers.
Version Control Systems (VCS) have seen great improvements over the past few decades and some are better than others. VCS are sometimes known as SCM (Source Code Management) tools or RCS (Revision Control System). One of the most popular VCS tools in use today is called Git. Git is a Distributed VCS, a category known as DVCS, more on that later. Like many of the most popular VCS systems available today, Git is free and open source. Regardless of what they are called, or which system is used, the primary benefits you should expect from version control are as follows.
A complete long-term change history of every file. This means every change made by many individuals over the years. Changes include the creation and deletion of files as well as edits to their contents. Different VCS tools differ on how well they handle renaming and moving of files. This history should also include the author, date and written notes on the purpose of each change. Having the complete history enables going back to previous versions to help in root cause analysis for bugs and it is crucial when needing to fix problems in older versions of software. If the software is being actively worked on, almost everything can be considered an "older version" of the software.
Branching and merging. Having team members work concurrently is a no-brainer, but even individuals working on their own can benefit from the ability to work on independent streams of changes. Creating a "branch" in VCS tools keeps multiple streams of work independent from each other while also providing the facility to merge that work back together, enabling developers to verify that the changes on each branch do not conflict. Many software teams adopt a practice of branching for each feature or perhaps branching for each release, or both. There are many different workflows that teams can choose from when they decide how to make use of branching and merging facilities in VCS.
Traceability. Being able to trace each change made to the software and connect it to project management and bug tracking software such as Jira, and being able to annotate each change with a message describing the purpose and intent of the change can help not only with root cause analysis and other forensics. Having the annotated history of the code at your fingertips when you are reading the code, trying to understand what it is doing and why it is so designed can enable developers to make correct and harmonious changes that are in accord with the intended long-term design of the system. This can be especially important for working effectively with legacy code and is crucial in enabling developers to estimate future work with any accuracy.
While it is possible to develop software without using any version control, doing so subjects the project to a huge risk that no professional team would be advised to accept. So the question is not whether to use version control but which version control system to use.
There are many choices, but here we are going to focus on just one, Git.
This website is an example of GitHub CMS in action.
TODO
Source content can be in one of four publication states:
The system supports the following actions. The general logic is described along with the action.
Source: Brandon Morelli
Simply put: A callback is a function that is to be executed after another function has finished executing — hence the name ‘call back’.
More complexly put: In JavaScript, functions are objects. Because of this, functions can take functions as arguments, and can be returned by other functions. Functions that do this are called higher-order functions. Any function that is passed as an argument is called a callback function.
^ That’s a lot of words. Lets look at some examples to break this down a little more.
For one very important reason — JavaScript is an event driven language. This means that instead of waiting for a response before moving on, JavaScript will keep executing while listening for other events. Lets look at a basic example:
function first(){
  console.log(1);
}
function second(){
  console.log(2);
}
first();
second();
As you would expect, the function first is executed first, and the function second is executed second — logging the following to the console:
// 1
// 2
All good so far.
But what if function first contains some sort of code that can’t be executed immediately? For example, an API request where we have to send the request then wait for a response? To simulate this action, were going to use setTimeout which is a JavaScript function that calls a function after a set amount of time. We’ll delay our function for 500 milliseconds to simulate an API request. Our new code will look like this:
function first(){
  // Simulate a code delay
  setTimeout( function(){
    console.log(1);
  }, 500 );
}
function second(){
  console.log(2);
}
first();
second();
It’s not important that you understand how setTimeout() works right now. All that matters is that you see we’ve moved our console.log(1); inside of our 500 millisecond delay. So what happens now when we invoke our functions?
first();
second();
// 2
// 1
Even though we invoked the first() function first, we logged out the result of that function after the second() function.
It’s not that JavaScript didn’t execute our functions in the order we wanted it to, it’s instead that JavaScript didn’t wait for a response from first() before moving on to execute second().
So why show you this? Because you can’t just call one function after another and hope they execute in the right order. {% include elements/highlight.html text="Callbacks are a way to make sure certain code doesn’t execute until other code has already finished execution." %}
Alright, enough talk, lets create a callback!
First, open up your Chrome Developer Console (Windows: Ctrl + Shift + J)(Mac: Cmd + Option + J) and type the following function declaration into your console:
function doHomework(subject) {
  alert(`Starting my ${subject} homework.`);
}
Above, we’ve created the function doHomework . Our function takes one variable, the subject that we are working on. Call your function by typing the following into your console:
doHomework('math');
// Alerts: Starting my math homework.
Now lets add in our callback — as our last parameter in the doHomework() function we can pass in callback. The callback function is then defined in the second argument of our call to doHomework().
function doHomework(subject, callback) {
  alert(`Starting my ${subject} homework.`);
  callback();
}

doHomework('math', function() {
  alert('Finished my homework');
});
As you’ll see, if you type the above code into your console you will get two alerts back to back: Your ‘starting homework’ alert, followed by your ‘finished homework’ alert.
But callback functions don’t always have to be defined in our function call. They can be defined elsewhere in our code like this:
function doHomework(subject, callback) {
  alert(`Starting my ${subject} homework.`);
  callback();
}
function alertFinished(){
  alert('Finished my homework');
}
doHomework('math', alertFinished);
This result of this example is exactly the same as the previous example, but the setup is a little different. As you can see, we’ve passed the alertFinished function definition as an argument during our doHomework() function call!
Last week I published an article on how to Create a Twitter Bot in 38 lines of code. The only reason the code in that article works is because of Twitters API. When you make requests to an API, you have to wait for the response before you can act on that response. This is a wonderful example of a real-world callback. Here’s what the request looks like:
T.get('search/tweets', params, function(err, data, response) {
  if(!err){
    // This is where the magic will happen
  } else {
    console.log(err);
  }
})
T.get simply means we are making a get request to Twitter‘search/tweets’, which is the route of our request, params which are our search parameters, and then an anonymous function which is our callback.A callback is important here because we need to wait for a response from the server before we can move forward in our code. We don’t know if our API request is going to be successful or not so after sending our parameters to search/tweets via a get request, we wait. Once Twitter responds, our callback function is invoked. Twitter will either send an err (error) object or a response object back to us. In our callback function we can use an if() statement to determine if our request was successful or not, and then act upon the new data accordingly.
The GitHub CMS project presents a system for enabling content management and publication capabilities on any GitHub Repository. Content is stored as GitHub Issues, managed through GitHub Projects, published by a GitHub Action to a GitHub Repository and hosted by GitHub Pages.
Source: GitHub Guides
When you're working on a project, you're going to have a bunch of different features or ideas in progress at any given time – some of which are ready to go, and others which are not. Branching exists to help you manage this workflow.
When you create a branch in your project, you're creating an environment where you can try out new ideas. Changes you make on a branch don't affect the master branch, so you're free to experiment and commit changes, safe in the knowledge that your branch won't be merged until it's ready to be reviewed by someone you're collaborating with.
Branching is a core concept in Git, and the entire GitHub flow is based upon it. There's only one rule: anything in the master branch is always deployable.
Because of this, it's extremely important that your new branch is created off of master when working on a feature or a fix. Your branch name should be descriptive (e.g., refactor-authentication, user-content-cache-key, make-retina-avatars), so that others can see what is being worked on.
Once your branch has been created, it's time to start making changes. Whenever you add, edit, or delete a file, you're making a commit, and adding them to your branch. This process of adding commits keeps track of your progress as you work on a feature branch.
Commits also create a transparent history of your work that others can follow to understand what you've done and why. Each commit has an associated commit message, which is a description explaining why a particular change was made. Furthermore, each commit is considered a separate unit of change. This lets you roll back changes if a bug is found, or if you decide to head in a different direction.
Commit messages are important, especially since Git tracks your changes and then displays them as commits once they're pushed to the server. By writing clear commit messages, you can make it easier for other people to follow along and provide feedback.
Pull Requests initiate discussion about your commits. Because they're tightly integrated with the underlying Git repository, anyone can see exactly what changes would be merged if they accept your request.
You can open a Pull Request at any point during the development process: when you have little or no code but want to share some screenshots or general ideas, when you're stuck and need help or advice, or when you're ready for someone to review your work. By using GitHub's @mention system in your Pull Request message, you can ask for feedback from specific people or teams, whether they're down the hall or ten time zones away.
Pull Requests are useful for contributing to open source projects and for managing changes to shared repositories. If you're using a Fork & Pull Model, Pull Requests provide a way to notify project maintainers about the changes you'd like them to consider. If you're using a Shared Repository Model, Pull Requests help start code review and conversation about proposed changes before they're merged into the master branch.
Once a Pull Request has been opened, the person or team reviewing your changes may have questions or comments. Perhaps the coding style doesn't match project guidelines, the change is missing unit tests, or maybe everything looks great and props are in order. Pull Requests are designed to encourage and capture this type of conversation.
You can also continue to push to your branch in light of discussion and feedback about your commits. If someone comments that you forgot to do something or if there is a bug in the code, you can fix it in your branch and push up the change. GitHub will show your new commits and any additional feedback you may receive in the unified Pull Request view.
Pull Request comments are written in Markdown, so you can embed images and emoji, use pre-formatted text blocks, and other lightweight formatting.
With GitHub, you can deploy from a branch for final testing in production before merging to master.
Once your pull request has been reviewed and the branch passes your tests, you can deploy your changes to verify them in production. If your branch causes issues, you can roll it back by deploying the existing master into production.
Now that your changes have been verified in production, it is time to merge your code into the master branch.
Once merged, Pull Requests preserve a record of the historical changes to your code. Because they're searchable, they let anyone go back in time to understand why and how a decision was made.
By incorporating certain keywords into the text of your Pull Request, you can associate issues with code. When your Pull Request is merged, the related issues are also closed. For example, entering the phrase Closes #32 would close issue number 32 in the repository.
Source: Jonathan Fulton
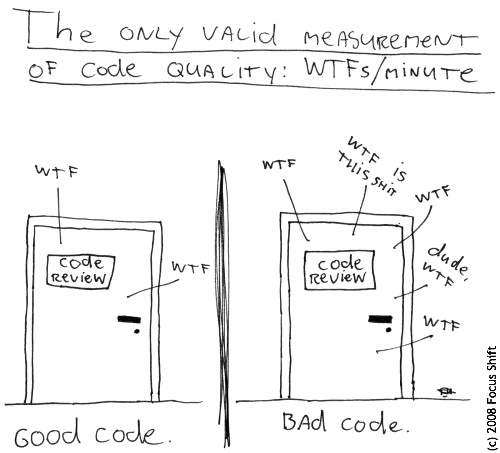
A few years ago at VideoBlocks we had a major code quality problem: “spaghetti” logic in most files, tons of duplication, no tests and more. Writing new features and even minor bug fixes required a couple of Tums at best and entire bottles of Pepto-Bismol and Scotch far too often. Our WTFs per minute were sky-high.
{% include elements/figure.html image="https://cdn-images-1.medium.com/max/1600/1*J2mKSLBEp_jUbMtOWXTTjQ.png" caption="Several years ago we were definitely in the room on the right but we’ve moved a lot closer to the room on the left." %}
Today, the overall quality of our codebases are significantly better thanks in large part to a deliberate effort to improve code quality. A couple ago when we identified the problem, we read Robert Martin’s Clean Code as a team and did our best to implement his recommendations and even introduced “clean code” as a core cultural tenant for the engineering team. I highly recommend doing both as you start scaling. Implementing “clean code” practices appropriately will double productivity in the long run (at a bare minimum) and significantly improve moral on the engineering team. Who wants to be in the room on the right given the choice?
Out of all the ideas we implemented from Clean Code and other sources, five provided at least 80% of the gains in productivity and team happiness.
Let’s walk through each one in detail so you can understand and start applying them in your day-to-day life on an engineering team.
I started regularly repeating this sentence to our engineers as we encountered bugs that should’ve been caught by (nonexistent) tests. You too will prove the quote true again and again unless you build a culture of testing. Write a lot of tests, especially unit tests. Think very hard about integration tests and make sure you have a sufficient number in place to cover your core business functionality. Remember, if there’s not test coverage for a piece of code you’ll likely break it in the future without realizing it until your customers find the bug.
Repeat “if it isn’t tested, it’s broken” to your team over and over until the message sinks in. Practice what you preach, whether you’re a brand new software engineer straight out of school or a grizzled veteran.
There are two hard problems in Computer Science: cache invalidation and naming things.
You may have heard this quote before and it couldn’t be more relevant to your day-to-day life on an engineering team. If you and your team aren’t good at naming things in your code, it will become an unmaintainable nightmare and you won’t get anything done. You’ll lose your best developers and your company will soon go out of business.
Seriously though, friends don’t let friends use bad variable names like data, foobar, or myNumber and they most certainly don’t let them name classes things like SomethingManager. Make sure your names are short and precise, but when in conflict favor precision. Strongly optimize around developer efficiency and make it easy to find files via “find by name” IDE shortcuts. Enforce good naming stringently with code reviews.
Small and SRP go together like a chicken and an egg, a virtuous cycle of deliciousness. Let’s start with small.
What does “small” mean for functions? No more than 4 lines of code. Yep, you read that correctly, 4 lines. You’re probably closing the tab right now but you really shouldn’t. It seems somewhat arbitrary and small and you’ve probably never written code like that in your life. However, 4-line functions force you to think hard and pick a lot of really good names for sub-functions that make your code self-documenting. Additionally, they mean you can’t use nested IF statements that force you to do mental gymnastics to understand all the code paths.
Let’s walk through an example together. Node has an npm module called “build-url” which is used for doing exactly what it’s name suggests: it builds URLs. You can find the link to the source file we’re going to look at here. Below is the relevant code.
{% gist 53b03db644353af05279f8fe3eea1a09 %}
Notice that this function is 35 lines long. It’s not too hard to understand but it could be significantly easier to reason about if we apply our “small” principle to factor out helper functions. Here’s the updated and improved version.
{% gist 167dc8833b9058eafc5cdebc3a2609a9 %}
You’ll notice that while we didn’t adhere strictly to the 4 lines per function rule, we did create several functions that are relatively “small”. Each one does exactly one task that’s easy to understand based on it’s name. You could even unit test each of these smaller functions independently if you wanted, as opposed to only being able to test the one large buildUrl function. You may also notice that this methodology produces slightly more code, 55 lines instead of 35. That’s perfectly acceptable because those 55 lines are a lot more maintainable and easier to read the the 35 lines.
How do you write code like this? I personally find it easiest to write the list of steps down that you need to accomplish the task you’re hoping to do. Each of these steps might be a good candidate for a sub/helper function. For instance, we could describe the buildUrl function as follows:
Notice how each of these steps translates almost directly into a sub-function. Once you get in the habit, you’ll eventually write all of your code using this top-down approach where you create a list of steps, stub the functions, and continue recursively like this into each of the sub-functions creating a list of steps, stubbing, and so on.
Moving on to our related concept, the Single Responsibility Principle. What does this mean? Quoting directly from Wikipedia:
The Single Responsibility Principle (SRP) is a computer programming principle that states that every module or class should have responsibility over a single part of the functionality provided by the software, and that responsibility should be entirely encapsulated by the class. All its services should be narrowly aligned with that responsibility.
Robert Martin in Clean Code provides a parallel definition:
The SRP states that a class or module should one, and only one, reason to change.
Let’s say we’re building a system that needs to a certain type of report and display it. A naive approach might be to build a single module/class that stores the report data as well as the logic for displaying the report. However, that violates SRP because there are two high level reasons to modify the class. First, if the report fields change, we’ll need to update it. Second, if the report visualization requirements change, we’ll need to update the class. Therefore instead of a single class to store both the data and the logic for rendering the data, we should split those concepts and areas of ownership into two different classes, say ReportData and ReportDataRenderer or something similar.
Side effects are truly evil and make it extremely difficult to create code without bugs. Check out the example below. Can you spot the side effect?
{% gist 63706c9490634bc48f768051256dbdf1 %}
The function as named is designed to look up a user by email/password combination, a standard operation for any web application. However, it also has a hidden side effect that you do not know about as the function consumer without reading the implementation code: it logs the user in, which creates a login token, adds it to the database, and sends a cookie back to our user with the value so they’re subsequently “logged in”.
There are many things wrong with this.
First, the function contract/interface is not easily understood without reading the implementation code. Even if the login side-effect is documented, though, it’s still not ideal. Engineers tend to use intellisense in modern IDEs so won’t think they need to read the documentation based on the simple function name. They’ll tend to use the function solely to fetch the user object, failing to realize that they’re adding a cookie to the request which can lead to all sorts of fun hard-to-find bugs.
Second, testing the function is fairly challenging given all the dependencies. Verifying that you can look a user up by email/password requires mocking out an HTTP response as well as handling the writes to the login token table.
Third, the tight coupling between user lookup and login inevitably won’t satisfy all use cases in the future, where you’ll likely need to look up a user or login a user independently. In other words, it’s not “future proof”.
In summary, make sure to remember and apply these four “clean code” principles to dramatically improve your team’s productivity:
This guide will show you how to setup GitHub CMS across three separate repositories aligning to the following roles:
You must have an access token with the repo scope on the three repositories above. The easiest way to do this is to make sure all of the repositories are in your account and create a Personal Access Token with the repo scope.
See Creating a personal access token for the command line for more information.
Although separate repositories makes the components of the system very clear and flexible, it is not a requirement that you create one repository per role.
GitHub CMS can be setup in a single repository, if you wish. Simply use the same repository as you follow the setup instructions below.
You can use any GitHub Repository (public or private) that you have repo access to. For this example, a repository was created at paulkoanui/meta-repo-1.
| META_OWNER | META_REPO |
|---|---|
| paulkoanui | meta-repo-1 |
(in a future step, you will configure the publication workflow to use the above values)
You can use any GitHub Repository (public or private) that you have repo access to. For this example, a repository was created at paulkoanui/target-content-repo-1.
| TARGET_OWNER | TARGET_REPO |
|---|---|
| paulkoanui | target-content-repo-1 |
(in a future step, you will configure the publication workflow to use the above values)
You can use any GitHub Repository (public or private) that you have repo access to and that has Issues you wish to publish to a Target Publication Repository. For this example, a repository was created at paulkoanui/source-content-repo-1.
| SRC_OWNER | SRC_REPO |
|---|---|
| paulkoanui | source-content-repo-1 |
(in a future step, you will configure the publication workflow to use the above values)
To complete installation and setup of publication capabilities on the Source Content Repository,
paulkoanui/source-content-repo-1 has a project called "Posts".GitHub CMS Action is an open source GitHub Action that executes the publication process when Issues inside of a Project change columns (state). It can be used without downloading anything. Think of it like a GitHub Repository Plugin.
For example, in the video below, we create a Project called "Posts" that will be used to publish Jekyll formatted blog posts.
This is a YAML file, called github-cms.yml. It defines the publication process and how it operates. Once customized, this file will be placed in .github/workflows in the Source Content Repository.
See the Configuring a Workflow for GitHub Actions for more info.
github-cms.template.ymlIn the env section of the workflow file, customize these values. Other values that you don't have to change have been omitted for brevity.
  # This is the source system repository
  SRC_AUTH: ***
  SRC_OWNER: paulkoanui
  SRC_REPO: source-content-repo-1
  # This is the target system repository
  TARGET_AUTH: ***
  TARGET_OWNER: paulkoanui
  TARGET_REPO: target-content-repo-1
  # This is the metadata repository
  META_AUTH: ***
  META_OWNER: paulkoanui
META_REPO: meta-repo-1The "Posts" Project contains three state columns "Staging", "Published", "Archived". GitHub CMS Action observes when Issues move to the "Published" or "Archived" columns.
  # Collections and actions mapped to project columns
  POSTS_PUBLISH_COLUMN: 8363572
  POSTS_ARCHIVE_COLUMN: 8363575
You can get the project column ID by choosing "Copy Column Link"

To enable all of the GitHub CMS publication features, push github-cms.yml to the Source Content Repository at .github/workflows/github-cms.yml.
With
.github/workflows/github-cms.ymlin place, content publication with GitHub CMS can begin!
_posts folder.There are four pieces that enable publishing:
The architecture presented here is separated by functional role within the system (and, therefore, into separate repositories). Separate repositories are not a requirement and GitHub CMS can be completely self contained in a single repository.
The GitHub CMS Action represents the process that executes publication actions and manages publication state. This action is used by a Source Content Repository.
The GitHub Issues in this repository represent the "Source of Truth" for all content that is published by GitHub CMS Action. A GitHub Issue and content item are used interchangeably. They are the same from our perspective.
GitHub Projects in this repository are used to organize Issues into "Collections". These projects also represent state machines used to move Issues between Staging, Published, Unpublished, and Archived states. State changes are observed and reacted to by GitHub CMS Action.
This GitHub Repository hosts all content published from the Source Content Repository. GitHub CMS is configured to generate Markdown formatted text files containing Jekyll front-matter. This allows instant support for hosting published content with GitHub Pages.
This GitHub Repository stores the following information content items:
published, archived.Do not go gentle into that good night,
Old age should burn and rave at close of day;
Rage, rage against the dying of the light.
Though wise men at their end know dark is right,
Because their words had forked no lightning they
Do not go gentle into that good night.
Good men, the last wave by, crying how bright
Their frail deeds might have danced in a green bay,
Rage, rage against the dying of the light.
Wild men who caught and sang the sun in flight,
And learn, too late, they grieved it on its way,
Do not go gentle into that good night.
Grave men, near death, who see with blinding sight
Blind eyes could blaze like meteors and be gay,
Rage, rage against the dying of the light.
And you, my father, there on the sad height,
Curse, bless, me now with your fierce tears, I pray.
Do not go gentle into that good night.
Rage, rage against the dying of the light.
— Dylan Thomas, 1914 - 1953
Source: RICO STA. CRUZ
The “Hello world” program is usually the first introduction to any programming language. It looks like this in the C programming language:
/* hello.c */
#import <stdio.h>

int main(int argc, char *argv[]) {
  printf("Hello, world!");
  return 0;
}
It demonstrates the minimum amount you need to write a C program. In more modern languages however, this example isn’t as useful anymore. Here’s the same example in Python:
# hello.py
print "Hello, world!"In today’s world of more succint programming languages, we need a different “hello world” to demonstrate language features better. Here’s what I propose:
// hello.js
function getGreeting (name) {
  return `Hello, ${name}!`
}

const message = getGreeting('world')
console.log(message)
This simple example demonstrates a few more things than printing strings:
The Movies Project is something like Netflix, the only difference is that it's not real! It doesn't exist! I just created it to demonstrate how the showcase page looks like and how you can write whatever you want with full markdown support.
{% include elements/button.html link="https://github.com/YoussefRaafatNasry/portfolYOU" text="Learn More" %}
A declarative, efficient, and flexible JavaScript library for building user interfaces.
🖖 Vue.js is a progressive, incrementally-adoptable JavaScript framework for building UI on the web.
TypeScript is a superset of JavaScript that compiles to clean JavaScript output.
An Open Source Machine Learning Framework for Everyone
The Web framework for perfectionists with deadlines.
A PHP framework for web artisans
Bring data to life with SVG, Canvas and HTML. 📊📈🎉
JavaScript (JS) is a lightweight interpreted programming language with first-class functions.
Some thing interesting about web. New door for the world.
A server is a program made to process requests and deliver data to clients.
Machine learning is a way of modeling and interpreting data that allows a piece of software to respond intelligently.
Some thing interesting about visualization, use data art
Some thing interesting about game, make everyone happy.
We are working to build community through open source technology. NB: members must have two-factor auth.
Open source projects and samples from Microsoft.
Google ❤️ Open Source for everyone.
Alibaba Open Source for everyone
Data-Driven Documents codes.
China tencent open source team.


