Pushing Code with Git
Learning Goals
- Create a remote repository on GitHub
- Connect a local repository to a remote repository
- Set the destination of a repo with
git remote - Send code to the remote repo with
git push
Introduction
You may have heard of GitHub before. In the previous lesson, you used it to get Facebook's code for the React framework. For all the amazing power that GitHub provides (Microsoft thought it was so powerful that they bought GitHub for a cool $7.5 billion), as far as Git is concerned they're just a big old server that hosts a whole bunch of remote repositories ("remotes").
You've seen how valuable
remotes are for getting software. Now we can take a look at the other side
of the transaction: how we mirror our local repository to a remote repository
using git push and git remote.
Once your code is on a remote, it's backed up — which is always a good
thing — Also, once you push to a remote you can choose whether to let
others fork or clone and benefit from it. Let's learn how to push our code!
Create a Remote Repository on GitHub
There are a few steps to follow to create a remote repository on GitHub.
-
Go to: github.com/new, while logged into GitHub.
-
Enter a name for your repository in the
Repository namefield. You can name it whatever you'd like; be creative! The default options are fine as-is — don't initialize the new repository with a README or add a.gitignoreor license. Click the greenCreate repositorybutton. -
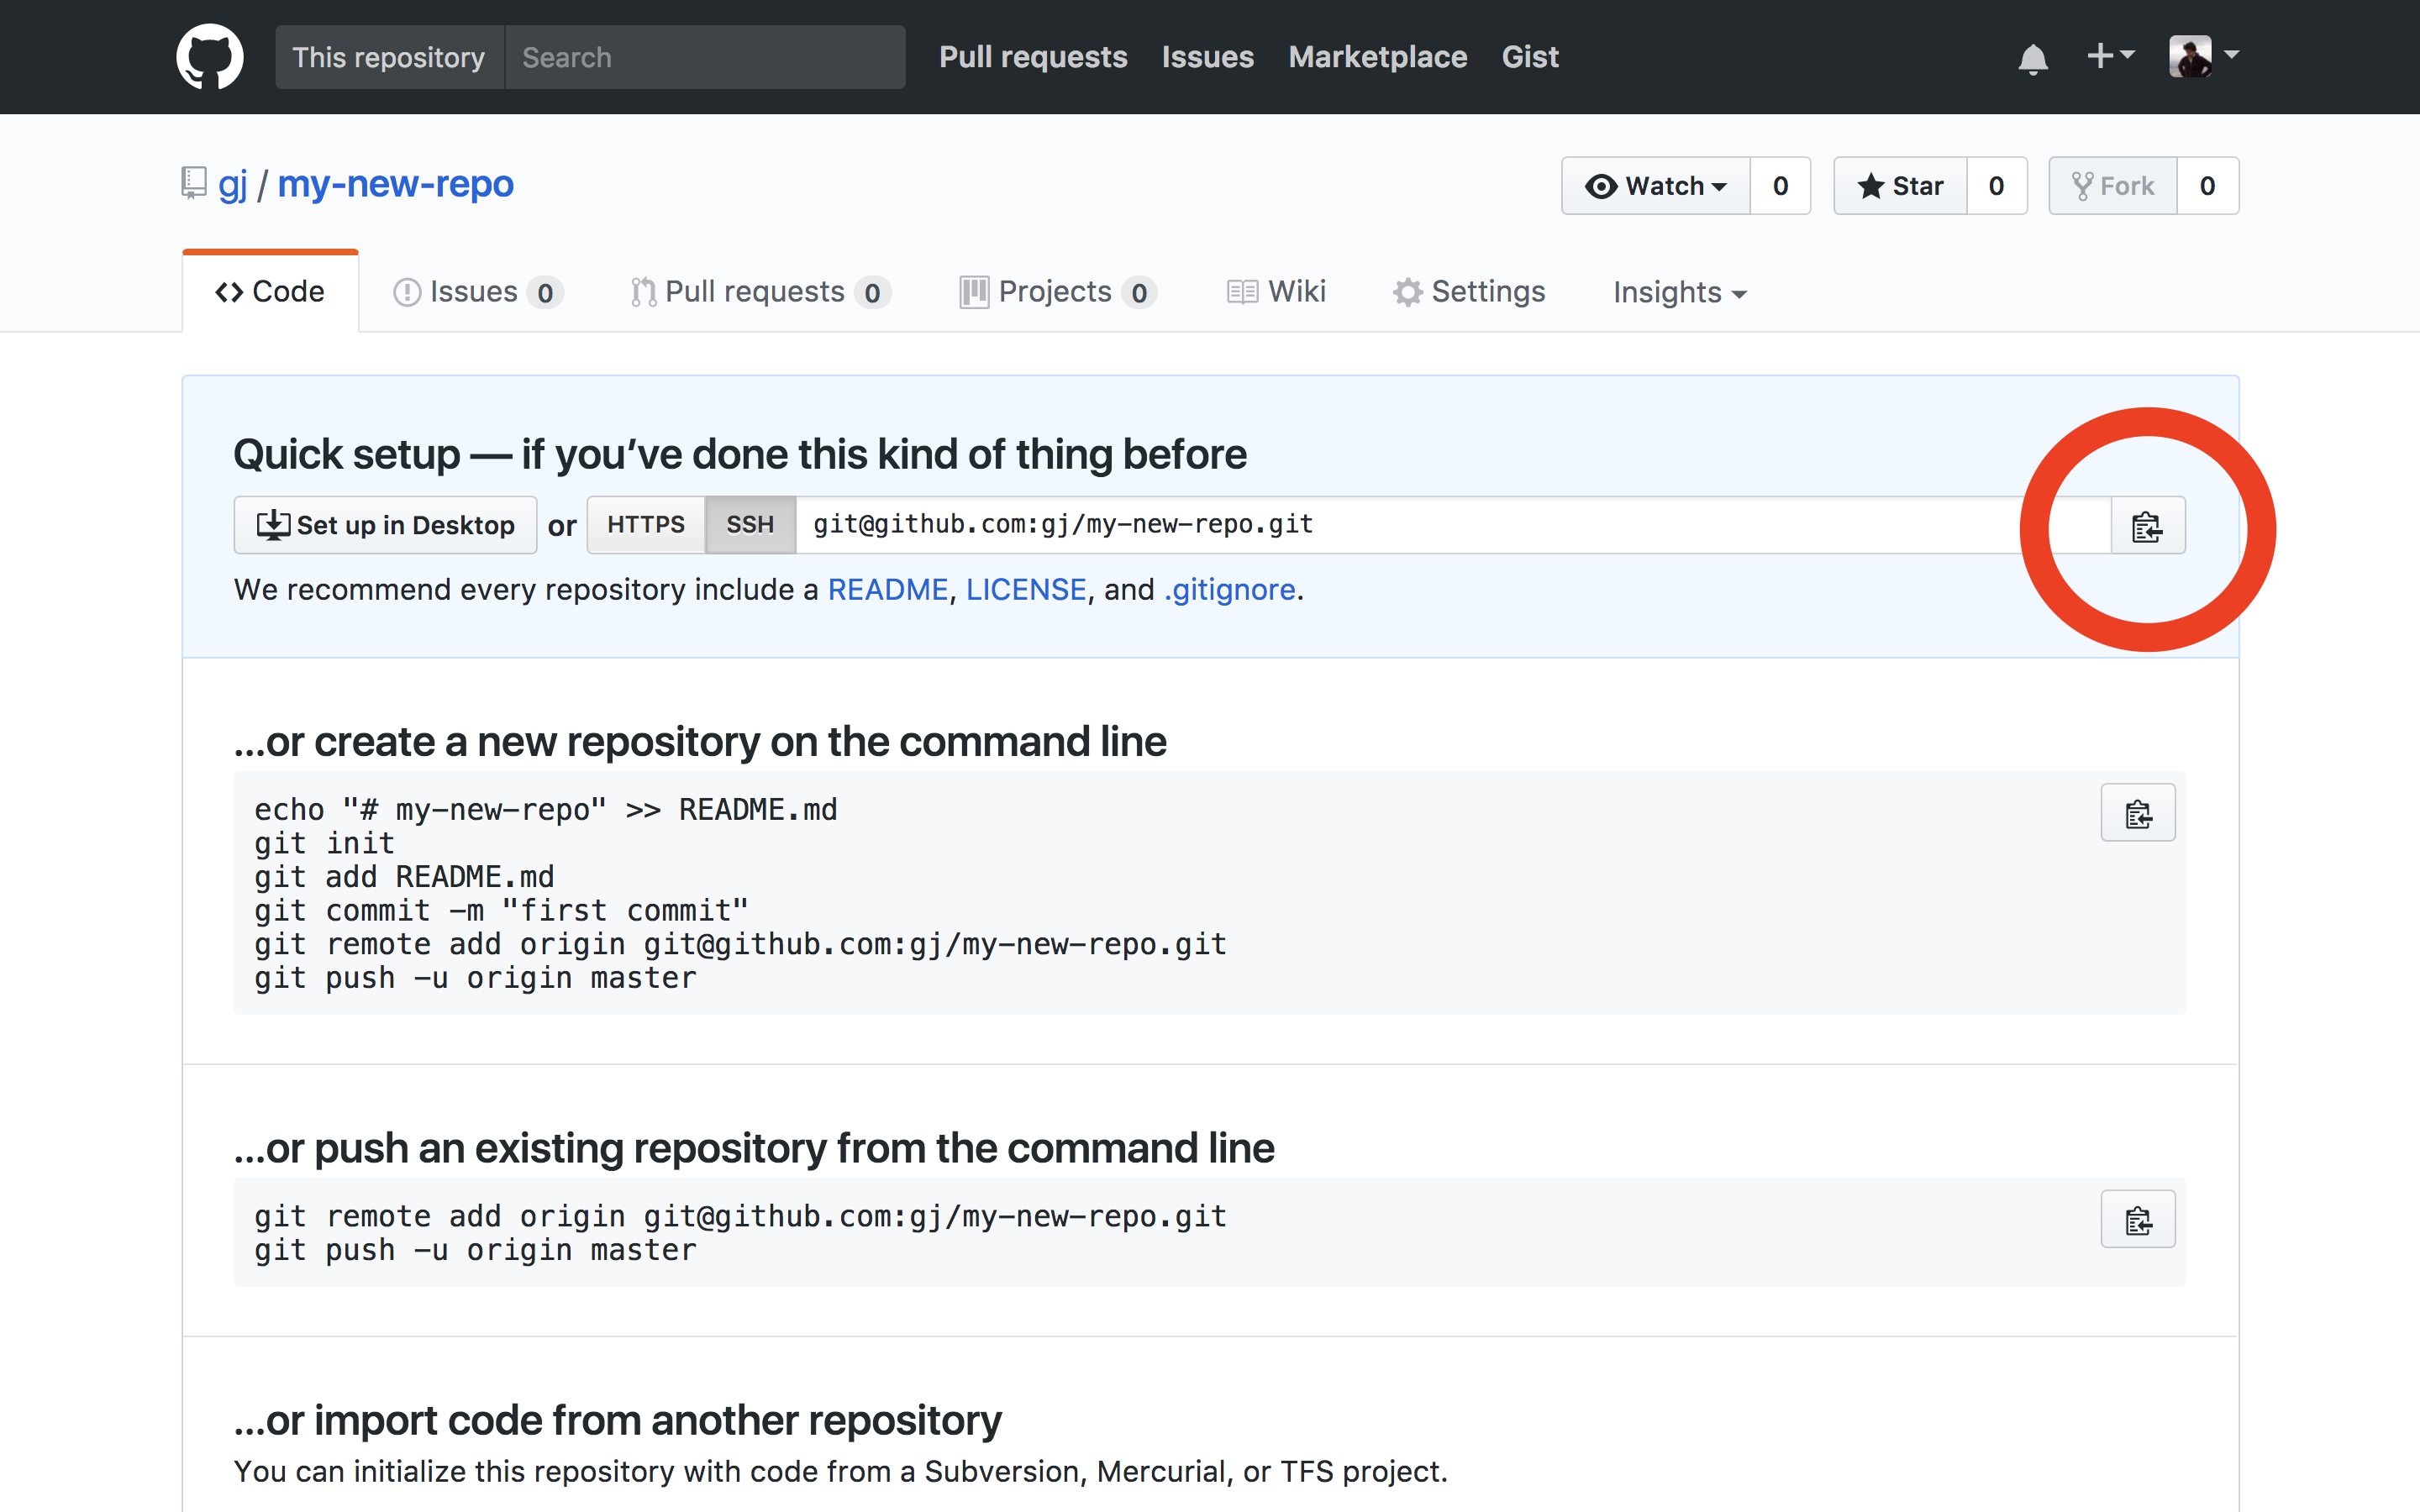
After you create the remote repository, you should see a "Quick setup" page. Click the "Copy to clipboard" symbol next to the repo URL (pictured) to copy the URL. (We'll use this in the next section.)
Behind the scenes, GitHub has essentially git init'd a blank directory.
Connect a Local Repository to a Remote Repository
After you've created your remote GitHub repository, you'll want to get your local repository uploaded to GitHub. Follow the appropriate steps below:
For the In-Browser Learn IDE
-
On this Learn.co lesson page, click the 'Sandbox' button to open up a blank IDE
-
First, we want to create a folder for our repository, which we'll call
my_new_directory. In the terminal, typemkdir my_new_directory. The folder will appear in the tree on the left of the IDE. Alternatively, you can use the 'Create New' button at the bottom of the IDE. -
To navigate into this new folder, type
cd my_new_directory. Your terminal should displaymy_new_directory, indicating that you are now inside of the new folder. -
Next, we need to create a new file named
README.md. In the terminal, typetouch README.md. In the file tree, if you expand the foldermy_new_directory, you should now see yourREADME.mdfile. Click on it to open it in the text editor. -
We can directly type in content here, but we can also use our terminal skills to add content. So, in the terminal, type
echo "This is my readme file" > README.md. If you've got the README file open, the new text will appear! -
Now that we've got some basic content, we can initialize our local repository. In your terminal, type
git init. Your terminal should show that an 'empty Git repository' has been initialized. -
Type
git add README.mdto stage the newREADME.mdfile so it will be tracked bygit. -
Now, type
git commit -m 'initialize git'. This will create the first commit for this local repository, which will allow us to push our work to the remote repository we created earlier.
For the Standalone Learn IDE
-
Create a new directory and add a file. You can run this series of commands:
- Change into your
codedirectory:cd ~/code- If your development directory is named something other than
~/code, that's fine,cdinto whatever yours is called.
- If your development directory is named something other than
- Create a new directory named
my_new_directory:mkdir my_new_directory - Change into the newly-created directory:
cd my_new_directory - Create a new file named
README.md:touch README.md - Add some text to the new file:
echo "This is my readme file" > README.md
- Change into your
-
Now that we've got some basic content, we can initialize our local repository, so in your terminal, type
git init. Your terminal should show that an 'empty Git repository' has been initialized. -
Type
git add README.mdto stage the newREADME.mdfile so it will be tracked by Git. -
Now, type
git commit -m 'initialize git'. This will create the first commit for this local repository, which will allow us to push our work to the remote we created earlier.
Set the Destination of a Repo with git remote
To connect your local repository to the newly created GitHub repository, you
must add a new remote with a remote name. Adding a remote involves giving git a "short name" and
a "repository path." You copied the repository path from GitHub a few steps
above.
The repository path is a long bunch of technical words. The creators of Git
thought it would be easier to type a "nickname" or a "short name" that points to
that long "repository path." It's common to have a "default" remote. The default
remote short name is called master. So we're going to create a new remote with
short name of master.
Make sure you've still got your remote Git info copied from GitHub, and type the following into the terminal:
git remote add origin <your-copied-remote-repository-URL>.
This sets the remote, so you can now push code.
You can use git remote -v (the v is for "verbose") to view the remote(s).
git remote -v
# View existing remotes
# origin  https://github.com/OWNER/REPOSITORY.git (fetch)
# origin  https://github.com/OWNER/REPOSITORY.git (push)
Send Code to the Remote Repo with git push
Now that we have added a remote repo, we need to send our latest work the remote. We use this command when we want to send some code from the local repository to the associated remote repository. Git will push all the local, committed work to the remote repository.
The git push command takes two arguments. The first is the name of the remote
repo. Remember, origin is just an alias or "short name" that refers to the
repository name. You don't actually have to enter the repository name. Instead,
you can just use origin. The second is the name of the remote branch you want
to send code to. In the example below, we're pushing to our remote repository's
default branch, master. We're still going to hold off on discussing branching
until later, but it's important to remember that master is a special branch, it's
the default name.
git push -u origin masterThis will push your code up to the remote repo/branch. The first time you push
code up to a newly-added remote repository, use the -u flag to tell Git to
"save" the remote repository as the default push destination:
git push -u origin master.
For every subsequent push, you only need to enter git push
Conclusion
Being able to add Git remotes allows you to back up your local repository to a
remote server. If you remember git init,
git remote add origin your-remote-repository-URL, add, and push your changes,
you'll be able to get your project up to GitHub in minutes!


