

The goal of this workshop is to take you through a deployment scenario where the Palo Alto Networks VM-Series firewall is deployed on an AWS environment. We will discuss design scenarios leveraging the AWS Gateway Load balancer. This workshop will demonstrate a use case that involves deploying Zero Trust Policies on VM-Series Virtual Next-Generation Firewall (NGFW) to protect your applications against various attacks.

As part of this workshop, you will be deploying security services on Palo Alto VM-Series Virtual Firewalls to protect your virtual application environment against the Log4j attack. You will follow best practice recommendations to deploy a tiered protection against Log4j and similar attacks with the VM-Series NGFW.
A Zero Trust implementation should provide security administrators with the visibility and the ability to secure traffic between the various applications.
-
VM-Series Virtual Next-Generation Firewalls
- Protect Private Cloud investments
- Safeguard cloud and virtualized investments with the virtual firewall that pays for itself. VM-Series NGFWs are built for high performance and significant ROI.
- Detect hard-to-find threats, Stop outbound traffic exfiltration, Protect against lateral movement
-
- Consolidate policy management. Panorama™ network security management simplifies policies across infrastructures and clouds. Seamless integration. Increased oversight.
- Panorama can be deployed as a virtual appliance on VMware ESXi™ and vCloud® Air, Linux KVM, and Microsoft Hyper-V®.

Figure: Hands on Lab Environment – Achieving Zero Trust Security
For this workshop, we have pre-deployed some components for you. You will see a VM-Series, Panorama and an Application Virtual Machine and an Attacker VM pre-deployed.
- Use Zero Trust Policy on VM-Series to protect your application against Log4j attack
- Use Panorama to apply Zero Trust Policy on VM-Series NGFWs
- Use Panorama to Monitor Logs to see Security activity
In this section, we will launch the lab environment. These are the steps that we will accomplish at this time.
- Start the lab on your designated Qwiklab account.
- Login to the AWS Console using the provided credentials and set up IAM roles
- Subscribe to the Palo Alto Networks VM-Series PAYG and Panorama appliances on the AWS Marketplace.
- Deploy lab environment using Terraform
Please follow the link provided below to open the Qwiklab classroom on which the lab is being hosted.
https://paloaltonetworks.qwiklabs.com/classrooms/966/labs/1449
- On the Qwiklab environment, Click on Start Lab Button to start the lab.
At this point, Qwiklabs will build an AWS account for you.
In order to access the EC2 application instances via SSH in your environment, you will be using keys generated by Qwiklabs. There are two types of keys generated; PEM and PPK keys.
- If you are on a MAC, you will be using ‘Terminal’ to connect to the devices via SSH. For this, click on the “Download PEM” link. This will download a file named “qwikLABS-L*****-*****.pem”.
- Make sure to note the location where the file is downloaded. On a Mac, by default, it will be downloaded to “/Users/<username>/Downloads”

- If you are using a windows laptop to access this lab, you will need to have a ssh application like PuTTY installed.
- In this case, click on the “Download PPK” link. This will download a file named “qwikLABS-L*****-*****.ppk”.

- To login to the AWS environment, right click on “Open Console’ and “Open link in Incognito window” for Chrome-based browsers. For other browsers, use the appropriate option to open the AWS Console in a new private tab.

- On the AWS Console, copy over the IAM username and password from the previous tab.


- Now, click on “Sign In”.

Once you are successfully logged in, you will land on the AWS Management Console.

Figure: The AWS Management Console
As mentioned earlier, the Qwiklab user account, by default, does not have the permissions to AWS Marketplace and CloudShell services, which are required for the purpose of this lab. We will now edit the permissions for the Qwiklab user account to provide access to those services.
On the AWS console,
- If you see a message for ‘new AWS Console’ click on ‘Switch now’
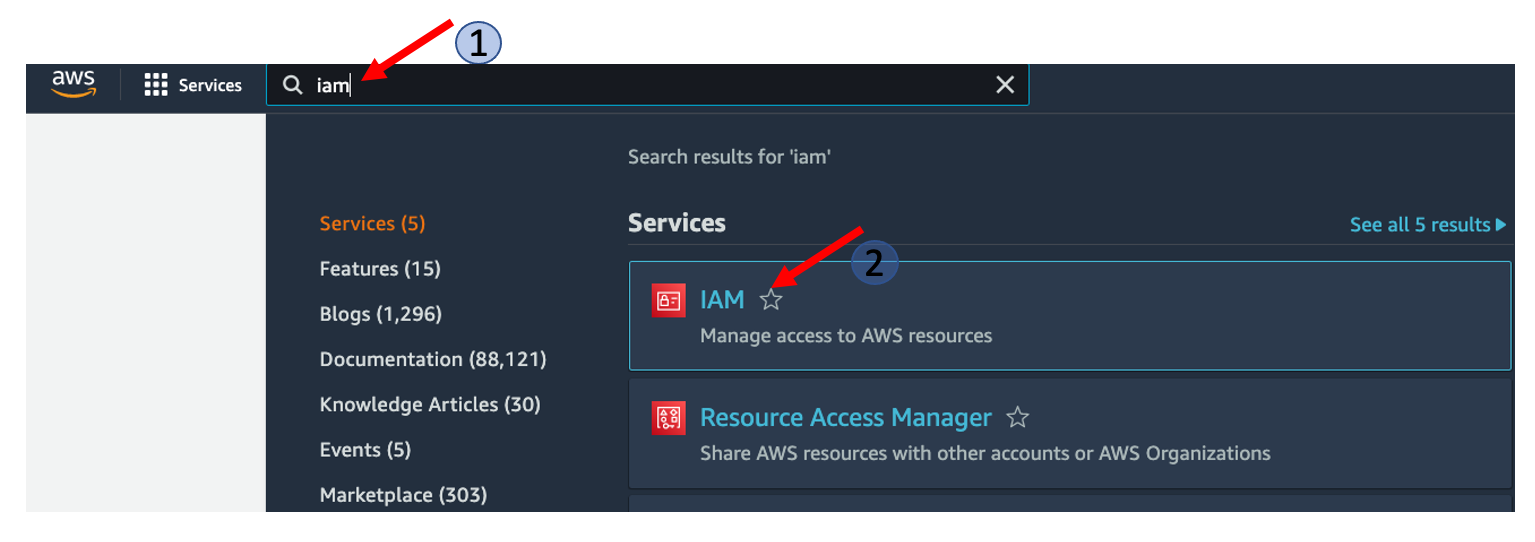
- On the search bar type ‘iam’.
- Click on the link to IAM. A new IAM dashboard window will open.
- Click on ‘2’ below users.

- Click on ‘awsstudent’.

- Expand the default policy by clicking on the small triangle icon against default_policy in the list.

- Click on the ‘Edit Policy’ button.

- Click the ‘JSON’ tab.

- Scroll down to the Deny policy and remove two lines (line number 27 and line number 36) listed below
"aws-marketplace:\*ubscribe",
...
"cloudshell:\*",
Make sure to delete the whole line.

- Click on ‘Review policy’ at the bottom of the screen.

- On the next screen, click on ‘Save changes’.
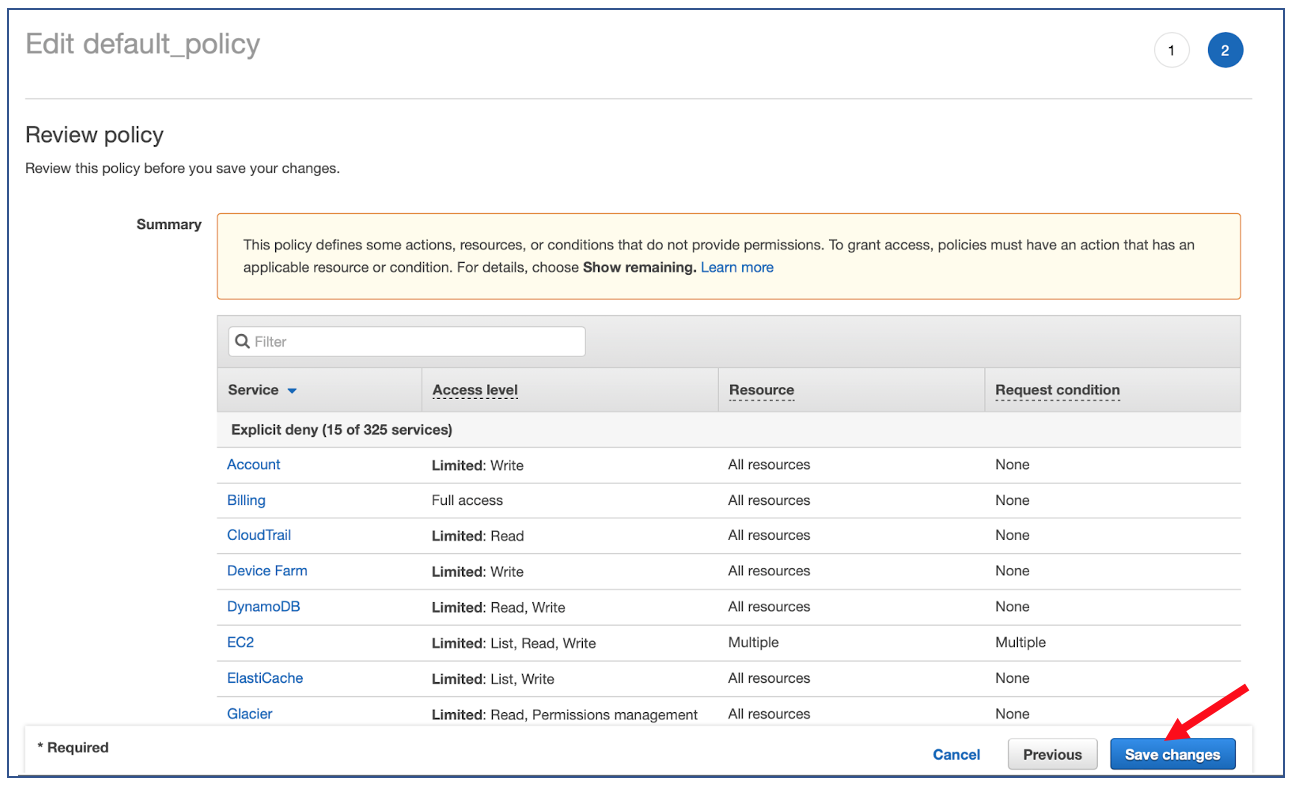
- Account setup is now complete.
In this section, we will deploy the AWS Cloud resources required for the purpose of this lab using Terraform.
- Click on ‘AWS’ on the top left hand corner to navigate to the primary console.
- Make sure that the region is N.Virginia.

-
Subscribe to VM series.
- Click on the link below and the page that opens up, Click on “Continue to Subscribe” and then Click on “Accept Terms”.
https://aws.amazon.com/marketplace/pp?sku=hd44w1chf26uv4p52cdynb2o


- Wait a few minutes until the effective date changes from ‘Pending’ to date.


-
Subscribe to Panorama.
- Click on the link below and the page that opens up, Click on “Continue to Subscribe” and then Click on “Accept Terms”.
https://aws.amazon.com/marketplace/pp?sku=eclz7j04vu9lf8ont8ta3n17o


- Wait till Effective date changes from ‘Pending’ to today’s date. This will take a few minutes.

- From the AWS management Console, launch CloudShell using the icon on the top right side of the console.

If you do not see the icon as shown in the image above, please check the region and ensure that you are in the N. Virginia region.
- Close out the welcome pop up.

It takes around a minute for cloudshell to launch and to get the prompt as shown in the example below.
- After the cloudshell is launched, we will start by cloning the following github repository:
git clone https://github.com/PaloAltoNetworks/lab-aws-zero-trust.git

Figure: Example of cloning the GitHub repository
- Change current directory to git repositories’ root directory:
cd panw-zero-trust-aws
- Run the setup script:
./setup.sh
It will take a few minutes (~5m ) to deploy all the lab components. Status will be updated on the cloudshell console as deployment progresses. At the end of deployment, you should see the message “Completed successfully!”

Figure: Completion message of the Lab Setup script
- Review the deployed lab environment with the topology diagram shown below.

Figure: The Lab topology that is deployed using Terraform
- On the AWS Console, on the search bar at the top, type VPC and select VPC from the listed results.

- Review Four VPCs created (5 including the default VPC).


Figure: Zero Trust Policy Blocking Log4j Attack – VM-Series
In this section we will configure different ways of securing your Application environment against Log4j attacks. We will leverage application identification, malware and vulnerability protection to block attacks to deliver a multi-tiered protection, based on best practices.
In the lab, there are two virtual machines deployed - ‘vul-app-server’ and ‘att-app-server’. We will first start the application on the VM ‘vul-app-server’.
- From AWS console, navigate to EC2 instances.


- Note the application ‘qwikLABS-vul-app-server’ and its public IP address in your environment.
- Similarly, note the attacker ‘qwikLABS-att-app-server’ and its public IP address. We will be accessing these applications via SSH to their public IP address.
We will be using the user ‘ec2-user’ as the username to login to these applications.
- Launch terminal on your MAC.
- Navigate to the folder where the pem keys were downloaded to.
cd ~/Downloads
- Substitute qwikLABS-****.pem with the PEM key that you downloaded and run the command below
chmod 400 qwikLABS-\*\*\*\*.pem
- Substitute qwikLABS-****.pem with the PEM key that you downloaded and run the command below. Username is ‘ec2-user’. IP Address is the public IP address of the ‘qwikLABS-vul-app-server’ that we noted in the previous step.
ssh -i qwikLABS-L\*\*\*\*.pem ec2-user@<vul-app-public-ip>
For example:

If you are using PuTTY to connect to the servers, after opening the putty,
- On the Category menu on the left, expand SSH and click on Auth.
- In the field to select the Private key file for authentication, browse for the downloaded PPK file and select it.

- Within the same PuTTY window, on the Category menu on the left, click on Session and provide the Public IP Address of the vul-app server as shown below.
- Click “Open” to connect to the server.

- Use the following command to start the container application at the prompt. This will be launching an application that is vulnerable to Log4j.
sudo docker container run -itd --rm --name vul-app-1 -p 8080:8080 us.gcr.io/panw-gcp-team-testing/qwiklab/pcc-log4shell/l4s-demo-app:1.0
For example:

- Verify that the app is running by running the below command.
sudo docker container list -a

- In this lab environment we do not have a DNS set up. So we would add an entry directly on the pod hosts file.
sudo docker exec -it vul-app-1 /bin/sh -c 'echo "10.2.1.100 att-svr" >> /etc/hosts'
- To verify the update of the hosts file, try to ping the att-app-server using the hostname (att-svr) provided.
sudo docker exec -it vul-app-1 /bin/sh -c 'ping att-svr'

-
SSH to the ‘qwikLABS-att-app-server’ using one of the following methods
- If you are using a PEM file to connect, substitute qwikLABS-****.pem with the PEM key that you downloaded and run the command below. Username is ‘ec2-user’, IP Address is the public IP address of the ‘qwikLABS-att-app-server’ that we noted in the previous step.
ssh -i qwikLABS-L\*\*\*\*.pem ec2-user@<att-server-public-ip>For example:
- If you are using a PPK file to connect, connect to ‘qwikLABS-att-app-server’ using putty as you did in a previous step when connecting to the vulnerable app server.
-
Execute the below command.

sudo docker container run -itd --rm --name att-svr -p 8888:8888 -p 1389:1389 us.gcr.io/panw-gcp-team-testing/qwiklab/pcc-log4shell/l4s-demo-svr:1.0
For example:

sudo docker container list -a

- On AWS console search on EC2 and click on EC2

- Copy the public IP of Panorama Instance.

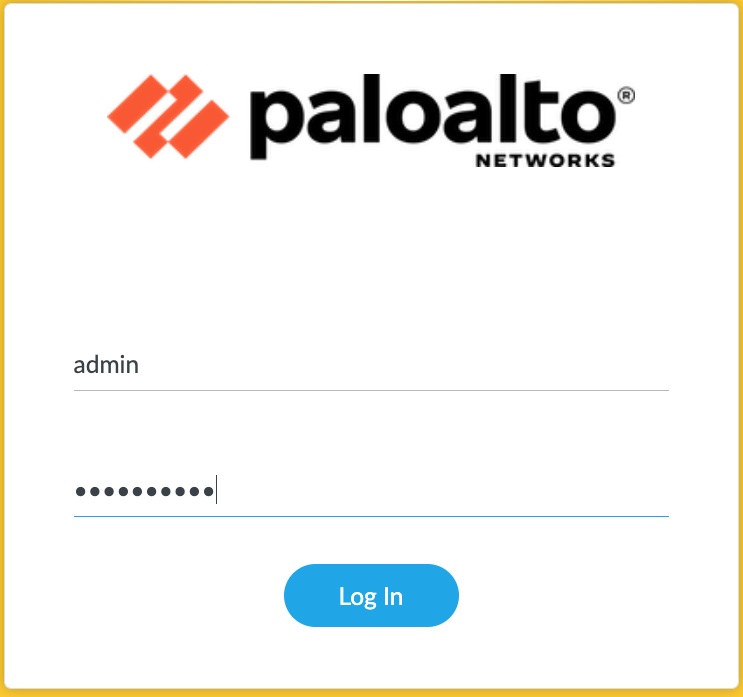
- Launch Panorama on a new browser tab by typing the following on the address bar. Replace <panorama_public_ip> with the Public IP address of the Panorama instance.
https://<panorama_public_IP>
- Username: admin
- Password: Paloalto@1

- Once logged in, navigate to the Panorama tab, Click on Managed Devices > Summary on the vertical tree. Ensure that PA-VM is in Connected state.

- On the att-app-server command prompt, execute this command to launch the Log4J attack.
/tmp/launch_attack.sh
- You should receive a ‘Hello World’ message back.

- On your Panorama tab on the browser, navigate to Monitor > Traffic

- Notice the 3 sessions associated with a successful Log4J attack.
| Source | Destination | Destination Port | Application | | ------------------------------------------------------------------------------- | | att-svr(10.2.1.100) | vul-app(10.1.1.100) | 8080 | web | | vul-app(10.1.1.100) | att-svr(10.2.1.100) | 1389 | LDAP | | vul-app(10.1.1.100) | att-svr(10.2.1.100) | 8888 | Malware transfer |
- The application has now been infected by malware. On the Vulnerable application execute these commands:
sudo docker exec -it vul-app-1 /bin/sh
ls -lrt /tmp
For example:

- Remove the malware-sample file for subsequent tests.
rm -rf /tmp/malware-sample

In the following sections, we will see how you can build a policy model that will provide multi-tiered protection for your application against Log4j attack. Multiple complementary security controls across our portfolio, combined with best practices, can help protect organizations against the vulnerability. If your organization is already aligned with our security best practices, you gain automatic protection against the multiple steps of this attack with no manual intervention.
In the following section, we will deploy best practices zero trust policies to protect against attacks. We will deploy 3 policies one each for outbound, inbound and application based protection.
- On the Panorama tab on the browser, navigate to Policies tab. Ensure that you are in Shared Device Group
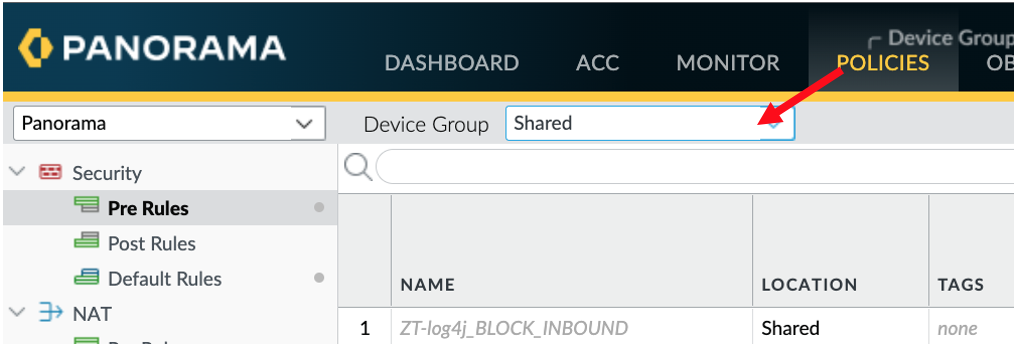
The policies will look like this.

- Enable ZT-log4j_BLOCK_INBOUND

- On the policy, Click on ZT-log4j_BLOCK_INBOUND, navigate to the ‘Profile’ column and click on the icon shown there. Ensure that ‘Strict’ vulnerability protection profile has been enabled for this policy.


- Click ‘OK’
- Commit the changes and push to device


-
Wait for status to complete.
-
If you see the message ‘Not all Commit-All jobs got triggered”, close the window.
-
On the top right, click on Commit again and select ‘Push to Devices’
-
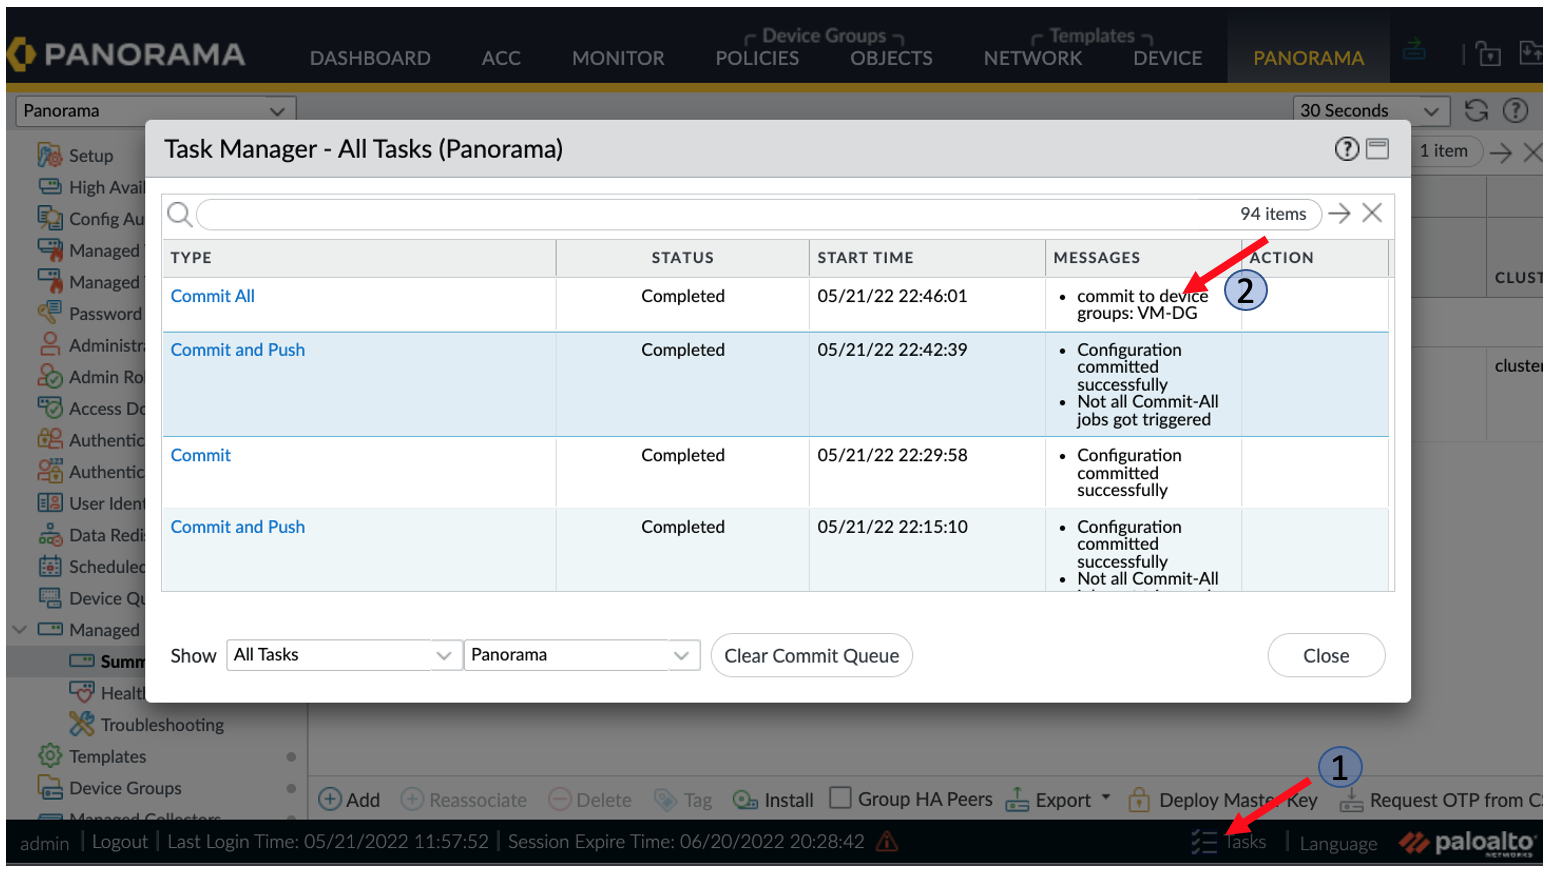
Click in ‘Tasks’ button
on the bottom horizontal bar and ensure that ‘commit all’ job finishes. Click on Close to exit out of the window.
-
Ensure that all commit processes are completed by monitoring
-
-
Relaunch the attack by navigating to the SSH session on att-app-server and issue the command.


/tmp/launch_attack.sh
- This time we will see it does not go through

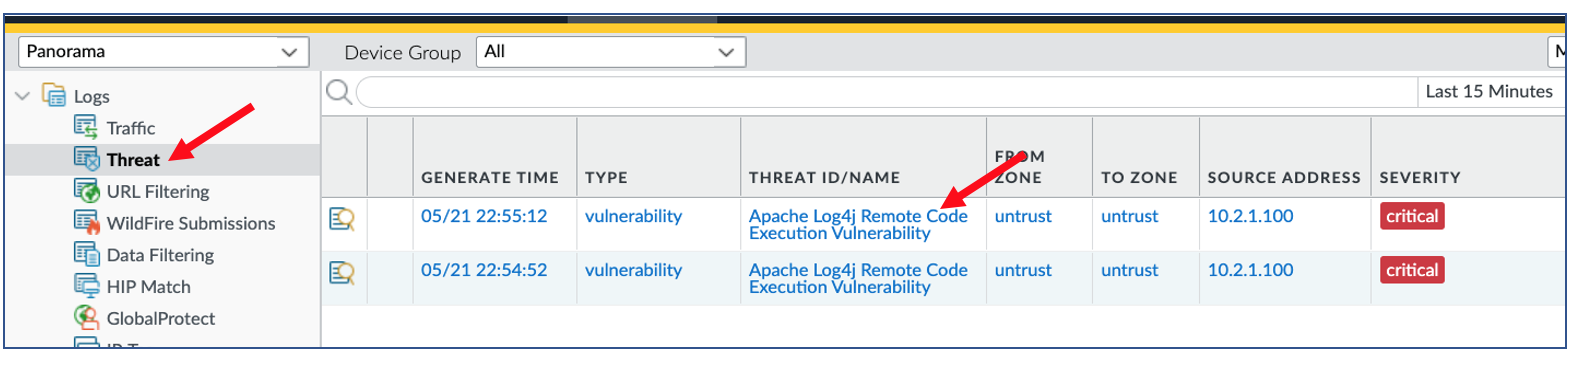
- Navigate back to Panorama > Monitor > Threat
- You will see that the Firewall detected the attack and blocked it.
The Log4j attack requires access to malicious Java code hosted externally. Our Advanced URL Filtering and DNS Security service are constantly monitoring and blocking new, unknown and known malicious domains (websites) to block those unsafe external connections.
In this activity, we will use a policy that has both the profiles set to protect outbound traffic.
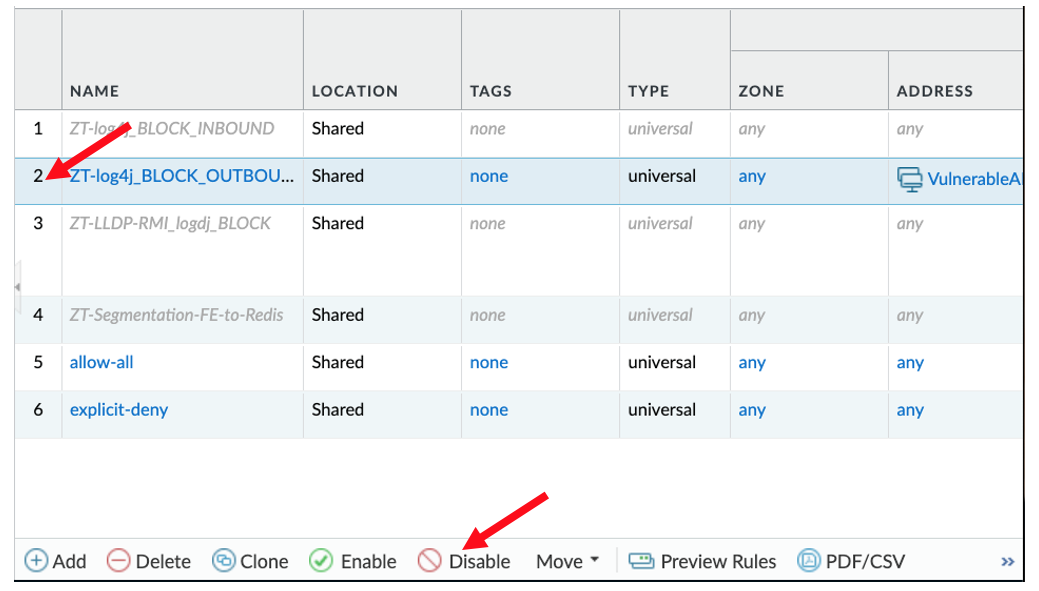
- On the Panorama tab on the browser, navigate to Policies tab. Ensure that you are in Shared Device Group
- Disable policy 1 and Enable policy 2.
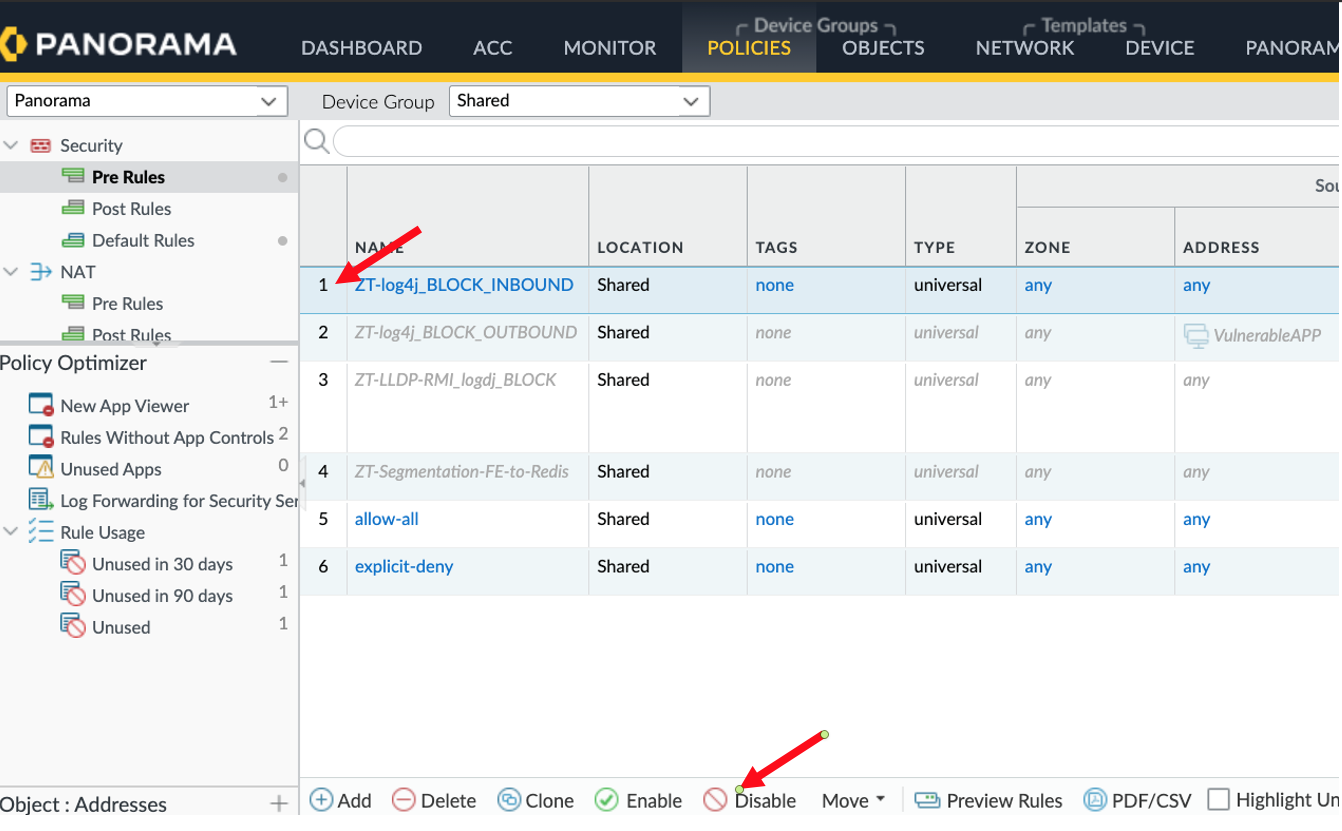


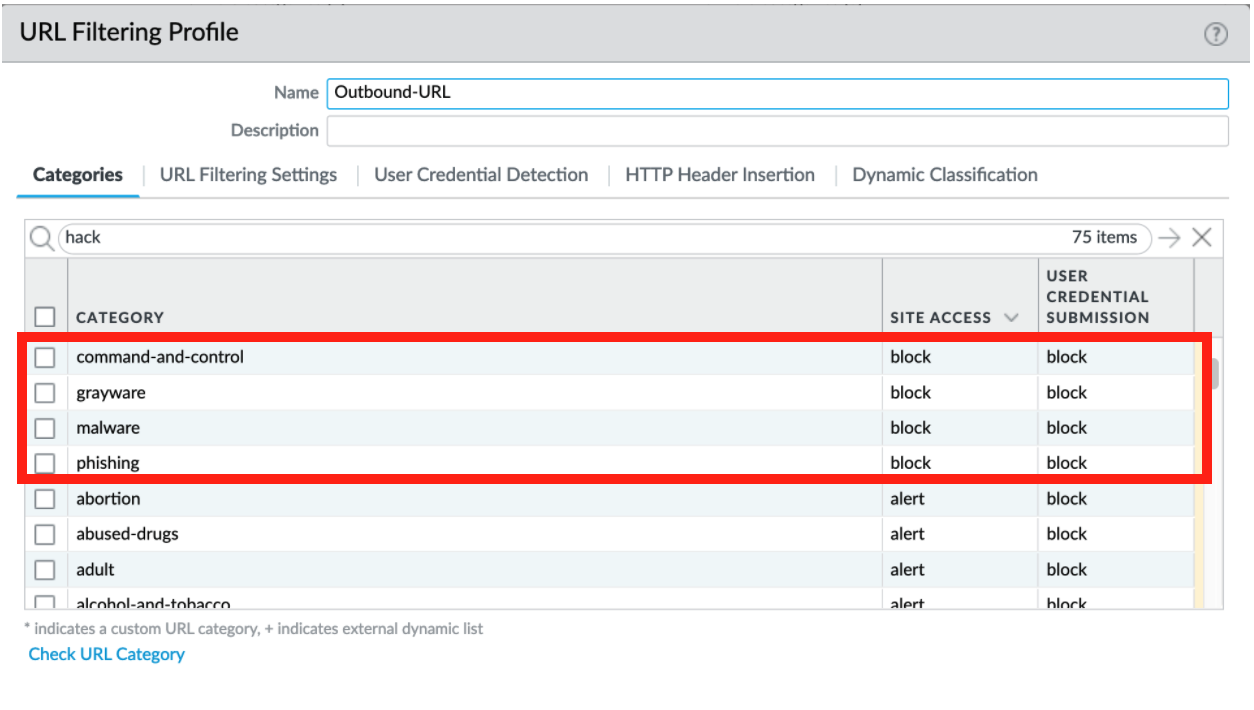
- On the policy, Click on ZT-log4j_BLOCK_OUTBOUND, navigate to the ‘Profile’ column and click on the icons shown there. Ensure that the Anti-spyware and URL Filtering profiles set.

- To view the profiles, navigate to Panorama > Objects > Security Profiles>URL Filtering

- The profile follows best practices recommendations for URL filtering.
- Close and Commit the changes and push to device

-
Wait for status to complete.
-
If you see the message ‘Not all Commit-All jobs got triggered”, close the window.
-
On the top right click on Commit again and select ‘Push to Devices’
-
Click in ‘Tasks’ button
-
Ensure that all commit processes are completed by monitoring the Tasks
-
-
Relaunch the attack by navigating to the SSH session on att-app-server and issue the command.

/tmp/launch_attack.sh
- This time we will see the ‘Hello, world!’ message but the attack does not succeed.
- On the vul-app-server, you will see that the malware-sample file is not transferred. On the vul-app-server, execute these commands:
sudo docker exec -it vul-app-1 /bin/sh
ls -lrt /tmp

- Navigate to Panorama > Monitor > Traffic to see the firewall logging the web-browsing action. On the Filter search bar, paste the below query.
((addr.src in 10.1.1.100) and (addr.dst in 10.2.1.100) or (addr.src in 10.2.1.100) and (addr.dst in 10.1.1.100))

We can use the App-ID for ldap and rmi-iiop to block all RMI and LDAP to or from untrusted networks and unexpected sources.
- Navigate to Panorama > Policies
- Disable Policy 2 and enable Policy 3 ZT-LLDP-RMI_logdj_BLOCK


- Commit the changes and push to device

- Wait for status to complete.
-
If you see the message ‘Not all Commit-All jobs got triggered”, close the window.
-
On the top right click on Commit again and select ‘Push to Devices’
-
Click in ‘Tasks’ button
-
Ensure that all commit processes are completed by monitoring
-
-
Relaunch the attack by navigating to the SSH session on att-app-server and issue the command.

/tmp/launch_attack.sh
- Attack fails as the firewall block application access
- Navigate to Panorama > Monitor > Traffic. On the Filter search bar, paste the below query.
((addr.src in 10.1.1.100) and (addr.dst in 10.2.1.100) or (addr.src in 10.2.1.100) and (addr.dst in 10.1.1.100))

As we conclude this session, you have familiarized yourself with building a policy model that provides multi-tier protection for your applications on AWS against Log4j, following best practices guidelines.
