The purpose of this project is to give you the feel of late 1900's broadcast television using modern hardware and software. This broadcast can be viewed on vintage televisions as well as modern telelvisions.
The Raspberry Pi makes an excellent candidate for a homebrew UHF television station because it has composite video out baked into the hardware. That's a rare thing to find on a modern device.
Plugging the Pi directly into a Hlly UHF transmitter makes for a clean solution. This gives you over the air television like what you would experience in the late 1900's.
The UHF wireless transmitter is optional, but a very cool option at that. However it is expensive.
It is a perfectly fine solution to connect the pi directly to a vintage CRT television over RCA (composite video) cables or even to a modern television over HDMI. In this mode I would pretend that the pi is a mini cable TV box from 1995. That would feel suitable to the experience in my opinion.
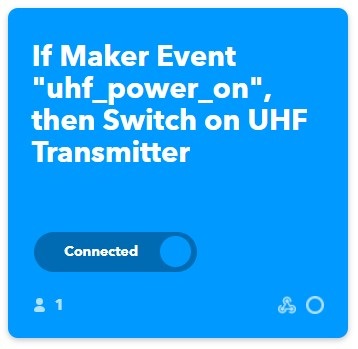
If using the UHF transmitter, by adding a smart wall-plug (via IFTTT) to control the power to the transmitter, this makes for a fully remote controlled solution. At a whim you can power on an old UHF television, open up the remote software on a phone or PC, toggle the power on, and start streaming from a selection of playlists.
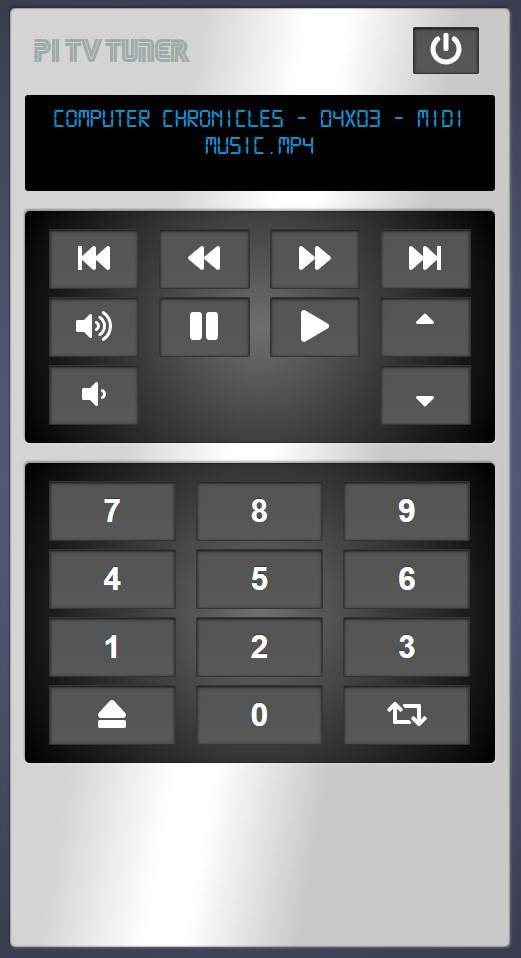
The controls for advancing through playlists and episodes has been refined while still keeping a remote control feel.
Channel Up/Down progress through playlists.
Forward/Back progress through episodes in the playlists
Punching in digits on the number pad will go to that video number after a short delay
Navigating through playlists or episodes gives quick feedback on the LCD screen, while also preventing spamming of change video requests
- Latest Video Demo
- Original Video Demo *The remote software shown in this video is quite outdated now, this is a reminder to update this link.
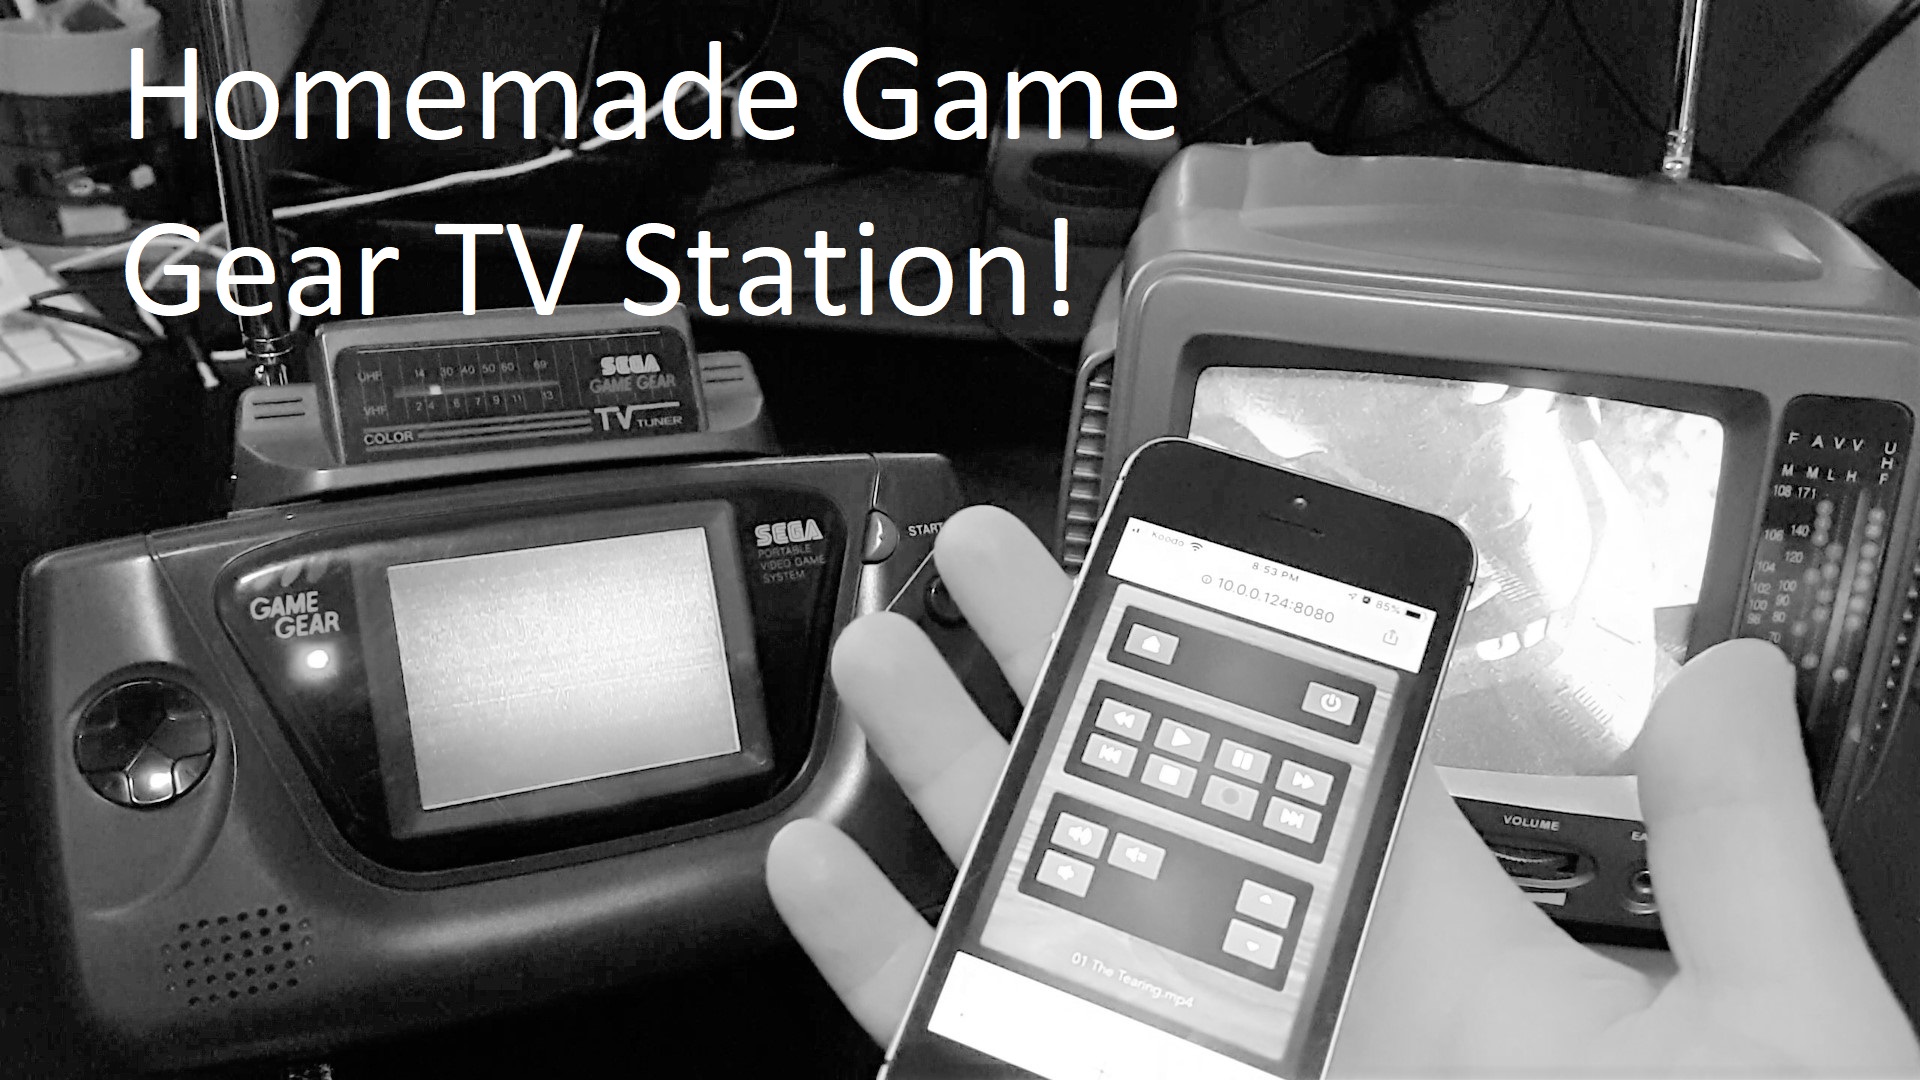
The point of this project was to make use of my Game Gear TV Tuner, so this requires a UHF transmitter. However you could plug the pi directly into an old CRT TV, and old VCR, or a modern TV with composite inputs.
There are a few options for buying or building a UHF transmitter.
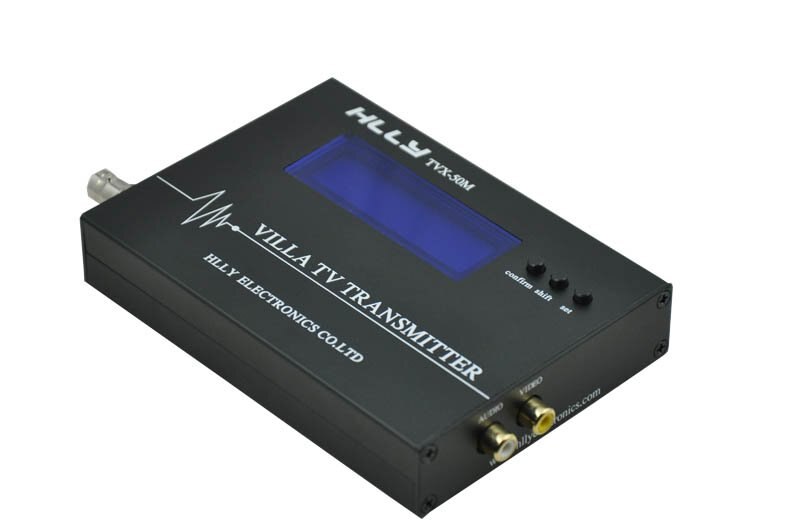
This is the most expensive solution but the most robust. You can set the device to any frequency for video and audio, this means you can pick which channel it broadcasts on and which audio profile it has so that it supports both PAL and NTSC TV.
This device also has an impressive range.
I bought mine off ebay and it was about $100
This is a very good option if you have a PAL television. This is not a good option for NTSC televisions because the audio will not work.
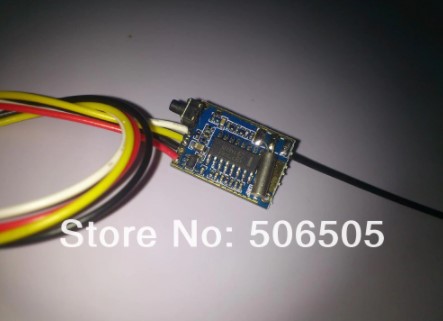
This option is cheap and has a surprisingly clean signal for both video and audio. The range is not as good as option 1. You can choose from a subset of frequencies/channels.
What I love about this option is that you could solder it directly to the audio/video pins on the pi itself, giving you a all-in-one solution.
I bought this device for $15 off AliExpress.
Like in this video, you can use an old VCR with coax output, run into a signal booter to build a poor-mans UHF transmitter. I think this is an excellent solution if you can get your hands on the parts for free or cheap. I personally don't know where I would find the booster other than a random find at a thrift store. I'll be keeping an eye out for these.
YOUTUBE: Turn your old VHS video player into a TV transmitter
sudo apt-get update
sudo apt-get install omxplayer #command line video play for raspberry pi, written by member of Kodi team
npm install pm2@latest -g #optional but recommended, used to have the API and App as system services
pm2 startup #so that pm2 will start on reboot
cd api
nvm use
npm install
pm2 start api.js --watch --name=uhf-api
cd app
nvm use
npm install
npm run build
cd dist
pm2 serve . --watch --name=uhf-app
sudo apt-get install smbclient
vi /etc/fstab
//[IP-OF-SERVER]/Video /media/video cifs user=[SAMBA USERNAME],pass=[SAMBA PASSWORD] 0 0
mkdir /media/video
mount -a
Create an account at ifttt.com
Create two webhooks called uhf_power_on and uhf_power_off
Associate these webhooks with your smart plug of choice
Get your API key
Add IFTTT_KEY=[your key] to the .env in the api directory (see .env.example)