UINavigationController & TableViews

When something is important enough, you do it even if the odds are not in your favor. ~Elon Musk
Overview
In this lesson we'll build an app together that involves laying out the UI, using navigation controllers, and setting up the TableView controller.
Learning Objectives
- Set up the UI of an application
- Add a navigation controller to an application
- Implement a tableview
Introduction
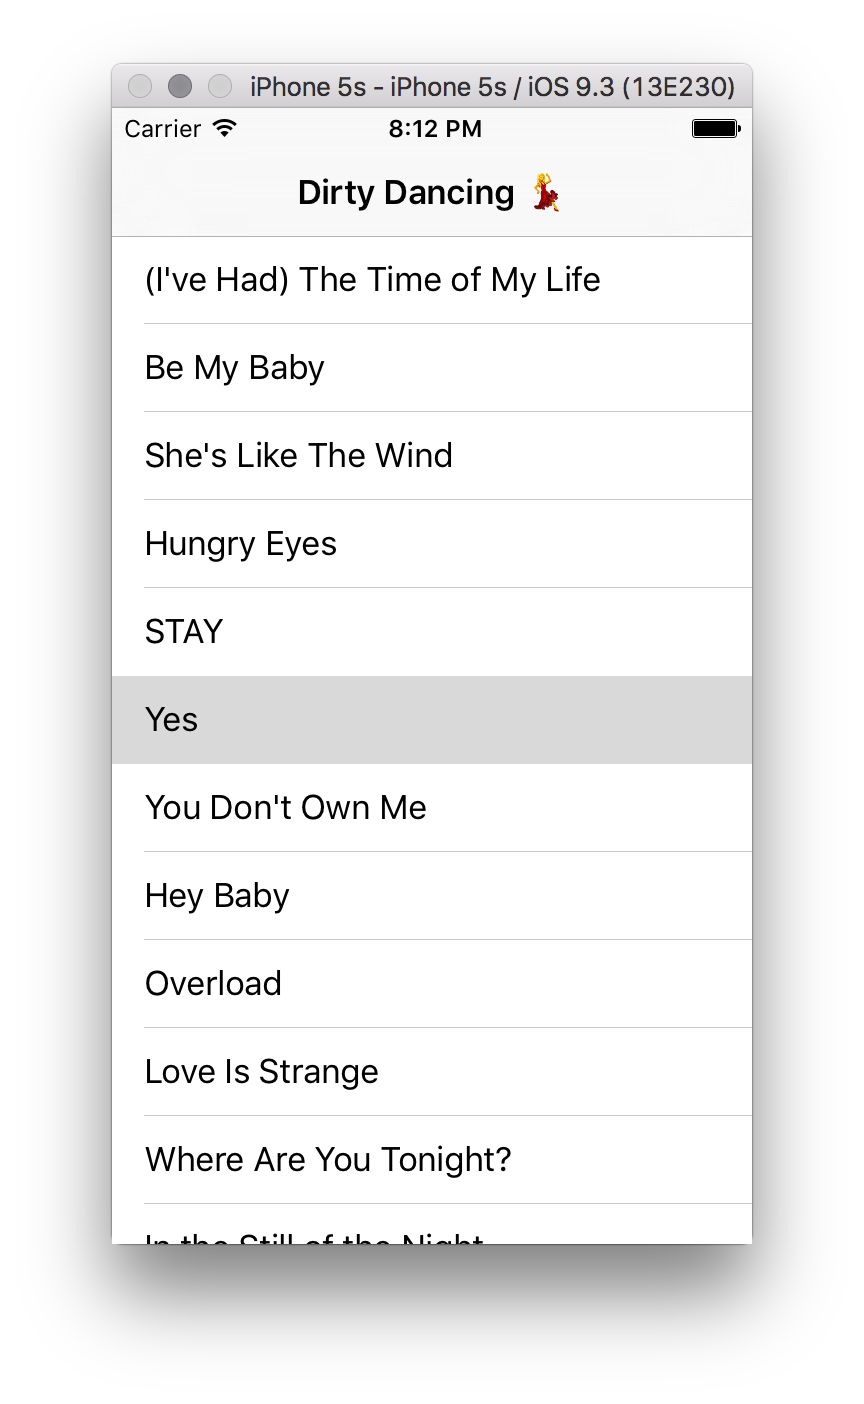
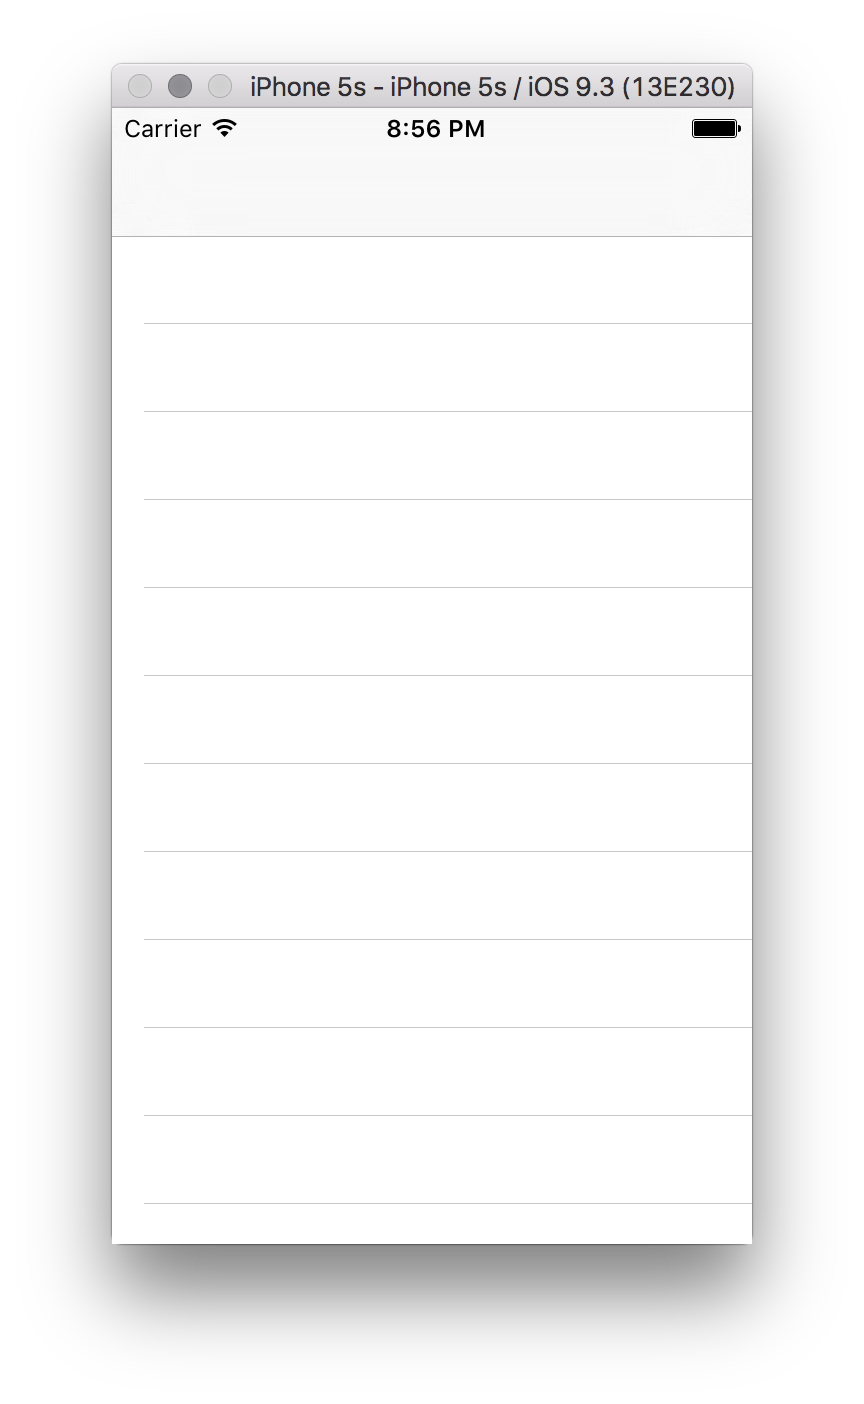
Remember those magic days of summer camp, carrying watermelons around and learning how to dance? In this lesson, you're going to build a simple app using a table view that lists all the songs in the Dirty Dancing soundtrack so you can relive those glory days. When you're done, your app will look like this:
In making this app, you'll also learn about navigation controllers, a type of controller that manages navigation in your iOS apps.
Laying Out the UI
Start by opening NavStuff.xcodeproj from this repo. Right now, this is a very barebones iOS project. Main.storyboard is completely empty, and TableViewController.swift contains almost no code. You'll be filling in all the blanks over the course of this lesson.
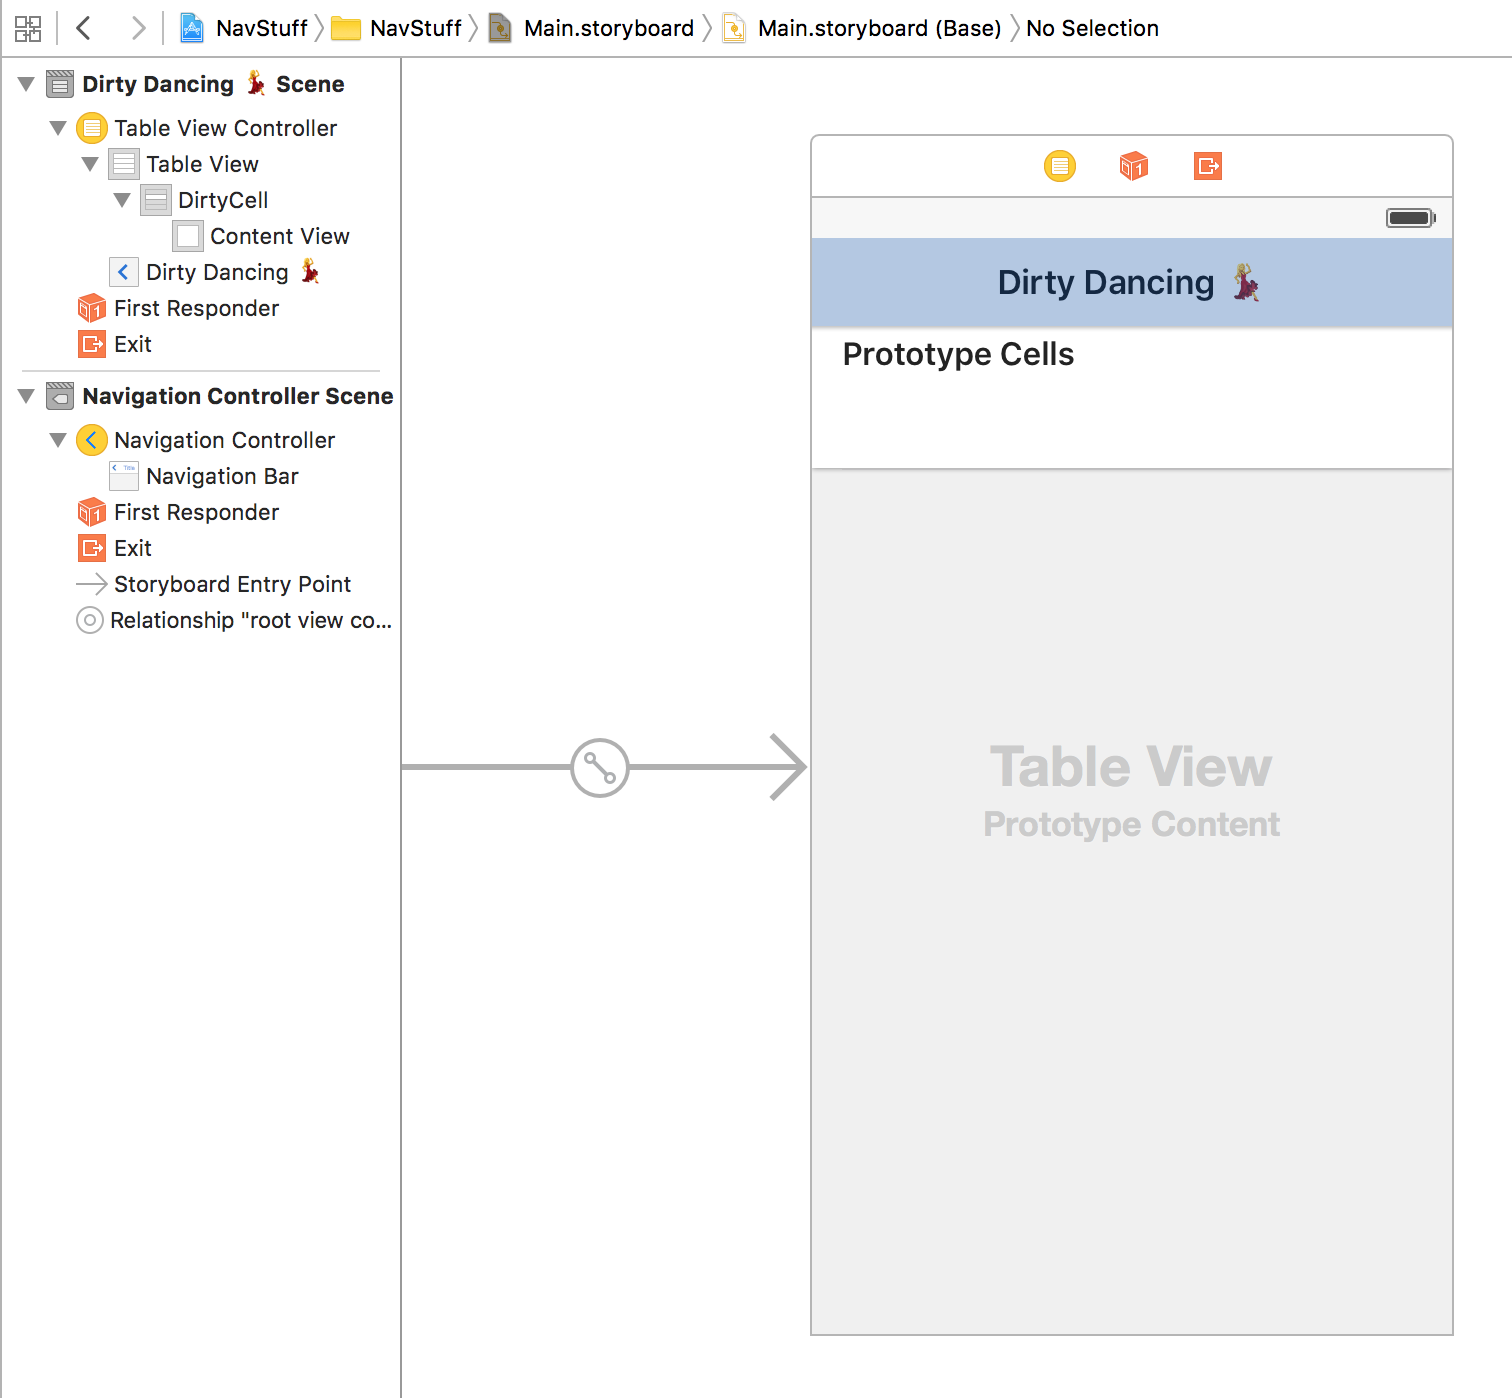
Start by adding a table view controller to the storyboard. You can search for "table view controller" in the object library at the bottom right corner of Interface Builder. Once you find it, drag and drop it onto the storyboard. You should see a basic table view in the center of your screen.
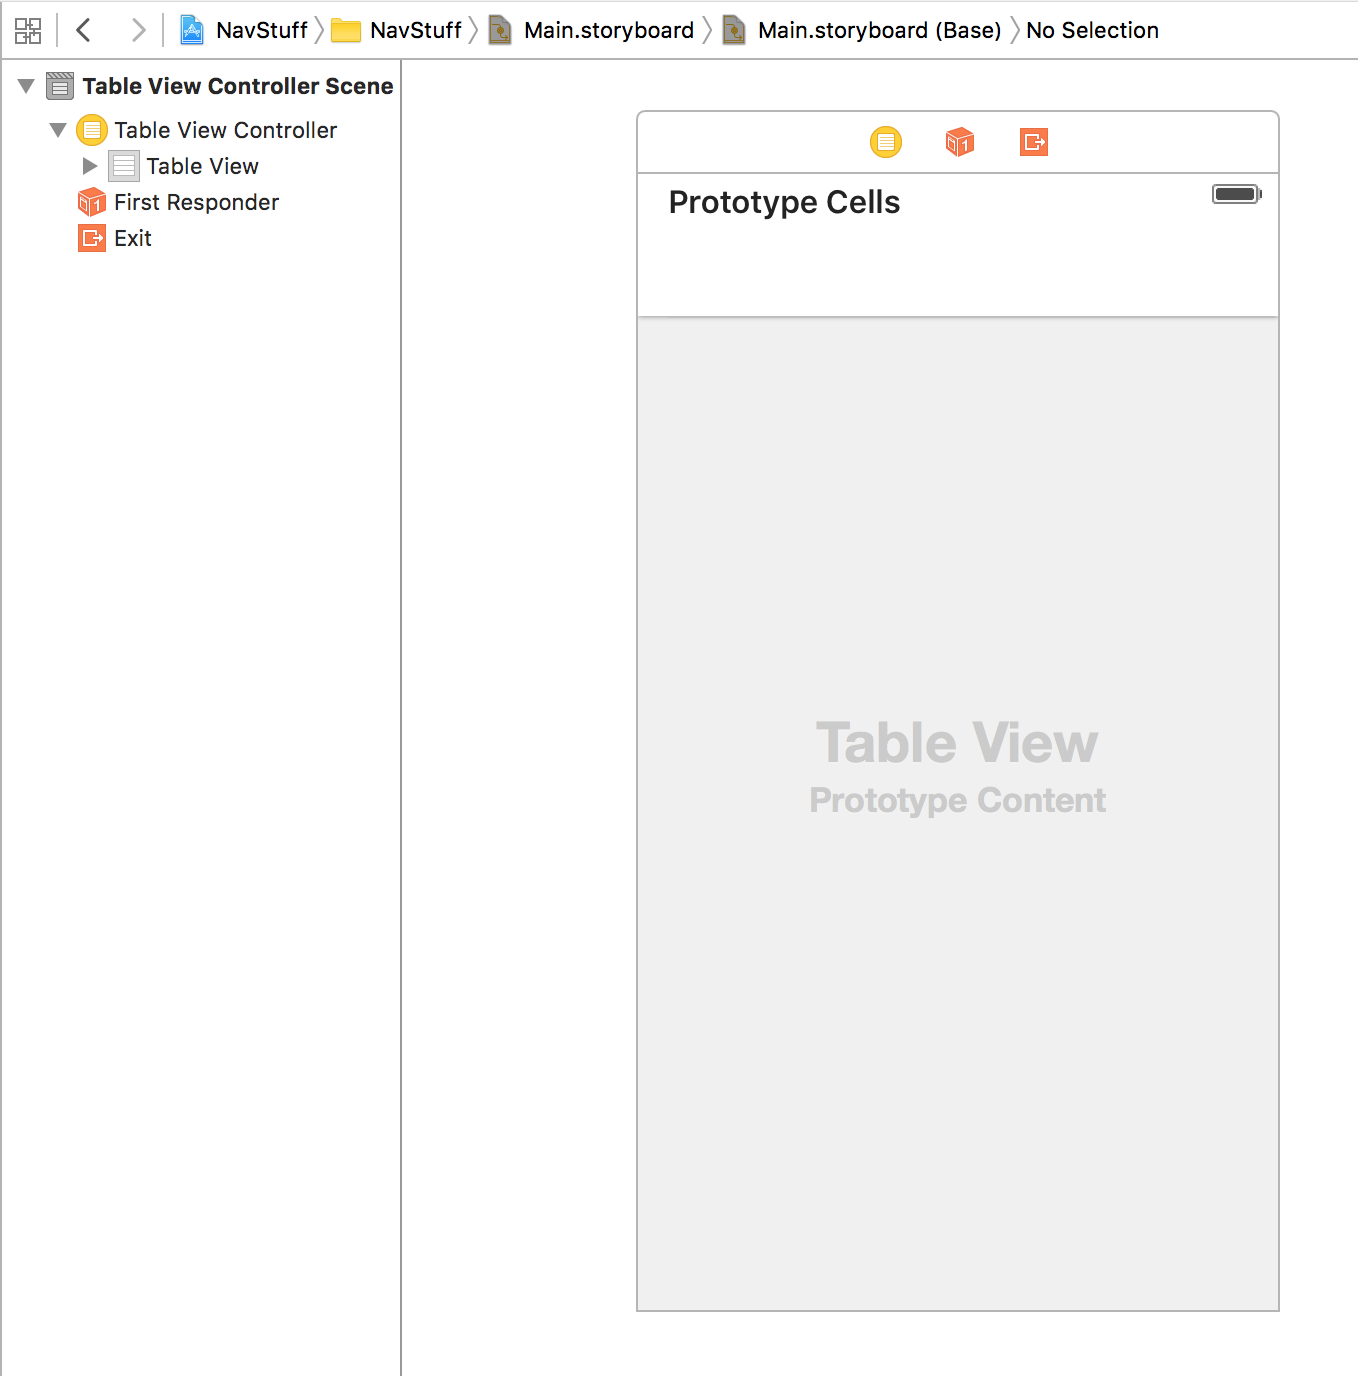
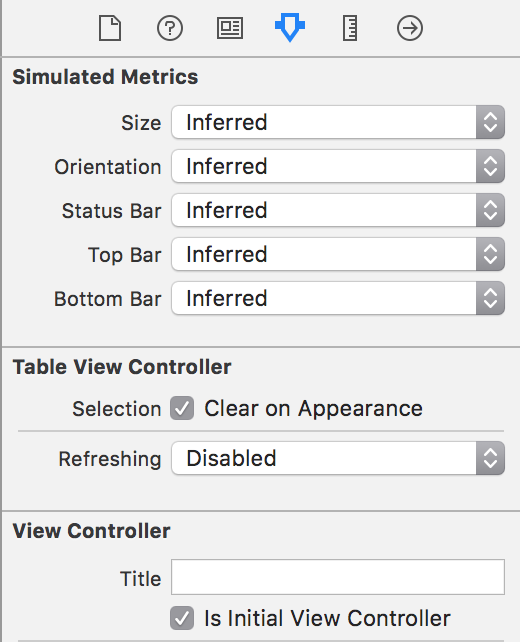
Once you've created the table view controller, don't forget to set it as the initial view controller. Select Table View Controller Scene in Interface Builder's object listing, then bring up the Attributes Inspector and check the box marked Is Initial View Controller. A grey arrow pointing to the table view should appear in Interface Builder.
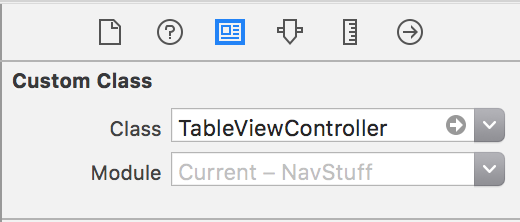
Finally, you should set the table view controller's class to be TableViewController, which is the subclass in which you will be writing your own table view controller code. Select Table View Controller from the object listing, bring up the Identity Inspector, and set the class to TableViewController.
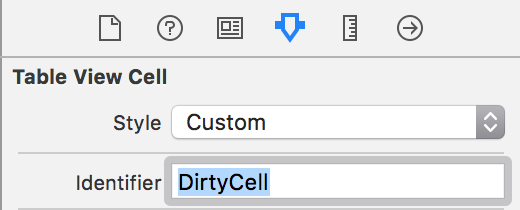
One more thing to do for the time being. Remember the whole system table view controllers do to allocate and dequeue cells? You need to set the reuse identifier for your table view's cells. You will then use this reuse identifier to dequeue the appropriate cell from the table view controller. Select Table View Cell in the object listing, then bring up the Attributes Inspector. See where it says Reuse Identifier near the top? Type "DirtyCell" into that box and hit Return. That's the identifier you'll use to dequeue your table view's cells.
Great! You're done...for now. You can build and run your app if you want to, although it won't do anything particularly useful yet. You're about to fill in the useful bits of the app.
Navigation Controllers
Let's talk about navigation controllers again for a minute. Consider the Contacts app that comes with your iPhone. When you launch it, you initially see a list of your contacts in a table view. When you press on a contact, a detailed view of all of that contact's information slides in from the right. You also get an Edit button in the top right corner, and a back button in the top right.
That navigation is managed by a navigation controller. A navigation controller essentially sits "above" all the other controllers, and manages the interaction or navigation between different views.
Apps can make good use of a navigation controller, even if they only contain one view (such as the Dirty Dancing app you're building right now). The navigation controller also draws the bar along the top of the view, just below the clock and system tray, which often displays the title of the app. If nothing else, it provides a nice way to "anchor" your view, even if you only have one.
You should get into the habit of using navigation controllers, even if your app is initially very simple (like one view). As your app grows, you're likely to add more views, and a navigation controller makes it simple to handle the—ahem—navigation of your app. It's much easier to add a navigation controller at the beginning of app development, even if you don't really use it, then try to shoehorn it in later.
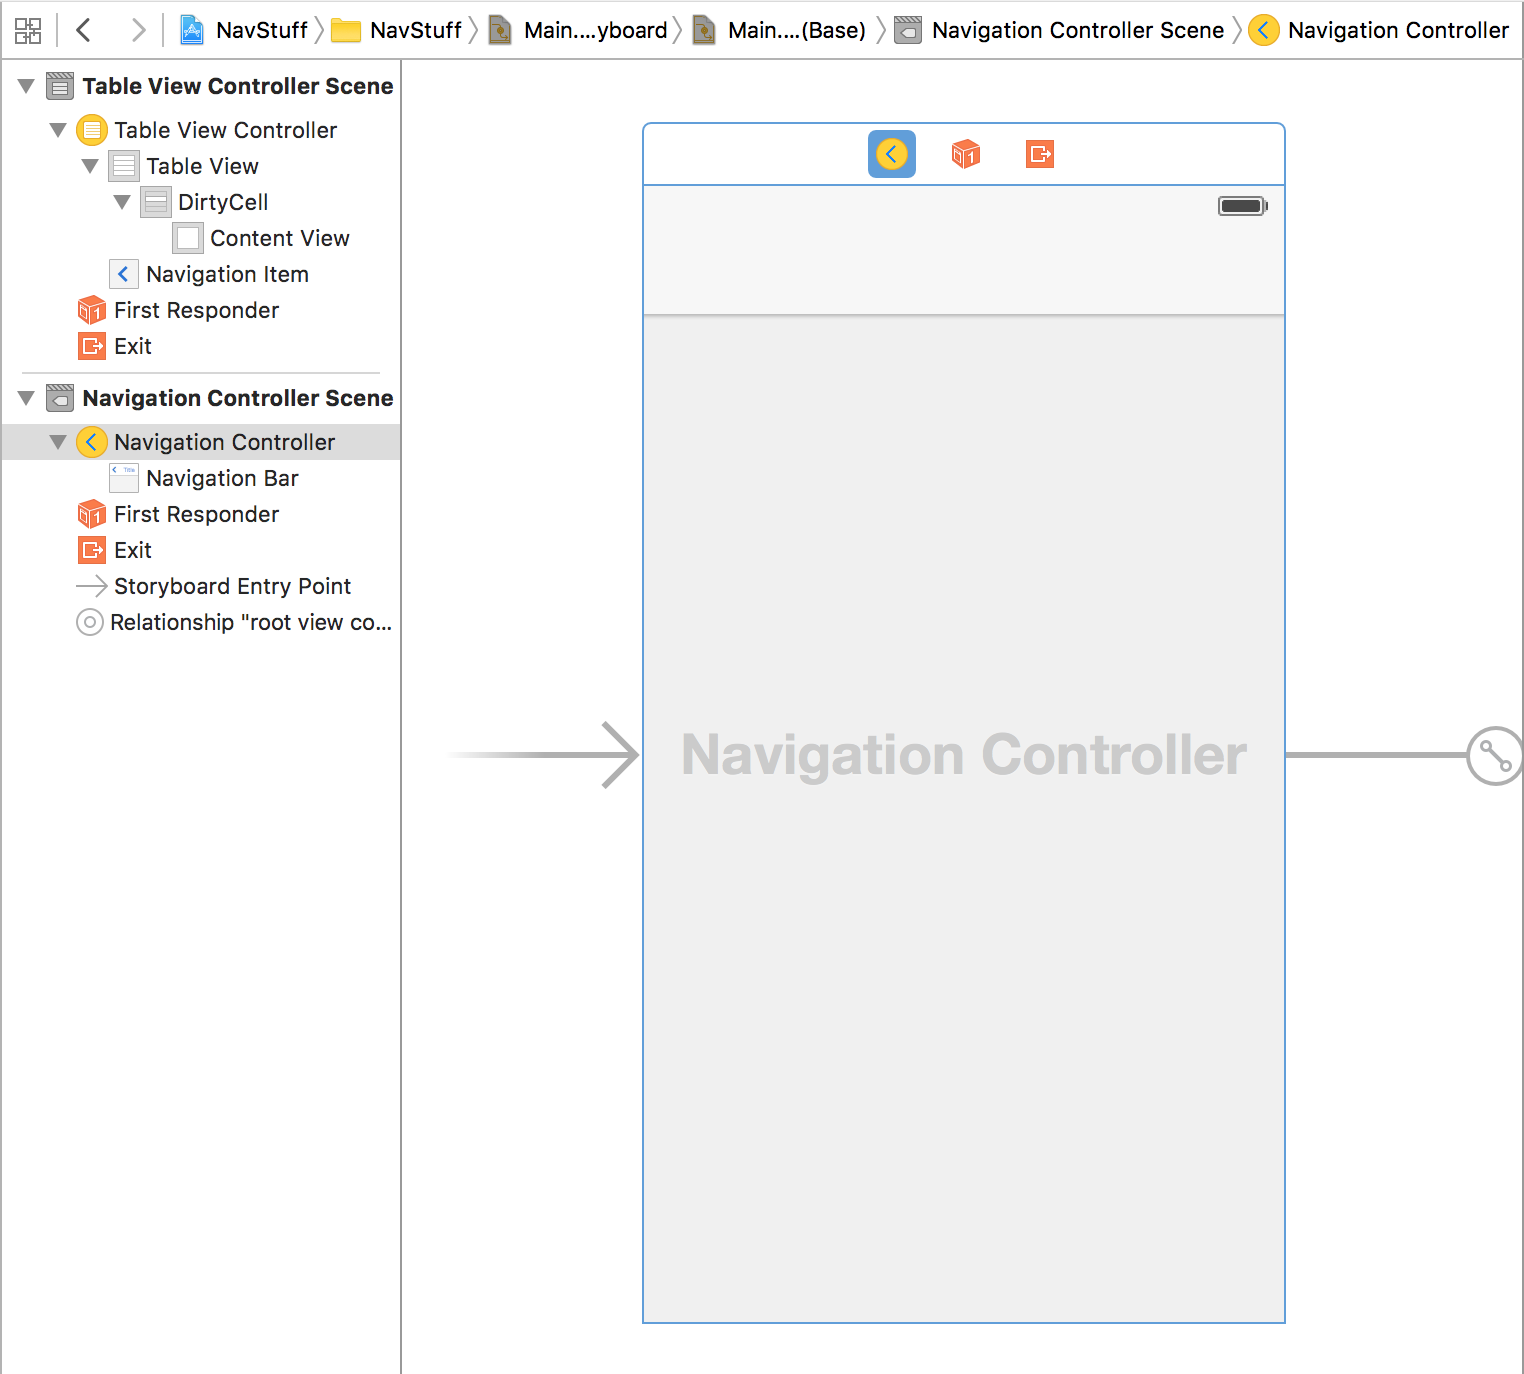
And adding a navigation controller is easy! To add a navigation controller to your Dirty Dancing app, first make sure that Table View Controller Scene is selected in Interface Builder. Then, from the Editor menu, select Embed In, then select Navigation Controller from the submenu. Voilà! You've added a navigation controller to your app, which you should see reflected in Interface Builder's object listing. You'll also see a new Navigation Controller element on the storyboard.
Try building and running your app again. It'll look mostly the same as before (that is, blank), but now there's a nice, wide grey bar at the top of the screen.
It would be nice to have a title in that space, wouldn't it? Remember, one of the obvious benefits (although perhaps not the most important) of a navigation controller is that it allows you to easily add a title to your UI.
Changing the title displayed in the top navigation bar is not as obvious as it seems, and understanding how to do so requires a bit of understand of how a navigation controller works. Remember how a navigation controller sits "above" the other view controllers? The navigation controller is responsible for managing a stack of views. The current view (be it a table view or some other view) is at the top of the stack. As the user navigations within your app, views are popped off the top of the stack (if the user goes "back") or push on top (if the user goes "forward").
The title displayed in the navigation bar is not the title of the navigation controller; rather, the navigation controller gets that title from the view on the top of the view stack, and draws that in the navigation bar.
This is a wordy way of saying that the title is actually set in the topmost view controller—in this case, the table view.
In the object listing, you should see an item under Table View Controller Scene called Navigation Item.
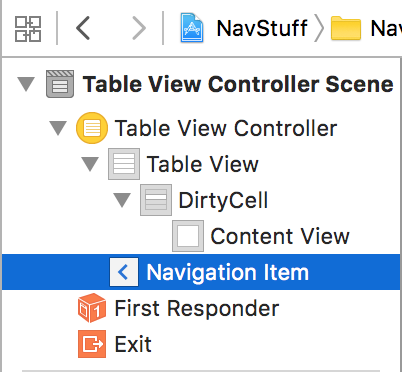
Click once on that item to select it. Then, in its Attributes Inspector, change its title to "Dirty Dancing". You should see that title appear in the navigation bar.
Build and run your app again. It still won't do anything cool, but you'll see the title in the nav bar now.
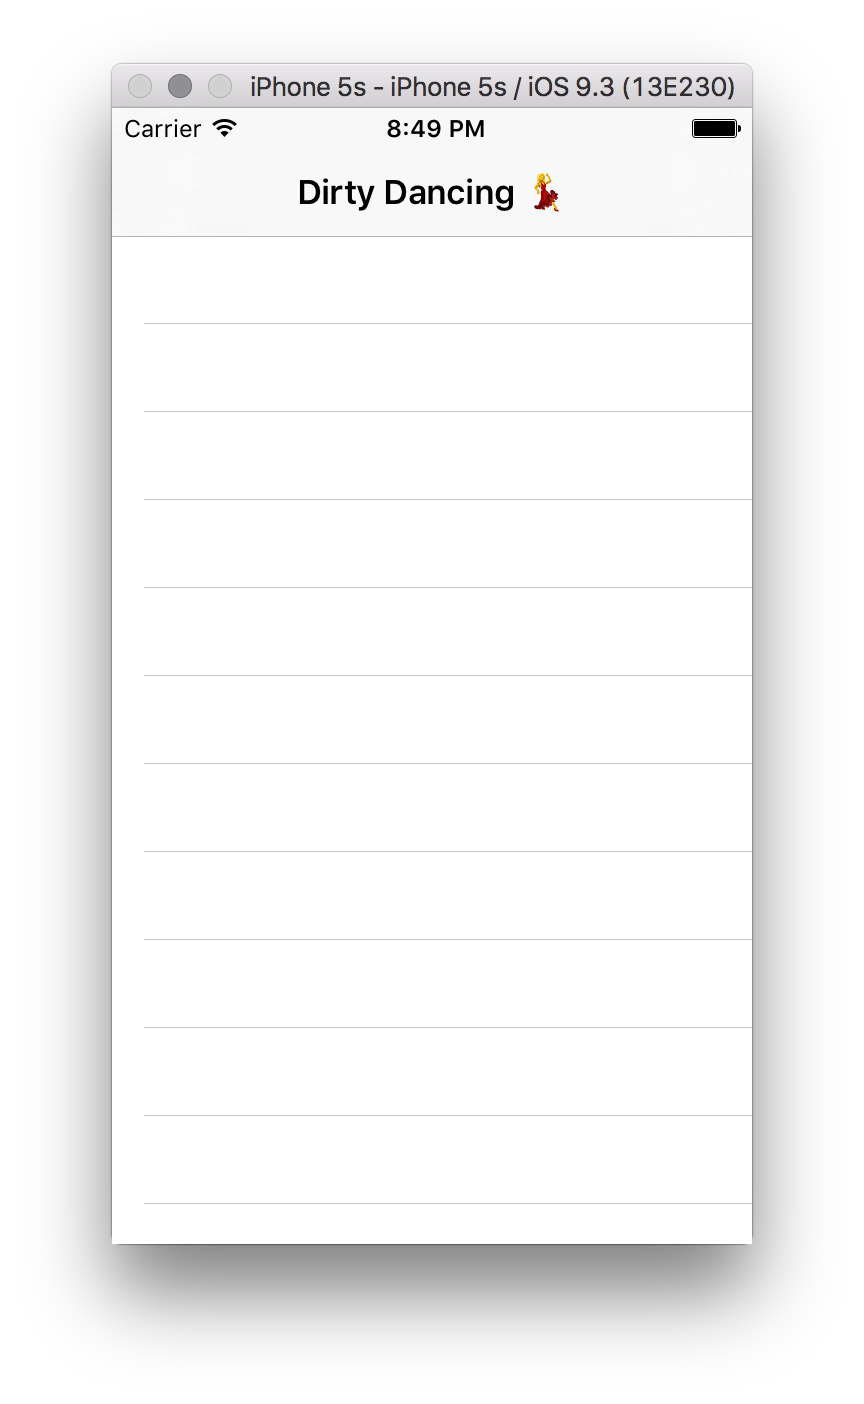
Table View Controllers
Let's write some code to make your app actually work. Switch back to the TableViewController.swift file. This file currently contains one class, TableViewController. As the name suggests, this is a table view controller—specifically, the one that will power your app! Let's get to work on it.
First, you're going to need a way to store the names of the songs that make up the Dirty Dancing soundtrack. It makes sense to store them in a property, doesn't it? And since it's a list of songs, an Array of Strings ([String]) seems like an appropriate data type. Create a property called dirtyDancingSoundtrack to store these items. The songs that comprise the Dirty Dancing soundtrack are:
- "(I've Had) The Time of My Life"
- "Be My Baby"
- "She's Like the Wind"
- "Hungry Eyes"
- "STAY"
- "Yes"
- "You Don't Own Me"
- "Hey Baby"
- "Overload"
- "Love Is Strange"
- "Where Are You Tonight?"
- "In the Still of the Night"
Did you create that property? If you need some help, here's what TableViewController's class definition should look like so far:
class TableViewController: UITableViewController {
    let dirtyDancingSoundtrack = [
        "(I've Had) The Time of My Life",
        "Be My Baby",
        "She's Like the Wind",
        "Hungry Eyes",
        "STAY",
        "Yes",
        "You Don't Own Me",
        "Hey Baby",
        "Overload",
        "Love Is Strange",
        "Where Are You Tonight?",
        "In the Still of the Night"
    ]
}
(Note that there are a few ways to create properties in Swift. If your dirtyDancingSoundtrack property is defined a bit differently, that's okay!)
Now you can fill in the methods that will provide data back to your table view. Do you remember the three methods you should provide so the table view can be drawn correctly?
The first is numberOfSectionsInTableView(_:), which returns the number of sections in the table view. In this relatively simple app, there is only one section, so this method can return 1:
    override func numberOfSections(in tableView: UITableView) -> Int {
        return 1
    }
The second method you must provide is tableView(_:numberOfRowsInSection:), which returns the number of rows for a given section. There's only one section, so you don't have to worry about the section in this method. There is one row for each song, so you can just return the total number of songs:
    override func tableView(_ tableView: UITableView, numberOfRowsInSection section: Int) -> Int {
        return dirtyDancingSoundtrack.count
    }
Finally, the trickiest of the three methods: tableView(_:cellForRowAt:). Remember, this method passes in an exact section (which is always 0 in this app, since there's only one section) and row number, and is responsible for returning a rendered cell corresponding to that row. This method is a bit tricky because you have to worry about dequeuing a cell (do you remember why from the previous lesson) and setting its text label correctly.
Go ahead and try this one yourself. Refer back to the previous lesson if you need to.
When you've implemented tableView(_:cellForRowAt:), it should look something like this:
    override func tableView(_ tableView: UITableView, cellForRowAt indexPath: IndexPath) -> UITableViewCell {
        let cell = tableView.dequeueReusableCell(withIdentifier: reuseIdentifier, for: indexPath)
    let songTitle = dirtyDancingSoundtrack[indexPath.row]
    cell.textLabel?.text = songTitle
    return cell
    }
What's going on here? First you call tableView.dequeueReusableCell(withIdentifier: reuseIdentifier, for: indexPath) to get a cell for the given row number. You use the same reuseIdentifier that you specified when setting up the table view in Main.storyboard ("DirtyCell"). This part is key—make sure you use the exact same reuse identifier. Otherwise, you'll get a completely different type of cell!
This may be a cell that was already allocated (and is being reused), or it may be a completely new one. On the next line, you get the song title for that row (which is at the same index in the dirtyDancingSoundtrack array). On the third line, you set the cell's label to the song title, and then finally return the initialized cell on the fourth line.
Surprisingly, that's it. You're done implementing the table view.
Now you can build and run your app and see it in action!
As you work your way through the next few lessons, you'll build increasingly complex apps backed by table views, and also learn more about using navigation controllers to move easily between different views of your app. But for now, enjoy your brand-new Dirty Dancing app! Nobody puts you in the corner.


