1 # Install_Jenkins
To install Jenkins on your CentOS system, follow the steps below: Jenkins is a Java application, so the first step is to install Java. Run the following command to install the OpenJDK 8 package:
$ sudo yum install java-1.8.0-openjdk-devel
2 # Enable the Jenkins repository. To do that, import the GPG key using the following curl command:
$ curl --silent --location http://pkg.jenkins-ci.org/redhat-stable/jenkins.repo | sudo tee /etc/yum.repos.d/jenkins.repo
3 # And add the repository to your system with:
$ rpm --import https://jenkins-ci.org/redhat/jenkins-ci.org.key
4 # Once the repository is enabled, install the latest stable version of Jenkins by typing
$ yum install jenkins
5 # After the installation process is completed, start the Jenkins service with
$ systemctl start jenkins
6 # To check whether it started successfully run: $ systemctl status jenkins
7 # Finally enable the Jenkins service to start on system boot.
$ systemctl enable jenkins


OutPut: jenkins.service is not a native service, redirecting to /sbin/chkconfig.
Executing /sbin/chkconfig jenkins on
8 # Adjust the Firewall
If you are installing Jenkins on a remote CentOS server that is protected by a firewall you need to port 8080.

$ sudo firewall-cmd --permanent --zone=public --add-port=8080/tcp
$  sudo firewall-cmd --reload
9 # Setting Up Jenkins
set up your new Jenkins installation, open your browser and type your domain or IP address followed by port 8080:
10 # following command to print the password on your terminal
$ sudo cat /var/lib/jenkins/secrets/initialAdminPassword
11 # Copy the password from your terminal, paste it into the Administrator password field and click Continue.
Install Apache Maven in CentOS 7
1 # Next, go to the official Apache Maven download page and grab the latest version or use the following wget command to download it under the maven home directory ‘/usr/local/src’.
$ cd /usr/local/src
$ cd wget http://www-us.apache.org/dist/maven/maven-3/3.5.4/binaries/apache-maven-3.5.4-bin.tar.gz
2 # Extract the downloaded archive file, and rename it using following commands
$ tar -xf apache-maven-3.5.4-bin.tar.gz
$ mv apache-maven-3.5.4/ apache-maven/
3 # Configure Apache Maven Environment
$ cd /etc/profile.d/
$ vim maven.sh
export M2_HOME=/usr/local/src/apache-maven
export PATH=${M2_HOME}/bin:${PATH}
4 # Now make the ‘maven.sh’ configuration file executable and then load the configuration by running the ‘source’ command. $ chmod +x maven.sh $ source /etc/profile.d/maven.sh
5 # Check Apache Maven Version
$ mvn --version
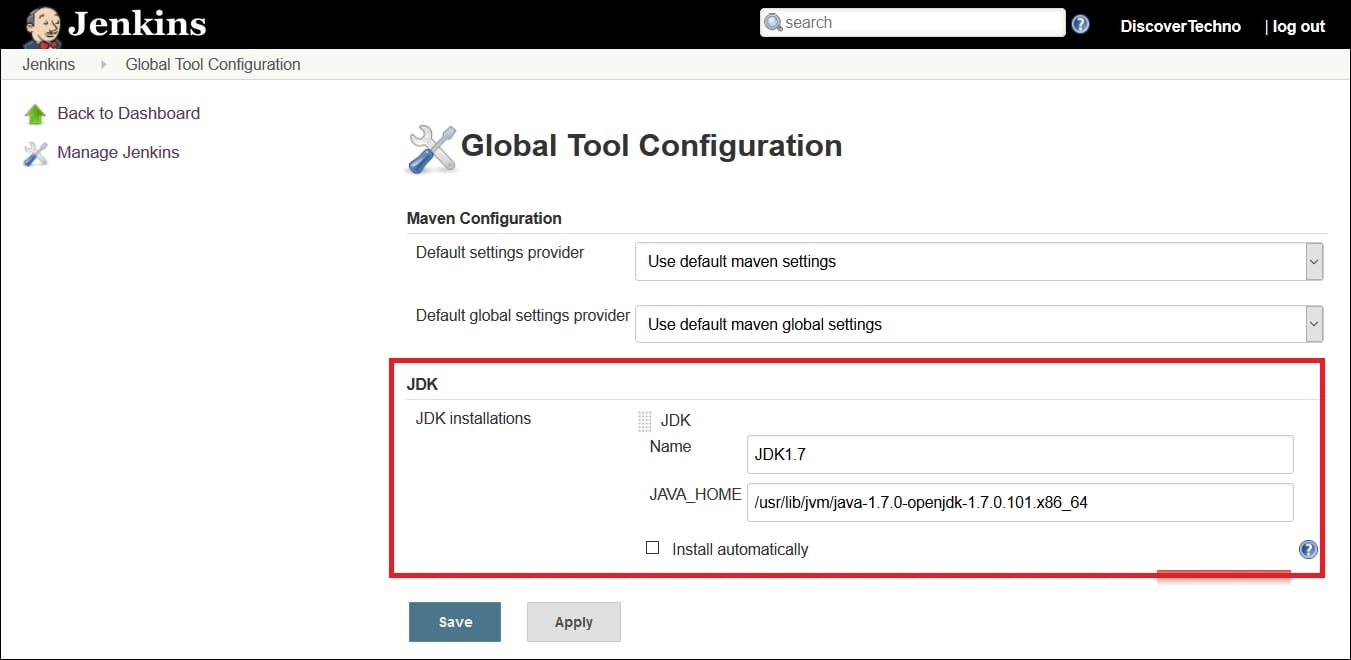
6 # Jenkins JDK configuration
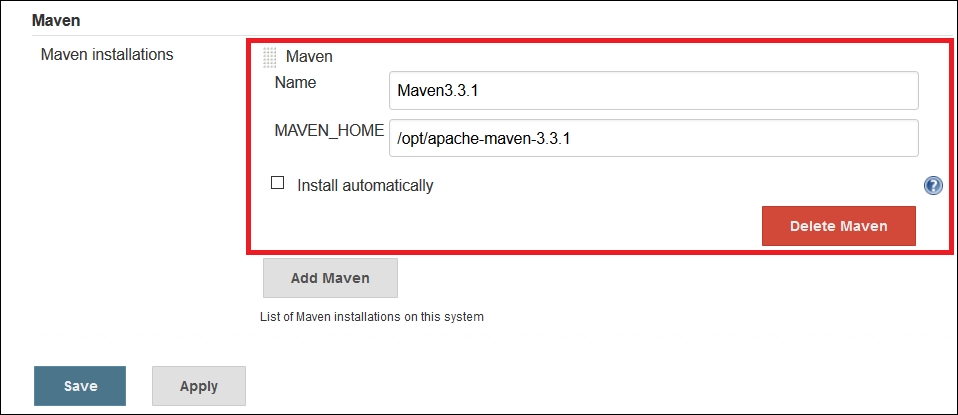
7 # Jenkins Maven configuration ![alt text] https://static.packt-cdn.com/products/9781786465702/graphics/image_02_013.jpg

