English|中文
Please be aware that the License of this repo has changed to prevent some web shops from deceiving the customers. You cannot use versions after AOE 2023.3.28 for commercial activity.
由于部分无良商家销售WebUI,捆绑本插件做卖点收取智商税,本仓库的许可证已修改。 自许可证修改之日(AOE 2023.3.28)起,之后的版本禁止用于商业目的。
Both WebUI and this extension are FREE. Don't be cheated by some webshop owners.
The extension enables large image drawing & upscaling with limited VRAM via the following techniques:
- Two SOTA diffusion tiling algorithms: Mixture of Diffusers and MultiDiffusion
- My original Tiled VAE algorithm.
- My original TIled Noise Inversion for better upscaling.
- Ultra high-consistency image upscale, up to 8k resolution in 12G memory.
- Especially good when you don't want to wildly change your character's face.
- See here for a comparison before & after 4x upscaling of a 4096 * 6464 image.
- Compare to Ultimate SD Upscale, the algorithm is much more faithful to the original image and produces significantly fewer artifacts. See the comparison with Ultimate SD Upcaler.
NOTE: Instead of generating an 8k image at once, you should first try the default parameters with a small image and a small upscale factor (i.e., 1.5) to see if it works. If the retouch = 1, then CFG must be <= 2.
- It saves your VRAM at nearly no cost.
- You may not need --lowvram or --medvram anymore.
- Take highres.fix as an example, if you can only do 1.5x upscale previously, you may do 2.0x upscale with it now.
- Normally you can use default settings without changing them.
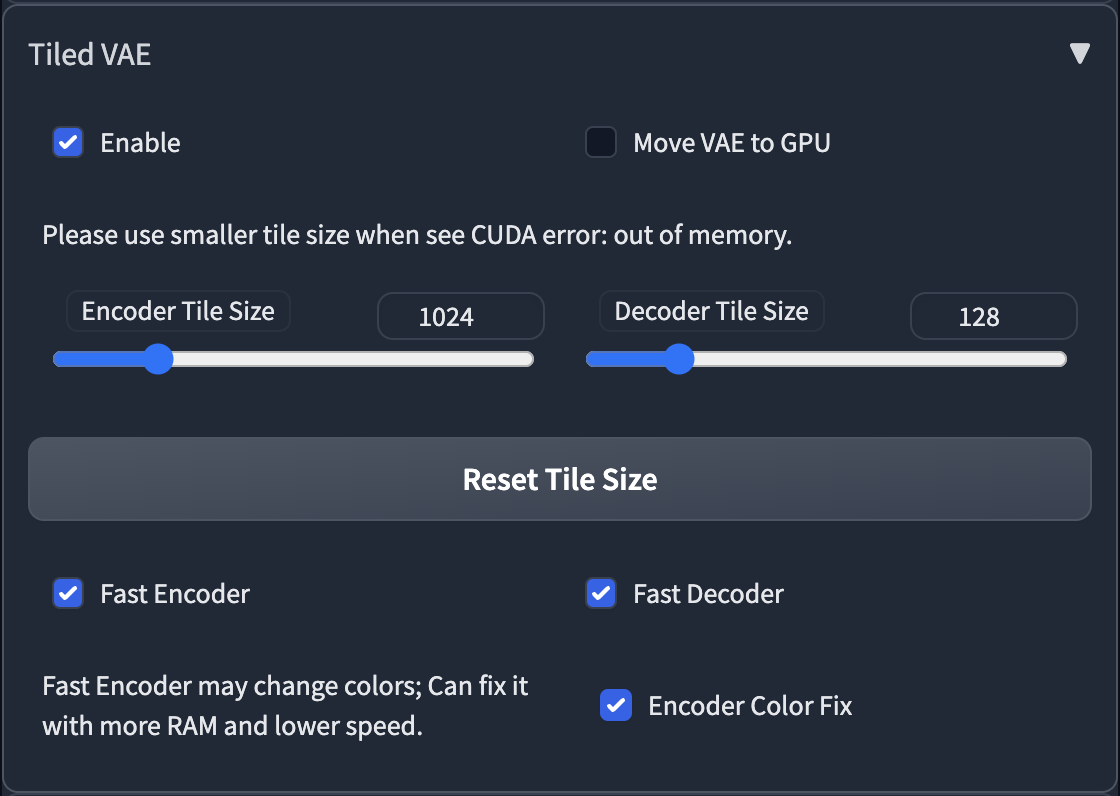
- But if you see CUDA out of memory error, just lower the two tile sizes.
- Screenshot:

Draw large images by fusing multiple regions together.
NOTE: we recommend you use custom regions to fill the whole canvas.
-
Params:
-
Ckpt: Anything V4.5, 1920 * 1280 (no highres), method=Mixture of Diffusers
-
Main prompt = masterpiece, best quality, highres, extremely clear 8k wallpaper, white room, sunlight
-
Negative prompt = ng_deepnegative_v1_75t EasyNegative
-
The tile size parameters become useless; just ignore them.
-
-
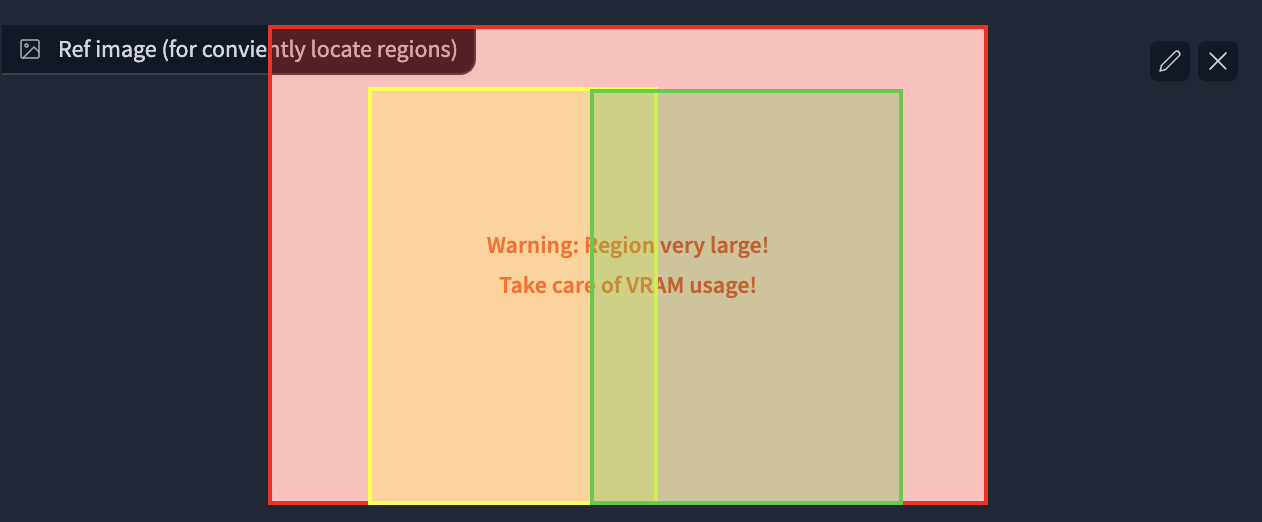
Regions:
- Region 1: Prompt = sofa, Type = Background
- Region 2: Prompt = 1girl, gray skirt, (white sweater), (slim) waist, medium breast, long hair, black hair, looking at viewer, sitting on sofa, Type = Foreground, Feather = 0.2
- Region 3: Prompt = 1girl, red silky dress, (black hair), (slim) waist, large breast, short hair, laughing, looking at viewer, sitting on sofa, Type = Foreground, Feather = 0.2
-
Region Layout:

-
Result (2 out of 4)


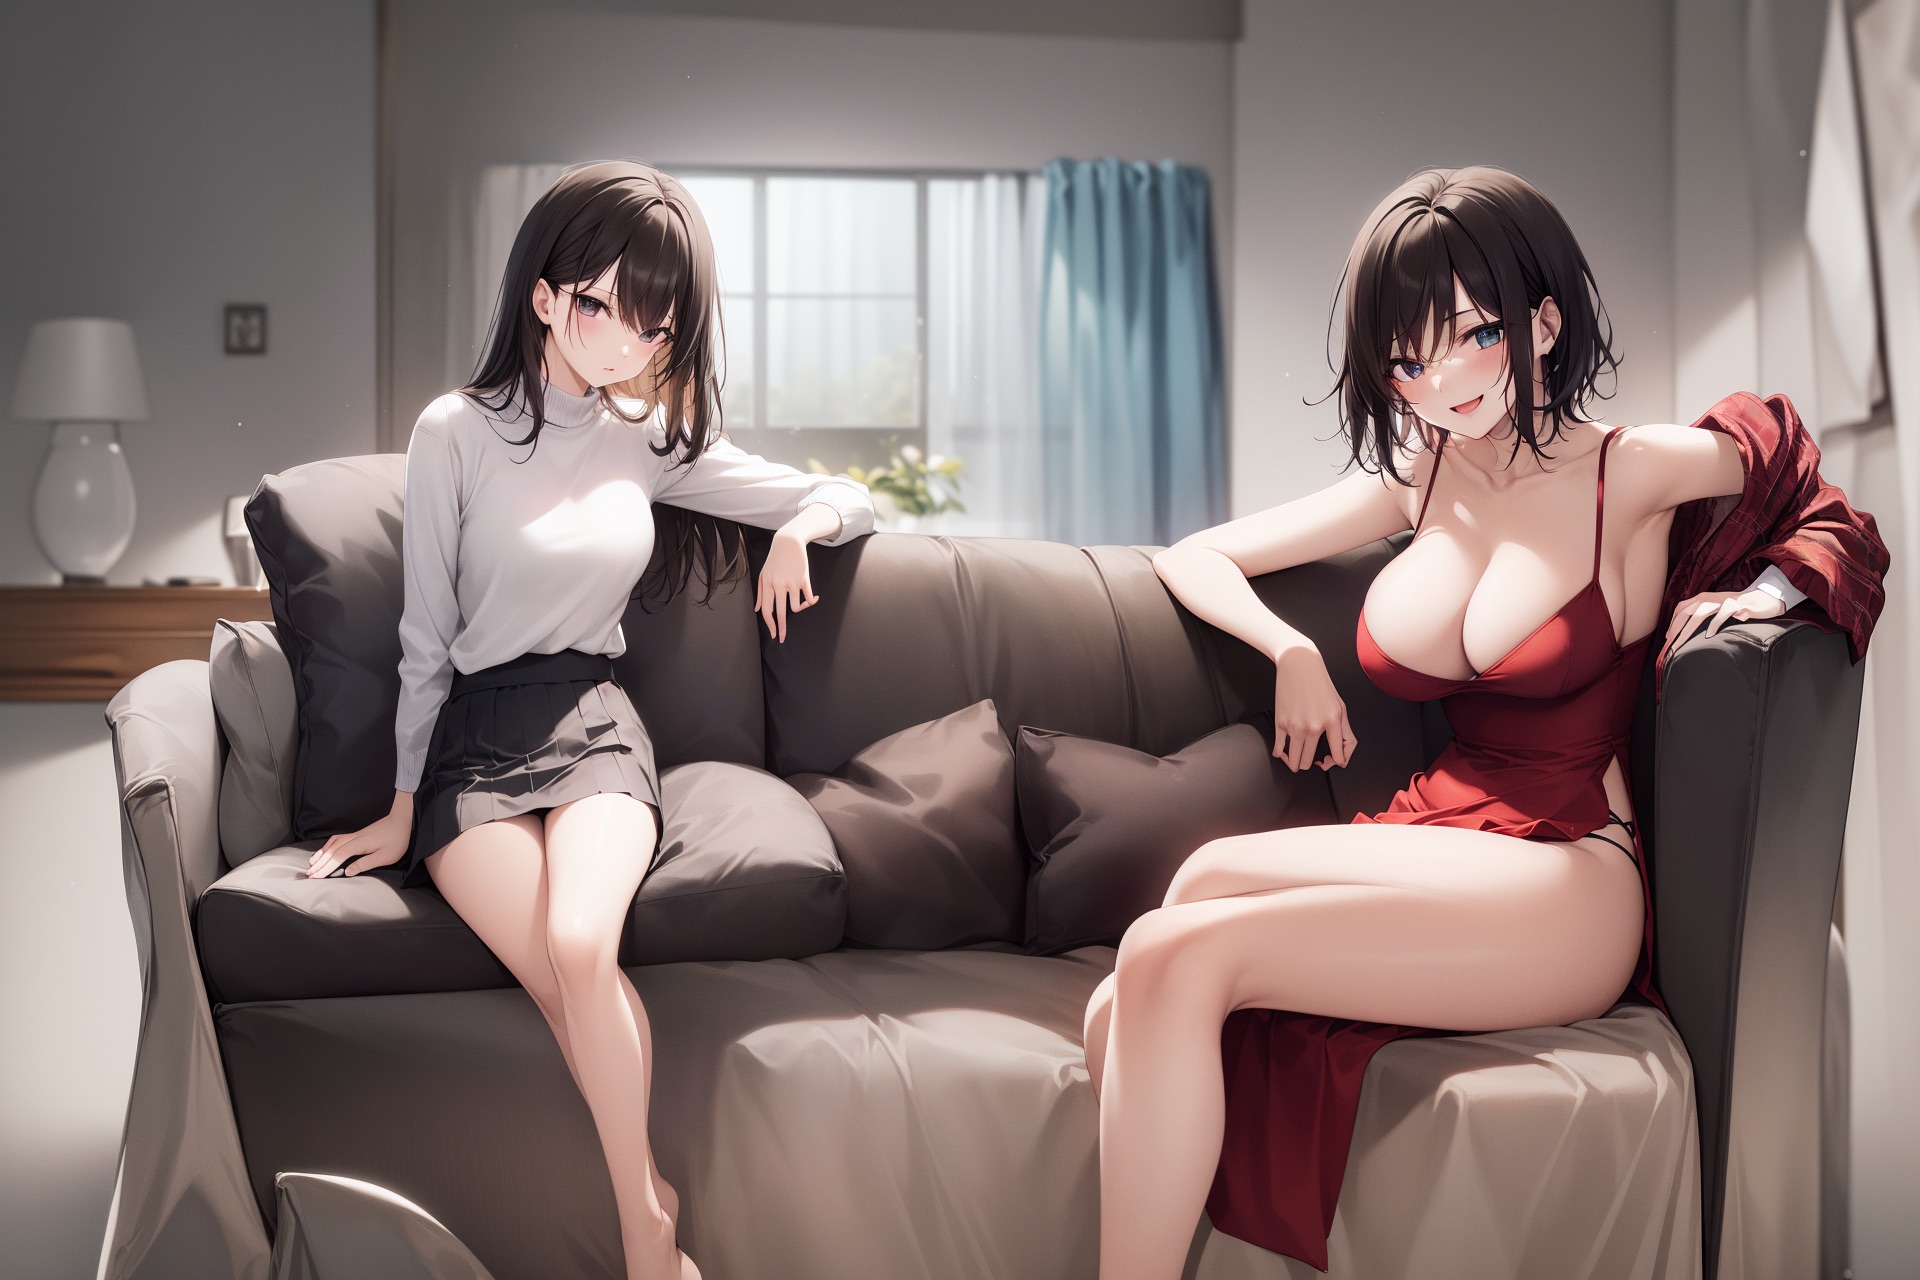
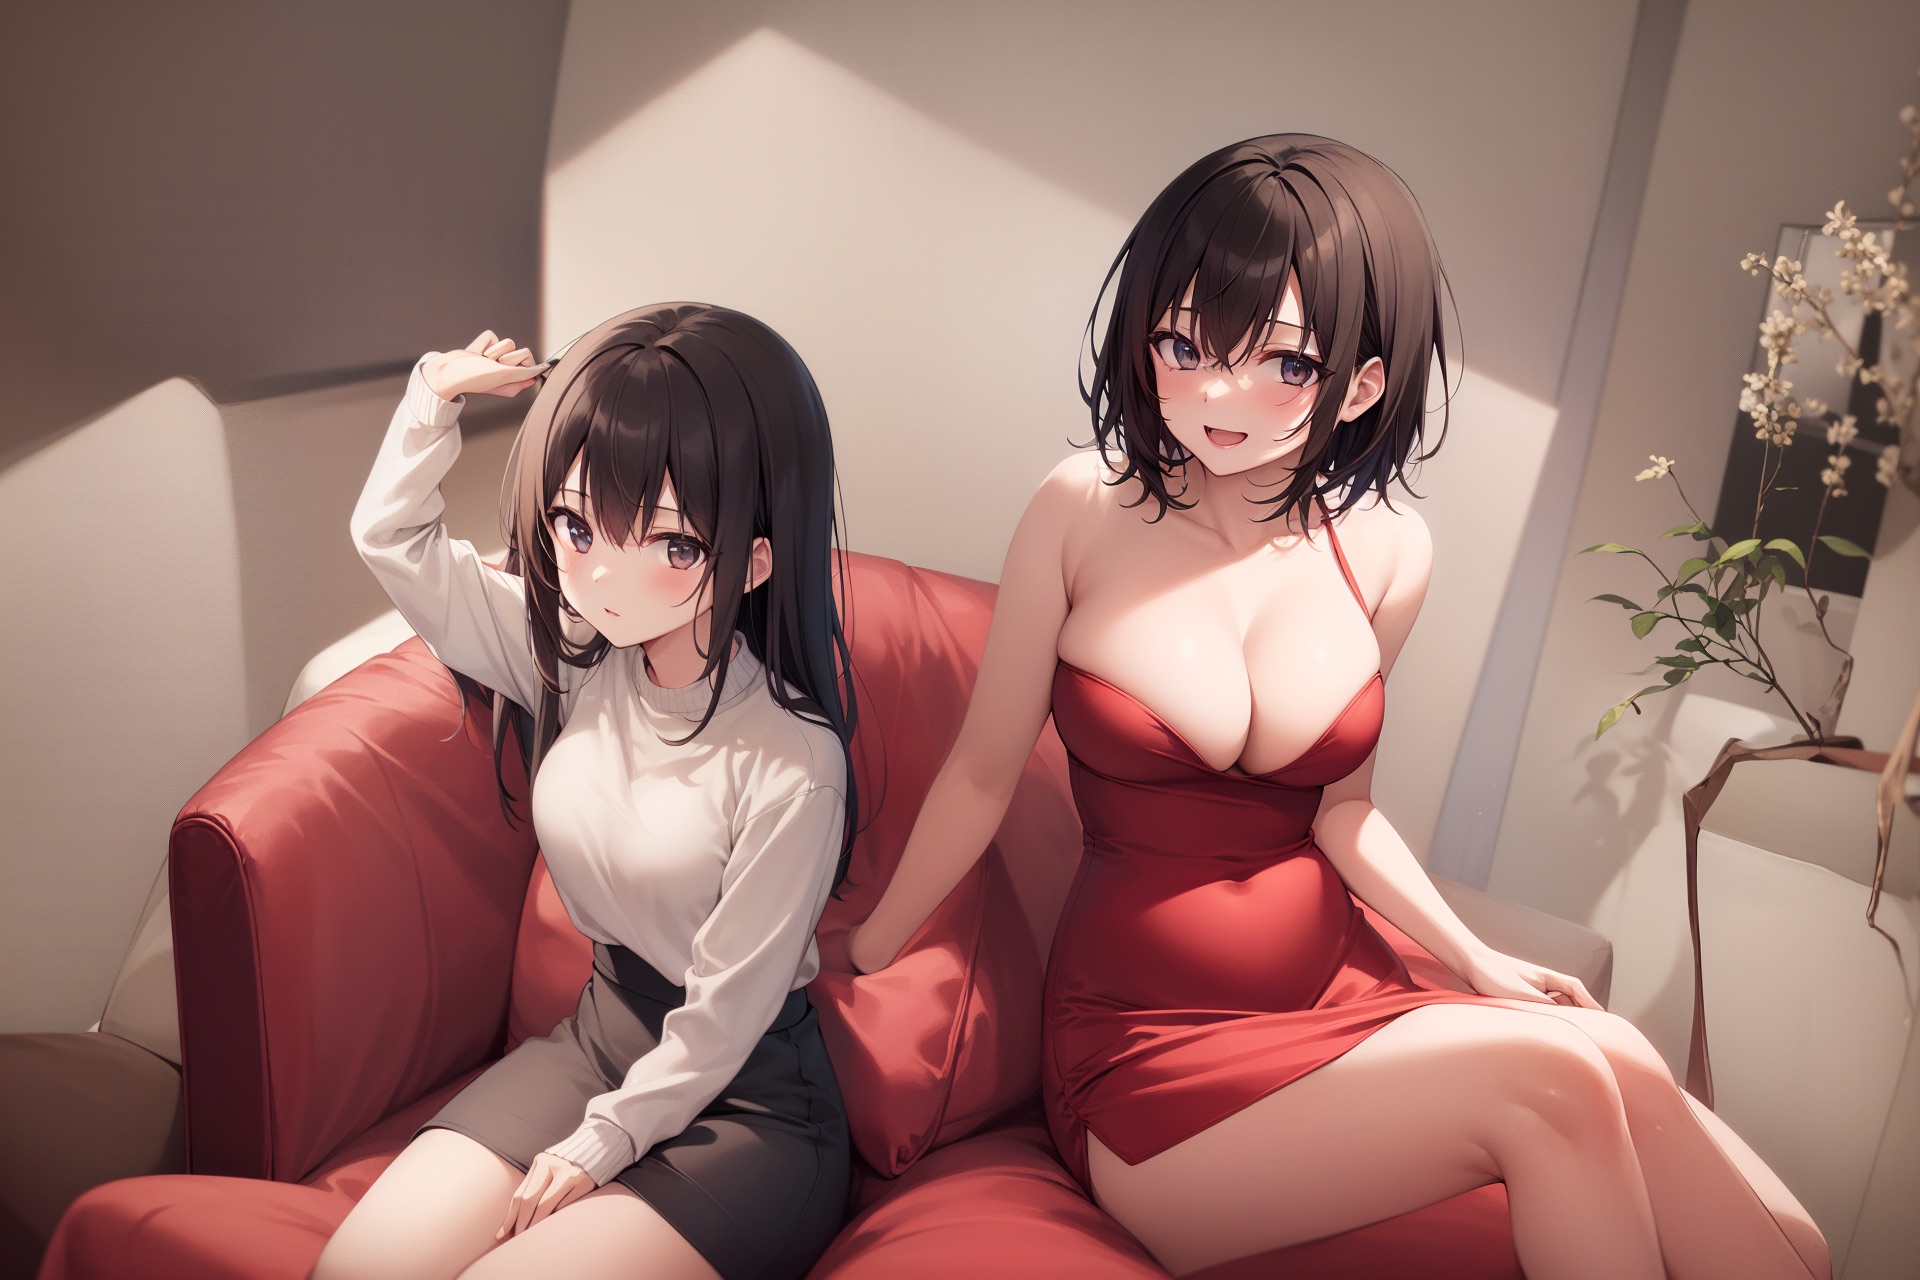
- Usually, it is difficult to draw a full-body character at a high resolution (e.g., it may concatenate two bodies).
- By putting your character in your background, it becomes much easier.
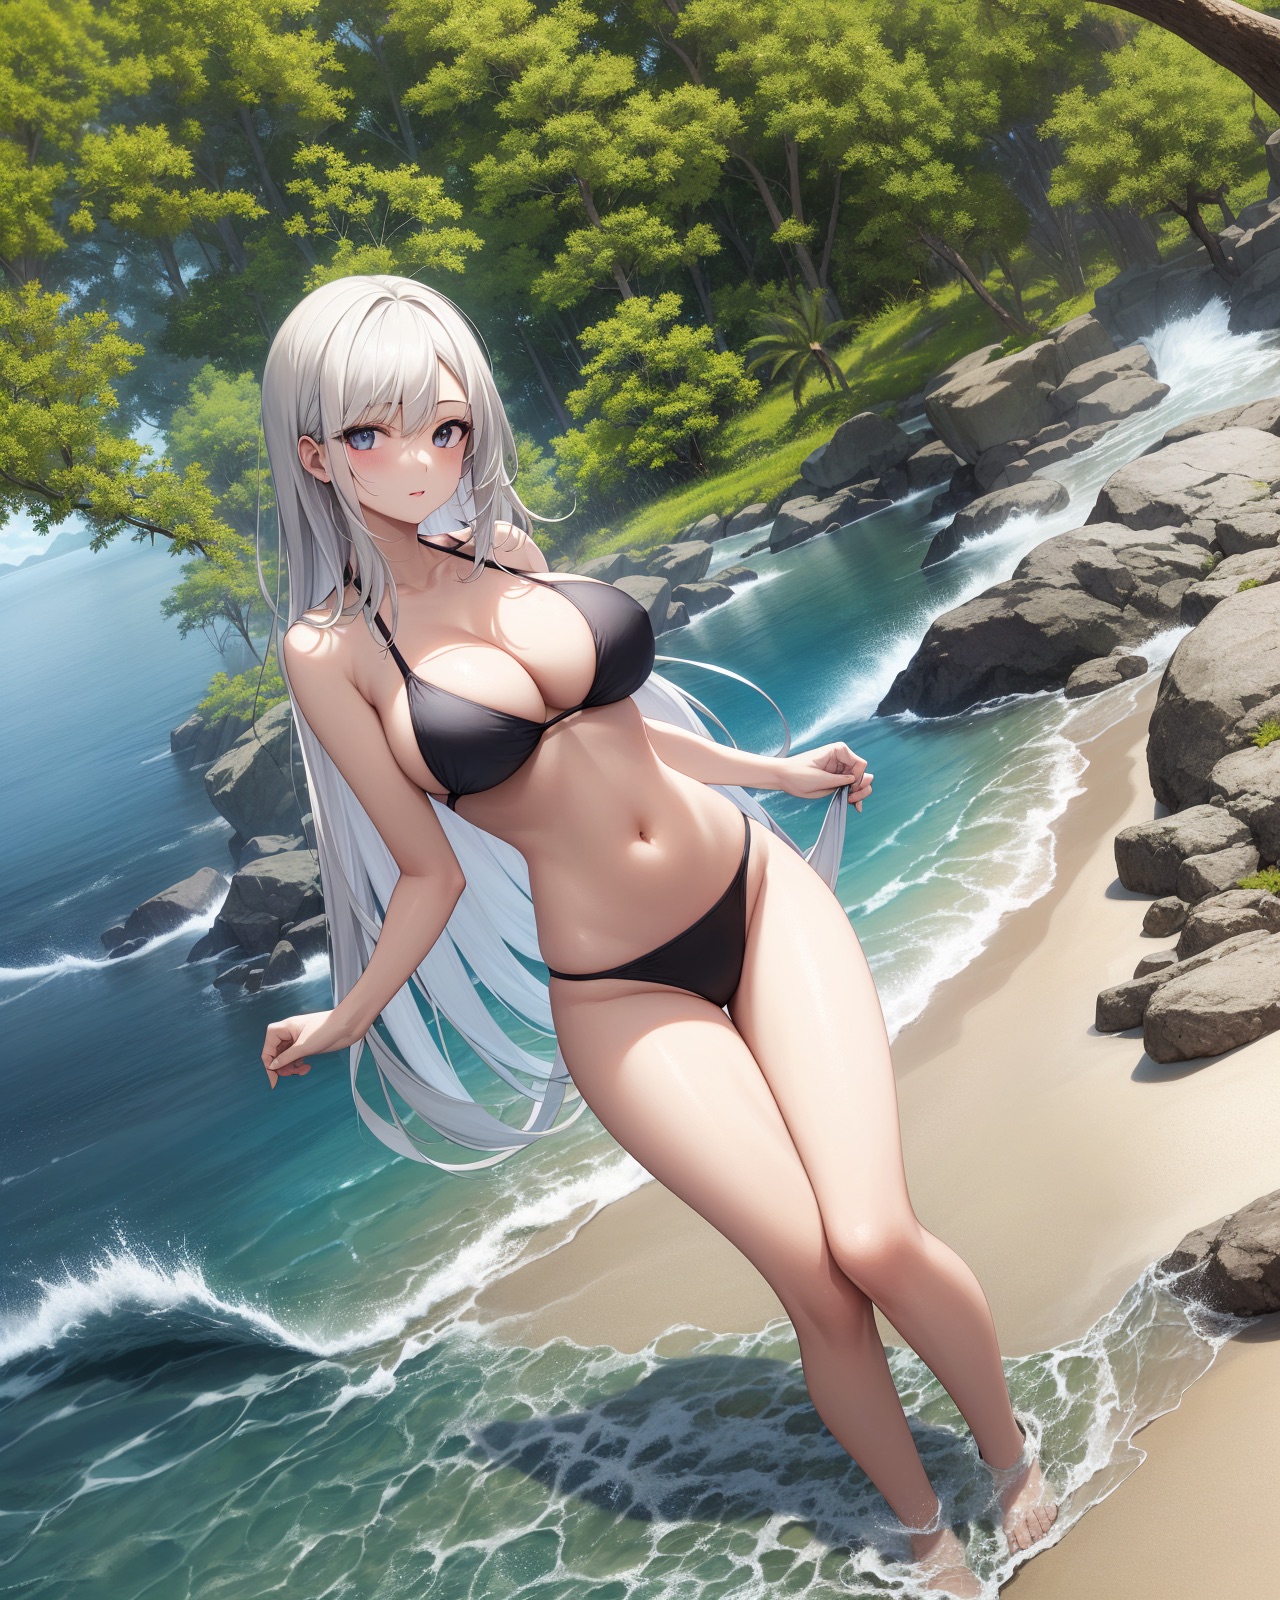
- Params:
- Ckpt: Anything V4.5, width = 1280, height = 1600 (no highres), method=MultiDiffusion
- Main prompt: masterpiece, best quality, highres, extremely clear 8k wallpaper, beach, sea, forest
- Neg prompt: ng_deepnegative_v1_75t EasyNegative
- Regions:
- Region 1 Prompt = 1girl, black bikini, (white hair), (slim) waist, giant breast, long hair, Type = Foreground, Feather: 0.2
- Region 2 Prompt = (empty), Type: Background
- Region Layout:

- Result: 32s, 4729 MB on NVIDIA V100. I was lucky to get this at once without cherry-picks.

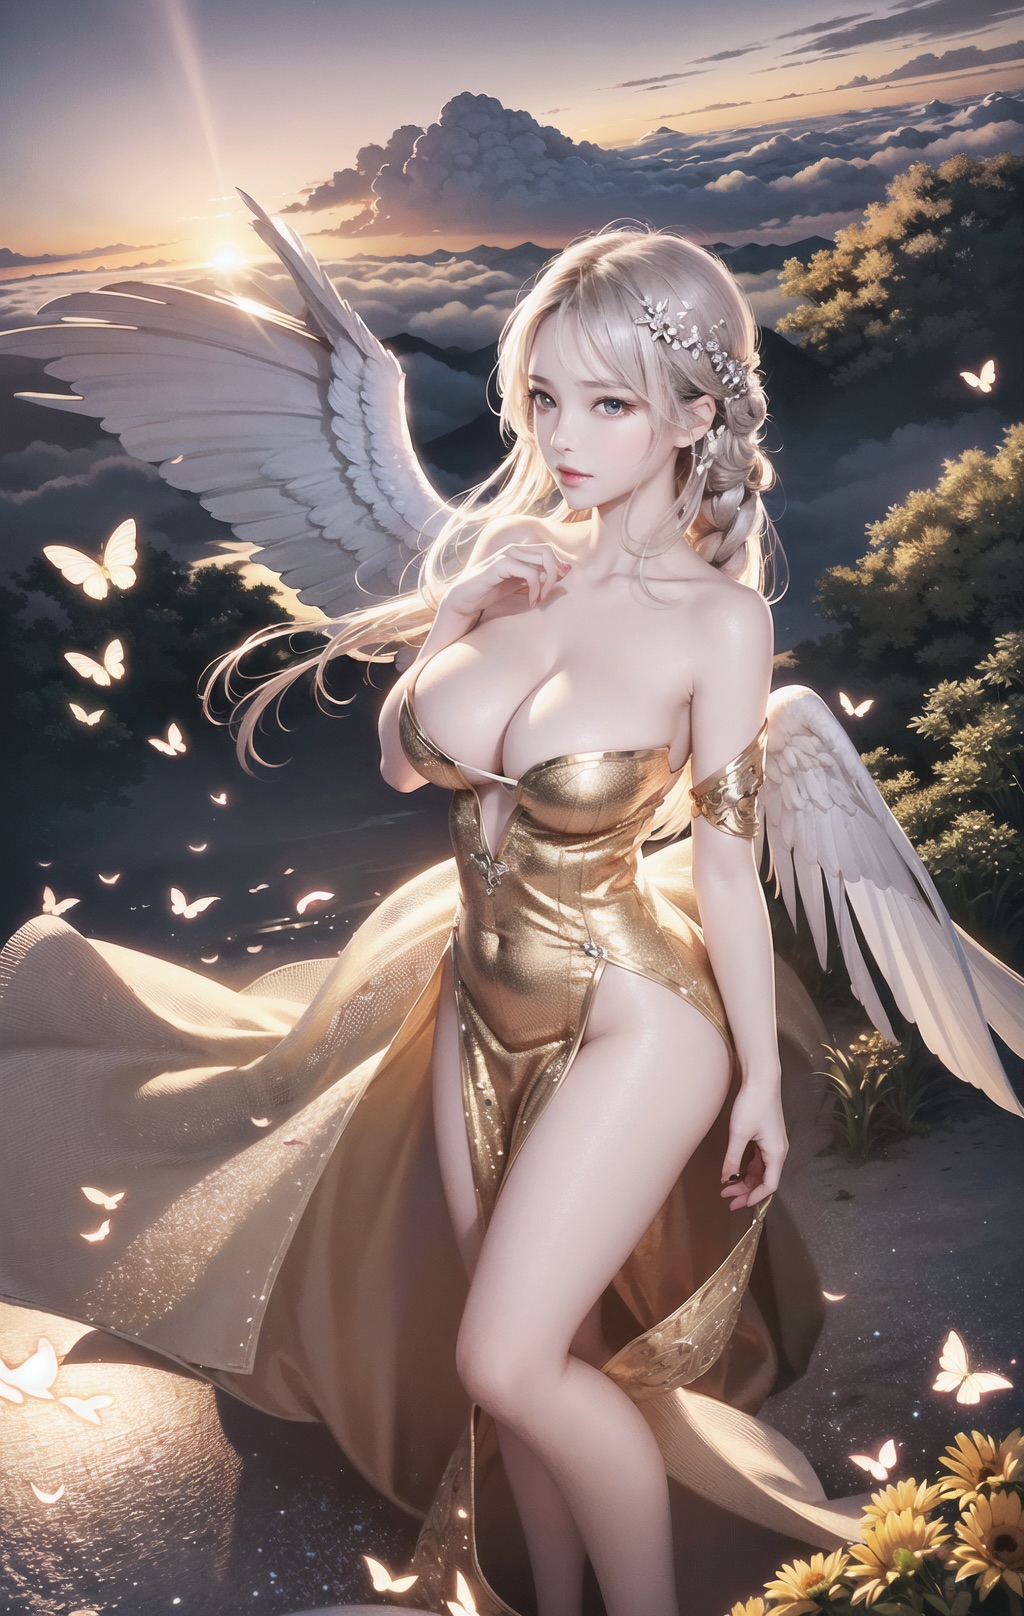
- Also works well for 2.5D characters. For example, the 1024*1620 image generation
- Great thanks to all settings from @辰熙. Click here for more of her artworks: https://space.bilibili.com/179819685
- Cherry-picked from 20 generations.


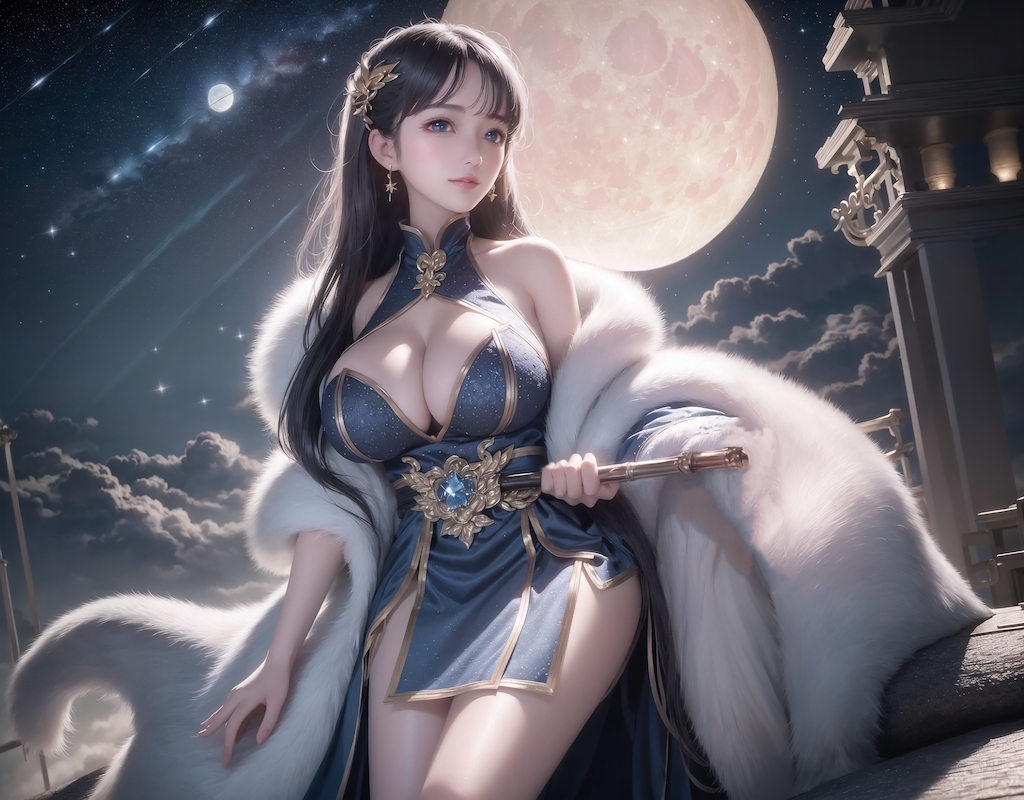
- Leverage Tiled Diffusion to upscale & redraw large images
-
Params:
- denoise=0.4, steps=20, Sampler=Euler a, Upscaler=RealESRGAN++, Negative Prompts=EasyNegative,
- Ckpt: Gf-style2 (4GB version), CFG Scale = 14, Clip Skip = 2
- method = MultiDiffusion, tile batch size = 8, tile size height = 96, tile size width = 96, overlap = 32
- Prompt = masterpiece, best quality, highres, extremely detailed 8k wallpaper, very clear, Neg prompt = EasyNegative.
-
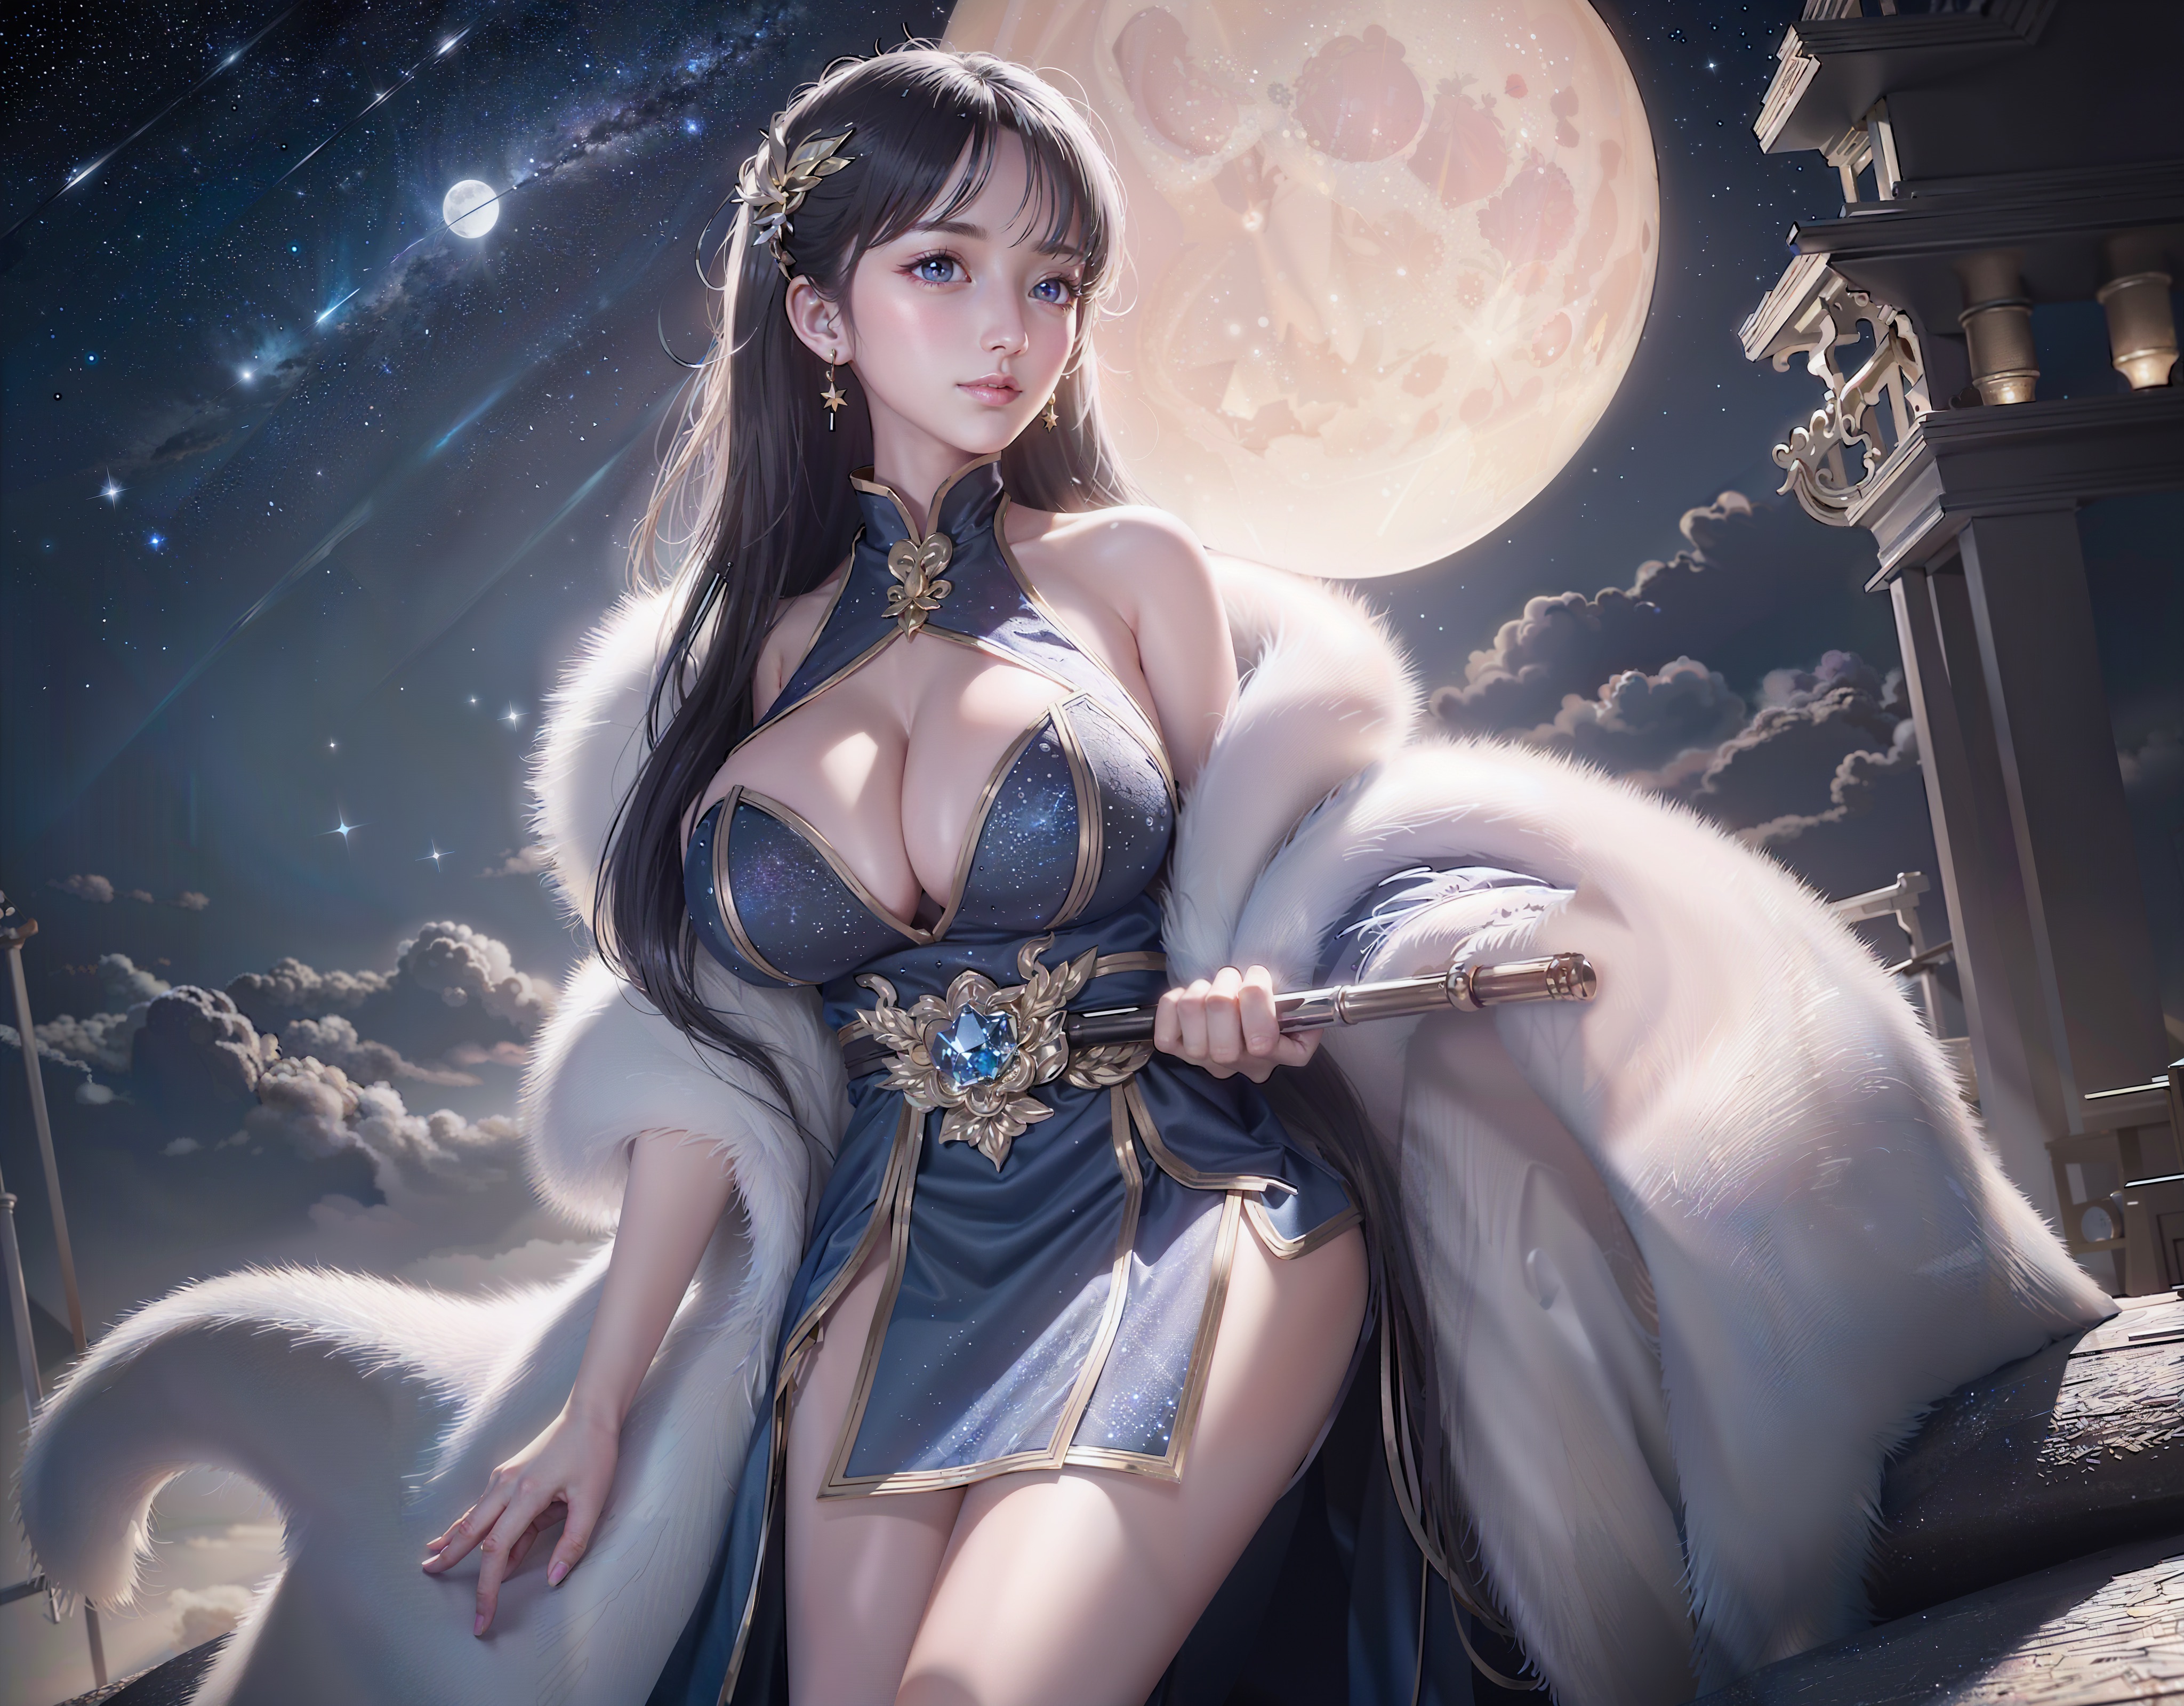
Before upscaling:

-
After 4x upscale, No cherry-picking. 1min12s on NVIDIA Tesla V100. (If 2x, it completes in 10s)

- Please use simple positive prompts at the top of the page, as they will be applied to each tile.
- If you want to add objects to a specific position, use regional prompt control and enable draw full canvas background

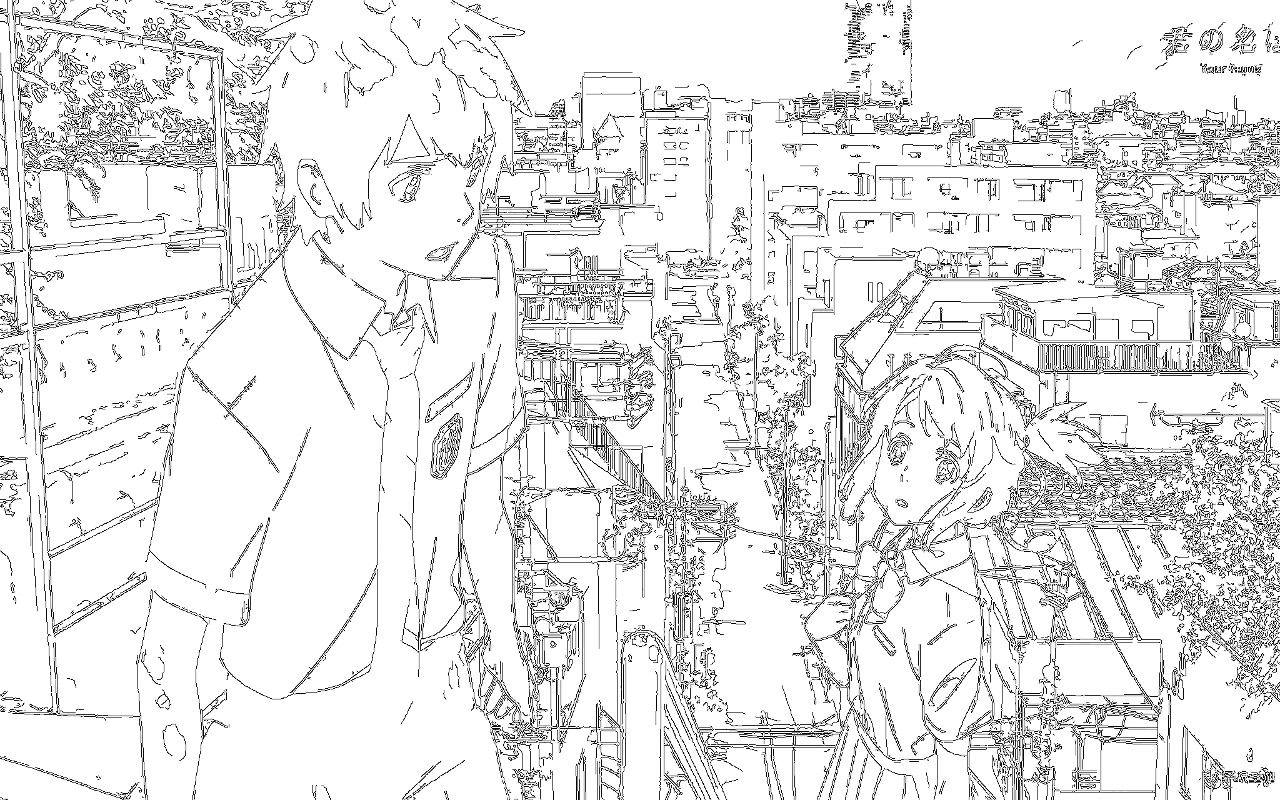
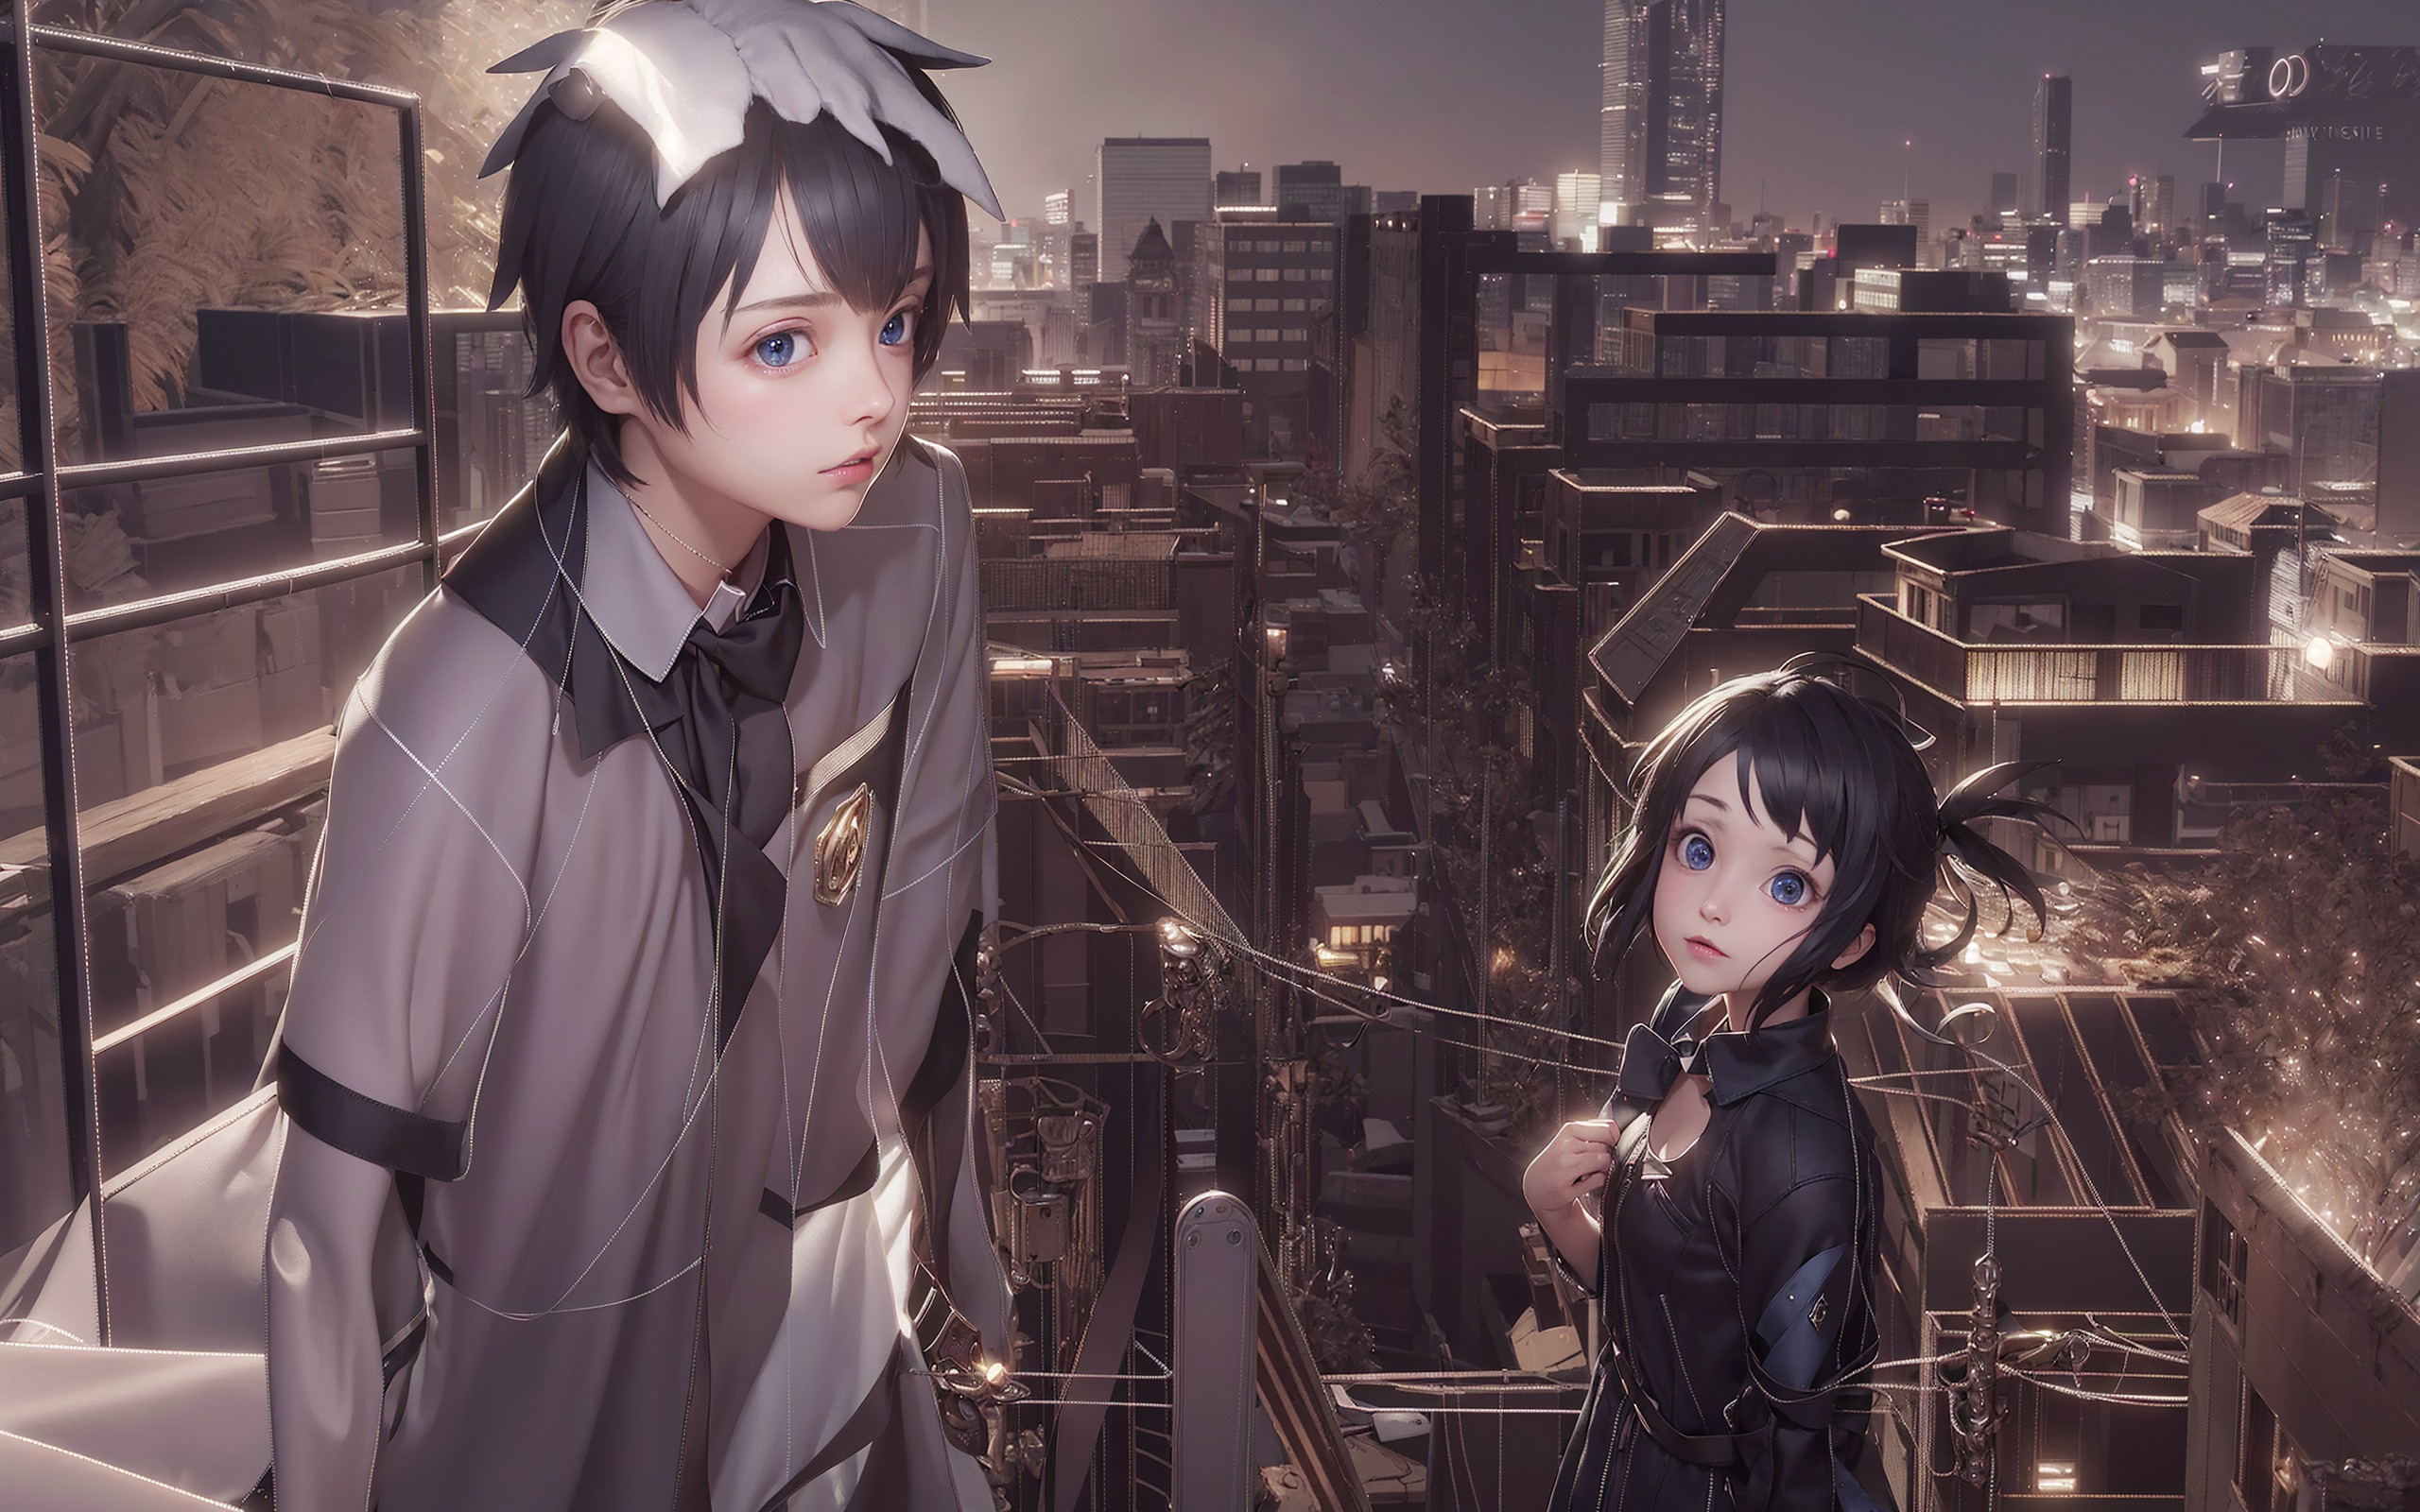
- 22020 x 1080 ultra-wide image conversion
- Masterpiece, best quality, highres, ultra-detailed 8k unity wallpaper, bird's-eye view, trees, ancient architectures, stones, farms, crowd, pedestrians
- Before: click for the raw image

- After: click for the raw image


- ControlNet canny edge


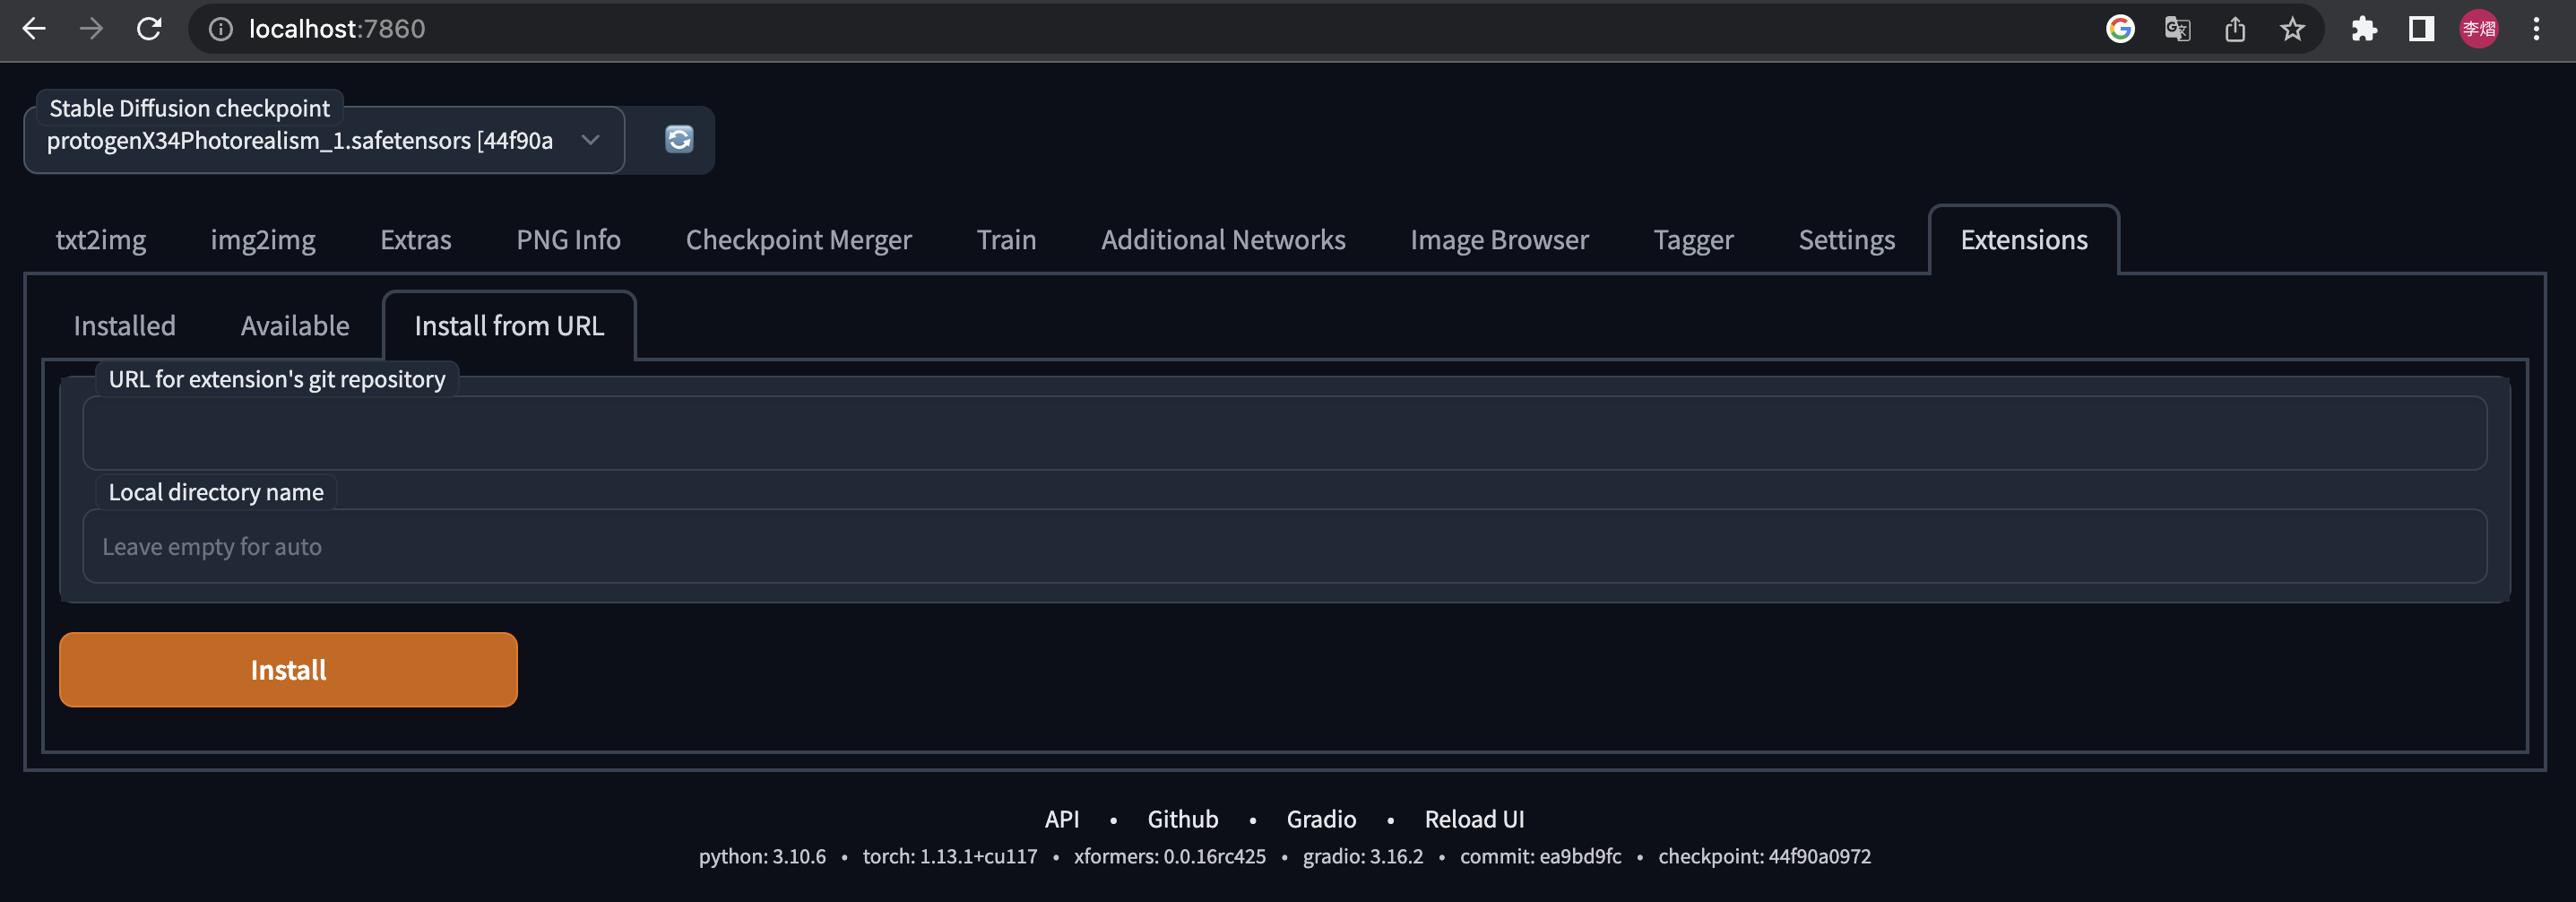
- Open Automatic1111 WebUI -> Click Tab "Extensions" -> Click Tab "Available" -> Find "[MultiDiffusion with Tiled VAE]" -> Click "Install"
- Open Automatic1111 WebUI -> Click Tab "Extensions" -> Click Tab "Install from URL" -> type in https://github.com/pkuliyi2015/multidiffusion-upscaler-for-automatic1111.git -> Click "Install"

- The script will recommend settings for you when first use.
- So normally, you don't need to change the default params.
- You only need to change params in the following cases
- When you see CUDA out of memory error before generation, or after generation, please low down the tile size.
- If you use too small a tile size and the picture becomes gray and unclear, please enable Encoder Color Fix.
-
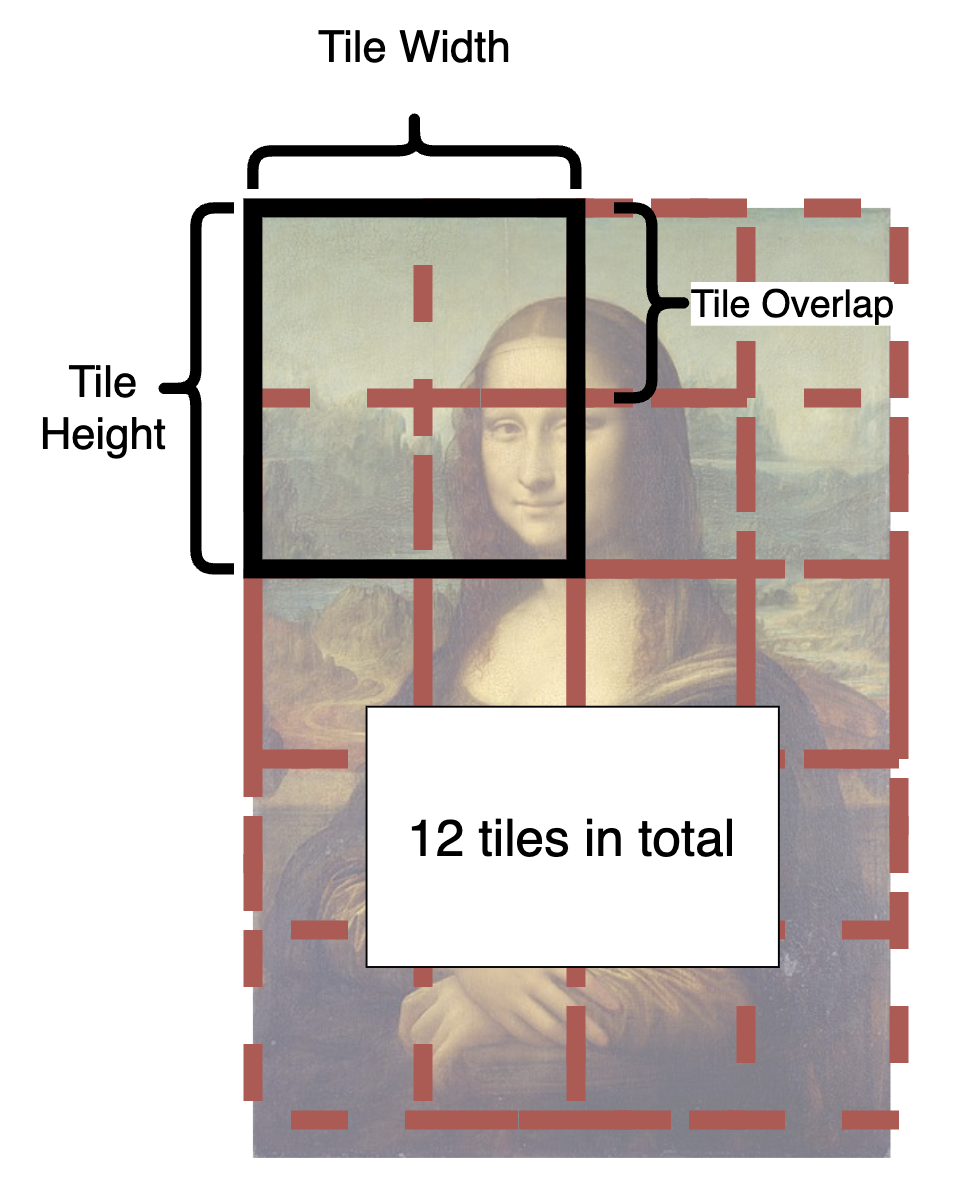
Main Part / Image tiling options
The following part controls the tiling of the image:

Here is an illustration:

-
From the illustration, you can see how is an image split into tiles.
- In each step, each tile in the latent space will be sent to Stable Diffusion UNet.
- The tiles are split and fused over and over again until all steps are completed.
-
What is a good tile size?
- A larger tile size will increase the speed because it produces fewer tiles.
- However, the optimal size depends on your checkpoint. The basic SD1.4 is only good at drawing 512 * 512 images (SD2.1 will be 768 * 768). And most checkpoints cannot generate good pictures larger than 1280 * 1280. So in latent space let's divide this by 8, and you will get 64 - 160.
- Hence, you should pick a value between 64 - 160.
- Personally, I recommend 96 or 128 for fast speed.
-
What is a good overlap?
- The overlap reduces seams in fusion. Obviously, a larger overlap means fewer seams, but will significantly reduce the speed as it brings much more tiles to redraw.
- Compared to MultiDiffusion, Mixture of Diffusers requires less overlap because it uses Gaussian smoothing (and therefore can be faster).
- Personally, I recommend 32 or 48 for MultiDiffusion, 16 or 32 for Mixture of Diffusers
-
Upscaler will appear in i2i. You can select one to upscale your image in advance.

- Normally, all tiles share the same main prompt.
- So you can't draw meaningful objects with the main prompt, it will draw your object everywhere and ruin your image.
- To handle this, we provide the powerful region prompt control tool.


- First, enable the region prompt control.
- NOTE: When you enable the control, the default tiling behavior will be disabled.
- If your custom regions can't fill the whole canvas, it will produce brown color (MultiDiffusion) or noises (Mixture of Diffusers) in those uncovered areas.
- We recommend you use your own regions to fill the canvas, as it can be much faster when generation.
- If you are lazy to draw, you can also enable the Draw full canvas background. However, this will be much slower when generation.
- Upload an image or click the button to create an empty image as a reference.
- Click the enable in Region 1, you will see a red rectangle appears in the image.
- Click and drag the region with your mouse to move and resize them.
- Select region type. If you want to draw objects, select Foreground. Otherwise select Background.
- Feather will appear if you select foreground.
- The larger value will give you more smooth edges.
- Type in your prompt and negative prompt for the region.
- Note: your prompt will be appended to the prompt at the top of the page.
- You can leverage this to save your words, i.e., write common things like "masterpiece, best quality, highres..." and use embedding like EasyNegative at the top of the page.
- You can also use Textual Inversion and LoRA in the prompt
- Recommend Parameters for Efficient Upscaling.
- Sampler = Euler a, steps = 20, denoise = 0.35, method = Mixture of Diffusers, Latent tile height & width = 128, overlap = 16, tile batch size = 8 (reduce tile batch size if see CUDA out of memory).
- We are compatible with masked inpainting
- If you want to keep some parts, or the Tiled Diffusion gives you weird results, just mask these areas.
- The checkpoint is crucial.
- MultiDiffusion works very similar to highres.fix, so it highly relies on your checkpoint.
- A checkpoint that is good at drawing details can add amazing details to your image.
- A full checkpoint instead of a pruned one can yield much finer results.
- Don't include any concrete objects in your main prompts, otherwise, the results get ruined.
- Just use something like "highres, masterpiece, best quality, ultra-detailed 8k wallpaper, extremely clear".
- And use regional prompt control for concrete objects if you like.
- You don't need too large tile size, large overlap and many denoising steps, or it can be very slow.
- CFG scale can significantly affect the details.
- A large CFG scale (e.g., 14) gives you much more details.
- You can control how much you want to change the original image with denoising strength from 0.1 - 0.6.
- If your results are still not as satisfying as mine, see our discussions here.
For those who want to know how this works.
The core technique is to estimate GroupNorm params for a seamless generation.
- The image is split into tiles, which are then padded with 11/32 pixels' in the decoder/encoder.
- When Fast Mode is disabled:
- The original VAE forward is decomposed into a task queue and a task worker, which starts to process each tile.
- When GroupNorm is needed, it suspends, stores current GroupNorm mean and var, send everything to RAM, and turns to the next tile.
- After all GroupNorm means and vars are summarized, it applies group norm to tiles and continues.
- A zigzag execution order is used to reduce unnecessary data transfer.
- When Fast Mode is enabled:
- The original input is downsampled and passed to a separate task queue.
- Its group norm parameters are recorded and used by all tiles' task queues.
- Each tile is separately processed without any RAM-VRAM data transfer.
- After all tiles are processed, tiles are written to a result buffer and returned.
Encoder color fix = only estimate GroupNorm before downsampling, i.e., run in a semi-fast mode.
- The latent image is split into tiles.
- In MultiDiffusion:
- The UNet predicts the noise of each tile.
- The tiles are denoised by the original sampler for one time step.
- The tiles are added together but divided by how many times each pixel is added.
- In Mixture of Diffusers:
- The UNet predicts the noise of each tile
- All noises are fused with a gaussian weight mask.
- The denoiser denoises the whole image for one time step using fused noises.
- Repeat 2-3 until all timesteps are completed.
- Draw super large resolution (2k~8k) images in limited VRAM
- Seamless output without any post-processing
- It will be significantly slower than the usual generation.
- The gradient calculation is not compatible with this hack. It will break any backward() or torch.autograd.grad()
- Chinese README
- Saving region info into image & read back is in progress.
- Tiled noise inverse for better upscaling
If you like the project, please give me a star!
Thank you!


