
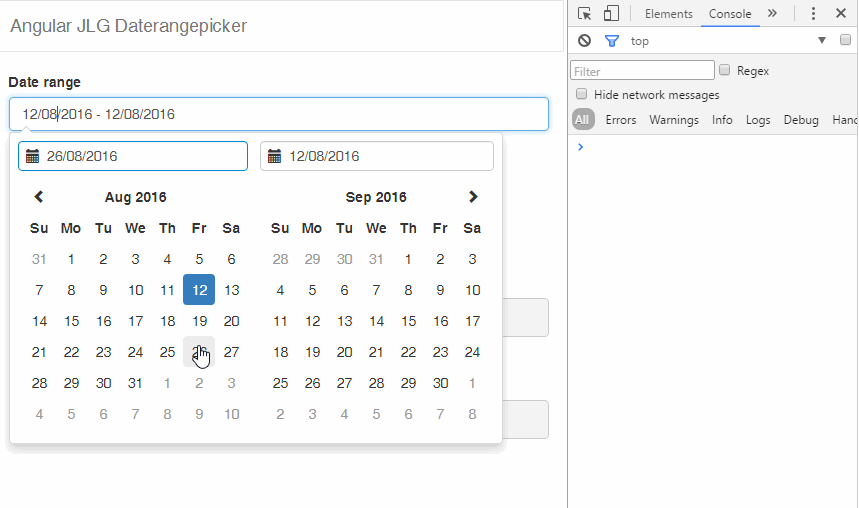
Angular directive wrapping the Dan Grossman daterangepicker jQuery plugin without loss of functionnalities.
Access to the DEMO.
The daterangepicker jQuery plugin is simply wrapped:
- "2 way binding" on the
optionsobject so that all options can be used and changed at will. - access to a reference on the jQuery plugin object.
- "2 way binding" on an object configuring the specific events of the plugin.
This angular module can be installed with bower or npm (browserify). You can also check the test examples.
###Bower
bower install angular-jlg-daterangepicker --save- Install the bootstrap-daterangepicker as indicated in this document.
- Add the javascript file in your HTML file:
path/to/bower_components/angular-jlg-daterangepicker/dist/angular-jlg-daterangepicker.js - Use the angular directive in your HTML file.
<input type="daterangepicker" class="form-control" ng-model="model.daterange" placeholder="Enter a date range"
                               export="myDaterangepicker" options="daterangeOptions"
                               on="eventObject" />
Example of index.html file:
<!DOCTYPE html>
<html ng-app="mainApp" lang="en">
	<head>

		<meta charset="utf-8">
		<meta http-equiv="X-UA-Compatible" content="IE=edge">
		<meta name="viewport" content="width=device-width, initial-scale=1.0, user-scalable=no">

		<title>Bower test</title>

		<link rel="stylesheet" href="../../bower_components/angular/angular-csp.css" />
		<link rel="stylesheet" href="../../bower_components/bootstrap/dist/css/bootstrap.css" />
		<link rel="stylesheet" href="../../bower_components/bootstrap-daterangepicker/daterangepicker.css" />

	</head>

	<body ng-cloak>
		<div class="container">
			<div class="row">
				<div class="col-md-4">
					<form name="form" ng-submit="onSubmit();">
						<div class="form-group">
							<label for="exampleInputEmail1">Date range</label>
							<input type="daterangepicker" class="form-control" ng-model="model.daterange" placeholder="Enter a date range"
								export="myDaterangepicker" options="daterangeOptions"
								on="eventObject" />
						</div>
						<button type="submit" class="btn btn-default">Submit</button>
					</form>
				</div>
			</div>
		</div>


		<script src="../../bower_components/jquery/dist/jquery.js"></script>
		<script src="../../bower_components/moment/moment.js"></script>
		<script src="../../bower_components/bootstrap/dist/js/bootstrap.js"></script>
		<script src="../../bower_components/angular/angular.js"></script>
		<script src="../../bower_components/bootstrap-daterangepicker/daterangepicker.js"></script>

		<script src="../../bower_components/angular-jlg-daterangepicker/dist/angular-jlg-daterangepicker.js"></script>
		<script src="app.js"></script>

	</body>
</html>
and here is an example of a app.js file:
(function() {
	'use strict';

	var app = angular.module('mainApp', ['jlg-daterangepicker']);

	app.run(['$injector', function($injector) {
		var $rootScope = $injector.get('$rootScope');

		$rootScope.daterangeOptions = {
			locale: {
				format: 'DD/MM/YYYY'
			},
			autoApply: true
		};

		$rootScope.eventObject = {};


		$rootScope.eventObject['show.daterangepicker'] = [function() {
			console.log('event show.daterangepicker', arguments);
		}];

		$rootScope.model = {};

		$rootScope.onSubmit = function() {
			console.log('$rootScope.model', $rootScope.model);
			window.alert('form submitted. Look at the console.');
		};

	}]);
})();
###npm and browserify
npm install angular-jlg-daterangepicker --saveThe app.js file to browserify should looks like this:
'use strict';
require('./style.css');
window.$ = window.jQuery = require('jquery');
window.moment = require('moment');
window.angular = require('angular');

var app = angular.module('mainApp', [require('angular-jlg-daterangepicker')]);

app.run(['$injector', function($injector) {
	var $rootScope = $injector.get('$rootScope');

	$rootScope.daterangeOptions = {
		locale: {
			format: 'DD/MM/YYYY'
		},
		autoApply: true
	};

	$rootScope.eventObject = {};


	$rootScope.eventObject['show.daterangepicker'] = [function() {
		console.log('event show.daterangepicker', arguments);
	}];

	$rootScope.model = {};

	$rootScope.onSubmit = function() {
		console.log('$rootScope.model', $rootScope.model);
		window.alert('form submitted. Look at the console.');
	};

}]);The directive used to wrap the jQuery plugin $('selector').daterangepicker(); is the following:
<input type="daterangepicker" class="form-control" ng-model="model.daterange" placeholder="Enter a date range"
								export="myDaterangepicker" options="daterangeOptions"
								on="eventObject" />
where:
<input type="daterangepicker" />[mandatory] is the directive itself.class="form-control"[mandatory] is for Bootstrap designng-model="model.daterange"[mandatory] is for linking the model as usualplaceholder="Enter a date range"(optional) is to have a traditional placeholder.export="myDaterangepicker"(optional) is to link the jQuery plugin object to the angular model.options="daterangeOptions"(optional) is to link the jQuery plugin options object to the angular model. You can put all the options documented in the Dan Grossman daterangepicker project.on="eventObject"(optional) is to specify all custom event the jQuery plugin can accept. Once more, you can put all the event documented in the [Dan Grossman daterangepicker project].
Note that both the options and the eventObject are watched. So the directive can be dynamically configured. Requirements
Same requirements as Dan Grossman bootstrap-daterangepicker project:
- jquery
- angular
- bootstrap
- moment
- bootstrap-daterangepicker (>=2.1.24)
- Because I needed an angular directive to this daterangepicker.
- Because the other angular modules on this daterangepicker did not have the
autoApplyoptions, and a lot of other options were missing. The options were not dynamically synchronized with the widget. - Because I did not want to relearn a new syntax. I wanted to reuse the existing one in the jQuery plugin.
What this modules bring ?
- A wrapper on the daterangepicker jQuery plugin.
- The options object is linked from the current scope to the directive with "2 way binding",
- The events can also be specified with a "2 way binding" scope object.
In fact, I think most of the jQuery plugin could be wrapped in angular with the adopted design here.
Intuitive ! Simple ! Reliable !
Jean-Louis GUENEGO @ 2016
ISC
Easy... just star the Github repo! No money needed. Just vanity satisfied... ;)


