jdolinay / avr_debug Goto Github PK
View Code? Open in Web Editor NEWSource level debugger for Arduino - GDB stub for Atmega328 microcontroller used in Arduino Uno.
License: GNU Lesser General Public License v3.0
Source level debugger for Arduino - GDB stub for Atmega328 microcontroller used in Arduino Uno.
License: GNU Lesser General Public License v3.0
Hey,
I've attempted to port the stub to the ATmega32A.
By which I mean I've changed a couple of register values.
It's not working however, this is GDB's output
wyn@hyron:~/dbg$ sudo avr-gdb main.elf -tui
Reading symbols from main.elf...done.
(gdb) target remote /dev/ttyS3
Remote debugging using /dev/ttyS3
Ignoring packet error, continuing...
warning: unrecognized item "timeout" in "qSupported" response
Ignoring packet error, continuing...
Remote replied unexpectedly to 'vMustReplyEmpty': timeout
(gdb)
As soon as the target remote /dev/ttyS3 line has been executed the chip's execution halts.
Do any of these error messages ring a bell for you?
It might be something really obvious as I'm definitely still a beginner when it comes to MCU's.
I'm using a bare Atmega32A connected though a FTDI FT232RL
VCC to VCC
GND to GND
RX to (TXD) PD1
TX to (RDX) PD0
DTR & CTS unconnected
Related to #37
debug_message(), for some reason, was implemented such that it only sends the first 47 chars of msg.
It seems this was done so it could utilize gdb_ctx->buff as a temporary buffer Which is uint8_t buff[AVR8_MAX_BUFF+1];.
However, I've proven that the underlying API that sends the text:
static void putDebugChar(uint8_t c); /* Write a single character to serial port */...has no such limitation.
See gdb_send_buff():
__attribute__((optimize("-Os")))
static void gdb_send_buff(const uint8_t *buff, uint8_t sz)
{
	uint8_t sum = 0;

	putDebugChar('$');
	while ( sz-- > 0)
	{
		putDebugChar(*buff);
		sum += *buff;
		buff++;
	}

	putDebugChar('#');
	putDebugChar(nib2hex((sum >> 4) & 0xf));
	putDebugChar(nib2hex(sum & 0xf));
}
There's no reason debug_message() couldn't be re-implemented using the same technique.
Note also, that it's unnecessary that debug_mesasge() appends an \n. GDB automatically puts every $0xxx# command on a separate line.
anything i've configured my com ports for arduino nano to be anything bigger than 9
(i.e 10, 17 etc..) i get (if for example i'm using COM 10 )
when i try to debug
.pioinit:13: Error in sourced command file:
COM10: No such file or directory.
[env:nanoatmega328new]
platform = atmelavr
board = nanoatmega328new
framework = arduino
monitor_port = COM10
upload_port = COM10
debug_port = COM10
debug_tool = avr-stub
monitor_speed = 115200
lib_deps =
marcoschwartz/LiquidCrystal_I2C@^1.1.4
jdolinay/avr-debugger@^1.5
It's an excellent project. Following the instructions in the "doc/avr_debug.pdf", I debugging arduino uno successfully in vscode. But everytime the "debug arrow" returns to the loop() function from the main() function, an unexpected message appears, it says "Exception has occurred. Unknow stopping event".
(https://user-images.githubusercontent.com/29191854/72438764-7e562c00-37e0-11ea-80c9-554bab11c610.jpg)
Hi Jdolinay, for a while I'm using your avr_debug tool and it's really great. But now I tested it with i2c communication and sometimes my breakpoints are ignored. Even the coded breakpoint function doesn't work sometimes. Do you have any idea for a workaround?
I'm using Arduino Mega 2560.
I think this project is great! I would so much need this for my mega2560 board.
I was thinking that it would be great if it had a porting layer so that support for other boards could be added easily. Do you think that is possible?
Porting layer or not, how would go about porting the stub to the mega2560?
Cheers.
The avr-gbd from Arduino package could be instead of the one from Atmel toolchain. If all the toolchain including make can be used from Arduino, Atmel Studio does not need to be installed. Avr-gdb was returned to Arduino 1.6.5 (its version 7.8); it was not present in previous versions since about1.5.9.
Debugging with this avr-gdb works OK; verified.
Has anyone succeded to run avr_debug on Mac?
I'm using VS Code for Mac with Arduino extension and now I want to be able to debug my program but there are a lot of obstacles in configuring the launch.json file.
avr-gdb. I searched for it in the Arduino IDE 2.0 directory but such a file doesn't exist. So I downloaded AVR 8-Bit Toolchain (OSX) from microchip website. When I run it constantly throws that error.
My next problem is with miDebuggerServerAddress. What value to set there? My Arduino runs on /dev/tty.usbmodem142401 serial port. When I set that value the vs code enters an endless loop.
Also I can't turn off compiler optimizations because such path hardware/arduino/avr in Arduino IDE 2.0 directory on Mac doesn't exist
So my biggest problem is with paths especially because documentation is strictly for Windows and it's very hard and time-consuming to search workarounds for Mac. So if anyone has succeeded in running the avr_debug on Mac, please tell me:
This is how my Arduino.ino file and my launch.json file looks like code snippet
Thanks for your time.
Hi, Jan,
There is a problem when using the software serial in debugging:
I have a little usb-serial board (base on CH340) in hand, there is my connect:
arduino uno~~~~~~CH340 board
D2 ------------------- TXD
D3 ------------------- RXD
GND ------------------- GND
https://create.arduino.cc/projecthub/visualmicro/arduino-uno-debugging-f4d470
Then I connect both of them's usb ports to my computer using two usb cables, and find that the serial port of arduino is COM9, the serial port of CH340 board is COM7.
The code (a text file named "test code.txt" in the attachment):
test code.txt
Step1: Select COM9 in vscode, then upload the code above to arduino.
Step2: Click debug button, then the vscode enter the debugging session.
Step3: Close COM9, select and open COM7 in vscode, and select the baud rate 9600.
Step4: Click the step over button, then the software serial port output appears (you can see the 0 output by "USE_SERIAL.println(fieldIndex);" in the OUTPUT tab). So the output of COM7 is OK in debugging.
My problem is: Is there anyway to send data to COM7 in debugging? I press "F1" key and select "Arduino: Send Text to Serial Port", and enter "12,3,1", and press the "enter" key, but it doesn't work. It seems that USE_SERIAL.available() always return 0, so the "debug arrow" can't enter the "if(USE_SERIAL.available())" statement.
Best regards.
A weird behavior, similiar to #19 is occuring. The last comments in that issue state how upgrading the AVR-GCC toolchain to 7.3.0 (from 5.4.0) using
platform_packages =
  toolchain-atmelavr@>=1.70300.0
fixes the compilation error about
undefined reference to `regs'
but, as soon I do that in the very minimal project as outlined in here with my Uno, debugging doesn't work anymore. There's an infinite loading bar going on and no breakpoint is being hit. Using the breakpoint() function also doesn't work.
platformio.ini
[env:uno]
platform = atmelavr
board = uno
framework = arduino
debug_tool = avr-stub
debug_port = \\.\COM14
lib_deps =
    jdolinay/avr-debugger @ ~1.1
platform_packages =
  toolchain-atmelavr@>=1.70300.0
with src\main.cpp
#include "Arduino.h"
#include "avr8-stub.h"

void setup()
{
  // initialize GDB stub
  debug_init();
  pinMode(LED_BUILTIN, OUTPUT);
}

void loop()
{
  digitalWrite(LED_BUILTIN, HIGH);
  delay(1000);
  digitalWrite(LED_BUILTIN, LOW);
  delay(1000);
}
doesn't work, infinite loading (blue bar chasing from left to right)

Removing
platform_packages =
  toolchain-atmelavr@>=1.70300.0
makes it work.

So there's something magical going on with compiler bugs or linking errors or the assembly code or whatever so that this doesn't work on a new toolchain.
Since hopefully PlatformIO will update the the 7.4.0 toolchain soon, it should be found out why this doesn't work on 7.4.0.
see pic

When the any of the serial methods from Arduino is used the error in the title prevents me from
building. Because of that I can't use any of the Serial methods.
The following will pass:
#include <Arduino.h>
#include "avr8-stub.h"

void setup()
{
  debug_init();

}

void loop()
{
  int a = 5;
}
But any of the following will not:
#include <Arduino.h>
#include "avr8-stub.h"

void setup()
{
  debug_init();

Serial.begin(9600);
Serial.print("Because of that is the coolect2.exe: error: Id returned 1 exit status");
}

void loop()
{
  int a = 5;
}
or
#include <Arduino.h>
#include "avr8-stub.h"

void setup()
{
  debug_init();

Serial.begin(9600);
}

void loop()
{
  int a = 5;
  Serial.println("Because of that is the coolect2.exe: error: Id returned 1 exit status");

}
I've been working with Visual Micro about this issue for a while. They suggested I check with you. When I upload my large project (even a simple project) the debugger starts but does not stop at breakpoint. It works with small, simple project.
I've removed the Debug and .vs folders to reduce file size.
MaplePump.zip

Thanks
Abbott
I've decided to continue to discuss this functionality on a new issue.
Basically we can make the debug_init and breakpoint functions compilable only if a certain definition exists, let's call it DEBUG.
What do we gain?
Right now the development flow gets a bit slower when you use avr_debugger because to change from debug to release and the other way around you need to add or comment the related functions.
By making those functions conditional compiled we can seamlessly change from both modes and greatly improve the user experience.
Besides that, most of the development environments already have their own set of definitions that signals the program if it was compiled for release or debug, like PlatformIO which always adds the PLATFORMIO definition for both release and debug and the PLATFORMIO_BUILD_DEBUG which is only added for debug mode, so we could use those to determine the mode used at compiler time. Other dev environments probably would have something similar and at worst the user could define it by themselves.
if i understand correctly, debug_init() must always be called first before any objects.
but in the event i have any other objects defined globally, that may never happen as those objects maybe call other objects upon init.

Hi Jan,
it seems that platformIO is the best IDE for integrating avr-stub (I just failed do to it in Sloeber/Eclipse). However, there are a number of funny things going on (you are not responsible for). Let me just enumerate the things I noticed:
I guess, you are not the right person to report this to, but you my know, where I could post it.
Best,
Bernhard
#include <app_api.h>
#include <avr8-stub.h>
debug_init ();
verify:
In function setup': vsc/hisketch.ino:10: undefined reference to debug_init'
I did an adaptation of the build system to make it compile by using the PlatformIO environment.
https://github.com/msquirogac/avr-debugger-bootloader
This way it becomes easier to customise, build and program the bootloader section to any compatible mcu.
Hi admin, I'm new in using debug with arduino code. Because of my immaturity, allow me to ask about my problem:
I want to debug with Pio on VS code platform and I followed your instructions and fully loaded the latest library but I keep getting errors.
Let me know if I missed something or help me to fix it. Thanks
This is my code :
#include <Arduino.h> #ifdef DEBUG_AVR #include <avr8-stub.h> #include <app_api.h> #endif #include <RFID.h> #include <SPI.h> #include <LiquidCrystal_I2C.h> #include <Wire.h> RFID rfid (10, 9); LiquidCrystal_I2C lcd(0x27, 20, 4); int nutbam1 = 6; int nutbam2 = 5; int nutbam3 = 4; int biendemactive = 0; int biendemapp = 0; int biendemmenu = 0; int biendemcontrol = 0; int biendemcontent = 0; int biendemexit = 0; int biendemquatrinh = 0; int serNum0; int serNum1; int serNum2; int serNum3; int serNum4; //ON-OFF void on() { lcd.clear(); lcd.backlight(); lcd.setCursor(6, 0); lcd.print("XIN CHAO"); lcd.setCursor(3, 2); lcd.print(" CARD"); lcd.setCursor(12, 2); lcd.print(" MENU"); } // MÀN HÌNH CHÍNH void mainscreen() { if (biendemapp % 2 == 1) { lcd.clear(); lcd.setCursor(6, 0); lcd.print("XIN CHAO"); lcd.setCursor(3, 2); lcd.print(">CARD"); lcd.setCursor(12, 2); lcd.print(" MENU"); } if (biendemapp % 2 == 0) { lcd.clear(); lcd.setCursor(6, 0); lcd.print("XIN CHAO"); lcd.setCursor(3, 2); lcd.print(" CARD"); lcd.setCursor(12, 2); lcd.print(">MENU"); } } // MÀN HÌNH ỨNG DỤNG void applicant() { if (biendemapp % 2 == 1) { lcd.clear(); lcd.print("THE CUA BAN"); } if (biendemapp % 2 == 0) { lcd.clear(); lcd.print(">MENU 1"); lcd.setCursor(0, 1); lcd.print(" MENU 2"); lcd.setCursor(0, 2); lcd.print(" MENU 3"); lcd.setCursor(0, 3); lcd.print(" BACK"); } } // MÀN HÌNH ĐIỀU KHIỂN MENU void controlmenu() { if (biendemcontrol % 4 == 0) { lcd.clear(); lcd.print(">MENU 1"); lcd.setCursor(0, 1); lcd.print(" MENU 2"); lcd.setCursor(0, 2); lcd.print(" MENU 3"); lcd.setCursor(0, 3); lcd.print(" BACK"); } if (biendemcontrol % 4 == 1) { lcd.clear(); lcd.print(" MENU 1"); lcd.setCursor(0, 1); lcd.print(">MENU 2"); lcd.setCursor(0, 2); lcd.print(" MENU 3"); lcd.setCursor(0, 3); lcd.print(" BACK"); } if (biendemcontrol % 4 == 2) { lcd.clear(); lcd.print(" MENU 1"); lcd.setCursor(0, 1); lcd.print(" MENU 2"); lcd.setCursor(0, 2); lcd.print(">MENU 3"); lcd.setCursor(0, 3); lcd.print(" BACK"); } if (biendemcontrol % 4 == 3) { lcd.clear(); lcd.print(" MENU 1"); lcd.setCursor(0, 1); lcd.print(" MENU 2"); lcd.setCursor(0, 2); lcd.print(" MENU 3"); lcd.setCursor(0, 3); lcd.print(">BACK"); } } // MÀN HÌNH NỘI DUNG void content() { if (biendemcontrol % 4 == 0) { lcd.clear(); lcd.setCursor(3, 1); lcd.print("NOI DUNG MENU 1"); lcd.setCursor(0, 3); lcd.print(">BACK"); } if (biendemcontrol % 4 == 1) { lcd.clear(); lcd.setCursor(3, 1); lcd.print("NOI DUNG MENU 2"); lcd.setCursor(0, 3); lcd.print(">BACK"); } if (biendemcontrol % 4 == 2) { lcd.clear(); lcd.setCursor(3, 1); lcd.print("NOI DUNG MENU 3"); lcd.setCursor(0, 3); lcd.print(">BACK"); } if (biendemcontrol % 4 == 3) { lcd.clear(); mainscreen(); biendemcontrol=0; biendemmenu=0; biendemquatrinh=0; } } //THOÁT NỘI DUNG void exitcontent() { lcd.clear(); controlmenu(); biendemquatrinh=1; biendemmenu=1; } void setup() { debug_init(); Serial.begin(9600); lcd.begin(); lcd.noBacklight(); SPI.begin(); pinMode(nutbam1, INPUT_PULLUP); pinMode(nutbam2, INPUT_PULLUP); pinMode(nutbam3, INPUT_PULLUP); } void loop() { int(trangthai1) = digitalRead(nutbam1); int(trangthai2) = digitalRead(nutbam2); int(trangthai3) = digitalRead(nutbam3); Serial.println(); Serial.print(biendemquatrinh); Serial.print(biendemapp); Serial.print(biendemmenu); Serial.print(biendemcontrol); Serial.print(biendemcontent); //TẮT MỞ MENU if (trangthai1 == 0) { biendemactive++; if (biendemactive % 2 == 1) { on(); } if (biendemactive % 2 == 0) { lcd.clear(); lcd.noBacklight(); if (biendemapp != 0) biendemapp=0; if (biendemmenu != 0) biendemmenu=0; if (biendemcontrol != 0) biendemcontrol=0; if (biendemcontent != 0) biendemcontent=0; if (biendemquatrinh != 0) biendemquatrinh=0; } delay(300); } //SETUP QUÁ TRÌNH if (biendemactive % 2 == 1) { if (biendemapp > 0) { if (trangthai3 == 0) { biendemquatrinh++; delay(300); } } } //MÀN HÌNH CHÍNH if (biendemactive % 2 == 1) { if (trangthai2 == 0) { if (biendemquatrinh == 0) { biendemapp++; mainscreen(); } delay(200); } } //CHỌN ỨNG DỤNG if (biendemactive % 2 == 1) { if (biendemapp > 0) { if (trangthai3 == 0) { if (biendemquatrinh == 1) { biendemcontent=0; biendemmenu++; if (biendemmenu >= 1) { applicant(); } } delay(200); } } } //ĐIỀU KHIỂN MENU if (biendemactive % 2 == 1) { if (biendemmenu > 0) { if (biendemquatrinh == 1) { if (trangthai2 == 0) { biendemcontrol++; controlmenu(); delay(200); } } } } //CHỌN NỘI DUNG if (biendemactive % 2 == 1) { if (trangthai3 == 0) { if (biendemquatrinh >= 2) { biendemcontent++; if (biendemcontent > 0) { if (biendemcontent %2 == 1) { content(); } if (biendemcontent %2 == 0) { exitcontent(); } } } delay(200); } } }
And this is my error 👍
`Executing task: C:\Users\LENOVO.platformio\penv\Scripts\platformio.exe debug
Removing unused dependencies...
Error: Traceback (most recent call last):
File "C:\Users\LENOVO.platformio\penv\lib\site-packages\platformio_main_.py", line 102, in main
cli() # pylint: disable=no-value-for-parameter
File "C:\Users\LENOVO.platformio\penv\lib\site-packages\click\core.py", line 1130, in call
return self.main(*args, **kwargs)
File "C:\Users\LENOVO.platformio\penv\lib\site-packages\click\core.py", line 1055, in main
rv = self.invoke(ctx)
File "C:\Users\LENOVO.platformio\penv\lib\site-packages\platformio\cli.py", line 70, in invoke
return super().invoke(ctx)
File "C:\Users\LENOVO.platformio\penv\lib\site-packages\click\core.py", line 1657, in invoke
return _process_result(sub_ctx.command.invoke(sub_ctx))
File "C:\Users\LENOVO.platformio\penv\lib\site-packages\click\core.py", line 1404, in invoke
return ctx.invoke(self.callback, **ctx.params)
File "C:\Users\LENOVO.platformio\penv\lib\site-packages\click\core.py", line 760, in invoke
return __callback(*args, **kwargs)
File "C:\Users\LENOVO.platformio\penv\lib\site-packages\click\decorators.py", line 26, in new_func
return f(get_current_context(), *args, **kwargs)
File "C:\Users\LENOVO.platformio\penv\lib\site-packages\platformio\debug\cli.py", line 85, in cli
return helpers.predebug_project(
File "C:\Users\LENOVO.platformio\penv\lib\site-packages\platformio\debug\helpers.py", line 102, in predebug_project
ctx.invoke(
File "C:\Users\LENOVO.platformio\penv\lib\site-packages\click\core.py", line 760, in invoke
return __callback(*args, **kwargs)
File "C:\Users\LENOVO.platformio\penv\lib\site-packages\click\decorators.py", line 26, in new_func
return f(get_current_context(), *args, **kwargs)
File "C:\Users\LENOVO.platformio\penv\lib\site-packages\platformio\run\cli.py", line 145, in cli
process_env(
File "C:\Users\LENOVO.platformio\penv\lib\site-packages\platformio\run\cli.py", line 198, in process_env
result["succeeded"] = EnvironmentProcessor(
File "C:\Users\LENOVO.platformio\penv\lib\site-packages\platformio\run\processor.py", line 81, in process
install_project_env_dependencies(
File "C:\Users\LENOVO.platformio\penv\lib\site-packages\platformio\package\commands\install.py", line 132, in install_project_env_dependencies
_install_project_env_libraries(project_env, options),
File "C:\Users\LENOVO.platformio\penv\lib\site-packages\platformio\package\commands\install.py", line 204, in _install_project_env_libraries
_uninstall_project_unused_libdeps(project_env, options)
File "C:\Users\LENOVO.platformio\penv\lib\site-packages\platformio\package\commands\install.py", line 280, in _uninstall_project_unused_libdeps
lm.uninstall(spec)
File "C:\Users\LENOVO.platformio\penv\lib\site-packages\platformio\package\manager_uninstall.py", line 29, in uninstall
return self._uninstall(spec, skip_dependencies)
File "C:\Users\LENOVO.platformio\penv\lib\site-packages\platformio\package\manager_uninstall.py", line 34, in _uninstall
pkg = self.get_package(spec)
File "C:\Users\LENOVO.platformio\penv\lib\site-packages\platformio\package\manager\base.py", line 263, in get_package
spec = self.ensure_spec(spec)
File "C:\Users\LENOVO.platformio\penv\lib\site-packages\platformio\package\manager\base.py", line 133, in ensure_spec
return spec if isinstance(spec, PackageSpec) else PackageSpec(spec)
File "C:\Users\LENOVO.platformio\penv\lib\site-packages\platformio\package\meta.py", line 183, in init
self._parse(self.raw)
File "C:\Users\LENOVO.platformio\penv\lib\site-packages\platformio\package\meta.py", line 290, in _parse
raw = parser(raw)
File "C:\Users\LENOVO.platformio\penv\lib\site-packages\platformio\package\meta.py", line 315, in _parse_requirements
self.requirements = tokens[1].strip()
File "C:\Users\LENOVO.platformio\penv\lib\site-packages\platformio\package\meta.py", line 230, in requirements
else semantic_version.SimpleSpec(str(value))
File "C:\Users\LENOVO.platformio\penv\lib\site-packages\semantic_version\base.py", line 647, in init
self.clause = self._parse_to_clause(expression)
File "C:\Users\LENOVO.platformio\penv\lib\site-packages\semantic_version\base.py", line 1043, in _parse_to_clause
return cls.Parser.parse(expression)
File "C:\Users\LENOVO.platformio\penv\lib\site-packages\semantic_version\base.py", line 1063, in parse
raise ValueError("Invalid simple block %r" % block)
ValueError: Invalid simple block '`'
============================================================
An unexpected error occurred. Further steps:
Verify that you have the latest version of PlatformIO using
pip install -U platformio command
Try to find answer in FAQ Troubleshooting section
https://docs.platformio.org/page/faq/index.html
Report this problem to the developers
https://github.com/platformio/platformio-core/issues
============================================================


`
hi, i have this code
if i place a break point on the vsnprintf and try to inspect the buffer contents the debugger would hang
unless i place a const keyword on the size variable, why?
`#include <Arduino.h>
#include <Wire.h>
#include "IDisplayWrapper.h"
#include "DisplayWrapper.h"
#ifdef DEBUG_AVR
#include <avr8-stub.h>
#include <app_api.h>
#endif
#include <Utils.h>
void setup()
{
#ifdef DEBUG_AVR
debug_init();
#endif
Wire.begin();
}
int i = 0;
void println(const char *fmt, ...)
{
size_t size = 40;
char buffer[size] ;
va_list argptr;
va_start(argptr, fmt);
vsnprintf(buffer, sizeof(buffer), fmt, argptr);
va_end(argptr);
debug_message(buffer);

size_t sz = strlen(buffer);
char buffer_sz[sizeof(int) * 8 + 1];
itoa(sz, buffer_sz, 10);
debug_message(buffer_sz);

// display(buffer, 0, row, rtl);
}
void loop()
{
delay(1000);
const char msg[] = "שלום לך";
println("%s", msg);
}`
Good morning,
I usually work with VSCode and PlatformIO for my arduino projects.
I have use avr_debug before with VSCode, PlatformIO and Windows 10 and 11 without any problem. But it's imposible for me to make it work with my MBP with Apple Silicon.
The debugger never starts and the error I get in the debug console is:
undefineddyld[4130]: Library not loaded: /System/Library/Frameworks/Python.framework/Versions/2.7/Python
Referenced from: /Users/xxxxx/.platformio/packages/toolchain-atmelavr/bin/avr-gdb
Reason: tried: '/System/Library/Frameworks/Python.framework/Versions/2.7/Python' (no such file), '/Library/Frameworks/Python.framework/Versions/2.7/Python' (no such file)
There is not Python 2.7 for Apple silicon, and installing it with brew under Rosetta 2 don't solve the problem.
The software I'm using is:
MacOS Monterey 12.4
VSCode 1.67.1
PlatformIO Core 6.0.0 and Home 3.4.1
avr-debugger 1.5
The hardware:
MacBook Pro M1
Arduino Mega 2560
Am I the only one with this problem?
Thank you in advance.
Invalid library found in C:\Users\xxxxx\Documents\Arduino\libraries\avr_debug: no headers files (.h) found in C:\Users\xxxxx\Documents\Arduino\libraries\avr_debug
Whats wrong?
I make extensive use of ArduinoLog (https://github.com/thijse/Arduino-Log/).
It can log to any Print implemenation.
It'd be great if avr_debug included a Print implementation that called debug_message.
Thanks.
Hello, I am just new to avr_debug and I am using it in Visual Code with PlatformIO. It works fine for the first tests, but I have a question about the memory addresses. I have an Arduino UNO board attached and I want to check some String handling. The debugger shows address 0x800240 for the string, but the Atmege328 hasn´t such an address for SRAM. Where is my thinking error??
I probably just missed it but I read the documentation and did not find any reference to the debugger hardware. Does this require the ATSTK500 or ATATMEL-ICE debugger? Or does it just use the usb serial port? I’m confused due to the need for the external interrupt pin.
Thanks
On an atmega328 the optiboot.hex bootloader in avr_debug/bootloader/optiboot/Debug writes 44 as the version number in 7ffe, 7fff but avr8-stub checks for and requires >= 8 in 7fff when AVR8_BREAKPOINT_MODE == 2.
The debugging in this mode works correctly with an optiboot bootloader >= 8 major version.
I'm getting this:
Building in debug mode
Linking .pio\build\megaatmega2560\firmware.elf
HardwareSerial0.cpp.o (symbol from plugin): In function `Serial':
(.text+0x0): multiple definition of `__vector_25'
avr8-stub.c.o (symbol from plugin):(.text+0x0): first defined here
collect2.exe: error: ld returned 1 exit status
*** [.pio\build\megaatmega2560\firmware.elf] Error 1
My platform.io:
; PlatformIO Project Configuration File
;
;   Build options: build flags, source filter
;   Upload options: custom upload port, speed and extra flags
;   Library options: dependencies, extra library storages
;   Advanced options: extra scripting
;
; Please visit documentation for the other options and examples
; https://docs.platformio.org/page/projectconf.html

[paltformio]
default_envs = megaatmega2560
description = TV Slider

[common_env_data]
build_flags =
	-D __ASSERT_USE_STDERR
lib_deps_builtin =
	SPI
	Wire
lib_deps_external =
	arduino-libraries/Ethernet@^2.0.0
	marcoschwartz/[email protected]+sha.0e6b782568
	adafruit/Adafruit SleepyDog Library@^1.4.0
	andrealombardo/[email protected]
	adafruit/Adafruit_VL53L0X@^1.1.0
	adafruit/Adafruit_VL6180X@^1.2.0
	adafruit/Adafruit GFX Library@^1.10.7
	adafruit/Adafruit SSD1306@^2.4.3
	adafruit/Adafruit BusIO@^1.7.3
	bblanchon/ArduinoTrace@^1.2.0
	sparkfun/SparkFun VL53L1X 4m Laser Distance Sensor@^1.2.9
	sparkfun/SparkFun I2C Mux Arduino Library@^1.0.1
	bblanchon/ArduinoJson@^6.18.0
	thijse/ArduinoLog@^1.1.1
	jonblack/arduino-fsm @ ^2.2.0
	sparkfun/SparkFun Qwiic Relay Arduino Library@^1.2.0
	chris--a/Keypad@^3.1.1

[env:megaatmega2560]
platform = atmelavr
board = megaatmega2560
framework = arduino
monitor_speed = 57600
debug_tool = avr-stub
debug_port = SERIAL_PORT
build_flags =
	${common_env_data.build_flags}
lib_deps =
	${common_env_data.lib_deps_builtin}
	${common_env_data.lib_deps_external}
	jdolinay/avr-debugger@^1.4
In main.cpp:
// Libraries
#include <Wire.h>
#include <ArduinoLog.h>
#include <assert.h>
#include "avr8-stub.h"
//#include "app_api.h" // only needed with flash breakpoints

...

void setup(void) {
  debug_init();

...
Please help. Thanks.
Hi guys,
Greatly appreciate! The tutorial is extremely detailed and just helped me go through all the processes to make it work.
However, I think the latest Arduino IDE version which is 1.8.13 does not include the "avr-gdb.exe" in Arduino\hardware\tools\avr\bin\ folder.
Here is a link to a post related to this issue on the Arduino forum: https://forum.arduino.cc/t/missing-avr-gdb-exe-avr-core-1-8-3-included-in-ide-1-8-13/664566
The Arduino IDE did not update for almost a year and this issue remains. To solve it, just simply download the ZIP version (instead of the windows installer) of the 1.8.12 version of the Arduino IDE and copy&paste the "avr-gdb.exe" to the right place.
Then it should work fine.
Just trying to help those people who downloaded the 1.8.13 Arduino IDE.
Thank you!
millis() allways returns 0 under debug active
Hi,
Setting up my environment according to your posts in VScode on a MAC works like a charm to upload to my UNO board but debugging does not work as it cannot find "avr-dbg" program. Does it need to be installed separately ?
tx
Hi There just wanted to say amazing job with this project, it makes my life so much easier.
so I'm using an atmega2560 with serial ports to spear unfortunately due to how my PCB is it can’t operate without the main serial port. so I was wondering if there was a way to change the debugger to use one of the other Usart lines and if so what line would I need to edit
The following is about using Uno, eclipse, and the current version of avr_debug, following your 69 page instruction "Arduino Debugger" (dated Jan 18, 2018). I am on a Windows 10.
I had to revert until eclipse luna SR2 of June 2015, else, with later versions of eclipse, I could not get past page 26 of your instructions: Specifically, in the properties for the test project, "AVR ..." did not show until I used luna SR2.
My Arduino Uno shows up on COM5. Arduino 1.8.5 builds, up loads programs, and executes ok.
In the eclipse environment per your "Arduino Debugger", the example from page 37 compiles, up loads, and I can do a few "step over" before it quits, halts. Similarly, the example from page 40 compiles, up loads, and I can do a few "step over" before it too halts. The number of times I can repeat varies, a few to a dozen, maybe, but I was not able to do as many as 20.
In command line mode, I used the avr-gdb.exe from Atmel Studio 7.0 and I am able to connect with the UNO with the above example loaded. I am able to do several "n" commands, but after a number of times, I get "Remote connection closed", then the message, "The program is not being run".
What could it be? If the Gnu Gdb RSP protocol (your avr_debug in the UNO) is stable, then it must be the communications link.
Is there some way to get meaningful, verbose messages as to what is happening?
Any assistance would be appreciated, since being able to debug programs running on the Uno via gnu gdb would be quit useful to me.
Thank you.
Hello, I find that there is a method only using uart ports: https://github.com/adamgreen/mri
Could you port it for avr (arduino)?
Best regards.
Hi,
I like your debugger quite a lot and it works like a charm under platformIO. When reading the code while adapting the debugger to the ATmega1284 (see pull request), I was wondering whether another flash debugging mode would be possible. Currently you insert a "dead loop" at a breakpoint and discover that you have reached it by looking periodically using the WDT. Couldn't you also insert a "clear INTx output pin" instruction that raises a software interrupt using INTx? Since you use these software interrupts for single stepping anyway, this would not block another resource, and it would free the watchdog timer.
Best regards & thanks for your good work,
Bernhard
Hi, I try to use your debugger with my project and it's awesome!
The only problem I have is when I want to use my I2C display with the debug library. My project is in PlatformIO.
When I disable the display (by commenting out d.begin() and d.display() in main main.cpp everything works just fine, but when I enable it, it gets stuck on some waiting loop in twi.c. Here's my main.cpp and lcd.cpp.
main.cpp:
// Arduino libraries
#include <Arduino.h>

#define debug
#ifdef debug
#include <avr8-stub.h>
#include <app_api.h>
#endif

// My libraries
#include <eeprom_wrapper.h>
#include <sensors.h>
#include <pumps.h>
#include <lcd.h>

pumps p;
lcd d;

// Sensor's pins
#define WELL_MIN_PIN 2
#define WELL_MAX_PIN 3   // WELL
#define WTANK_DOUT_PIN 4 // wtank weight sensor with HX711 analog to digital converter
#define WTANK_SCK_PIN 5  // wtank weight sensor with HX711 analog to digital converter

// Pump's (relay's) pins
#define PUMP_WTANK_PIN 7
#define PUMP_GARDEN_PIN 8
#define DARLING_PIN 9

// Display pins
//#define DISPLAY_I2C_PIN1 A4
//#define DISPLAY_I2C_PIN2 A5

// Keypad pins
//#define SEL_BUTTON_PIN 6
//#define PREVIOUS_BUTTON_PIN A0
//#define NEXT_BUTTON_PIN A1
//#define UP_BUTTON_PIN A2
//#define DOWN_BUTTON_PIN A3

// Piezo and LED pins
//#define PIEZO_PIN 10      // Alarm for low water level
// #define LED_RED_PIN 11    // Water level is low
// #define LED_BLUE_PIN 12   // Water level is high enough, darling is on
// #define LED_GREEN_PIN 13  // Water level is high, garden pump is on

void setup()
{
  #ifdef debug
  debug_init();
  #endif
  //Serial.begin(9600);
  //Serial.println(WELL_MAX_PIN);
  p.begin(WELL_MAX_PIN, WELL_MIN_PIN, WTANK_DOUT_PIN, WTANK_SCK_PIN, PUMP_WTANK_PIN, PUMP_GARDEN_PIN, DARLING_PIN);
  d.begin();
}

void loop()
{
  p.pump();
  d.display();
  //delay(1000);
}
lcd.cpp:
#include "lcd.h"

// Arduino libraries
#include <Arduino.h>
#include <LiquidCrystal_I2C.h> // Library for LCD

// My libraries
#include <lang.h>
#include <sensors.h>
#include <settings.h>

settings setti;
sensors s;
lang lan;

#if defined(ARDUINO) && ARDUINO >= 100
#define printByte(args) write(args);
#else
#define printByte(args) print(args, BYTE);
#endif

// definice uživatelských znaků
// velké / malé ž
byte Z_s_hackem[8]={B01010,
                    B00100,
                    B11111,
                    B00010,
                    B00100,
                    B01000,
                    B11111};
// velké / malé š
byte S_s_hackem[8]={B01010,
                    B00100,
                    B01111,
                    B10000,
                    B01110,
                    B00001,
                    B11110};
// velké / malé č
byte C_s_hackem[8]={B01010,
                    B00100,
                    B01110,
                    B10000,
                    B10000,
                    B10000,
                    B01110};
//velké Ř
byte R_s_hackem[8]={B01010,
                    B00100,
                    B11110,
                    B10001,
                    B11110,
                    B10001,
                    B10001};
// malé á
byte a_s_carkou[8]={B00010,
                    B00100,
                    B11110,
                    B00001,
                    B01111,
                    B10001,
                    B01111};
// malé í
byte i_s_carkou[8]={B00010,
                    B00100,
                    B01100,
                    B00100,
                    B00100,
                    B00100,
                    B01110};
// malé ů
byte u_s_krouzk[8]={B00100,
                    B01010,
                    B00100,
                    B10001,
                    B10001,
                    B10011,
                    B01101};
// hodiny
byte Hodiny[8]={B00000,
                B01110,
                B10101,
                B10101,
                B10111,
                B10001,
                B01110,
                B00000}; // nahradit za é

LiquidCrystal_I2C dis(setti.DISPLAY_ADDRESS, setti.DISPLAY_COLUMNS, setti.DISPLAY_ROWS);

void lcd::begin()
{
    lan.set("cz");
    dis.init();

    dis.createChar(0, Z_s_hackem);
    dis.createChar(1, S_s_hackem);
    dis.createChar(2, C_s_hackem);
    dis.createChar(3, R_s_hackem);
    dis.createChar(4, a_s_carkou);
    dis.createChar(5, i_s_carkou);
    dis.createChar(6, u_s_krouzk);
    dis.createChar(7, Hodiny);

    dis.backlight();
    dis.setCursor(0, 0); // move cursor to   (0, 0)
    printText("Arduino");    // print message at (0, 0)
    dis.setCursor(2, 1);          // move cursor to   (2, 1)
    printText("GetStarted.com"); // print message at (2, 1)

}

void lcd::display()
{
    main_screen();
}

void lcd::printText(String input)
{
    //char32_t x = 'test';
    for (int i = 0; i < input.length(); i++)
    {
        //byte input = in[i];
        if (i+1 <= input.length())
        {
            char in = input[i];

            if (input[i] == -59  && input[i+1] == -66)
            {
                i++;
                dis.printByte(0);
            }
            else if (input[i] == -59 && input[i+1] == -95)
            {
                i++;
                dis.printByte(1);
            }
            else if (input[i] == -60 && input[i+1] == -115)
            {
                i++;
                dis.printByte(2);
            }
            else if (input[i] == -59 && input[i+1] == -103)
            {
                i++;
                dis.printByte(3);
            }
            else if (input[i] == -61 && input[i+1] == -95)
            {
                i++;
                dis.printByte(4);
            }
            else if (input[i] == -61 && input[i+1] == -83)
            {
                i++;
                dis.printByte(5);
            }
            else if (input[i] == -59 && input[i+1] == -81)
            {
                i++;
                dis.printByte(6);
            }
            //else if (input[i] == "Š" || input[i] == "š") dis.printByte(7);
            else
            {
                dis.print(input[i]);
            }
            //output[i] = input[i];
        }
    }
}

void lcd::main_screen()
{
    lan.set("cz");

    sensors::pstates res = s.get();

    dis.clear();
    dis.setCursor(0, 0);

    String wtank = lan.WATER_TANK + res.wtank_level + "L";
    printText(wtank);

    String well_state;
    if (res.well == 0)
    {
        well_state = lan.WELL_TOO_LOW;
    }
    if (res.well == 1)
    {
        well_state = lan.WELL_LOW;
    }
    if (res.well == 2)
    {
        well_state = lan.WELL_HIGH;
    }
    String well = lan.WELL + well_state;
    dis.setCursor(0, 1);
    printText(well);
}
If I pause the program, I always end up here:
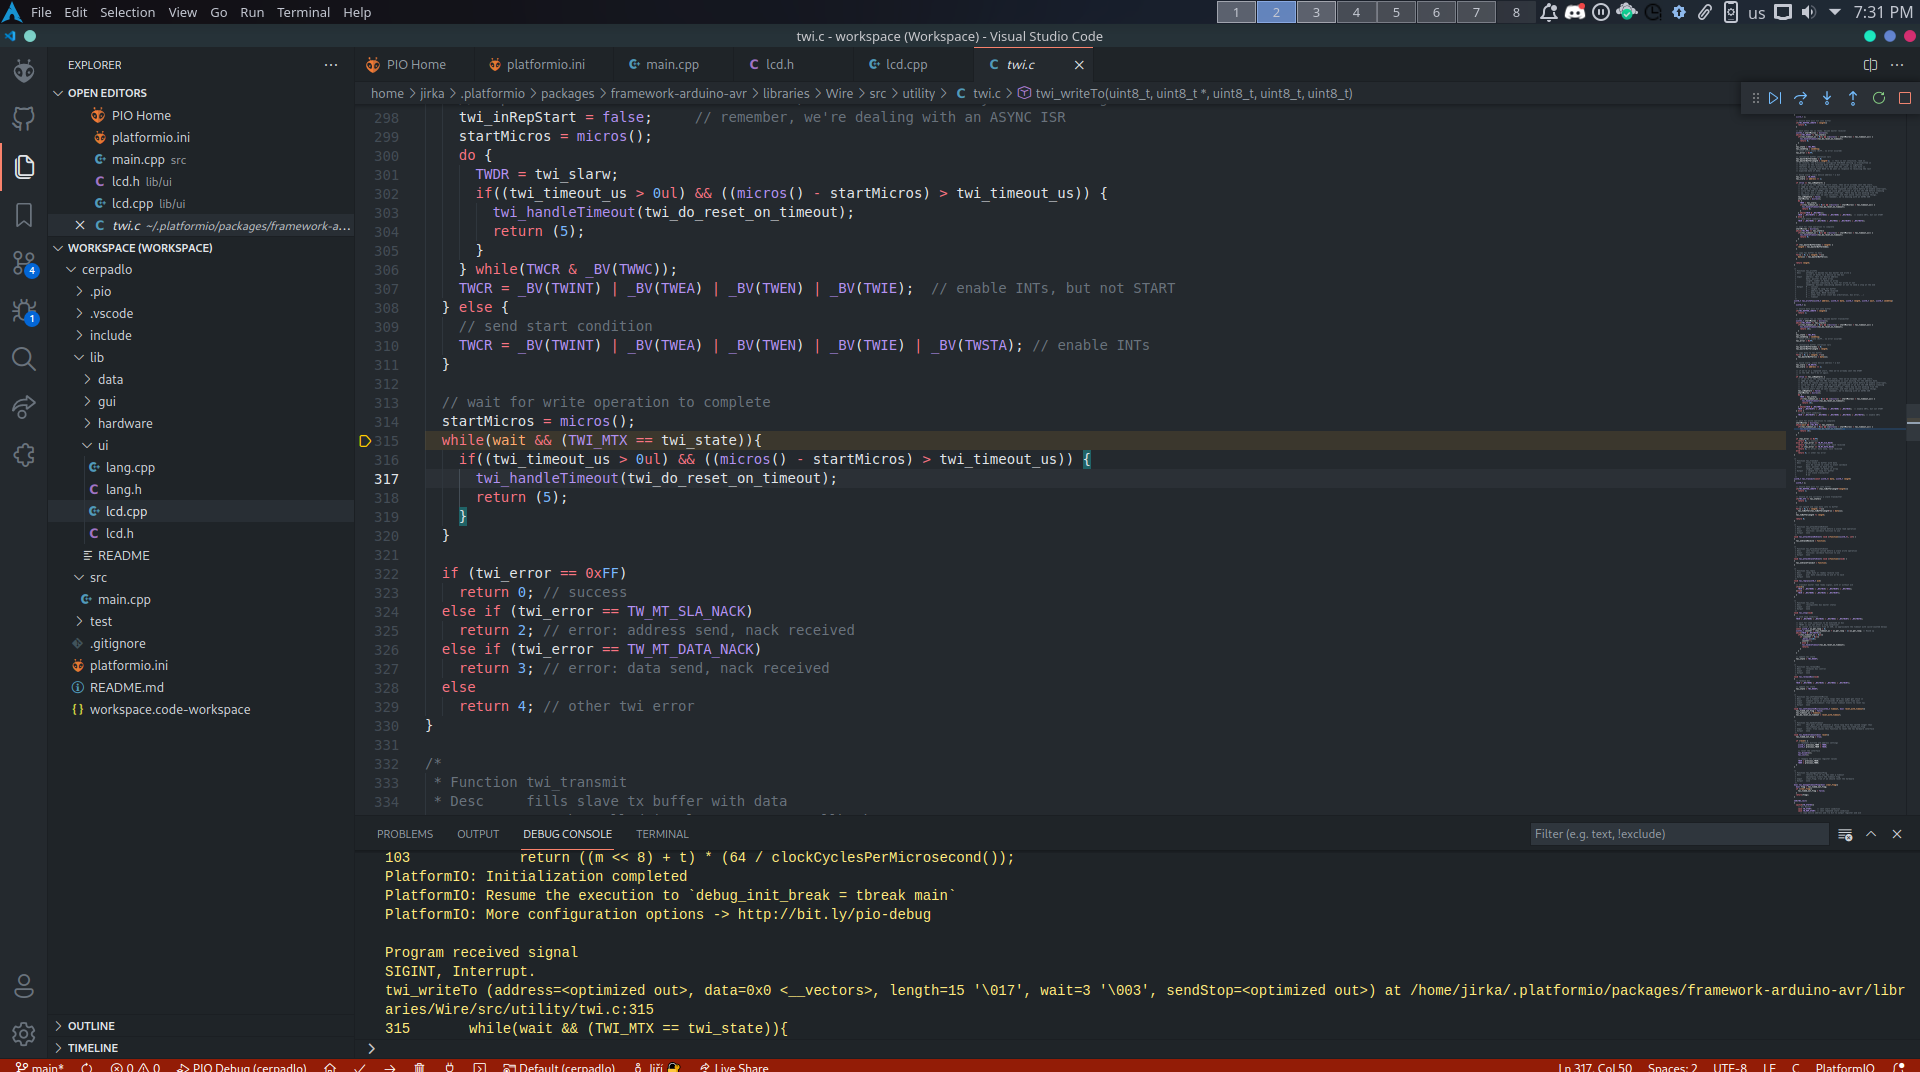
Am I doing something wrong?
Hello,
I succeeded to debug with this usefull library on atmega 2560 and platformIO on vscode using integration suggested by platformio but as soon as I add u8g2 lib or more code , linker shows these errors :
Linking .pio\build\megaatmega2560\firmware.elf AppData\Local\Temp\ccPR247p.ltrans1.ltrans.o: In function breakpoint':
Documents\PlatformIO\Projects\TestDbg/.pio\libdeps\megaatmega2560\avr-debugger\avr8-stub/avr8-stub.c:2066: undefined reference to regs' Documents\PlatformIO\Projects\TestDbg/.pio\libdeps\megaatmega2560\avr-debugger\avr8-stub/avr8-stub.c:2066: undefined reference to regs'
Documents\PlatformIO\Projects\TestDbg/.pio\libdeps\megaatmega2560\avr-debugger\avr8-stub/avr8-stub.c:2066: undefined reference to regs' Documents\PlatformIO\Projects\TestDbg/.pio\libdeps\megaatmega2560\avr-debugger\avr8-stub/avr8-stub.c:2066: undefined reference to regs'`
I tried multiple manaipulation included following the way you describe how ot integrate but I still have these errors. I have created aspecific github repo for the snippet code that shows the errors. here
Thank you for your help.
Hi, I am trying to use your debugger in a simple code using a custom board with and Atmega1284p, but I am not able to get it to work. I tried getting the optiboot bootloader and changing the Make file to set the following information.
What I changed:
# Atmega1284p (8MHz full-swing xtal) @ 38400 baudrate
atmega1284_38: TARGET = atmega1284p
atmega1284_38: MCU_TARGET = atmega1284p
atmega1284_38: CFLAGS += '-DLED_START_FLASHES=3' '-DBAUD_RATE=38400' '-DBIGBOOT'
atmega1284_38: AVR_FREQ = 8000000L
atmega1284_38: LDSECTIONS  = -Wl,--section-start=.text=0x1fc00
atmega1284_38: $(PROGRAM)_atmega1284p_38.hex
atmega1284_38: $(PROGRAM)_atmega1284p_38.lst

atmega1284_38_isp: atmega1284_38
atmega1284_38_isp: TARGET = atmega1284p
atmega1284_38_isp: MCU_TARGET = atmega1284p
# 1024 byte boot
atmega1284_38_isp: HFUSE = DE
# Full swing xtal (8MHz) 14CK+65ms
atmega1284_38_isp: LFUSE = F7
# 2.7V brownout
atmega1284_38_isp: EFUSE = FD
atmega1284_38_isp: isp
After compiling and loading this new bootloader to my device, I am able to program it, but the debugger is not working.
main.cpp
#include <Arduino.h>
#include "avr8-stub.h"
#include "app_api.h"

void setup() {
  debug_init();
  breakpoint();
  while(1);
}

void loop() {
}
platformio.ini
[env:custom]
platform = atmelavr
board = custom
framework = arduino

upload_port = COM13
monitor_port = COM13
monitor_speed = 38400

debug_tool = avr-stub
debug_port = \\.\COM13
debug_init_break = setup

lib_deps =
    jdolinay/avr-debugger @ ~1.4
custom.json
{
  "build": {
    "core": "arduino",
    "f_cpu": "8000000L",
    "mcu": "atmega1284p",
    "variant": "custom"
  },
  "debug": {
    "simavr_target": "atmega1284p",
    "avr-stub": {
      "speed": 115200
    }
  },
  "frameworks": [
    "arduino"
  ],
  "upload": {
    "maximum_ram_size": 16384,
    "maximum_size": 130048,
    "protocol": "arduino",
    "require_upload_port": true,
    "speed": 38400
  },
  "name": "custom",
  "url": "",
  "vendor": ""
}
The error I am getting...

I also tried following the bootloader flash instructions in avr_debug/bootloader/optiboot/readme_platformio.txt, but I cannot make it work.
Could you please let me know what I might be doing wrong and how to fix this issue?
Thanks!
#include <Arduino.h>
#include <app_api.h>
#include <avr8-stub.h>
void setup()
{
Serial.begin ( 115200 );
Serial.println ( "eye" );
debug_init ();
}
gives verify error:
Verifying...
HardwareSerial0.cpp.o (symbol from plugin): In function Serial': (.text+0x0): multiple definition of __vector_25'
....\Arduino\usbHostController\vsc\build\libraries\avr_debug\avr8-stub.c.o (symbol from plugin):(.text+0x0): first defined here
collect2.exe: error: ld returned 1 exit status
I've tested avr-debugger with the PlatformIO development tools, and works fine for both coding and debugging throught your library. Maybe you should consider updating the manual document and examples and include said tool, and if you need it, I got a repository with a ready to use example.
Edit: I forgot to mention that all my procedures and advances are also documented here
Hi,
I am beginning to learn to use your debugger but it is going uneasy for me.
I am using Arduino UNO Rev3. I have somethings I couldn't understand. I don't know if I am doing something wrong.
First, I have had a problem at the start as it said that there was no avr-gdb installed. But, I searched and found that SysGCC makes AVR version of C/C++ Compiler tools and it included avr-gdb.
I then began to debug, after I had followed the instructions and turned g++ and gcc optimization off. Yet, my debugger skips some lines. Here are examples of What I am encountering.
I first have my app.ino as follows

When I upload the code and run the debugger, instead of stopping at digitalWrite(13, OUTPUT) it stops in 'main.cpp` of your code.

Knowing that it doesn't stop in general at any digitalWrite() because it stops at the second digitalWrite() correctly.
I have also experimented with removing and commenting some statements, it seems like the debugger doesn't stop at the first few statements.
More weird is that it doesn't stop at any variable definition/initialization and skips even some operations as far as I have tested. Because at the first image, I included a breakpoint at a++ but When I run, this is what I get. It seems that it also doesn't stop in functions.

The breakpoint at a++disappeared and the breakpoint in the function greyed out.
This project was my way to try the debugger as I am trying to use it to implement a bit large project and it doesn't involve using Arduino Code as much as The use of Algorithms. So, I am trying to understand if I am doing something wrong or is that some sort of limitation of UART-based debugging?
Thanks for your help a lot.
On page 20, Section 1.7 of "Arduino Debugger", it says to let you know if there is a simpler set up.
I ran across 'Sloeber V4.2' at http://eclipse.baeyens.it/ It is Eclipse with Arduino. I was able to download it and immediately write a test program, including the debug codes on page 29 and page 40; upload them; and execute.
It does not have a Gdb front end.
I was able to use command line avr-gdb.exe version 7.8 from Atmel Studio 7.0 and separately avr-gdb.exe version 7.11 from SysGCC to connect to the above mentioned test programs executing on Uno. The gdb experience is as expected, confirming that AVR_DEBUG functions as expected. Since Windows COM has issues, I had to use COMbyTCP.exe
As an aside, I could not execute the avr-gdb.exe that comes with sloeber V4.2 ... it errors because of dll problems.
Since Sloeber is Eclipse, would it be possible to add the GDB Hardware Debugging launch configuration, similar to Section 1.6 of your user guide, to Sloeber ?
Then, all your goals would be met and it would be simpler for the user.
A declarative, efficient, and flexible JavaScript library for building user interfaces.
🖖 Vue.js is a progressive, incrementally-adoptable JavaScript framework for building UI on the web.
TypeScript is a superset of JavaScript that compiles to clean JavaScript output.
An Open Source Machine Learning Framework for Everyone
The Web framework for perfectionists with deadlines.
A PHP framework for web artisans
Bring data to life with SVG, Canvas and HTML. 📊📈🎉
JavaScript (JS) is a lightweight interpreted programming language with first-class functions.
Some thing interesting about web. New door for the world.
A server is a program made to process requests and deliver data to clients.
Machine learning is a way of modeling and interpreting data that allows a piece of software to respond intelligently.
Some thing interesting about visualization, use data art
Some thing interesting about game, make everyone happy.
We are working to build community through open source technology. NB: members must have two-factor auth.
Open source projects and samples from Microsoft.
Google ❤️ Open Source for everyone.
Alibaba Open Source for everyone
Data-Driven Documents codes.
China tencent open source team.