Giter Site home page Giter Site logo

relativty / relativty Goto Github PK

View Code? Open in Web Editor NEW
6.3K 251.0 332.0 173.05 MB

An open source VR headset with SteamVR supports for $200

Home Page: https://www.relativty.com/

License: GNU General Public License v3.0

C++ 51.91% C 45.60% Assembly 1.42% Makefile 0.49% Processing 0.09% Batchfile 0.01% HTML 0.03% CSS 0.32% GDB 0.13%
virtual-reality hardware diy vr oculus vr-headset maxim-xyz

relativty's Introduction

Relativty

Open-source VR headset with SteamVR support.

WebsiteDiscord

I’m Maxim xyz and when my best friend Gabriel Combe and I were 15 years old we built our own VR headset because we couldn't afford to buy one.

5 years later : this headset became Relativty.

  • Fully Open-source - hardware, software, firmware.
  • Steam VR support.
  • Natively displays 2K resolution at 120FPS.
  • Compatible with Arduino.
  • Experimental Body-Tracking

This repo serves as a Build guide, to learn more about the headset see you at Relativty.com

Made for Hackers

Relativty is NOT A CONSUMER PRODUCT. We made Relativty in my bedroom with a soldering iron and a 3D printer and we expect you to do the same: build it yourself.

Relativty at its basics is a 3 Degrees of Freedom (3-DoF) VR headset with no built-in controller support, designed to work with SteamVR. This may limit its practical usability for games that demand knuckle-style VR controllers. If you are looking for a more full-featured DIY VR project 6-Dof tracking and controller support, we recommend you check out HadesVR.

Whether or not you are building either Relativty or HadesVR, or if you just want to join our community and hang out, we invite you to Relativty's Guild on Discord.

It is a place for the DIY/Open-Source VR community to learn, grow, share knowledge, and ask for help.

Start Building Relativty

Building The Hardware

1. CURRENT RECOMMENDED BUILD - As of May 2023

1.1 Introduction

This is an updated build guide to help people who recently discovered Relativty. It aims to explain how to build the minimum functional product, which can be further improved upon and modified to the individual's liking. The original build guide can still be found further below.

        Following this guide to build a Relativty headset assumes basic understanding of electronics and programming Arduino boards.
        A VR headset is a complex system and can be difficult to figure out what is not working if you get stuck with the build.
        If you encounter any issues, join our Discord and ask for help, we are happy to assist.

1.2 ELECTRONICS

The following electronic components are required:

NOTES on VR DISPLAYS:
- The display does not connect to the Microcontroller, it only connects to the Computer running your VR Apps.
- Technically, any PC display/monitor can be configured as the display used by Relativty. Therefore, you can simply test your build on your PC monitor
first to make sure it works, before you decide to spend a significant amount of money on lenses, display(s) and other parts.
- High performance, small form factor displays are expensive, and often very delicate. Handle them with care! :)

1.2.1 Wiring the IMU and MCU

The IMU needs to be connected to the MCU for power and communication. The MCU connects to your computer via USB to send the IMU readings to SteamVR.

In case of an Arduino Pro Micro, you need to connect the following pins:

Pro Micro       IMU
VCC         ->  VCC  
GND         ->  GND  
SDA(pin 2)  ->  SDA  
SCL(pin 3)  ->  SCL  

If you use a different MCU, the SDA and SCL pins might be mapped to different pin numbers.

Also, make sure that the VCC of your MCU is compatible with the rated operating voltage of your IMU.

Supplying incorrect voltage to electronic components may cause damage to them.

The MCU itself simply connects to your computer via the USB port.

1.2.2 Connecting the display

As mentioned previously, any display that is compatible with a personal computer should be able to function as your VR display.

In case you are using the recommended one or a similar component that is powered via micro-USB or other USB standard, it is possible that you will encounter situations where the board does not power up. This could be either because the micro-USB cable you are using is too long (so the board cannot power up because the voltage dropped too much), or the board is unable to turn on because the USB port it connects to on the computer side is simply unable to supply enough power. In this case, you might need to try different ports on your computer or a powered USB hub.

1.3 MECHANICAL BUILD

The following parts are required for the Mechanical Build:

  • Housing - .STL files for 3D-printable model provided in Relativty_Mechanical_build folder.
  • Lenses - for building the 3D-printable headset, Lenses with 40mm diameter/50mm focal length required. You can often find these on Aliexpress or similar.
  • Strap and Facial Interface - e.g. replacement strap + foam for HTC Vive. You can often find these on Aliexpress or similar.

If you do not have access to 3D-printing, it is also possible (and MUCH simpler) to just use an Android VR Phone case, and modify it to fit your screen and so that you can attach your IMU and MCU to it.

The advantage of this approach is that you get everything in one package, often including IPD adjustment.

1.4 SOFTWARE SETUP

1.4.1 Introduction

Relativty depends on 2 main software components:

  • the Arduino firmware
  • the SteamVR driver

As the system is designed to work with SteamVR, you need to have Steam installed and SteamVR downloaded on your computer.

1.4.2 Programming your MCU

As previously mentioned, we recommend you use an Arduino Pro Micro and an IMU supported by the FastIMU Library. FastIMU is an awesome package that supports many commonly used IMUs and comes with a pre-written Arduino sketch that works with Relativty.

First, you will need to install the Arduino IDE and connect your MCU to your computer via the USB connector.

Once you have it connected and verified your Arduino IDE can work with your MCU, download FastIMU from the library manager.

Wire up your IMU as recommended in Section 1.2.1.

Find the Examples/Fastimu/Calibrated_relativty sketch in your Arduino IDE:

And finally, Upload it to your MCU.

FastIMU also includes a built-in calibration tool that can store the calibration data on the IMUs EEPROM.

Calibrating the IMU may help with sensor drift that you can experience over time while using Relativty.

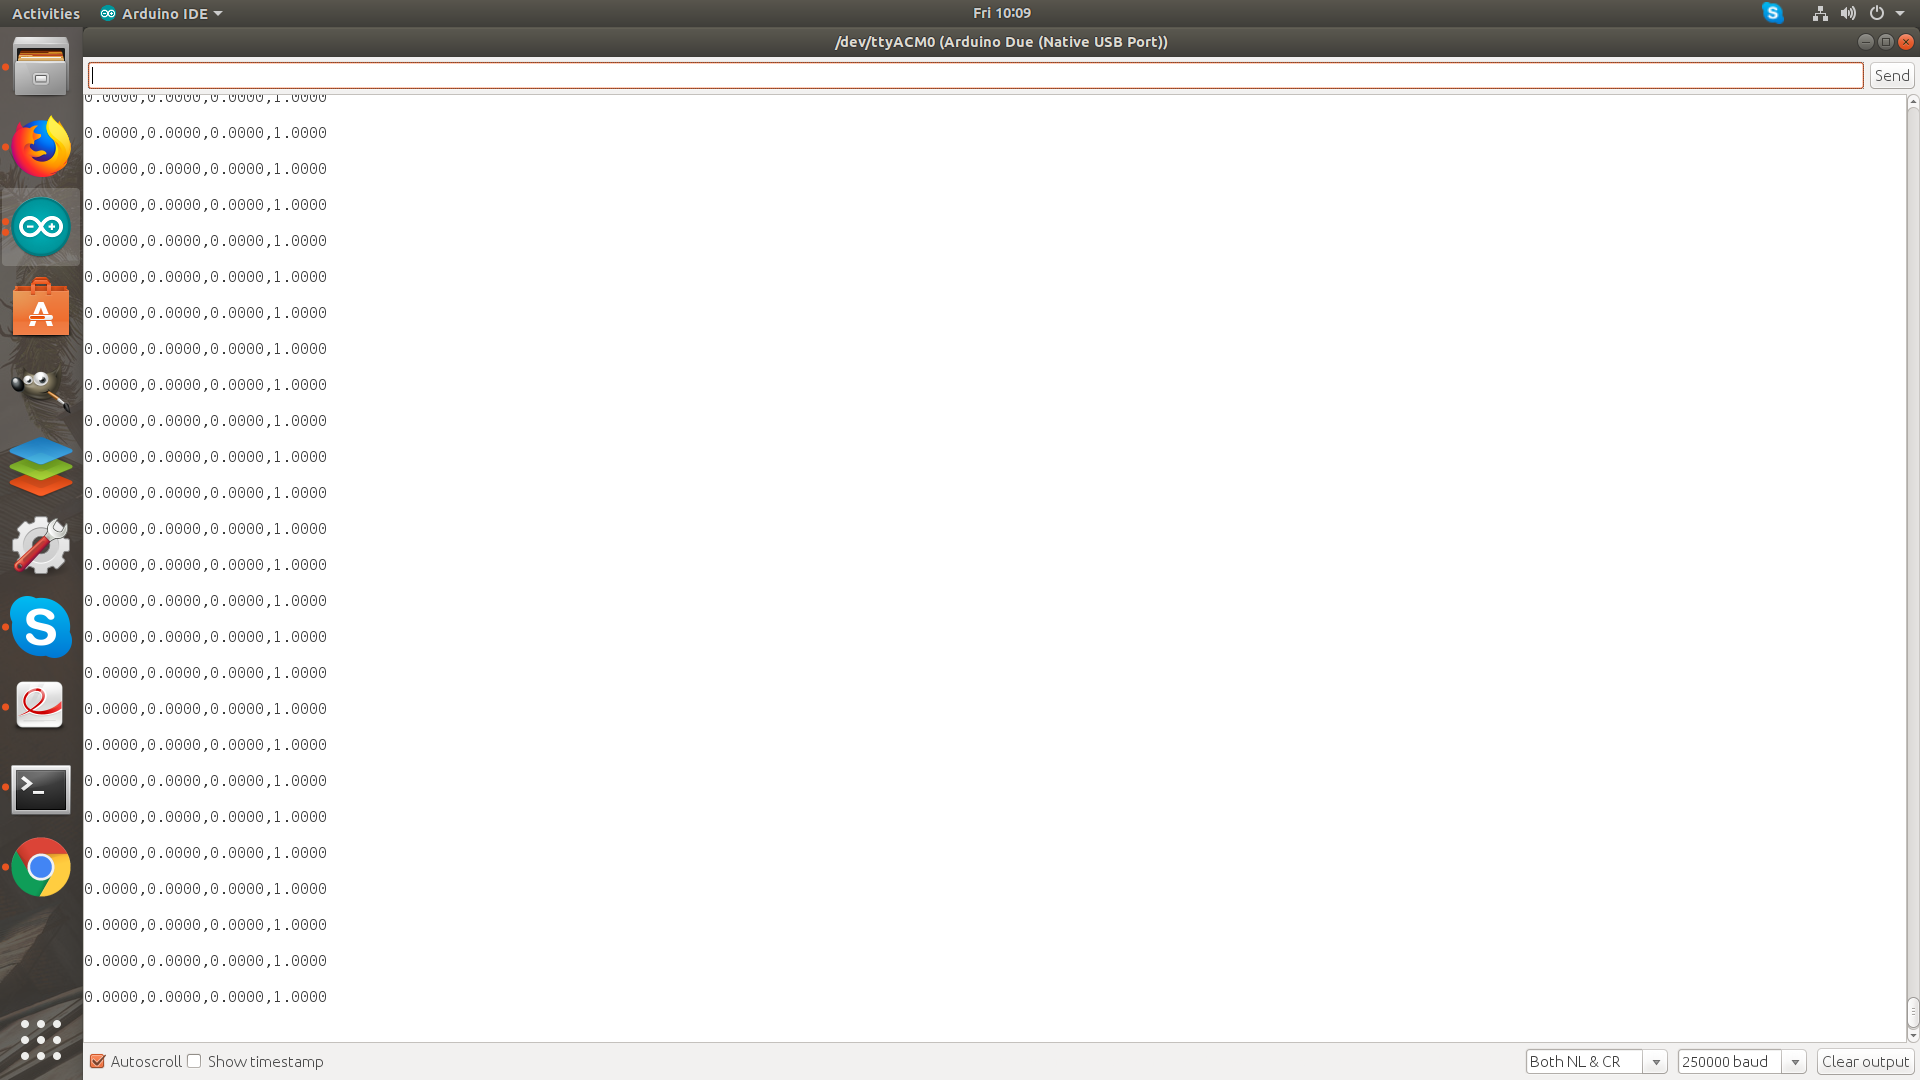
After uploading Calibrated_relativty sketch to the IMU, you can open the Arduino Serial Monitor to initiate a calibration sequence:

  NOTE: you only have to do this once, but make sure to follow the instructions given to you in the serial monitor.

1.4.3 Installing The SteamVR Driver

To install the Relativty SteamVR driver:

  • download the master repository
  • inside Relativty-master find the Relativty_Driver\Relativty folder and copy it to your SteamVR installation's drivers directory.

1.4.4 Configuring The SteamVR Driver

Once you copied the driver files, it is time to configure the driver to work with your setup and computer.

Inside drivers\Relativty\resources\settings, there should be a file called default.vrsettings.

This is the configuration file for the driver.

There are a few things that you need to change.

Configuring the driver to talk to the MCU

ASSUMING you use an Arduino Pro Micro and the FastIMU library:

In the Relativty_hmd segment find these values:

  • hmdPid
  • hmdVid
  • hmdIMUdmpPackets

and change the values like so:

      "hmdPid" : 32823,
      "hmdVid": 9025,
      "hmdIMUdmpPackets":  false,

If you are using a different MCU, you need to figure out the USB PID and VID values.

Easiest way is to connect it to your computer via USB and check in Arduino IDE.

In the menu bar, select Tools/Get Board Info:

Take the PID and VID values and convert them to decimal with a hex converter.

The converted values then go into the hmdPid and hmdVid values in default.vrsettings.

Configuring the Display Settings

Now let's look at configuring the driver to work with your Display.

The config variables for the display are in the Relativty_extendedDisplay segment:

For the VR Viewport window's point of origin:

      "windowX" : 3440,
      "windowY" : 0,

For the VR Viewport's actual size

      "windowWidth" : 1920,
      "windowHeight" : 1080,

For the VR Viewport's rendering resolution - this should be normally the same as the size

      "renderWidth" : 1920,
      "renderHeight" : 1080,

And some miscellaneous settings:

      "DistortionK1" : 0.4,
      "DistortionK2" : 0.5,
      "ZoomWidth" : 1,
      "ZoomHeight" : 1,
      "EyeGapOffsetPx" : 0,
      "IsDisplayRealDisplay" : true,
      "IsDisplayOnDesktop" : true

If the point of origin and size is not configured correctly, the driver will crash and SteamVR will not display anything!

Therefore we need to have a look at and understand the coordinate system SteamVR uses for displays.

Windows always assumes one of the connected displays as your Primary Display.

You can verify which one is your Primary in Display Settings.

You can select each of your displays with the mouse. The one that has "Make this my main display" checkbox greyed out is your Primary Display.

THIS GUIDE ASSUMES THAT THE TOP EDGE OF ALL OF YOUR DISPLAYS ARE ALIGNED IN WINDOWS DISPLAY SETTINGS (as seen on the screenshots)

Consequently, checking the same on another, non-primary display will make that one your Primary.

The TOP LEFT corner of your Primary Display is the ORIGIN POINT of SteamVR's display coordinate system.

To be able to tell SteamVR where to draw the VR Viewport on your displays, you need to make sure you understand this fact and as a result can identify the correct point of origin for the Viewport.

For example, in a setup like this:

Because the "1" screen is the primary, and the "3" screen is the VR Display, the origin point (the 0,0 coordinate) is on the top left of the "1" screen.

This screen has 3440x1440 resolution.

This means it occupies the X axis from 0 to 3439, and the next screen on its right starts at point 3440.

Therefore, in this case the correct windowX and windowY values are:

      "windowX" : 3440,
      "windowY" : 0,

If "2" screen was the VR display (and "1" is still the Primary), the correct values would be:

      "windowX" : -1920,
      "windowY" : 0,

Because the "2" screen's coordinates occupy space over the other side of the origin point.

For windowWidth,windowHeight,renderWidth,renderHeight, simply set the Native Resolution of your VR display.

Once this is all set, save the settings file.

Now you should be ready to start SteamVR.

If everything is set up right, you should get straight into the vr holodeck area:

If you are encountering any issues with your build:

  • open the SteamVR Web Console and copy the entire log file
  • Join Relativty's Guild on Discord, tell us about the issues you are facing, and upload the log file in the chat.

IF YOUR VR WINDOW DISAPPEARS AFTER CLICKING ON IT:

Open Windows PowerShell and paste these commands into the command line, then hit enter:

get-process vrcompositor | stop-process -Force;cd "C:\Program Files (x86)\Steam\steamapps\common\SteamVR\bin\win64";.\vrcompositor.exe

Afterwards the VRCompositor should remain stable, so you only have to do this once per session.

2. LEGACY BUILD

The hardware is based on the Relativty Motherboard which includes an Atmel SAM3X8E ARM Cortex-M3 processor and uses an MPU-6050 as it’s IMU. Alternatively, any processor that supports the ArduinoCore and is connected to an MPU-6050/MPU-9250 can be used as the hardware for Relativty. Both methods are explained below.

Building The Relativty Motherboard

PCB Manufacturing.

We first start with the naked PCB.

it can be manufactured and bought for around $4 on websites like jlcpcb.

You’ll need to provide the Gerber file folder Relativty_Electronics_build/GerberFiles.zip which describes the shape of the board.

Assembling

Soldering the components onto the naked PCB.

You’ll have to buy the components listed in one of the two BOMs, depending on availability:

  • Relativty_Electronics_build/Assembly/jlcpcb.com_motherboard_BOM.csv
  • Relativty_Electronics_build/Assembly/motherboard_BOM.xlsx

Where to position those components on the PCB is described in the file Relativty_Electronics_source/motherboard.brd which can be opened in Eagle.

Using an Arduino

An alternative to the Relativty Motherboard is to use an Arduino Due and to connect it to an MPU-6050.

5V      -> VCC  
GND     -> GND  
SDA(20) -> SDA  
SCL(21) -> SCL  
PIN 2   -> INT  

If you are using an MPU-9250 with the alternative firmware provided the pinout is:

5V      -> VCC  
GND     -> GND  
SDA(20) -> SDA  
SCL(21) -> SCL   

Then push the ERASE and the RESET button on the Arduino Due and you’ll be able to install the Relativty Firmware.

Installing The Relativty Firmware

You’ll now need to install the Relativty board in the Arduino IDE.

To do that copy that JSON URL: https://raw.githubusercontent.com/relativty/Relativty/master/Relativty_Firmware/package_Relativty_board_index.json and open the Arduino IDE

In Arduino, Click File and then Preferences:

  • If you are using the Relativty PCB, aad the JSON URL to the Additional Boards Manager text box.
  • Go to Tools > Board > Board Manager and you should see the Relativty Board, click install.
  • Reboot the Arduino IDE and under Tools > Boards, select Relativty.
  • You can now open Relativty_Firmware/firmware/firmware.ino and upload it to your board.

If you are using a different board e.g. Arduino Due:

  • install contents of Relativty_Firmware\Relativty_board\ to your Arduino IDE
  • if you are using MPU-6050, use Relativty_Firmware/firmware/firmware.ino
  • if you are using MPU-9250, use Relativty_Firmware\MP9250-HID\MP9250-HID\MP9250-HID.ino

Building The Mechanical Parts

Assembling the HMD

All the files needed for the 3D printing can be found in the Relativty_Mechanical_build folder and the screws needed to assemble the Headset are listed in screws_BOM.xlsx.

We've used parts from Aliexpress:

The screen for the HMD

Relativty Headset runs a dual-screen at 120FPS 2K, however, because of the open nature of Relativty you can equip it with any screen.

Our model can be found on Aliexpress, but depending on the vendor similar screens can cost from $150 to $190. You'll have to hunt and maybe wait for the right vendor at the right price to get the display for cheap (or buy in bulk).

This is the model we used.

Setting Up the Software

Installing Relativty Driver for SteamVR

The Relativty Driver is contained within Relativty_Driver/Relativty folder.

⚠️ You’ll need to set it up by editing the JSON file Relativty_Driver/Relativty/resources/settings/default.vrsettings

If you are not using a Relativty PCB, you will need to change these:

  "hmdPid" : 9,
  "hmdVid": 4617,

These are the USB HID device's unique Vendor and Producit Identifieres (pid/vid)

If you are using and Arduino Due, the correct values will be:

  "hmdPid" : 62,
  "hmdVid" : 9025,

In case you are using a different board, the process to get the right values is as below:

  1. Plug your board in

  2. Select your board in Arduino IDE and click Tools/Get Board info. you will see something like this:

	BN: Arduino Due (Native USB Port)
	VID: 2341
	PID: 003e
	SN: HIDHB
  1. Make note of the VID and PID numbers. These are hexadecimal values.

    To apply them to the config, they need to be converted to int.

    If you are unsure how to do that, there is plenty online converters available.

    Such as: https://www.rapidtables.com/convert/number/hex-to-decimal.html

  2. Change your hmdPid and hmdVid values to the converted values.

Next, you need to set up the display coordinates and resolution.

At first, you should have the HMD's display set up as a secondary screen extending your desktop,

aligned onto the top right corner of your primary display.

In the config file's "Relativty_extendedDisplay" segment, find and set these:

      "windowX" : *whatever your primary screen resolution's width is*,
      "windowY" : 0,
      "windowWidth" : *HMD's native resolution width*,
      "windowHeight" : *HMD's native resolution height*,
      "renderWidth" : *HMD's native resolution width*,
      "renderHeight" : *HMD's native resolution height*,
	  
	  And at the bottom of this segment:
	  
      "IsDisplayRealDisplay" : true,
      "IsDisplayOnDesktop" : true

Make sure not to delete any "," symbols as that will break the config.

Only the last item in the config should not have a "," symbol.

If for whatever reason the above settings do not work out for you try:

Set your HMD display as a mirrored display of your primary display.

Change config as follows:

      "windowX" : 0,
      "windowY" : 0,
      "windowWidth" : *HMD's native resolution width*,
      "windowHeight" : *HMD's native resolution height*,
      "renderWidth" : *HMD's native resolution width*,
      "renderHeight" : *HMD's native resolution height*,
	
      "IsDisplayRealDisplay" : false,
      "IsDisplayOnDesktop" : true
	

⚠️ Please note that this may result in keyboard/mouse input not being captured by the VR window, should your game require it, it might become unplayable.

You can also make IPD (Interpupillary Disance) adjustments within the configuration file:

In the "Relativty_hmd" segment find and adjust:

      "IPDmeters" : 0.063,

You can also change the lens distortion correction by changing these:

      "DistortionK1" : 0.4,
      "DistortionK2" : 0.5,

You can now install Relativty Driver:

  • Locate your vrpathreg.exe program, usually located at C:/Steam/steamapps/common/SteamVR/bin/win64/vrpathreg.exe
  • Then open the Windows Command Prompt and run the following commands: cd C:/Steam/steamapps/common/SteamVR/bin/win64 vrpathreg.exe

And then assuming your Relativty_Driver/Relativty driver folder is located at: C:/code/Relativty_Driver/Relativty

  • run vrpathreg adddriver C:/code/Relativty_Driver/Relativty

Relativty Driver is now installed. You can uninstall it any time by running:

  • vrpathreg removedriver C:/code/Relativty_Driver/Relativty

Setting up the Experimental 3D Tracking

The tracking is still very experimental and can only be run on NVIDIA GPU due to the usage of CUDA. The tracking makes uses of only a video input and an Artificial Neural Network AI trained to estimate a 3D body position.

This method is nothing close to the precision or freedom of movements of a dedicated sensor however we believe that the model can be trained and improved by orders of magnitude.

You first need to connect a webcam to your computer and install Python 3.8.4 and select the option to add it to the path. Then install PyTorch, you can do so by running the following commands:

python -m pip install torch===1.6.0 torchvision===0.7.0 -f https://download.pytorch.org/whl/torch_stable.html

Then proceed to install CUDA Toolkit 11.0.

You’ll then need to download the Folder PYTHONPATH at https://github.com/relativty/Relativty/releases and add its location to PyPath in the JSON Relativty_Driver/Relativty/resources/settings/default.vrsettings

Set tracking to 1. The tracking is now turned on and can be turned off anytime by setting tracking to 0. The tracking can also be calibrated depending on your camera, this can be done by tweeking scalesCoordinateMeter and offsetCoordinate. scalesCoordinateMeter correspond to the delta of coordinates in a given axis calculated by the AI after normalization when you move 1 meter in that given axis.

Note: If you plan on using mpu9250 firmware do not forget to switch to it in the driver by setting hmdIMUdmpPackets to false: "hmdIMUdmpPackets": false,

Final Steps

Everything is now set up to start playing.

To start using Relativty:

  • Lay the headset on a flat surface with the front panel facing the ground
  • Plug in the Headset. It’ll automatically calibrate after a few seconds.

You can now run any SteamVR game!

relativty's People

Contributors

7ep3s avatar adamgibbins avatar asm512 avatar delp avatar dishwasha avatar djblazkowicz avatar gabriel-combe avatar hammyhavoc avatar hugogarrix avatar justins-b avatar jwdinius avatar kasbah avatar kimmoli avatar kosai106 avatar maxim-perumal avatar mzltn avatar okawo80085 avatar penguindono avatar thelostgarden avatar twtom041 avatar ummahusla avatar

Stargazers

 avatar  avatar  avatar  avatar  avatar  avatar  avatar  avatar  avatar  avatar  avatar  avatar  avatar  avatar  avatar  avatar  avatar  avatar  avatar  avatar  avatar  avatar  avatar  avatar  avatar  avatar  avatar  avatar  avatar  avatar  avatar  avatar  avatar  avatar  avatar  avatar  avatar  avatar  avatar  avatar  avatar  avatar  avatar  avatar  avatar  avatar  avatar  avatar  avatar  avatar  avatar  avatar  avatar  avatar  avatar  avatar  avatar  avatar  avatar  avatar  avatar  avatar  avatar  avatar  avatar  avatar  avatar  avatar  avatar  avatar  avatar  avatar  avatar  avatar  avatar  avatar  avatar  avatar  avatar  avatar  avatar  avatar  avatar  avatar  avatar  avatar  avatar  avatar  avatar  avatar  avatar  avatar  avatar  avatar  avatar  avatar  avatar  avatar  avatar  avatar

Watchers

 avatar  avatar  avatar  avatar  avatar  avatar  avatar  avatar  avatar  avatar  avatar  avatar  avatar  avatar  avatar  avatar  avatar  avatar  avatar  avatar  avatar  avatar  avatar  avatar  avatar  avatar  avatar  avatar  avatar  avatar  avatar  avatar  avatar  avatar  avatar  avatar  avatar  avatar  avatar  avatar  avatar  avatar  avatar  avatar  avatar  avatar  avatar  avatar  avatar  avatar  avatar  avatar  avatar  avatar  avatar  avatar  avatar  avatar  avatar  avatar  avatar  avatar  avatar  avatar  avatar  avatar  avatar  avatar  avatar  avatar  avatar  avatar  avatar  avatar  avatar  avatar  avatar  avatar  avatar  avatar  avatar  avatar  avatar  avatar  avatar  avatar  avatar  avatar  avatar  avatar  avatar  avatar  avatar  avatar  avatar  avatar  avatar  avatar  avatar  avatar

relativty's Issues

[FEATERE REQUEST] Compatible SteamVR games, controllers and laser pointer support

Hi,

Built my own headset! Looks pretty good and works. Thanks a lot for this project.

Anyway, I am unable to play most of Steam games with this setup:

  • Relativ headset
  • Xbox360-compatible controller

The laser beam just do not appear even in SteamVR Home application. It is also impossible to navigate in a dashboard. What games can you advise for your headset? I've found an interesting space simulator - but it is only game I've found.
Either game is playable through mouse/keyboard/joystick, either it is connected to SteamVR and it is impossible to play the game. I just see what's aroung in this headset - which is pretty good, but I am interested in making it playable. So, I think, users of the Headset need from you:

  1. List of compatible games
  2. List of compatible tracker and controller hardware for using with SteamVR and Relativ.

Serial Output is all zeros!

The output on the arduino serial is something like-
0.00 0.00 0.00 1.00
And it's not changing at all. Plz help
screenshot from 2019-01-11 10-09-05

Micro USB power voltage for displays?

I purchased the exact same LCD screen(s) you linked in the readme. I also avail of a Mini DP to HDMI cable.

Which kind of power cord / voltage did you use for the Micro USB? My displays do not turn on, I only get a blue blinking light on the main panel of the displays. Is it 5V/2A or 5V/3A?

Thanks.

PS: And/or tell me which power adapter you are using.

Diopter enhancement

I'm really very exited to build one, do you think it's easy to modify the structure to add dioptry adjustment ?
Really thanks for this amazing job.

Hand controls ?

Hey guys,

Do you have any suggestions for hand based controls (vive style ?)

Thanks

(Relativty sdk) here doesn't link

Pretty cool project!

One small issue. On the line "Or build your own game in a minute using the Relativty sdk, learn more by clicking here." in Readme, the link is missing.

Update Headset Form

The Form of the Headset doesnt look comfortable at all.
Is there a possibility to update it so it sits firmly and is not so boxy?
Maybe compatible with the Foampad from the Samsung Galaxy VR (7€) foam piece.
And where to get the headstraps and stuff?
Maybe it would be possible to merge this project with "WiFiBroadcast" from Raspberry so it gets fully Wireless with a powerbank. Im really looking to the improvements but im not good at 3D modelling but im trying to make some games for it like a "Raft VR" version and "MarioKart 3D" or "Prison Escape" so we can fully enjoy this nice project.

Thanks for your great work and keep having fun in coding :)

Headset drifts back towards calibration point after any movement.

I set everything up with an Arduino due cause I had one on hand, and the tracking seems okay except that it will drift back to where the headset was originally calibrated. For example, if I look left it will follow me left but as soon as I stop rotating it starts drifting back to the calibration point. It happens in all directions and is returning to the calibration position which makes me think that it is a code issue, but I am not sure if it was something I changed or something else. Any ideas?

About the driver

Turn on steamvr, no matter whether my gyroscope is moving or not, the screen will jitter violently. I thought the gyroscope was broken, but the data on the serial port monitoring tool is normal
From Google Translate

[FEATERE REQUEST] Use correct industry terminology for what this project is developing

Is your feature request related to a problem? Please describe.
This project is using the wrong terminology in regards to the tracking technology being developed. The sensors used are not "6DoF" or "9DoF" as described. Using correct terminology will clear up a lot of confusion around the project's current goals and released software.

Describe the solution you'd like
"#DoF" stands for "Degrees of Freedom" and is a term used to describe how the user can move about in VR. The tracking system being developed here only provides 3DoF: Pitch, Yaw, Roll.

6DoF means that on top of rotation the user is also able to translate around the VR space in X, Y, Z directions. Therefore there are now 6 degrees of freedom: Pitch, Yaw, Roll, X, Y, Z. As far as I can figure out there aren't additional degrees in which to unlock to achieve "9DoF".

The sensors you're developing are multi-axis sensors in the pursuit of higher quality "3DoF" tracking. The 3 sensors utilized in this project provide a 9-Axis tracking solution and only provides more accurate rotational tracking.

Additional context
https://creator.oculus.com/learn/vr-glossary/

"min was not declared in this scope"

In Arduino IDE, when trying to compile the code, and error message, "min was not declared in this scope" pops up. Any Solution?

The Full Error Messages:

Arduino: 1.8.10 (Windows 10), Board: "Generic STM32F103C series, STM32F103C8 (20k RAM. 64k Flash), STM32duino bootloader, 72Mhz (Normal), Smallest (default)"

sketch\I2Cdev_PillPatch.cpp: In static member function 'static int8_t I2Cdev::readBytes(uint8_t, uint8_t, uint8_t, uint8_t*, uint16_t)':

I2Cdev_PillPatch.cpp:276:50: error: 'min' was not declared in this scope

         for (uint8_t k = 0; k < length; k += min<int>(length, BUFFER_LENGTH)) {

                                              ^

I2Cdev_PillPatch.cpp:276:54: error: expected primary-expression before 'int'

         for (uint8_t k = 0; k < length; k += min<int>(length, BUFFER_LENGTH)) {

                                                  ^

I2Cdev_PillPatch.cpp:276:54: error: expected ')' before 'int'

I2Cdev_PillPatch.cpp:276:57: error: expected unqualified-id before '>' token

         for (uint8_t k = 0; k < length; k += min<int>(length, BUFFER_LENGTH)) {

                                                     ^

I2Cdev_PillPatch.cpp:693:59: error: expected '}' at end of input

uint16_t I2Cdev::readTimeout = I2CDEV_DEFAULT_READ_TIMEOUT;

                                                       ^

C:\Users\dogsp\Desktop\Relativ-master\STM32\STM32_BlackPill\STM32_BlackPill.ino: In function 'void setup()':

STM32_BlackPill:48:14: error: 'class TwoWire' has no member named 'setSDA'

     Wire.setSDA(PB7);

          ^

STM32_BlackPill:49:14: error: 'class TwoWire' has no member named 'setSCL'

     Wire.setSCL(PB6);

          ^

Multiple libraries were found for "Wire.h"
Used: C:\Users\dogsp\AppData\Local\Arduino15\packages\stm32duino\hardware\STM32F1\2019.12.31\libraries\Wire
Not used: C:\Users\dogsp\AppData\Local\Arduino15\packages\stm32duino\hardware\STM32F1\2019.12.31\libraries\WireSlave
exit status 1
'min' was not declared in this scope

This report would have more information with
"Show verbose output during compilation"
option enabled in File -> Preferences.

Clarification on the LCD Screen

Hi! This project looks awesome!
Quick question, saw the LCD Screen you guys posted. Should I buy it with the board ( over 100 USD ) or just the screen?

Vive Tracker

I don't know if you've though about this, but just to put idea on the table.

Have you ever thought about Vive tracker integration as 6DoF tracking data source?

[Improvement] Switch from MPU-6050 6 axis sensor to MPU-9250 9 axis

As previously discussed on discord, using a gyroscope without a fixed reference point causes yaw drift to happen to on the Z axis on long sessions (this naturally happens due to earth's rotation).
Switching to the MPU-9250 a 9 axis sensor gives us access to the (magnetometer) compass wich allows us to get the referece point on earth's north.
Doing this change will make the expense fom the sensor from 0.80-1$ to 2$, (in my opinion something that is worth the extra 1$ :) ) .
We could also use alternative sensors like the BNO055 but it's 10$ on aliexepress.

Controllers and playing games.

Hi I just wanted to ask a quick question. I was wondering if their is not controllers how are you able to play games on steam VR? Last I checked you need controllers. Iv'e heard you can pair valve index with lighthouses and that will work but is there any other way?

New headset?

We are starting a new company called Unai, building a new standalone VR headset from the ground-up and, alongside, the OS and Virtual World powering it. Our end goal is to solve immersiveness. This poses challenges in fields ranging from optics, computer vision, electrical design, low-level OS, game engine and many more.

I plan on reworking the design for contribution, are you going to release the new headset or can i get an access to pre-release version?

CC @maxim-xyz

Lenses not available any more ?

No store behind the lens might be an idea to make a list of stores And places where you can source the components not just one link for every component

Some questions

I was talking extensively with my friend about this project, because we find it very interesting. When we checked out the components needed for the system, we figured that the Arduino Due would be quite an overkill for its job here. Did you choose this specific device on purpose or did you just pick an Arduino Due because it was more convenient in your situation?
According to our results a way weaker micro controller could be used in this scenario.

Secondly, how important is it that the screen has at least 1440p? Did you test it with a lower resolution to see if it is garbage or acceptable?

Hardware license

You've currently chosen to put the GPLv3 license on the project. The GPL is suitable for software, but less so for hardware. In addition please consider how using the GPL essentially complicates any commerical use of your creation. While this indeed keeps your project out of the hands of commercial companies who could run away with the idea it also blocks anyone from creating a proper product based on your work.

What's your end goal for the project? Creating a commercial success for yourself or creating an open VR headset that's made available commercially by several companies?

Anyhow please consider using a permissive license like MIT or BSD for the software and a truely OSHW license like the CERN–OHL-P.

JLCPCP CPL File

Hi,
JLCPCB needs CPL file to assable the PCB, please add the file

'VectorFloat16' was not declared in this scope

Hello, trying to compile the sketch I get the following error:


main:133:9: error: 'VectorFloat16' was not declared in this scope

     VectorFloat16 down;

     ^

main:134:28: error: 'down' was not declared in this scope

     mpu.dmpGetGravity(&down, &q);

                        ^

exit status 1
'VectorFloat16' was not declared in this scope


How can I correct it?

Thanks, regards

conversion from 'type' to 'type' function is illegal in every OS except Windows!

Following the Microsoft Compiler Warning (level 4) C4239

The relativ_osvr_plugin/Relativ_OSVR_Plugin.cpp code fails to compile on any OS except Windows with this error:
error: cannot bind non-const lvalue reference of type ‘serial::Timeout&’ to an rvalue of type ‘serial::Timeout’

To resolve this, Кзобьтовскый created this fix:

Line 57
relativ.setTimeout(serial::Timeout::simpleTimeout(1000)); 

replace the whole of Line 57 with this:

serial::Timeout sto = serial::Timeout::simpleTimeout(1000);
relativ.setTimeout(sto);

Single display instead of stereoscopic

I there a way to create this with a large single display instead of dual displays? I know many people desire stereoscopic, but I would rather have one larger display instead of locking my eyes into a little lens. The 6dof control and head tracking I feel would be more immersive without a limited stereoscopic display and this open source project would be a good testing ground.

[BUG] I2C connection is unstable

The bug

Just connect STM32 blue pill with MPU6050 sensor. It will work pretty good, but sometimes, after some small shakes, or SteamVR lags it just hangs. Reboot causes USB device disconnect(which is an another issue), but still, after the reboot the connection is not established.

To Reproduce
Steps to reproduce the behavior:

  1. Start any SteamVR game with a headset and a high load
  2. Shake the headset and rotate it
  3. The orientation will hang.
  4. Exit SteamVR and OSVR driver
  5. Test Serial connection by opening the corresponding port
  6. If it opens, but there is no data it means I2C hang.

Proposed solution

Check I2C for timeout errors, and if timeout happen, reset the I2C bus. You can find the implementation of this algorithm in Ardupilot repository, as an example. I have a PoC code which resets the bus at reset, can share it.

Relativ_OSVR_Plugin.cpp - Missing JSON file

Lines 20 to 21 & 136 to 144 of Relativ_OSVR_Plugin.cpp reference a file called Relativ_Core.json, its generated header file Relativ_Core_json.h and its compiled version Relativ_Core_json.

#include "Relativ_Core_json.h"

<SNIP>

	class Relativ_Device {
	public:
		Relativ_Device(OSVR_PluginRegContext ctx) {
			m_ctx = ctx;
			OSVR_DeviceInitOptions opts = osvrDeviceCreateInitOptions(ctx);
			osvrDeviceTrackerConfigure(opts, &m_tracker);
			m_dev.initAsync(ctx, DEVICE_NAME, opts);
			m_dev.sendJsonDescriptor(Relativ_Core_json);
			m_dev.registerUpdateCallback(this);

but the json file that is included in the source directory (& which is referenced in CMakeLists.txt) is called Relativ_OSVR_Plugin.json. Should the references in Relativ_OSVR_Plugin.cpp be updated to Relativ_OSVR_Plugin.json (as below) - or should a different json file be used (& if so, which one)?

#include "Relativ_OSVR_Plugin_json.h"

<SNIP>

	class Relativ_Device {
	public:
		Relativ_Device(OSVR_PluginRegContext ctx) {
			m_ctx = ctx;
			OSVR_DeviceInitOptions opts = osvrDeviceCreateInitOptions(ctx);
			osvrDeviceTrackerConfigure(opts, &m_tracker);
			m_dev.initAsync(ctx, DEVICE_NAME, opts);
			m_dev.sendJsonDescriptor(Relativ_OSVR_Plugin_json);
			m_dev.registerUpdateCallback(this);

STL files license

From what I can see there is no explicit license for the STL files in Relativty_Mechanical_build. It would be very much appreciated if the terms could be stated more clearly. For example, how would I go about distributing modified versions of the STL files and comply with the terms of the project?

Thanks.

Linux Support

Hey I hope you are doing well! I am really interested in this project and I was wondering if this headset had drivers that would work on Linux or if not there are plans to add Linux support.

Kind regards,

Relativ on The Changelog?

Howdy from The Changelog!

(Never heard of The Changelog? We've been interviewing the hackers, leaders, and innovators of open source and software development since '09.)

We'd love to have you on the show sometime soon. Who would be best person to join us to talk about Relativ and how y'all built it?

Please email [email protected] to coordinate.

Looking forward to it! 💚

How do you track the headset position?

Do you track the headset position using SLAM?
Or you don't track the position, just use rotation from IMU?
I would want to create a tracked headset that works like Mixed Reality tracking quality.

[FEATERE REQUEST] CH340 or FTDI serial connection

Is your feature request related to a problem? Please describe.
it is related to the potential unstability of USB STM32 Serial drivers

Describe the solution you'd like

I recommend you using the CH340 or FTDI serial dongles (or separate PCBs) because they have MUCH more improved stability, I have an experience of working with CH340 device, which was connected to a Windows machine for a month.
Your arduino code could probably be left unchanged.
Check Aliexpress for cheap serial converters.

Case Sensitivity Typo

Ran into a problem today where a user running a non-Due arduino wanted to use this option from the code block. But this won't compile unless "Relativ" is changed to "relativ"

Going to do a pull request.

EDIT: I thought I opened this from a specific line but sorry, I am new to this feature.

Recommend Projects

  • React photo React

    A declarative, efficient, and flexible JavaScript library for building user interfaces.

  • Vue.js photo Vue.js

    🖖 Vue.js is a progressive, incrementally-adoptable JavaScript framework for building UI on the web.

  • Typescript photo Typescript

    TypeScript is a superset of JavaScript that compiles to clean JavaScript output.

  • TensorFlow photo TensorFlow

    An Open Source Machine Learning Framework for Everyone

  • Django photo Django

    The Web framework for perfectionists with deadlines.

  • D3 photo D3

    Bring data to life with SVG, Canvas and HTML. 📊📈🎉

Recommend Topics

  • javascript

    JavaScript (JS) is a lightweight interpreted programming language with first-class functions.

  • web

    Some thing interesting about web. New door for the world.

  • server

    A server is a program made to process requests and deliver data to clients.

  • Machine learning

    Machine learning is a way of modeling and interpreting data that allows a piece of software to respond intelligently.

  • Game

    Some thing interesting about game, make everyone happy.

Recommend Org

  • Facebook photo Facebook

    We are working to build community through open source technology. NB: members must have two-factor auth.

  • Microsoft photo Microsoft

    Open source projects and samples from Microsoft.

  • Google photo Google

    Google ❤️ Open Source for everyone.

  • D3 photo D3

    Data-Driven Documents codes.