Giter Site home page Giter Site logo

ashawkey / nerf2mesh Goto Github PK

View Code? Open in Web Editor NEW
853.0 13.0 84.0 1003 KB

[ICCV2023] Delicate Textured Mesh Recovery from NeRF via Adaptive Surface Refinement

Home Page: https://me.kiui.moe/nerf2mesh/

License: MIT License

Python 69.46% Shell 3.18% C++ 0.41% Cuda 21.80% C 1.07% HTML 4.08%
mesh nerf real-time

nerf2mesh's Introduction

nerf2mesh

This repository contains a PyTorch re-implementation of the paper: Delicate Textured Mesh Recovery from NeRF via Adaptive Surface Refinement.

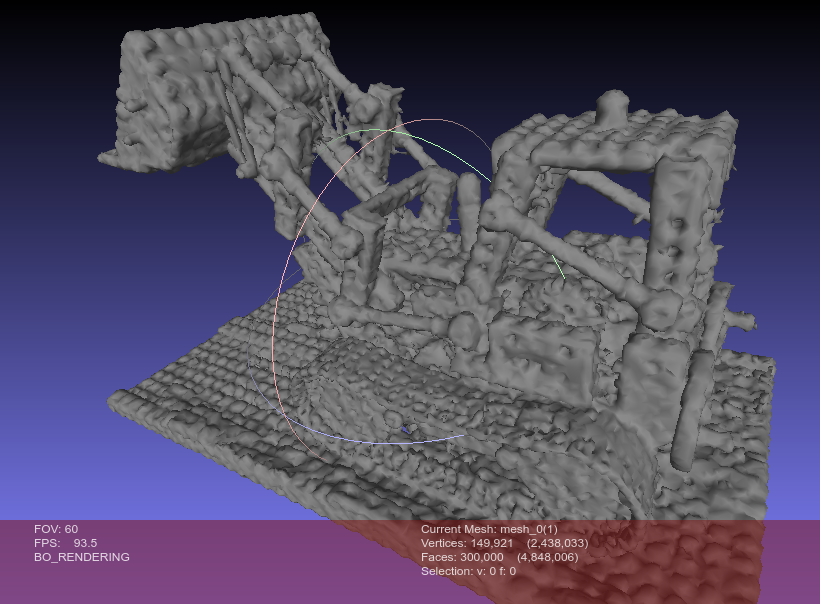
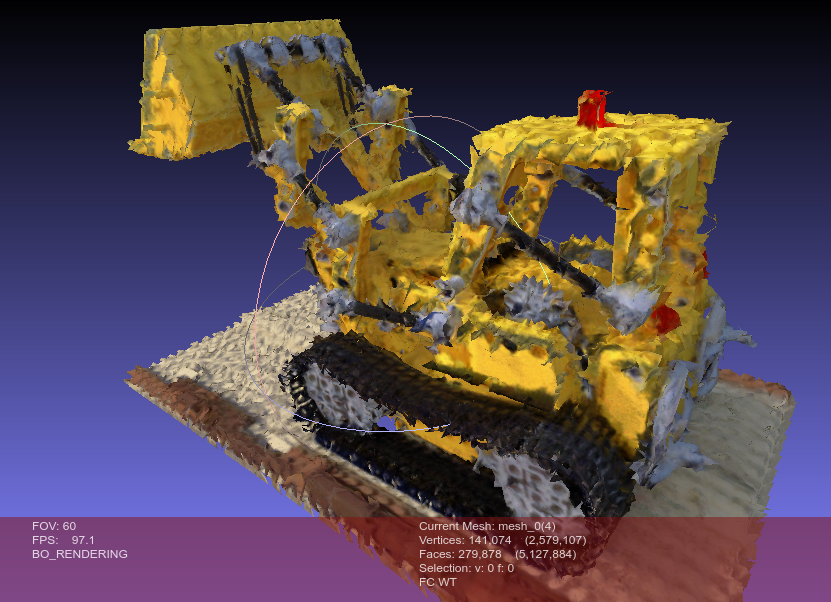
News (2023.5.3): support background removal and SDF mode for stage 0, which produces more robust and smooth mesh for single-object reconstruction:

Install

git clone https://github.com/ashawkey/nerf2mesh.git
cd nerf2mesh

Install with pip

pip install -r requirements.txt

# tiny-cuda-nn
pip install git+https://github.com/NVlabs/tiny-cuda-nn/#subdirectory=bindings/torch

# nvdiffrast
pip install git+https://github.com/NVlabs/nvdiffrast/

# pytorch3d
pip install git+https://github.com/facebookresearch/pytorch3d.git

Build extension (optional)

By default, we use load to build the extension at runtime. However, this may be inconvenient sometimes. Therefore, we also provide the setup.py to build each extension:

# install all extension modules
bash scripts/install_ext.sh

# if you want to install manually, here is an example:
cd raymarching
python setup.py build_ext --inplace # build ext only, do not install (only can be used in the parent directory)
pip install . # install to python path (you still need the raymarching/ folder, since this only install the built extension.)

Tested environments

  • Ubuntu 22 with torch 1.12 & CUDA 11.6 on a V100.

Usage

We support the original NeRF data format like nerf-synthetic, and COLMAP dataset like Mip-NeRF 360. Please download and put them under ./data.

First time running will take some time to compile the CUDA extensions.

Basics

### Stage0 (NeRF, continuous, volumetric rendering), this stage exports a coarse mesh under <workspace>/mesh_stage0/

# nerf
python main.py data/nerf_synthetic/lego/ --workspace trial_syn_lego/ -O --bound 1 --scale 0.8 --dt_gamma 0 --stage 0 --lambda_tv 1e-8

# colmap
python main.py data/garden/ --workspace trial_360_garden -O --data_format colmap --bound 16 --enable_cam_center --enable_cam_near_far --scale 0.3 --downscale 4 --stage 0 --lambda_entropy 1e-3 --clean_min_f 16 --clean_min_d 10 --lambda_tv 2e-8 --visibility_mask_dilation 50

### Stage1 (Mesh, binarized, rasterization), this stage exports a fine mesh with textures under <workspace>/mesh_stage1/

# nerf
python main.py data/nerf_synthetic/lego/ --workspace trial_syn_lego/ -O --bound 1 --scale 0.8 --dt_gamma 0 --stage 1

# colmap
python main.py data/garden/ --workspace trial_360_garden   -O --data_format colmap --bound 16 --enable_cam_center --enable_cam_near_far --scale 0.3 --downscale 4 --stage 1 --iters 10000

### Web Renderer
# you can simply open <workspace>/mesh_stage1/mesh.obj with a 3D viewer to visualize the diffuse texture.
# to render full diffuse + specular, you'll need to host this folder (e.g., by vscode live server), and open renderer.html for further instructions.

Custom Dataset

Tips:

  • To get best mesh quality, you may need to adjust --scale to let the most interested object fall inside the unit box [-1, 1]^3, which can be visualized by appending --vis_pose.
  • To better model background (especially for outdoor scenes), you may need to adjust --bound to let most sparse points fall into the full box [-bound, bound]^3, which can also be visualized by appending --vis_pose.
  • For single object centered captures focusing on mesh assets quality:
    • remove the background by scripts/remove_bg.py and only reconstruct the targeted object.
    • use --sdf to enable sdf based stage 0 model.
    • use --diffuse_only if you only want to get the diffuse texture.
    • adjust --decimate_target 1e5 to control stage 0 number of mesh faces, and adjust --refine_remesh_size 0.01 to control stage 1 number of mesh faces (average edge length).
    • adjust --lambda_normal 1e-2 for more smooth surface.
  • For forward-facing captures:
    • remove --enable_cam_center so the scene center is determined by sparse points instead of camera positions.
# prepare your video or images under /data/custom, and run colmap (assumed installed):
python scripts/colmap2nerf.py --video ./data/custom/video.mp4 --run_colmap # if use video
python scripts/colmap2nerf.py --images ./data/custom/images/ --run_colmap # if use images

# generate downscaled images if resolution is very high and OOM (asve to`data/<name>/images_{downscale}`) 
python scripts/downscale.py data/<name> --downscale 4
# NOTE: remember to append `--downscale 4` as well when running main.py

# perform background removal for single object 360 captures (save to 'data/<name>/mask')
python scripts/remove_bg.py data/<name>/images
# NOTE: the mask quality depends on background complexity, do check the mask!

# recommended options for single object 360 captures
python main.py data/custom/ --workspace trial_custom -O --data_format colmap --bound 1 --dt_gamma 0 --stage 0 --clean_min_f 16 --clean_min_d 10 --visibility_mask_dilation 50 --iters 10000 --decimate_target 1e5 --sdf
# NOTE: for finer faces, try --decimate_target 3e5

python main.py data/custom/ --workspace trial_custom -O --data_format colmap --bound 1 --dt_gamma 0 --stage 1 --iters 5000 --lambda_normal 1e-2 --refine_remesh_size 0.01 --sdf
# NOTE: for finer faces, try --lambda_normal 1e-1 --refine_remesh_size 0.005

# recommended options for outdoor 360-inwarding captures
python main.py data/custom/ --workspace trial_custom -O --data_format colmap --bound 16 --enable_cam_center --enable_cam_near_far --stage 0 --lambda_entropy 1e-3 --clean_min_f 16 --clean_min_d 10 --lambda_tv 2e-8 --visibility_mask_dilation 50

python main.py data/custom/ --workspace trial_custom -O --data_format colmap --bound 16 --enable_cam_center --enable_cam_near_far --stage 1 --iters 10000 --lambda_normal 1e-3

# recommended options for forward-facing captures
python main.py data/custom/ --workspace trial_custom -O --data_format colmap --bound 2 --scale 0.1 --stage 0 --clean_min_f 16 --clean_min_d 10 --lambda_tv 2e-8 --visibility_mask_dilation 50

python main.py data/custom/ --workspace trial_custom -O --data_format colmap --bound 2 --scale 0.1 --stage 1 --iters 10000 --lambda_normal 1e-3

Advanced Usage

### -O: the recommended setting, equals
--fp16 --preload --mark_untrained --random_image_batch --adaptive_num_rays --refine --mesh_visibility_culling

### load checkpoint
--ckpt latest # by default we load the latest checkpoint in the workspace
--ckpt scratch # train from scratch. For stage 1, this will still load the stage 0 model as an initialization.
--ckpt trial/checkpoints/xxx.pth # specify it by path

### testing
--test # test, save video and mesh
--test_no_video # do not save video
--test_no_mesh # do not save mesh

### dataset related
--data_format [colmap|nerf|dtu] # dataset format
--enable_cam_center # use camera center instead of sparse point center as scene center (colmap dataset only)
--enable_cam_near_far # estimate camera near & far from sparse points (colmap dataset only)

--bound 16 # scene bound set to [-16, 16]^3, note that only meshes inside the center [-1, 1]^3 will be adaptively refined!
--scale 0.3 # camera scale, if not specified, automatically estimate one based on camera positions. Important targets should be scaled into the center [-1, 1]^3.

### visualization 
--vis_pose # viusalize camera poses and sparse points (sparse points are colmap dataset only)
--gui # open gui (only for testing, training in gui is not well supported!)

### balance between surface quality / rendering quality

# increase these weights to get better surface quality but worse rendering quality
--lambda_tv 1e-7 # total variation loss (stage 0)
--lambda_entropy 1e-3 # entropy on rendering weights (transparency, alpha), encourage them to be either 0 or 1 (stage 0)
--lambda_lap 0.001 # laplacian smoothness loss (stage 1)
--lambda_normal 0.001 # normal consistency loss (stage 1)
--lambda_offsets 0.1 # vertex offsets L2 loss (stage 1)
--lambda_edgelen 0.1 # edge length L2 loss (stage 1)

# set all smoothness regularizations to 0, usually get the best rendering quality
--wo_smooth

# only use diffuse shading
--diffuse_only

### coarse mesh extraction & post-processing
--mcubes_reso 512 # marching cubes resolution
--decimate_target 300000 # decimate raw mesh to this face number
--clean_min_d 5 # isolated floaters with smaller diameter will be removed
--clean_min_f 8 # isolated floaters with fewer faces will be removed
--visibility_mask_dilation 5 # dilate iterations after performing visibility face culling

### fine mesh exportation
--texture_size 4096 # max texture image resolution
--ssaa 2 # super-sampling anti-alias ratio
--refine_size 0.01 # finest edge len at subdivision
--refine_decimate_ratio 0.1 # decimate ratio at each refine step
--refine_remesh_size 0.02 # remesh edge len after decimation

### Depth supervision (colmap dataset only)

# download depth checkpoints (omnidata v2)
cd depth_tools
bash download_models.sh
cd ..

# generate dense depth (save to `data/<name>/depths`)
python depth_tools/extract_depth.py data/<name>/images_4

# enable dense depth training
python main.py data/<name> -O --bound 16 --data_format colmap --enable_dense_depth

Please check the scripts directory for more examples on common datasets, and check main.py for all options.

Acknowledgement

Citation

@article{tang2022nerf2mesh,
  title={Delicate Textured Mesh Recovery from NeRF via Adaptive Surface Refinement},
  author={Tang, Jiaxiang and Zhou, Hang and Chen, Xiaokang and Hu, Tianshu and Ding, Errui and Wang, Jingdong and Zeng, Gang},
  journal={arXiv preprint arXiv:2303.02091},
  year={2022}
}

nerf2mesh's People

Contributors

ashawkey avatar bell-one avatar gr3atchoi avatar wangyida avatar

Stargazers

 avatar  avatar  avatar  avatar  avatar  avatar  avatar  avatar  avatar  avatar  avatar  avatar  avatar  avatar  avatar  avatar  avatar  avatar  avatar  avatar  avatar  avatar  avatar  avatar  avatar  avatar  avatar  avatar  avatar  avatar  avatar  avatar  avatar  avatar  avatar  avatar  avatar  avatar  avatar  avatar  avatar  avatar  avatar  avatar  avatar  avatar  avatar  avatar  avatar  avatar  avatar  avatar  avatar  avatar  avatar  avatar  avatar  avatar  avatar  avatar  avatar  avatar  avatar  avatar  avatar  avatar  avatar  avatar  avatar  avatar  avatar  avatar  avatar  avatar  avatar  avatar  avatar  avatar  avatar  avatar  avatar  avatar  avatar  avatar  avatar  avatar  avatar  avatar  avatar  avatar  avatar  avatar  avatar  avatar  avatar  avatar  avatar  avatar  avatar  avatar

Watchers

 avatar  avatar  avatar  avatar  avatar  avatar  avatar  avatar  avatar  avatar  avatar  avatar  avatar

nerf2mesh's Issues

Surface reconstruction evaluation

Thanks for the great work.

Do you have code on how to evaluate the surface reconstruction capacity of your method?

In the paper you mention you sample a point cloud from the test-time cameras. Could you please share this implementation?

Thanks!

Why mesh_0.ply is better than mesh_0_updated.ply?

Why mesh_0.ply is better than mesh_0_updated.ply?

The stage 1 processes using mesh_0_updated.ply. So, the result is not good if it was using mesh_0.ply

Here the screenshot of mesh_0 lego synthetic dataset:
image

Here the screenshot of mesh_0_updated lego synthetic dataset:
image

Final texturing:
image

Here is the syntaxs:

!python3 scripts/colmap2nerf.py --images LEGO/images/ --run_colmap

!python3 main.py LEGO --workspace /content/trial_colab_lego/ -O --bound 1 --scale 0.8 --dt_gamma 0 --stage 0 --lambda_tv 1e-8 --mcubes_reso 256 --env_reso 256 --iters 20000

!python3 main.py LEGO --workspace /content/trial_colab_lego/ -O --bound 1 --scale 0.8 --dt_gamma 0 --stage 1 --lambda_tv 1e-8 --mcubes_reso 256 --env_reso 256 --texture_size 2048 --iters 10000

Using low iters just for trial. Have been using higher iters (30k iters) but still got same issue.

Trained with google colab. Thanks for #34 for creating the notebook.

EGL Initilisation failed.

Error1: /nvdiffrast/common/glutil.h:36:10: fatal error: EGL/egl.h: No such file or directory
Error 2 EGL initialisation failed

Saving Mesh Failed

First of all great job.

I used colmap and ran the following command: python3 main.py plant/ --workspace plant-output -O --data_format colmap --bound 1 --scale 0.3 --stage 0 --clean_min_f 16 --clean_min_d 10 --lambda_tv 2e-8 --visibility_mask_dilation 10 --decimate_target 500000

But got below error.

File "/home/ubuntu/nerf2mesh/lib/python3.8/site-packages/nvdiffrast/torch/ops.py", line 248, in forward
out, out_db = _get_plugin().rasterize_fwd_cuda(raster_ctx.cpp_wrapper, pos, tri, resolution, ranges, peeling_idx)
RuntimeError: Cuda error: 700[cudaMemcpyAsync(&atomics[0], m_crAtomics.getPtr(), sizeof(CRAtomics) * m_numImages, cudaMemcpyDeviceToHost, stream);]

Two meshes have been saved in stage1

Thanks a lot for your great work!
But I'ev encountered an issue that if I change the --scale from 0.8(which is the default setting) to 1 I will get two separate meshes in /nerf2mesh-main/lego_scale1box2/mesh_stage1/.And these two separate meshes can be merged into a full mesh which is exactly the mesh for the object.

2 small bugs

Hi again,

just wanted to drop these 2 notes for you about bugs I encountered and had to manually fix.

The first is the torch-scatter requirement. Idk if its the '_' or what but it would never install. I just used this link from the github instead pip install torch-scatter -f https://data.pyg.org/whl/torch-1.13.0+cu117.html

Secondly, The mesh exporting function call might have old code.

Traceback (most recent call last):
File "/home/tommysugg/nerf2mesh/nerf/gui.py", line 274, in callback_mesh
self.trainer.save_mesh(resolution=256, threshold=10)
TypeError: Trainer.save_mesh() got an unexpected keyword argument 'threshold'

I changed it to this and it started working. Let me know if that is correct

image

Custom data's texture is so dark

Thank you for awesome project
this is result of ngp_stage1_ep0100_rgb.mp4 which from stage 1

ngp_stage1_ep0100_rgb.mp4

but result of mesh texture is soooo dark.
Screenshot from 2023-04-27 17-45-40

Screenshot from 2023-04-27 17-47-09

any solutions?

ValueError: string is not a file: trial_custom/mesh_stage0/mesh_4.ply

Thanks for this very great work, how can this problem be solved please?
Traceback (most recent call last):
File "main.py", line 159, in
model = NeRFNetwork(opt)
File "/root/nerf2mesh/nerf/network.py", line 38, in init
super().init(opt)
File "/root/nerf2mesh/nerf/renderer.py", line 121, in init
mesh = trimesh.load(os.path.join(self.opt.workspace, 'mesh_stage0', f'mesh_{cas}.ply'), force='mesh', skip_material=True, process=False)
File "/root/miniconda3/envs/nerf2mesh/lib/python3.8/site-packages/trimesh/exchange/load.py", line 116, in load
) = parse_file_args(file_obj=file_obj,
File "/root/miniconda3/envs/nerf2mesh/lib/python3.8/site-packages/trimesh/exchange/load.py", line 630, in parse_file_args
raise ValueError('string is not a file: {}'.format(file_obj))
ValueError: string is not a file: trial_custom/mesh_stage0/mesh_4.ply

Stage 0 - Epoch 1 TypeError

╭───────────────────── Traceback (most recent call last) ──────────────────────╮
│ /home/k/nerf2mesh/main.py:224 in │
│ │
│ 221 │ │ │ valid_loader = NeRFDataset(opt, device=device, type='val') │
│ 222 │ │ │ │
│ 223 │ │ │ trainer.metrics = [PSNRMeter(),] │
│ ❱ 224 │ │ │ trainer.train(train_loader, valid_loader, max_epoch) │
│ 225 │ │ │ │
│ 226 │ │ │ # last validation │
│ 227 │ │ │ trainer.metrics = [PSNRMeter(), SSIMMeter(), LPIPSMeter(de │
│ │
│ /home/k/nerf2mesh/nerf/utils.py:902 in train │
│ │
│ 899 │ │ for epoch in range(self.epoch + 1, max_epochs + 1): │
│ 900 │ │ │ self.epoch = epoch │
│ 901 │ │ │ │
│ ❱ 902 │ │ │ self.train_one_epoch(train_loader) │
│ 903 │ │ │ │
│ 904 │ │ │ if (self.epoch % self.save_interval == 0 or self.epoch == │
│ 905 │ │ │ │ self.save_checkpoint(full=True, best=False) │
│ │
│ /home/k/nerf2mesh/nerf/utils.py:1127 in train_one_epoch │
│ │
│ 1124 │ │ │ │
│ 1125 │ │ │ # update grid every 16 steps │
│ 1126 │ │ │ if self.model.cuda_ray and self.global_step % self.opt.up │
│ ❱ 1127 │ │ │ │ loss_grid = self.model.update_extra_state() │
│ 1128 │ │ │ else: │
│ 1129 │ │ │ │ loss_grid = None │
│ 1130 │
│ │
│ /home/k/nerf2mesh/nerf/renderer.py:972 in update_extra_state │
│ │
│ 969 │ │ │ │ │ │ │ │ cas_xyzs += (torch.rand_like(cas_xyzs │
│ 970 │ │ │ │ │ │ │ │ # query density │
│ 971 │ │ │ │ │ │ │ │ with torch.cuda.amp.autocast(enabled= │
│ ❱ 972 │ │ │ │ │ │ │ │ │ sigmas = self.density(cas_xyzs)[' │
│ 973 │ │ │ │ │ │ │ │ # assign │
│ 974 │ │ │ │ │ │ │ │ tmp_grid[cas, indices] = sigmas │
│ 975 │
│ │
│ /home/k/nerf2mesh/nerf/network.py:65 in density │
│ │
│ 62 │ def density(self, x): │
│ 63 │ │ │
│ 64 │ │ # sigma │
│ ❱ 65 │ │ h = self.encoder(x, bound=self.bound) │
│ 66 │ │ h = self.sigma_net(h) │
│ 67 │ │ │
│ 68 │ │ sigma = trunc_exp(h[..., 0]) │
│ │
│ /home/k/.local/lib/python3.10/site-packages/torch/nn/modules/module.py:1501 │
│ in _call_impl │
│ │
│ 1498 │ │ if not (self._backward_hooks or self._backward_pre_hooks or s │
│ 1499 │ │ │ │ or _global_backward_pre_hooks or _global_backward_hoo │
│ 1500 │ │ │ │ or _global_forward_hooks or _global_forward_pre_hooks │
│ ❱ 1501 │ │ │ return forward_call(*args, **kwargs) │
│ 1502 │ │ # Do not call functions when jit is used │
│ 1503 │ │ full_backward_hooks, non_full_backward_hooks = [], [] │
│ 1504 │ │ backward_pre_hooks = [] │
│ │
│ /home/k/nerf2mesh/gridencoder/grid.py:156 in forward │
│ │
│ 153 │ │ prefix_shape = list(inputs.shape[:-1]) │
│ 154 │ │ inputs = inputs.view(-1, self.input_dim) │
│ 155 │ │ │
│ ❱ 156 │ │ outputs = grid_encode(inputs, self.embeddings, self.offsets, s │
│ 157 │ │ outputs = outputs.view(prefix_shape + [self.output_dim]) │
│ 158 │ │ │
│ 159 │ │ #print('outputs', outputs.shape, outputs.dtype, outputs.min(). │
│ │
│ /home/k/.local/lib/python3.10/site-packages/torch/autograd/function.py:506 │
│ in apply │
│ │
│ 503 │ │ if not torch._C._are_functorch_transforms_active(): │
│ 504 │ │ │ # See NOTE: [functorch vjp and autograd interaction] │
│ 505 │ │ │ args = _functorch.utils.unwrap_dead_wrappers(args) │
│ ❱ 506 │ │ │ return super().apply(*args, **kwargs) # type: ignore[misc │
│ 507 │ │ │
│ 508 │ │ if cls.setup_context == _SingleLevelFunction.setup_context: │
│ 509 │ │ │ raise RuntimeError( │
│ │
│ /home/k/.local/lib/python3.10/site-packages/torch/cuda/amp/autocast_mode.py: │
│ 98 in decorate_fwd │
│ │
│ 95 │ │ args[0]._dtype = torch.get_autocast_gpu_dtype() │
│ 96 │ │ if cast_inputs is None: │
│ 97 │ │ │ args[0]._fwd_used_autocast = torch.is_autocast_enabled() │
│ ❱ 98 │ │ │ return fwd(*args, **kwargs) │
│ 99 │ │ else: │
│ 100 │ │ │ autocast_context = torch.is_autocast_enabled() │
│ 101 │ │ │ args[0]._fwd_used_autocast = False │
│ │
│ /home/k/nerf2mesh/gridencoder/grid.py:54 in forward │
│ │
│ 51 │ │ else: │
│ 52 │ │ │ dy_dx = None │
│ 53 │ │ │
│ ❱ 54 │ │ _backend.grid_encode_forward(inputs, embeddings, offsets, outp │
│ 55 │ │ │
│ 56 │ │ # permute back to [B, L * C] │
│ 57 │ │ outputs = outputs.permute(1, 0, 2).reshape(B, L * C) │
╰──────────────────────────────────────────────────────────────────────────────╯
TypeError: grid_encode_forward(): incompatible function arguments. The following
argument types are supported:
1. (arg0: torch.Tensor, arg1: torch.Tensor, arg2: torch.Tensor, arg3:
torch.Tensor, arg4: int, arg5: int, arg6: int, arg7: int, arg8: int, arg9:
float, arg10: int, arg11: Optional[torch.Tensor], arg12: int, arg13: bool,
arg14: int) -> None

please, help ..

Data process

Thank you for your nice work! I might missed something so I met an issue with the data process:

First case: I use --data_format colmap to load my own data (colmap):

Second case: I first run your torch-ngp python scripts/colmap2nerf.py to generate transform_train/val/test.json. Then, I use --data_format nerf to load my own data.

The two cases lead to different results: the first one gets 18 in PSNR while the latter produces 22: the visualizations also reflect such a performance gap.

May I know your suggestion on this? Thanks.

Running on WSL?

Hello, I'm trying to run this on WSL, running ubuntu

Running the first stage, I get
(pasting full output since I'm not sure if the warnings are relevant)

ubuntu@DESKTOP-CVF0MI9:/mnt/c/Users/jurre/Desktop/School/Minor/NeRF/nerf2mesh$ python main.py data/nerf_synthetic/lego/ --workspace trial_syn_lego/ -O --bound 1 --scale 0.8 --dt_gamma 0 --stage 0 --lambda_tv 1e-8
Warning:
Unable to load the following plugins:

        libio_e57.so: libio_e57.so does not seem to be a Qt Plugin.

Cannot load library /home/ubuntu/.local/lib/python3.8/site-packages/pymeshlab/lib/plugins/libio_e57.so: (/lib/x86_64-linux-gnu/libp11-kit.so.0: undefined symbol: ffi_type_pointer, version LIBFFI_BASE_7.0)

Loading train data: 100%|█████████████████████████████████████████████████████████████████████████████████████████████████████████████████████████████████████████████████████████████████████████████| 100/100 [00:01<00:00, 58.13it/s]
[INFO] max_epoch 300, eval every 60, save every 6.
[INFO] Trainer: ngp_stage0 | 2023-05-05_10-58-04 | cuda | fp16 | trial_syn_lego/
[INFO] #parameters: 18367240
Namespace(H=1000, O=True, W=1000, adaptive_num_rays=True, background='random', bound=1.0, camera_traj='', ckpt='latest', clean_min_d=5, clean_min_f=8, color_space='srgb', contract=False, cuda_ray=True, data_format='nerf',
decimate_target=300000.0, density_thresh=10, diffuse_only=False, diffuse_step=1000, downscale=1, dt_gamma=0.0, enable_cam_center=False, enable_cam_near_far=False, enable_dense_depth=False, enable_offset_nerf_grad=False,
enable_sparse_depth=False, env_reso=256, fovy=50, fp16=True, grid_size=128, gui=False, ind_dim=0, ind_num=500, iters=30000, lambda_density=0, lambda_depth=0.1, lambda_edgelen=0, lambda_eikonal=0.1, lambda_entropy=0,
lambda_lap=0.001, lambda_lpips=0, lambda_mask=0.1, lambda_normal=0, lambda_offsets=0.1, lambda_rgb=1, lambda_specular=1e-05, lambda_tv=1e-08, lr=0.01, lr_vert=0.0001, mark_untrained=True, max_ray_batch=4096, max_spp=1,
max_steps=1024, mcubes_reso=512, mesh='', mesh_visibility_culling=True, min_near=0.05, n_ckpt=50, n_eval=5, num_points=262144, num_rays=4096, offset=[0, 0, 0], patch_size=1, path='data/nerf_synthetic/lego/', pos_gradient_boost=1,
preload=True, radius=5, random_image_batch=True, refine=True, refine_decimate_ratio=0.1, refine_remesh_size=0.02, refine_size=0.01, refine_steps=[3000, 6000, 9000, 12000, 15000, 21000], refine_steps_ratio=[0.1, 0.2, 0.3, 0.4, 0.5,
0.7], scale=0.8, sdf=False, seed=0, ssaa=2, stage=0, tcnn=False, test=False, test_no_mesh=False, test_no_video=False, texture_size=4096, train_split='train', trainable_density_grid=False, update_extra_interval=16, vis_pose=False,
visibility_mask_dilation=5, wo_smooth=False, workspace='trial_syn_lego/')
NeRFNetwork(
  (encoder): GridEncoder: input_dim=3 num_levels=16 level_dim=1 resolution=16 -> 2048 per_level_scale=1.3819 params=(6119864, 1) gridtype=hash align_corners=False interpolation=linear
  (sigma_net): MLP(
    (net): ModuleList(
      (0): Linear(in_features=19, out_features=32, bias=False)
      (1): Linear(in_features=32, out_features=1, bias=False)
    )
  )
  (encoder_color): GridEncoder: input_dim=3 num_levels=16 level_dim=2 resolution=16 -> 2048 per_level_scale=1.3819 params=(6119864, 2) gridtype=hash align_corners=False interpolation=linear
  (color_net): MLP(
    (net): ModuleList(
      (0): Linear(in_features=35, out_features=64, bias=False)
      (1): Linear(in_features=64, out_features=64, bias=False)
      (2): Linear(in_features=64, out_features=6, bias=False)
    )
  )
  (specular_net): MLP(
    (net): ModuleList(
      (0): Linear(in_features=6, out_features=32, bias=False)
      (1): Linear(in_features=32, out_features=3, bias=False)
    )
  )
)
[INFO] Loading latest checkpoint ...
[INFO] Latest checkpoint is trial_syn_lego/checkpoints/ngp_stage0_ep0300.pth
[INFO] loaded model.
[INFO] loaded EMA.
[INFO] load at epoch 300, global step 30000
[INFO] loaded optimizer.
[INFO] loaded scheduler.
[INFO] loaded scaler.
Loading val data: 100%|███████████████████████████████████████████████████████████████████████████████████████████████████████████████████████████████████████████████████████████████████████████████| 100/100 [00:01<00:00, 57.05it/s]
[mark untrained grid] 0 from 2097152
[INFO] training takes 0.000001 minutes.
Setting up [LPIPS] perceptual loss: trunk [vgg], v[0.1], spatial [off]
/home/ubuntu/.local/lib/python3.8/site-packages/torchvision/models/_utils.py:208: UserWarning: The parameter 'pretrained' is deprecated since 0.13 and may be removed in the future, please use 'weights' instead.
  warnings.warn(
/home/ubuntu/.local/lib/python3.8/site-packages/torchvision/models/_utils.py:223: UserWarning: Arguments other than a weight enum or `None` for 'weights' are deprecated since 0.13 and may be removed in the future. The current behavior is equivalent to passing `weights=VGG16_Weights.IMAGENET1K_V1`. You can also use `weights=VGG16_Weights.DEFAULT` to get the most up-to-date weights.
  warnings.warn(msg)
Loading model from: /home/ubuntu/.local/lib/python3.8/site-packages/lpips/weights/v0.1/vgg.pth
++> Evaluate at epoch 300 ...
loss=0.000251 (0.000316): : 100% 100/100 [00:22<00:00,  4.44it/s]
PSNR = 35.362388
SSIM = 0.977125
LPIPS (vgg) = 0.029383
++> Evaluate epoch 300 Finished, loss = 0.000316
Loading test data: 100%|██████████████████████████████████████████████████████████████████████████████████████████████████████████████████████████████████████████████████████████████████████████████| 200/200 [00:05<00:00, 39.96it/s]
++> Evaluate at epoch 300 ...
loss=0.000279 (0.000435): : 100% 200/200 [00:45<00:00,  4.37it/s]
PSNR = 34.270256
SSIM = 0.974770
LPIPS (vgg) = 0.032933
++> Evaluate epoch 300 Finished, loss = 0.000435
==> Start Test, save results to trial_syn_lego/results
100% 200/200 [00:18<00:00, 10.92it/s]==> Finished Test.
100% 200/200 [00:20<00:00,  9.67it/s]
==> Saving mesh to trial_syn_lego/mesh_stage0
[F glutil.cpp:332] eglGetDisplay() failed
Aborted

I guess this makes sense, since my WSL does not have a display, but I didn't think a display would be needed for a program like this?
What could I do to mitigate this? I'm not planning on running linux locally, nor do I have any linux machines laying around. I'm not sure how smooth a VM would be with GPU passthrough and the headaches that would come with it. Is it possible to run this without any display attached?

image from render_stage1 has a shrinkage/distortion effect

I test the code on garden data, then compare the validation image with origin image, the contents near image corner has a shrinkage/distortion effect, other data also has this issue.
the validation image is generated by differentiable rendering from nvdiffrast, so why these issue happend ? is it a defect of differentiable rendering ?
compare image in the following gif.
thanks for apply.
Peek 2023-04-18 18-59

Stage 1 training failed

Hi, thanks you for sharing your great work.

I am training on custom dataset following the command line with the exact same parameters:
python main.py data/custom/ --workspace trial_custom -O --data_format colmap --bound 4 --scale 0.3 --stage 0 --clean_min_f 16 --clean_min_d 10 --lambda_tv 2e-8 --visibility_mask_dilation 50

After the stage 0 training finished, I got two meshes: mesh_0.ply and mesh_1.ply. Then I used the second command line to train for stage 1:
python main.py data/custom/ --workspace trial_custom -O --data_format colmap --bound 4 --scale 0.3 --stage 1 --iters 10000 --lambda_normal 1e-3

However, exception occurred while the nerfrenderer try reading cascade meshes, which is shown as below:
Traceback (most recent call last): File "/media/ethan/Files/nerf2mesh/main.py", line 159, in <module> model = NeRFNetwork(opt) File "/media/ethan/Files/nerf2mesh/nerf/network.py", line 38, in __init__ super().__init__(opt) File "/media/ethan/Files/nerf2mesh/nerf/renderer.py", line 121, in __init__ mesh = trimesh.load(os.path.join(self.opt.workspace, 'mesh_stage0', f'mesh_{cas}.ply'), force='mesh', skip_material=True, process=False) File "/home/ethan/anaconda3/envs/nerf2mesh/lib/python3.9/site-packages/trimesh/exchange/load.py", line 116, in load ) = parse_file_args(file_obj=file_obj, File "/home/ethan/anaconda3/envs/nerf2mesh/lib/python3.9/site-packages/trimesh/exchange/load.py", line 630, in parse_file_args raise ValueError('string is not a file: {}'.format(file_obj)) ValueError: string is not a file: trial_custom/mesh_stage0/mesh_2.ply
screenshot2

It seems the number of meshes the nerfrenderer tries to read is related to --bound, is it something wrong with my training data, or should I change the parameter for stage 1 training?

Best settings for the garden dataset?

Hi again, I have now successfully output a mesh for the mipnerf360 garden dataset, but the mesh quality is very bad, with holes in the floor and many inaccuracies.

Can you please share the settings / command line used to generate the garden mesh in the example images here ?

image

Thanks!

Question about Chamfer distance

Could you please to provide your scripts about the calculation of chamfer distance ?

I tried several methods but could not meet your results.

Look forward to your favourable reply。

ninja: build stopped: subcommand failed.

I am using docker container (pytorch/pytorch:1.13.0-cuda11.6-cudnn8-devel)

Training got completed but faced below error while saving mesh on sample lego dataset

++> Evaluate epoch 300 Finished.
Loading test data: 100%|██████████████████████| 200/200 [00:02<00:00, 71.51it/s]
++> Evaluate at epoch 300 ...
loss=0.000199 (0.000249): : 100% 200/200 [01:10<00:00, 2.84it/s]
PSNR = 33.700192
SSIM = 0.972311
LPIPS (vgg) = 0.043763
++> Evaluate epoch 300 Finished.
==> Start Test, save results to trial_syn_lego/results
100% 200/200 [00:29<00:00, 7.17it/s]==> Finished Test.
100% 200/200 [00:34<00:00, 5.87it/s]
==> Saving mesh to trial_syn_lego/mesh_stage0
Traceback (most recent call last):
File "/opt/conda/lib/python3.9/site-packages/torch/utils/cpp_extension.py", line 1900, in _run_ninja_build
subprocess.run(
File "/opt/conda/lib/python3.9/subprocess.py", line 528, in run
raise CalledProcessError(retcode, process.args,
subprocess.CalledProcessError: Command '['ninja', '-v']' returned non-zero exit status 1.

The above exception was the direct cause of the following exception:

Traceback (most recent call last):
File "/home/data2/nerf2mesh/main.py", line 241, in
trainer.save_mesh(resolution=opt.mcubes_reso, decimate_target=opt.decimate_target, dataset=train_loader._data if opt.mesh_visibility_culling else None)
File "/home/data2/nerf2mesh/nerf/utils.py", line 871, in save_mesh
self.model.export_stage0(save_path, resolution=resolution, decimate_target=decimate_target, dataset=dataset)
File "/opt/conda/lib/python3.9/site-packages/torch/autograd/grad_mode.py", line 27, in decorate_context
return func(*args, **kwargs)
File "/home/data2/nerf2mesh/nerf/renderer.py", line 486, in export_stage0
visibility_mask = self.mark_unseen_triangles(vertices, triangles, dataset.mvps, dataset.H, dataset.W).cpu().numpy()
File "/opt/conda/lib/python3.9/site-packages/torch/autograd/grad_mode.py", line 27, in decorate_context
return func(*args, **kwargs)
File "/home/data2/nerf2mesh/nerf/renderer.py", line 818, in mark_unseen_triangles
self.glctx = dr.RasterizeGLContext(output_db=False)
File "/opt/conda/lib/python3.9/site-packages/nvdiffrast/torch/ops.py", line 221, in init
self.cpp_wrapper = _get_plugin(gl=True).RasterizeGLStateWrapper(output_db, mode == 'automatic', cuda_device_idx)
File "/opt/conda/lib/python3.9/site-packages/nvdiffrast/torch/ops.py", line 118, in _get_plugin
torch.utils.cpp_extension.load(name=plugin_name, sources=source_paths, extra_cflags=opts, extra_cuda_cflags=opts+['-lineinfo'], extra_ldflags=ldflags, with_cuda=True, verbose=False)
File "/opt/conda/lib/python3.9/site-packages/torch/utils/cpp_extension.py", line 1284, in load
return _jit_compile(
File "/opt/conda/lib/python3.9/site-packages/torch/utils/cpp_extension.py", line 1508, in _jit_compile
_write_ninja_file_and_build_library(
File "/opt/conda/lib/python3.9/site-packages/torch/utils/cpp_extension.py", line 1623, in _write_ninja_file_and_build_library
_run_ninja_build(
File "/opt/conda/lib/python3.9/site-packages/torch/utils/cpp_extension.py", line 1916, in _run_ninja_build
raise RuntimeError(message) from e
RuntimeError: Error building extension 'nvdiffrast_plugin_gl': [1/1] c++ common.o glutil.o rasterize_gl.o torch_bindings_gl.o torch_rasterize_gl.o -shared -lGL -lEGL -L/opt/conda/lib/python3.9/site-packages/torch/lib -lc10 -lc10_cuda -ltorch_cpu -ltorch_cuda_cu -ltorch_cuda_cpp -ltorch -ltorch_python -L/opt/conda/lib64 -lcudart -o nvdiffrast_plugin_gl.so
FAILED: nvdiffrast_plugin_gl.so
c++ common.o glutil.o rasterize_gl.o torch_bindings_gl.o torch_rasterize_gl.o -shared -lGL -lEGL -L/opt/conda/lib/python3.9/site-packages/torch/lib -lc10 -lc10_cuda -ltorch_cpu -ltorch_cuda_cu -ltorch_cuda_cpp -ltorch -ltorch_python -L/opt/conda/lib64 -lcudart -o nvdiffrast_plugin_gl.so
/usr/bin/ld: cannot find -lcudart
collect2: error: ld returned 1 exit status
ninja: build stopped: subcommand failed.

Build errors, Windows

Hi, I am trying to build following your instruction, and when i run 👍

cd raymarching
python setup.py build_ext --inplace

I see the following:

 Creating library D:\NERF\SDF\nerf2mesh\raymarching\build\temp.win-amd64-cpython-39\Release\NERF\SDF\nerf2mesh\raymarching\src\_raymarching_mob.cp39-win_amd64.lib and object D:\NERF\SDF\nerf2mesh\raymarching\build\temp.win-amd64-cpython-39\Release\NERF\SDF\nerf2mesh\raymarching\src\_raymarching_mob.cp39-win_amd64.exp
bindings.obj : error LNK2001: unresolved external symbol "void __cdecl composite_rays(unsigned int,unsigned int,float,bool,class at::Tensor,class at::Tensor,class at::Tensor,class at::Tensor,class at::Tensor,class at::Tensor,class at::Tensor,class at::Tensor)" (?composite_rays@@YAXIIM_NVTensor@at@@1111111@Z)
  Hint on symbols that are defined and could potentially match:
    "void __cdecl composite_rays(unsigned int,unsigned int,float,bool,class at::Tensor,class at::Tensor,class at::Tensor,class at::Tensor,class at::Tensor,class at::Tensor,class at::Tensor,class at::Tensor)" (?composite_rays@@YAXIIM_NVTensor@at@@1V12@22111@Z)
build\lib.win-amd64-cpython-39\_raymarching_mob.cp39-win_amd64.pyd : fatal error LNK1120: 1 unresolved externals
error: command 'C:\\Program Files\\Microsoft Visual Studio\\2022\\Community\\VC\\Tools\\MSVC\\14.34.31933\\bin\\HostX86\\x64\\link.exe' failed with exit code 1120

What can i try to get this running properly?

Thank you!

[F glutil.cpp:338] eglInitialize() failed

Issue:

==> Saving mesh to trial_syn_lego/mesh_stage0
[F glutil.cpp:338] eglInitialize() failed
Aborted (core dumped)

I am starting training the test lego by nerf2mesh in docker.
When the code is saveing the mesh ,it always push this.
I want to know how to solve this problem.
I think it is the problem for EGL, because when I get this issue before the code told me the "include<EGL.h> is not existed.
So I go to the web to find solution, and find one.
Using line code:
sudo apt-get install libglfw3-dev libgles2-mesa-dev
but after that I get this issue,and i don't know how to solve it,please help!!!

Error when saving mesh in stage 0

Hi,
Thinks for the amazing work.
When I try to run the stage 0 by README.md
python main.py data/nerf_synthetic/lego/ --workspace trial_syn_lego/ -O --bound 1 --scale 0.8 --dt_gamma 0 --stage 0 --lambda_tv 1e-8
It was report error

==> Finished Test.
100% 100/100 [00:24<00:00,  4.07it/s]
==> Saving mesh to trial_360_garden/mesh_stage0
[F glutil.cpp:332] eglGetDisplay() failed
[1]    2911345 abort (core dumped)

Can you give me some help?

Training doesnt converge for LLFF dataset

I am trying to generate a mesh for the fortress dataset (https://drive.google.com/drive/folders/1zotOx2wPtzV_3590x7KHuv9HyFfXzp4h) but the training never converges despite usign the recommended parameters. Attaching the training log below.

In order to avoid suspicion on the dataset/colmap transform, I trained an instant-ngp model with the same dataset and I was able to get a mesh out. Not sure what could be going wrong with this implementation.

log_ngp_stage0.txt

depth supervision

hi, thanks for your great work! there'are some questions about the depth supervision.
1.have your test your codes on depth supervision, your didn't mention any experiments about depth in your paper?
2.how did your train with depth supervision, because the depth map size is 384*384, while your training image size is different?
3.have your trained with depth supervision on some outdoor datasets, and did the depth supervision work well, cause the mono depth estimation on outdoor scenes are not good especially on plants

looking forward to your reply, thanks! @ashawkey

colmap stage 0 failed

image
image

I just follow your tutorial, which use garden to generate, i not sure why i failed

the stage 0 of nerf is success

version `Qt_5.15' not found

when import pymeshlab in the render, I met the problem with Qt, does it need more detailed information with pymeshlab version

aboutresult A few questions ?

  1. For .obj how to increase the number of vertices and faces, now the number of vertices and faces are relatively low?
  2. about renderer.html How to display my output?
    image

the result of forward-facing captures is bad

I had a problem running the dinosaur picture. My results are very poor!
The command lines run in the following order:
python scripts/colmap2nerf.py --images ./data/dragon/images/ --run_colmap
python scripts/downscale.py data/dragon --downscale 4
python main.py data/dragon/ --workspace trial_dragon -O --data_format colmap --bound 4 --scale 0.3 --downscale 4 --stage 0 --clean_min_f 16 --clean_min_d 10 --lambda_tv 2e-8 --visibility_mask_dilation 50
DJI_20200223_163016_842
20230414141153

Loading training data : Killed

I am training model on custom dataset. I have created 3 files (transforms_train/test/val.json) and 2 folders(colmap_text/sparse) using scripts/colmap2nerf.py and stored the images in separate folder.

**Note: The files generated using colmap2nerf.py was on windows machine and testing nerf2mesh algo on linux machine as colmap was giving error on linux.**

but I am getting message as Killed with no error at around 75% of data uploading in both trials (colmap and nerf data format). I don't have any memory shortage. Please let me know what I am missing?

Trial 1 root@1dcb588ae75a:/home/data2/nerf2mesh# python main.py data/custom/ --workspace trial_custom -O --data_format colmap --bound 16 --enable_cam_center --enable_cam_near_far --scale 0.3 --stage 0 --lambda_entropy 1e-3 --clean_min_f 16 --clean_min_d 10 --lambda_tv 2e-8 --visibility_mask_dilation 50
[INFO] ColmapDataset: image H = 4000, W = 6000
[INFO] 570 image exists in all 570 colmap entries.
[INFO] ColmapDataset: load poses (570, 4, 4), points (311022, 3)
[INFO] extracting sparse depth info...
100%|█████████████████████████████████████████████████████████████████████████████████████████████████████████| 570/570 [00:00<00:00, 1511.86it/s]
[INFO] extracted 4704.99 valid sparse depth on average per image
Loading train data: 74%|████████████████████████████████████████████████████████████████▍ | 369/498 [02:11<01:32, 1.39it/s]Killed

Trial 2: root@1dcb588ae75a:/home/data2/nerf2mesh# python main.py data/custom/ --workspace trial_custom -O --data_format nerf --bound 16 --enable_cam_center --enable_cam_near_far --scale 0.3 --stage 0 --lambda_entropy 1e-3 --clean_min_f 16 --clean_min_d 10 --lambda_tv 2e-8 --visibility_mask_dilation 50
Loading train data: 75%|█████████████████████████████████████████████████████████████████▏ | 373/498 [02:16<02:02, 1.02it/s]Killed

Protrusions in final Mesh: Stage 0 > Stage 1

I'm getting the following results out of this data

Screenshot 2023-05-19 at 10 36 57 PM

The following parameters are used -

--data_format colmap --bound 1 --scale 0.2 --stage 1 --iters 20000 --lambda_normal 5e-1

Post this I tried changing the following params, though the spikes are gone the definition quality is a lot less.

Iteration 1:

  • --lambda_edgelen 0.1
  • --lambda_offsets 0.1

Iteration 2:

  • --lambda_edgelen 0.01
Screenshot 2023-05-19 at 10 49 52 PM

Note: Stage 0 has no spikes.
Which params would be the most helpful in reducing the protrusions in your opinion?

Question for using multi GPU

Hi Thank you for amazing project for everyone.
I have a question for generating mesh speed with multi GPU

I guess the network using only 1 GPU for generating mesh, so Is there any way to use multi GPU for processing?
In my env, It spends 20mins for processing stage 1,2 (RTX 4090)
I just want to make more faster to generate mesh from NeRF. any solutions?

Thanks

Texturing Editing

Hi @ashawkey,
Thanks for sharing this work. However, while reading through the work, you have mentioned texture editing in the teaser but there are no details about how we can edit the texture. Can you elaborate on this?

why is the output of stage 0 still view-dependent

I noticed that in stage 0, the direction isn't fed to the network,only the x is needed,so I guess the result should be view independent...
However,I checked the video ngp_stage0_ep0300_rgb.mp4...
image
image
The color(left) is turning into white when the lego model is rotating,their postions should be the same when changing the view,so the color should be the same,since they are using the same network.....
That's strange,could you give me some hints,or am I missing anything?

Where is mesh_0.ply?

Hello. I want to create a detailed mesh, I went to stage 1 but get this error:
ValueError: string is not a file: trial_syn/mesh_stage0/mesh_0.ply

Here is how to produce:

  1. I create a custom dataset using script/colmap2nerf.py

  2. Run and train this command
    $ python3 main.py LEGO --workspace trial_syn/ -O --bound 1 --scale 0.8 --dt_gamma 0 --stage 0 --lambda_tv 1e-8 --max_ray_batch 256 --num_rays 256

  3. Stopped at 50 epoch (intentionally keyboard interupt)

  4. Run this command and get the error as stated before.
    $ python3 main.py LEGO --workspace trial_syn/ -O --bound 1 --scale 0.8 --dt_gamma 0 --stage 1

Second way, I tried to limit iters to 55

$ python3 main.py LEGO --workspace trial_syn/ -O --bound 1 --scale 0.8 --dt_gamma 0 --stage 0 --lambda_tv 1e-8 --max_ray_batch 256 --num_rays 256 --iters 55
RuntimeError: Unable to find a valid cuDNN algorithm to run convolution

Stage 1 Saving

Hi,

I closed my Windows related question, since I found it easier to get up and running in WSL. I'm right near the end of getting out a colorized ply. Unfortunately, there's one tiny issue I'm hoping you can help me with.

I have the gui open, I'm at stage 1, everything looks good so I click on 'mesh'. The gui says that it saved the file called ngp_stage1_1.ply, I see the terminal and it says saved to a folder called mesh_stage0, but there's no ply file by the name given in the gui.

image

During stage 0, I got an exported uncolorized ply in the mesh_stage0/ folder, but now there's no stage1 ply to be found anywhere. I can see it in the gui though - a colorized mesh.

Here's the log:

[INFO] Trainer: ngp_stage1 | 2023-03-09_08-25-07 | cuda | fp16 | trial_syn_lego/
[INFO] #parameters: 18513142
Namespace(path='data/nerf_synthetic/lego/', O=True, workspace='trial_syn_lego/', seed=0, stage=1, ckpt='latest', fp16=True, test=False, test_no_video=False, test_no_mesh=False, camera_traj='', data_format='nerf', train_split='train', preload=True, random_image_batch=True, downscale=1, bound=1.0, scale=0.8, offset=[0, 0, 0], mesh='', enable_cam_near_far=False, enable_cam_center=False, min_near=0.05, enable_sparse_depth=False, enable_dense_depth=False, iters=30000, lr=0.01, lr_vert=0.0001, pos_gradient_boost=1, cuda_ray=True, max_steps=1024, update_extra_interval=16, max_ray_batch=4096, grid_size=128, mark_untrained=True, dt_gamma=0.0, density_thresh=10, diffuse_step=1000, background='random', enable_offset_nerf_grad=False, num_rays=4096, adaptive_num_rays=True, num_points=262144, lambda_density=0, lambda_entropy=0, lambda_tv=1e-08, lambda_depth=0.1, lambda_specular=1e-05, wo_smooth=False, lambda_lpips=0, lambda_offsets=0.1, lambda_lap=0.001, lambda_normal=0, lambda_edgelen=0, contract=False, patch_size=1, trainable_density_grid=False, color_space='srgb', ind_dim=0, ind_num=500, mcubes_reso=512, env_reso=256, decimate_target=300000.0, mesh_visibility_culling=True, visibility_mask_dilation=5, clean_min_f=8, clean_min_d=5, ssaa=2, texture_size=4096, refine=True, refine_steps_ratio=[0.1, 0.2, 0.3, 0.4, 0.5, 0.7], refine_size=0.01, refine_decimate_ratio=0.1, refine_remesh_size=0.02, vis_pose=False, gui=True, W=1000, H=1000, radius=5, fovy=50, max_spp=1, refine_steps=[3000, 6000, 9000, 12000, 15000, 21000])
NeRFNetwork(
(encoder): GridEncoder: input_dim=3 num_levels=16 level_dim=1 resolution=16 -> 2048 per_level_scale=1.3819 params=(6119864, 1) gridtype=hash align_corners=False interpolation=smoothstep
(encoder_color): GridEncoder: input_dim=3 num_levels=16 level_dim=2 resolution=16 -> 2048 per_level_scale=1.3819 params=(6119864, 2) gridtype=hash align_corners=False interpolation=linear
(sigma_net): MLP(
(net): ModuleList(
(0): Linear(in_features=16, out_features=32, bias=False)
(1): Linear(in_features=32, out_features=1, bias=False)
)
)
(color_net): MLP(
(net): ModuleList(
(0): Linear(in_features=32, out_features=64, bias=False)
(1): Linear(in_features=64, out_features=64, bias=False)
(2): Linear(in_features=64, out_features=6, bias=False)
)
)
(specular_net): MLP(
(net): ModuleList(
(0): Linear(in_features=6, out_features=32, bias=False)
(1): Linear(in_features=32, out_features=3, bias=False)
)
)
)
[INFO] Loading stage 0 model to init stage 1 ...
[INFO] loaded model.
[WARN] missing keys: ['vertices_offsets']
[INFO] Loading latest checkpoint ...
[WARN] No checkpoint found, abort loading latest model.
==> Saving mesh to trial_syn_lego/mesh_stage0
==> Finished saving mesh.

Question about exporting mesh

Thank you very much for your excellent work. When I use my own data set to output mesh, I get an error: RuntimeError: resolution must be [<:2048, <:2048], after reading the comments in the code, I understand that the highest resolution is only 2048 , Does this resolution refer to the resolution of the training image? I downsampled the image to below 2048 and still reported the same error. May I ask how should I solve this problem?

Windows build

Hey, I gave this a shot yesterday and couldn't get it to run all the way through. On WSL I could get all the way through stage 0; however, OpenGL 4.2 is the latest version available on WSL so I couldn't try out stage 1.

I switched over to straight up Windows and then the issue is building the extensions inside of nerf2mesh/ like raymarching/ and freqencoder/. I tried with different versions of python, torch, and cuda.

Each of the extensions failed with this error:
and the typical "this is not a pip issue" or something like that

subprocess.CalledProcessError: Command '['ninja', '-v']' returned non-zero exit status 1.

IndexError while refine_and_decimate

Thanks for your great work.

while traning stage 1,
IndexError: boolean index did not match indexed array along dimension 0; dimension is 449875 but corresponding boolean dimension is 300000
in File "nerf/renderer.py", line 222, in refine_and_decimate.

I think the length of cnt_mask and mask is different because of the the code block '# only care about the inner mesh'

            cnt = self.triangles_errors_cnt.cpu().numpy()
            cnt_mask = cnt > 0
            errors[cnt_mask] = errors[cnt_mask] / cnt[cnt_mask]

            # only care about the inner mesh
            errors = errors[:self.f_cumsum[1]]
            cnt_mask = cnt_mask[:self.f_cumsum[1]]

            # find a threshold to decide whether we perform subdivision / decimation.
            thresh_refine = np.percentile(errors[cnt_mask], 90)
            thresh_decimate = np.percentile(errors[cnt_mask], 50)

            mask[(errors > thresh_refine) & cnt_mask] = 2
            mask[(errors < thresh_decimate) & cnt_mask] = 1

            print(f'[INFO] faces to decimate {(mask == 1).sum()}, faces to refine {(mask == 2).sum()}')

Recommend Projects

  • React photo React

    A declarative, efficient, and flexible JavaScript library for building user interfaces.

  • Vue.js photo Vue.js

    🖖 Vue.js is a progressive, incrementally-adoptable JavaScript framework for building UI on the web.

  • Typescript photo Typescript

    TypeScript is a superset of JavaScript that compiles to clean JavaScript output.

  • TensorFlow photo TensorFlow

    An Open Source Machine Learning Framework for Everyone

  • Django photo Django

    The Web framework for perfectionists with deadlines.

  • D3 photo D3

    Bring data to life with SVG, Canvas and HTML. 📊📈🎉

Recommend Topics

  • javascript

    JavaScript (JS) is a lightweight interpreted programming language with first-class functions.

  • web

    Some thing interesting about web. New door for the world.

  • server

    A server is a program made to process requests and deliver data to clients.

  • Machine learning

    Machine learning is a way of modeling and interpreting data that allows a piece of software to respond intelligently.

  • Game

    Some thing interesting about game, make everyone happy.

Recommend Org

  • Facebook photo Facebook

    We are working to build community through open source technology. NB: members must have two-factor auth.

  • Microsoft photo Microsoft

    Open source projects and samples from Microsoft.

  • Google photo Google

    Google ❤️ Open Source for everyone.

  • D3 photo D3

    Data-Driven Documents codes.