Giter Site home page Giter Site logo

geerlingguy / temperature-monitor Goto Github PK

View Code? Open in Web Editor NEW
268.0 27.0 54.0 1.63 MB

Raspberry Pi-based home temperature monitoring network.

JavaScript 64.82% Makefile 0.05% HTML 32.46% Shell 0.43% CSS 0.52% Python 1.45% Pug 0.15% Jinja 0.12%
raspberry-pi pi temperature-monitor environment nest-api javascript express ds18b20

temperature-monitor's Introduction

Simple Temperature Monitoring App

Temperature Monitoring Dashboard

I've created this project to power a network of temperature and environmental monitors in my home.

The architecture uses one 'master' Pi to aggregate and display log data, and many 'remotes' place around a house to send log data back to the 'master'.

I recommend a Pi model 2 B for the master (since it's running a heavier-weight Node.js-based application, but you can use any Pi for the remotes. I use the A+ or Zero for remotes since they're cheap and use minimal power when running headless.

Each Pi should already have:

  • Raspbian running on the microSD card, with raspi-config setup already completed.
  • Networking configured (either wired LAN or WiFi via USB).

This is a living project, so a lot of things will change while I experiment with making my monitoring more robust, more fully-featured, and eventually, more integrated with my smart thermostat and other environmental controls.

Vagrant quickstart for hacking

Set up the virtual machine:

  1. Install Vagrant, VirtualBox and Ansible.
  2. cd into playbooks and run ansible-galaxy install -r requirements.yml.
  3. cd back into this directory and run vagrant up.

Overall Setup

Before anything else, you need to install Ansible, then do the following:

  1. Copy example.config.yml to config.yml, and inventory-example to inventory, and update the values inside to match your desired environment and Pi IP addresses.
  2. Run ansible-galaxy install -r requirements.yml inside the playbooks directory to install the required Ansible roles.

Raspberry Pi Master Setup (Data Logger & Dashboard App)

An Ansible playbook builds the master logger and dashboard Pi, installing all the requirements for the Node.js-based data logger and dashboard app for viewing temperature data.

Run the Ansible playbook to configure the master Pi and start the dashboard app: ansible-playbook -i config/inventory playbooks/master/main.yml

Raspberry Pi Remote(s) Setup (Temperature Monitors)

An Ansible playbook builds the remote temperature monitoring Pi(s), installing all the requirements for the Python-based temperature data collection scripts. It also starts the script and begins sending temperature data to the Master Pi.

Before running the Ansible playbook to configure the remote(s), add a file named after the hostname or IP address of each remote Raspberry Pi inside config/host_vars (e.g. if the Pi's IP is 10.0.1.34, then add a host_vars file named 10.0.1.34 and put overrides inside, like the local_sensor_id for that Pi).

Run the Ansible playbook to configure the remote Pi(s): ansible-playbook -i config/inventory playbooks/remote-monitor/main.yml

scripts - Python Scripts for Logging Data

The scripts directory contains a variety of temperature logging scripts, written in Python, to assist with logging temperatures from DS18B20 1-Wire temperature sensors (connected via Raspberry Pi GPIO ports), external weather APIs, and even the Nest learning thermostat.

Connecting the Raspberry Pi to the DS18B20

Connect the DS18B20 to your Pi

You can use a breadboard, a shield, a GPIO ribbon cable, or whatever, but you basically need to connect the following (this is using the waterproof sensor—follow diagrams found elsewhere for the small transistor-sized chip):

  • 3V3 - Red wire
  • Ground - Black wire
  • GPIO 4 - Yellow wire (with 4.7K pull-up resistor between this and 3V3).

The 3V3 and Ground wire can be connected to any 3.3V or Ground pin, respectively (follow this great Raspberry Pi pinout diagram for your model of Pi), but by default, the 1-Wire library uses GPIO pin 4, which is the 7th physical pin on a B+/A+/B rev 2.

Edit /boot/config.txt and add the configuration line dtoverlay=w1-gpio, then reboot the Raspberry Pi (note that this configuration is done for you when you run the remote-monitor playbook).

To test whether the DS18B20 is working, you can cd into /sys/bus/w1/devices. ls the contents, and you should see a directory like 28-xxxxxxx, one directory per connected sensor. cd into that directory, then cat w1_slave, and you should see some output, with a value like t=23750 at the end. This is the temperature value. Divide by 1,000 and you have the value in °C.

Outdoor temperature logging via Weather APIs

There are multiple scripts for reading current local temperatures via online weather APIs:

  • Open Weather Map API, using scripts/outdoor-temps-owm.py. (No signup required, rate limit not specified, but temperature data is only updated about every 15-30 minutes).
  • Weather Underground API, using scripts/outdoor-temps-wu.py. This API requires a 'paid' account, but the free plan allows for 500 calls per day, up to 10/min. This would allow you to call the API via cron every 3 minutes, maximum. The data is more real-time, but you have to sign up for access and can't poll the service as often as OWM. You must set two environment variables, WU_API_KEY and WU_LOCATION (e.g. MO/Saint_Louis, to use this script.

The Ansible playbook for the master Pi will automatically configure a cron job to get data from the Weather Underground API every minute if you have an API key configured in config/config.yml.

Notes:

  • Prior to logging outdoor temperatures, you should add a sensor within the Dashboard app and set the id inside config/config.yml. See dashboard's API documentation for more info.
  • If you need to diagnose cron issues, install postfix using sudo apt-get install -y postfix, and remove the > /dev/null 2>&1 from the end of the line in the cron job.

Nest temperature logging via Nest API

There is another script, nest-temps.py, which requires you to have a Nest Developer account for API access. More information inside that script for now, but basically, once you're configured, get an access token then find your Nest thermostat ID.

The Ansible playbook for the master Pi will automatically configure a cron job to get data from the Nest Developer API every 5 minutes if you have an API key configured in config/config.yml.

Notes:

  • Nest's API documentation suggests "To avoid errors, we recommend you limit requests to one call per minute, maximum.", and since every call requires the Nest to wake up to return data to Nest's API servers, the default setting calls the API only once every 5 minutes.
  • If you need to diagnose cron issues, install postfix using sudo apt-get install -y postfix, and remove the > /dev/null 2>&1 from the end of the line in the cron job.

dashboard - Express App/API for Displaying and Adding Data

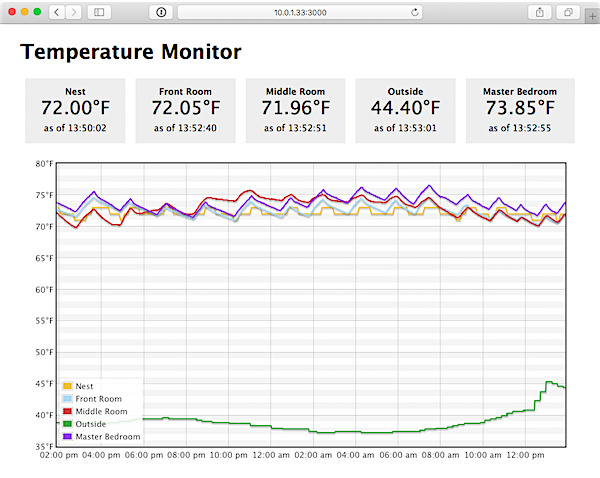
Once the master Pi is set up, you can view the dashboard app at http://[raspberry-pi-ip]:3000/ (where [raspberry-pi-ip] is the IP address or domain name of your Raspberry Pi).

dashboard API

The dashboard app has a simple REST API that allows you to add sensors to your dashboard, send temperature data directly to the dashboard from other devices, and retrieve sensor and temperature information.

More documentation may be added, but here's a list of the relevant API endpoints and example usage:

  • /sensors
    • GET: Returns a listing of all sensor data.
    • POST: Send a POST request with a location (maximum 255 characters) and group (maximum 32 characters) parameter, and it will respond with a new sensor ID.
    • DELETE: Not yet implemented.
  • /temps
    • POST: Send a POST request with a sensor, temp, and time parameter, and it will respond with a new temperature record ID.
    • GET /temps/:id: Get temperature data for a given sensor ID from the past 24h (by default). Add parameter startTime to set a starting time.
    • GET /temps/all: Get temperature data from all sensors the past 24h (by default). Add parameter startTime to set a starting time.

The API returns the following HTTP Status Codes:

  • 200 on success
  • 400 if you are missing some data or have an otherwise-invalid request
  • 501 if the method you're using is not yet implemented

An error message will also be returned in the body of the response.

License

MIT

Author

This project was created in 2015 by Jeff Geerling.

temperature-monitor's People

Contributors

dependabot[bot] avatar geerlingguy avatar

Stargazers

 avatar  avatar  avatar  avatar  avatar  avatar  avatar  avatar  avatar  avatar  avatar  avatar  avatar  avatar  avatar  avatar  avatar  avatar  avatar  avatar  avatar  avatar  avatar  avatar  avatar  avatar  avatar  avatar  avatar  avatar  avatar  avatar  avatar  avatar  avatar  avatar  avatar  avatar  avatar  avatar  avatar  avatar  avatar  avatar  avatar  avatar  avatar  avatar  avatar  avatar  avatar  avatar  avatar  avatar  avatar  avatar  avatar  avatar  avatar  avatar  avatar  avatar  avatar  avatar  avatar  avatar  avatar  avatar  avatar  avatar  avatar  avatar  avatar  avatar  avatar  avatar  avatar  avatar  avatar  avatar  avatar  avatar  avatar  avatar  avatar  avatar  avatar  avatar  avatar  avatar  avatar  avatar  avatar  avatar  avatar  avatar  avatar  avatar  avatar  avatar

Watchers

 avatar  avatar  avatar  avatar  avatar  avatar  avatar  avatar  avatar  avatar  avatar  avatar  avatar  avatar  avatar  avatar  avatar  avatar  avatar  avatar  avatar  avatar  avatar  avatar  avatar  avatar  avatar

temperature-monitor's Issues

Document ability to use different GPIO pin for DS18B20

According to this FAQ, the official way to use a different GPIO pin besides GPIO 4 for 1 Wire devices is to use the following syntax inside /boot/config.txt:

dtoverlay=w1-gpio,gpiopin=X

...where X is the pin number to use.

Also, it seems there may be a way to use an external pullup (and maybe save the wiring of a pullup resistor?):

dtoverlay=w1-gpio-pullup,gpiopin=X,extpullup=Y

Something to look into...

Read data from multiple/all sensors

Currently the dashboard app just reads one sensor, the sensor with ID == 1.

I'd like to update the one-page app to display a heading with the sensor name (in the db's sensors table), then the results for that sensor in the graph (from the temps table).

I can work on this independent of supporting multiple sensors in the temps.py script—also, I'd like to set things up so I could potentially have another script running grabbing data from my Nest thermostat, another sensor from another A+ Pi in the basement, etc. (basically, the master server with the database would potentially just be a DB + frontend).

Deal with requests.exceptions.ConnectionError 'Network is unreachable'

If the network connection drops when we try to send the request, the request library returns:

requests.exceptions.ConnectionError: ('Connection aborted.', error(51, 'Network is unreachable'))

We should catch the error and print a line instead of bailing out of the script entirely.

Add pi-temps.py script for Raspberry Pi GPIO monitoring

See the DS18B20 Guide for Raspberry Pi on Adafruit. It should be even simpler to set up than Arduino-based serial logging, since it's more internal to Raspbian.

Basically, modify the arduino-temps.py script to work with the GPIO pins on a Raspberry Pi.

It would also be pretty nice if I could get multi-sensor configuration to be pretty easy (e.g. just build a map of which sensor on which GPIO pin goes to which sensor_id...); that way I could grab a spare/cheap A+ with an Edimax 802.11n chip, and toss it pretty much anywhere in the house with a couple sensors for different rooms, run through walls/ceilings!

Add UI (forms) for Dashboard app Sensor management

Basically, I would like for there to be a UI (instead of just the POST-based API) to add, remove, or change sensors (the names, types, etc.).

Basically a CRUD interface for Sensors. No need at this time for authentication, as it's presumed everything is running in a closed network environment.

Switch everything to use Ansible for setup

Instead of a bunch of manual setup steps, build a couple playbooks, one for the master Pi, and one for remote temperature monitoring Pis.

I've already begun work on this simplification in 9a7a1a2

  • Basic configuration switched to Ansible
  • Make sure README includes full set of setup instructions
  • Make sure certain lines (see comments below) are added to /boot/config.txt
  • Make sure certain lines (see comments below) are added to /etc/rc.local

Add 'group' concept for sensors

I'd like to add a group field to the sensors table, and then use groups to group sensor data together. For example, instead of having the outdoor and indoor temperatures all together on one graph, I'd like to have a graph for 'Indoor' temps, and a graph for 'Outdoor' temps (this would make comparing the two a little easier—plus, I could set the outdoor graph to only update once every minute, or every 5 minutes, saving a little load).

Highlight sections of the graph when heat/cool is active

Using the Nest API, we are currently grabbing the ambient_temperature_f value from the Nest data, which is nice and helpful (though only in whole-number increments), but there's a wealth of other data, including ambient humidity, target temperature, etc.

One of the data points I'd like to add to the chart is a highlight when the heating or cooling is active. This would be helpful in seeing trends in how long it takes the furnace to heat/cool to the desired temperature, whether certain rooms/sections of the house get warmer faster than others, etc.

It all helps in my end goal to tie this system into a 'smart HVAC' system that can move air more intelligently around the house and compensate for shifts in seasonal temperatures, wind, and incoming sunlight (especially in the winter)—currently the sunlit side of the house can be as much as 3-5°F different than the opposite side!

Add Weather Underground API support

After a day using the Open Weather Maps data API, it seems the API only gives updates about once every 15-20 minutes, making it somewhat less useful than I was hoping (it's hard to see trends, especially with STL-area weather swinging from 40s-60s F in an afternoon!).

I'm going to rename the existing script outdoor-temps-owm.py and make a similar script that uses Weather Underground's 'Stratus' plan to fetch temperature data. Hopefully it's more real-time.

There is a rate limit for the free plan of 500/day, or 10/minute, so we could get by with a call every 3 minutes, I think.

Ansible issue downloading role via Ansible 1.7.x

I keep getting the following error:

 downloading role 'git', owned by geerlingguy
 no version specified, installing 1.2.1
 - downloading role from https://github.com/geerlingguy/ansible-role-git/archive/1.2.1.tar.gz
 - extracting geerlingguy.git to /etc/ansible/roles/geerlingguy.git
geerlingguy.git was installed successfully
 downloading role 'mysql', owned by geerlingguy
https://galaxy.ansible.com/roles/435/versions/?page=2&page_size=50
Traceback (most recent call last):
  File "/usr/bin/ansible-galaxy", line 822, in <module>
    main()
  File "/usr/bin/ansible-galaxy", line 816, in main
    fn(args, options, parser)
  File "/usr/bin/ansible-galaxy", line 695, in execute_install
    if len(role_versions) > 0:
TypeError: object of type 'NoneType' has no len()

Add HVAC status table / functionality

Initially, I would like to add an hvac_status table, which will log information about the heating and cooling system, with the following fields, at a minimum:

  • ambient temperature
  • ambient humidity (maybe)
  • target temperature
  • mode (heat/cool/away/off, etc.)
  • heat status (boolean)
  • cool status (boolean)
  • fan status (boolean)

Later, I'll add a little dashboard widget to display the pertinent data so it can be compared with current logged temperature data.

Add Express/Node.js-based display app

I'm probably just going to write up a little app that displays a graph of current temperatures using Flot for now. But this would make the project a lot more visible, since right now you have to go in and check a .log file.

Some other next steps would be adding a MySQL or SQLite database to store the values in, then read from there...

Add individual temperature sensor views

The home page shows all temperature sensor data. I'd like to add new endpoints like /temps/:id where you can view the same graph, but just for one sensor.

Make logger.py more flexible - Arduino or Pi GPIO

I'd like to make logger.py more of a temperature logging framework than a single-purpose USB serial-port logging mechanism. I have a few more Arduino UNO boards (3rd party, they're only like $9.99 at Micro Center!), and a spare Raspberry Pi A+, so I would like to use at least one UNO on my always-on Mac upstairs, and the Pi independently in a few areas of the house.

I'm thinking of breaking up the logger app so it has a few scripts (or one long-running one that does all the things I need):

  • Arduino serial logging (currently exists)
  • Logging directly from Pi GPIO
  • Logging through other services? (e.g. Nest API, etc.)

Add app (or functionality) to get outdoor temp for a location

It looks like there are a few different data sources I could use (besides just sticking a temperature sensor outside and calling it a day—possibly inviting critters in through the hole the sensor wire would run through!):

  • National Weather Service - chunky XML payload, slow... but it's free; temps seem higher than most other sources
  • WUnderground API - seems to be free for < 500 requests per day (not good for every 30s—that's a little more than a call every 5 min); temps seem accurate
  • OpenWeatherMap - temps seem lower than most other sources

OpenWeatherMap seems to be the simplest/fastest, and it's a small JSON payload to boot!

Consider going full-JS and using serialport

Currently there's a Python script to log the temperature data (read from a serial output from the Arduino to the Pi's USB port) into MySQL, then an Express app to display the data.

It might make the codebase simpler to use Node.js for both purposes. I would still like the two applications to be separate, though; makes them more purpose-built and lightweight. Kind of like 'microservices on pi'.

Won't Install (is it me?)

I may be an idiot as I am a Newbie, but I have a catastrophic error and a question. The error is when I try to run the command "ansible-galaxy install -r requirements.yml" from the playbooks folder I get:

downloading role '---', owned by
Sorry, --- was not found on galaxy.ansible.com.
 downloading role 'git', owned by -%20src%3A%20geerlingguy
Sorry, - src: geerlingguy.git was not found on galaxy.ansible.com.
 downloading role 'mysql', owned by -%20src%3A%20geerlingguy
Sorry, - src: geerlingguy.mysql was not found on galaxy.ansible.com.
 downloading role 'nodejs', owned by -%20src%3A%20geerlingguy
Sorry, - src: geerlingguy.nodejs was not found on galaxy.ansible.com.
 downloading role 'raspberry-pi', owned by -%20src%3A%20geerlingguy
Sorry, - src: geerlingguy.raspberry-pi was not found on galaxy.ansible.com.

The question is: Are Vagrant and virtual-box required? I am running multiple Raspberrys and don't need to run virtual systems on one box as far as I know.

I've got my sensors all wired up and running fine - I'd love to get this software figured out! Thank you. Steve

Error with host_var inventory - ValueError: dictionary has length 1; 2 is required

I now have installed on the master and one slave, but both have the result:

ansible-playbook -i config/inventory playbooks/remote-monitor/main.yml
ERROR! Unexpected Exception: dictionary update sequence element #0 has length 1; 2 is required
to see the full traceback, use -vvv

Verbrose mode gives:

ansible-playbook -i config/inventory playbooks/remote-monitor/main.yml -vvv
No config file found; using defaults
ERROR! Unexpected Exception: dictionary update sequence element #0 has length 1; 2 is required
the full traceback was:

Traceback (most recent call last):
  File "/usr/local/bin/ansible-playbook", line 103, in <module>
    exit_code = cli.run()
  File "/usr/local/lib/python2.7/dist-packages/ansible/cli/playbook.py", line 132, in run
    inventory = Inventory(loader=loader, variable_manager=variable_manager, host_list=self.options.inventory)
  File "/usr/local/lib/python2.7/dist-packages/ansible/inventory/__init__.py", line 98, in __init__
    self.parse_inventory(host_list)
  File "/usr/local/lib/python2.7/dist-packages/ansible/inventory/__init__.py", line 171, in parse_inventory
    self.get_host_vars(host)
  File "/usr/local/lib/python2.7/dist-packages/ansible/inventory/__init__.py", line 771, in get_host_vars
    return self._get_hostgroup_vars(host=host, group=None, new_pb_basedir=new_pb_basedir, return_results=return_results)
  File "/usr/local/lib/python2.7/dist-packages/ansible/inventory/__init__.py", line 845, in _get_hostgroup_vars
    group_results = self._variable_manager.add_host_vars_file(base_path, self._loader)
  File "/usr/local/lib/python2.7/dist-packages/ansible/vars/__init__.py", line 596, in add_host_vars_file
    data = self._load_inventory_file(path, loader)
  File "/usr/local/lib/python2.7/dist-packages/ansible/vars/__init__.py", line 577, in _load_inventory_file
    rval.update(data)
ValueError: dictionary update sequence element #0 has length 1; 2 is required

inventory file has:

[master]
192.168.1.77

[remotes]
192.168.1.79

host_var has 2 files

192.168.1.77

inside:

Master

192.168.1.79

inside:

Hall

Files will follow when I can ssh to the machine to copy them!!

Can anyone help!

I've come across this promising app from Jeff which would be very useful for my project.

Unfortunately, I'm not a Linux or programmer guy. My own specialties lie in Microsoft server, so please forgive me!

Basically, I have a PI zero with an ADC board and I can read the voltages;

image

I want to be able to graph these voltages just like the temperature in Jeff's program.

But I'm having issues! Firstly, I've tried setting up a VirtualBox Debian to load the Master program which the PI Zero can log to and I can't get it to work. I managed to install Ansible, SSH, Sudo and install the keys (ecdsa, dsa etc), modified the /config/config.yml and inventory to suit.

I can;
log onto SSH
Ansible 'Ping'
log onto Mysql
run as Sudo
Without error.

I ran the Ansible installer for the master program which only came up with one error (modifying /boot/config.txt) which I don't think is too important for the VM.

Logging onto http:\localhost:3000 comes up with nothing.

I've hit the limits of my diagnostic capabilities of this new OS (to me) and I don't know where to turn to next.

Any help would be greatly appreciated.

Installation woes. Probably simple, but so am I.

Howdy all,

I'm trying to install temperature-monitor and I'm good up to the point where I want to configure the Master. When I run the following command:

ansible-playbook -i config/inventory playbooks/master/main.yml

I get:

`ERROR! The requested action was not found in configured module paths. Additionally, core modules are missing. If this is a checkout, run 'git submodule update --init --recursive' to correct this problem.

The error appears to have been in '/etc/ansible/roles/geerlingguy.git/tasks/main.yml': line 2, column 3, but may
be elsewhere in the file depending on the exact syntax problem.

The offending line appears to be:


---
- name: Ensure git is installed (RedHat).
  ^ here


The error appears to have been in '/etc/ansible/roles/geerlingguy.git/tasks/main.yml': line 2, column 3, but may
be elsewhere in the file depending on the exact syntax problem.

The offending line appears to be:

---
- name: Ensure git is installed (RedHat).
  ^ here


I think 'git' is installed because I can run it from the command line.

Anyone have any ideas? I don't know where to begin to troubleshoot this. Thanks, Steve

Add security and firewall roles for basic hardening

I built this originally with the idea that the Pis would never see the outside world (the Internet), but in the case that someone uses them in a way that opens them up to the outside, I should have some basic hardening in place (imo).

I would like to add the geerlingguy.security and geerlingguy.firewall roles.

Allow for temperature offsets (for calibrated temps)

I'm finding that some of my 1-Wire temperature sensors are a bit off (usually by 3-5°F) when placed next to three other 'trusted' thermometers in the same location. Therefore I'd like to be able to add a configuration option like temp_offset so the temperatures can be more correct.

Allow graph time period to be adjusted

Currently it's hardcoded as the past 24h. The API backend allows for any amount of prior time via the startTime parameter. It'd be nice if we had a few links like "past month, past day, past 6h, past hour", or something like that.

Show current temperatures

Either above or below the graph, it would be nice to show the current (latest) temperature for each sensor, and possibly the min and max value for each sensor for completeness?

Create Ansible build playbook to build a Pi for Pi/Uno

There are a few steps:

  1. WiFi configuration (add an automatic-wifi-restart script that will try to automatically reconnect on dropped wifi connection) — and add the script as a cron job.
  2. Cloning this repository.
  3. Creating the local config file (as a template, so sensor IDs can be configured).
  4. Starting the proper script.

Each of these would use inventory or host vars to set the proper settings and choose the proper script.

Update for Raspbian 10 / Debian 10

Currently this project's Vagrant setup runs on an old now-unsupported version of Debian 8. Debian 10 is the base for Raspbian 10, so I would like to make sure everything runs on that OS version instead.

Document WiFi and Networking configuration?

I'd like to document best practices for connecting a Pi to the network (both for efficiency and for reliability). In playing around with three Pis and two Macs with Arduinos attached, I've found there are a few considerations that lead to the most stable and robust distributed architecture.

Specifically, configuring the WiFi connection using this guide for configuring wpa_supplicant on the Pi seems to give me pretty decent uptime/reliability. Though a wired connection will almost always win in terms of ultimate reliability!

Recommend Projects

  • React photo React

    A declarative, efficient, and flexible JavaScript library for building user interfaces.

  • Vue.js photo Vue.js

    🖖 Vue.js is a progressive, incrementally-adoptable JavaScript framework for building UI on the web.

  • Typescript photo Typescript

    TypeScript is a superset of JavaScript that compiles to clean JavaScript output.

  • TensorFlow photo TensorFlow

    An Open Source Machine Learning Framework for Everyone

  • Django photo Django

    The Web framework for perfectionists with deadlines.

  • D3 photo D3

    Bring data to life with SVG, Canvas and HTML. 📊📈🎉

Recommend Topics

  • javascript

    JavaScript (JS) is a lightweight interpreted programming language with first-class functions.

  • web

    Some thing interesting about web. New door for the world.

  • server

    A server is a program made to process requests and deliver data to clients.

  • Machine learning

    Machine learning is a way of modeling and interpreting data that allows a piece of software to respond intelligently.

  • Game

    Some thing interesting about game, make everyone happy.

Recommend Org

  • Facebook photo Facebook

    We are working to build community through open source technology. NB: members must have two-factor auth.

  • Microsoft photo Microsoft

    Open source projects and samples from Microsoft.

  • Google photo Google

    Google ❤️ Open Source for everyone.

  • D3 photo D3

    Data-Driven Documents codes.